


www.CasablancaFanCo.com
1.888.227.2178
10
M8511-01 • 10/30/14 • © Casablanca Fan Company
FR
OM
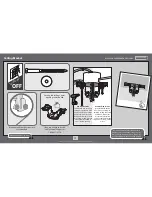
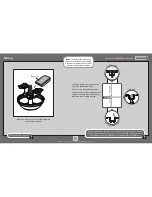
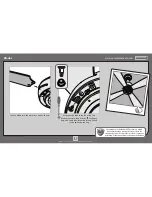
RECEIVER
whit
e
black
blue
whit
e (c
ommon out)
black (fan out)
blue (ligh
t out)
Using the wire connectors from the
remote control hardware bag:
•
Connect the white wire from the
receiver (marked “common out”)
to the white wire from fan.
•
Connect the black wire from the
receiver (marked “fan out”) to
the black wire from the fan.
•
Connect the blue wire from the
receiver (marked ”light out”) to
the blue wire from the fan.
The red wire from the receiver will
not be used, it has a pre-installed
wire terminator.
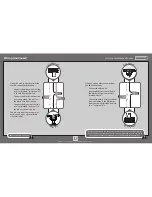
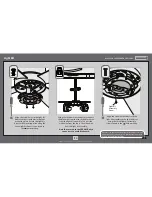
FROM FAN
FRO
M RECEIVE
R
Using an orange wire connector from
the hardware bag:
•
Connect the black wire
(ungrounded) from the ceiling to
the black wire from the receiver
(marked “live in”).
•
Connect the white wire (grounded)
from the ceiling to the white wire
from the receiver (marked “neutral
in” or “common in”).
FR
OM CEILING
black (ung
rounded)
whit
e (g
rounded)
whit
e (neutr
al in)
black (liv
e in)
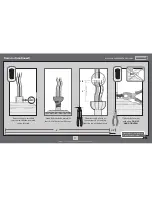
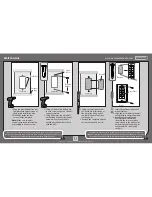
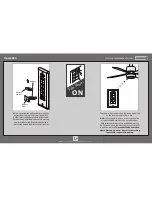
Turn the splices upward and push them carefully back through the hanger bracket
into the outlet box. Spread the wires apart, with the grounded wires on one side of
the outlet box and the ungrounded wires on the other side of the outlet box.
Refer to CAUTION c.1 on pg. 2
Wiring (continued)