background image

51

50

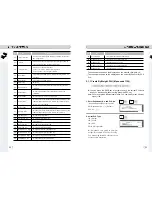
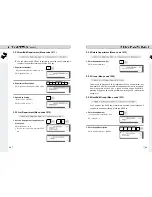
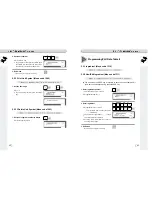
2.2.7 List Group (Menu code 1222)

1. Set the group range that you wish to

see 

EX) 1~10  

If you want to print list, press the TEST

key.

2.2.8 Delete Group (Menu code 1223)

2.2.9 Tax Rate (Menu code 1230)

You can use tax number when you create PLU.

1. Enter group number 

EX) Delete group 1. 

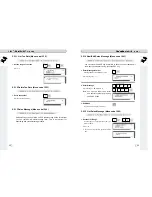
1. Enter tax number

TAX number is available 1 to 9

EX) TAX No. = 1

2. Set Tax Type  

See Tax Type table as below.

EX) Internal TAX Type

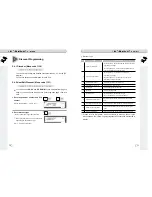
2.2.10 New/Edit Tax Rate (Menu code 1231)

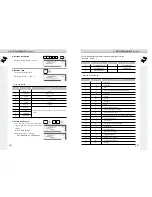
Item

Symbol

Description

Internal TAX

0

Tax is included in total price

External TAX

1

Tax is added on total price

Refer to menu code 1873(T.price = price + Tax) on chapter 2.14.21

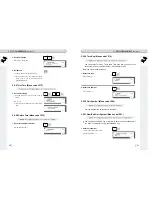
3. Enter Tax Rate 

EX) Tax Rate = 5.00%

4. Exit Menu 

If you want to exit, press  ESC key.

Содержание CL5000-B

Страница 1: ......

Страница 2: ... Menu code 1141 44 2 1 8 Deleting PLU Menu code 1142 44 2 1 9 Moving PLU Menu code 1143 45 2 1 10 Selecting PLU field Items Menu code 1144 45 2 1 11 PLU Sale Count Menu code 1145 46 2 2 Programming PLU Data Table I 47 2 2 1 Department Menu code 1210 47 2 2 2 New Edit Department Menu code 1211 48 2 2 3 List Department Menu code 1212 48 2 2 4 Delete Department Menu code 1213 49 2 2 5 Group Menu code...

Страница 3: ...Discount Menu code 1133 74 2 4 5 Delete by PLU No DC Menu code 1137 74 2 4 6 Delete by Dept No DC Menu code 1138 74 2 4 7 Delete ALL DC Menu code 1139 75 2 5 Global Discount Programming 76 2 5 1 Global Discount Menu code 1530 76 2 5 2 Priority Setting Menu code 1531 76 2 5 3 Weight Count PCS Discount Menu code 1532 1533 1534 76 2 6 Speed Key Setting 78 2 7 Traceability 79 2 7 1 Traceability Menu c...

Страница 4: ...840 115 2 14 6 User Security Configuration Menu code 1850 116 2 14 7 New Edit User Menu code 1851 116 2 14 8 Change Password Menu code 1852 117 Table of Contents Table of Contents 2 14 9 List User Menu code 1853 118 2 14 10 Delete User Menu code 1854 118 2 14 11 Config Permission Menu code 1855 118 2 14 12 Clerk Key Menu code 1856 121 2 14 13 Test Menu code 1860 121 2 14 14 Display Test Menu code ...

Страница 5: ...k Operations 164 3 10 Void 166 3 11 Payment Change 167 3 12 Return 169 3 13 Prepack Key 170 3 14 X Key 172 3 14 1 By Weight PLU 172 3 14 2 Non Weighed PLU 173 3 15 How to Change Sell By Date Time 174 3 16 How to Change Origin 175 3 17 How to Change Origin 176 3 18 Direct Discount 177 3 18 1 Fixed Price Key 177 3 18 2 Fixed Price Key 178 3 19 PLU Connection 179 3 19 1 Referenced PLU Function 179 3 ...

Страница 6: ...reduce electric shock or incorrect reading Do not spill water on the scale or place it in humid condition Avoid placing the scale near heater or in direct sunlight Insert plug firmly to wall outlet to prevent electric shock Damaged cord could cause electric shock or fire Do not pull the plug by its cord when unplugging For consistent and accurate reading maintain periodical check by your CAS autho...

Страница 7: ...ormat Italic Bold Underline Through Line Double through line Reverse shadow outline Printer Type DIRECT THERMAL PRINT Thank you for purchasing the CAS CL5000 price computing electronic printing scale We have designed this equipment with many advanced features high quality construction and user friendly menu driven programming We are confident that you will find the CAS CL5000 scale will meet all o...

Страница 8: ... 99 Department 99 1 99 Tax Type 9 1 9 Group 99 1 99 Clerk 31 1 31 Discount 99 1 99 Origin 499 1 499 Traceability 99 1 99 Slaughter House 99 1 99 Programmable Data Cutting Hall 99 1 99 Traceability Country 99 1 99 Label Format 45 Fixed 20 Free Format Bitmap Image 14 1 99 Customer 99 1 99 Quanty symbol 8 1 8 Scroll Message 9 1 9 X1 X2 Z1 Z2 Report Pay Type 7 Sales Message 99 1 99 Nutrifact 99 1 99 T...

Страница 9: ...17 16 DISPLAY KEYBOARD ...

Страница 10: ...19 18 Basic set up H type tray NOTE Push down ball connection B P R type ...

Страница 11: ...FOR 1 00 It toggles between the QTY PIECE and PRICE fields AUTO key Auto print mode Pre Pack key Used to enter Pre Packaging mode in which the scale Auto prints for every transaction and prevents the auto clearing of data Save key Save mode prevents the auto clearing of any called up data like tare weight PLU pricing etc Void key To remove erroneous sales from ADD Up When you type a PLU number and...

Страница 12: ... key It is used to exit in program mode Subtotal Total key Used with the ADD key in order to print ustomer totals Test key Used to print test pattern Feed key Use this key to feed labels or paper through printer Pay key Use this key to calculate change Print key Used to manually print transactions and also serves as an ENTER key Return key Used to credit sales for erroneous transactions or returns...

Страница 13: ...X Installation of the Label Roll Indirect Clerk Call Alpha keys Used to type text data Used to type For future Backspace key Used to backspace and delete text data Space bar Used to go to next line to enter text Special symbol keys Used to type special symbol See ASCII code table on page 194 Note X key is only used in sale mode and ESC key is only used in program mode Sale mode X key Program mode ...

Страница 14: ...n is not correct you have to check follows a Label size Label setting menu b Feed Adjustment Feed adjustment menu c Sensor calibration Sensor Calibration menu Program Mode Menu Tree Menu code 1000 To install the label roll at ANY time you must follow the directions in this section ...

Страница 15: ...29 28 ...
Страница 16: ...nter name 2 of item Maximum 40 characters 6 Name 3 Enter name 3 of item Maximum 40 characters 7 Group No Select group number This value can be from 0 to 99 8 Label No 0 99 0 Do not use Label No Label Formats 1 30 If Global Setting is YES it is not shown 9 Aux Label No 0 99 0 Do not use Label No Label Formats 1 30 This function prints aux label as saved number of label number 10 Origin No 0 500 0 D...

Страница 17: ...5 Traceability No 0 99 Enter traceability No 36 Bonus For future use 37 Nutri Fact No 0 500 Enter nutrition fact ID 38 Sales Msg No 0 99 Enter sales message No 39 Reference PLU Dept 0 99 Enter reference department No 40 Reference PLU No 0 999999 Enter reference PLU No 41 Coupled PLU Dept 0 99 Enter coupled PLU department 42 Coupled PLU No 0 999999 Enter coupled PLU No No Item Description 43 of Lin...

Страница 18: ...tails about label format refer to 8 Setting Global option EX 1 IS6030 0000 60x30 9 Enter Fixed Weight The weight of an item is fixed If you do not want to use enter 0 EX Do not use Fixed Weight 10 Enter Prefix If you do not want to use enter 0 EX Do not use Fixed Weight 11 Item Code EX Item Code 1941 12 Use Fixed Price Type 0 normal price 1 fixed price 13 Price EX Price 10 00 8 Select Origin If yo...

Страница 19: ...limit 19 Barcode No You can use barcode ID depending on the setting of Menu code 1520 EX Barcode Data Table 1 20 Produced Date 0 No print 1 Today 2 Yesterday 21 Packed Date 0 Today 1 Tomorrow 2 Tomorrow 1day 22 Packed Time current time up to 99 hrs EX 1 hour 23 Sell By Date This value can be from 0 to 9999 0 No print 1 Today 2 Packed date 1 EX tomorrow 2 24 Sell By Time This value can be from 0 to...

Страница 20: ...can preset sales massage at meny code 1241 EX Sales Message 1 31 Reference PLU Department If you do not want to use enter 0 EX Do not use Reference PLU Department 32 Reference PLU No If you do not want to use enter 0 EX Do not use reference PLU No 33 Coupled PLU Department If you do not want to use enter 0 EX Do not use Coupled PLU Department 34 Coupled PLU No If you do not want to use enter 0 EX ...

Страница 21: ...enter 0 EX Do not use Link PLU2 No 2 1 2 Create By Count PLU Menu code 1120 Showing only the different parts of PLU items You can press the SAVE key at anytime to save the current PLU data and if you want to exit without saving press the ESC key 1 Enter Department No PLU No Department should be set previously EX Department 1 Default PLU 2 2 Select PLU Type 1 By Weight 2 By Count 3 By PCS EX BY Cou...

Страница 22: ...t should be set previously EX Department 1 Default PLU 2 4 Pieces If you enter 0 it is regarded as 1 EX 10 piece 5 Qty Unit No EX Qty Unit No 6 2 1 4 Editing PLU Menu code 1120 You can call up existing PLU information for edit 2 1 5 Sample Printing Menu code 1170 If you press SAVE key during PLU creating or editing label will printing sample 2 1 6 Listing PLU Menu code 1150 Note Finding PLU You ne...

Страница 23: ... PLU No 1 2 1 9 Moving PLU Menu code 1143 All the PLU information will move with commend discount Tax barcode type etc 1 Select Source Enter the Department No and PLU No which you wish to move EX Source Department 1 2 Select Destination Enter the Department number where the PLU s will be located Enter the PLU number that you wish to move the Source PLU into EX Destination Department 2 2 1 10 Selec...

Страница 24: ...ale you have to change the setting Also you have to set Speed key for this department Programming PLU Data Table I As Department Group and PLU are organized as following figure This is important to understand this structure to maximize the CL5000 s sophisticate features label formats XZ Reports TAX type etc Note The group can break the hierarchy of department structure You can organize PLU with yo...

Страница 25: ... list press the TEST key 1 Enter Department number EX Delete department 2 2 2 4 Delete Department Menu code 1213 2 2 5 Group Menu code 1220 This menu is to group any PLU s regardless the PLU s department Any individual PLU must be involved in any department but not in any group User may select any PLUs as a group at users needs Especially grouping PLU s can be used to get total sum for a specific ...

Страница 26: ...group number EX Delete group 1 1 Enter tax number TAX number is available 1 to 9 EX TAX No 1 2 Set Tax Type See Tax Type table as below EX Internal TAX Type 2 2 10 New Edit Tax Rate Menu code 1231 Item Symbol Description Internal TAX 0 Tax is included in total price External TAX 1 Tax is added on total price Refer to menu code 1873 T price price Tax on chapter 2 14 21 3 Enter Tax Rate EX Tax Rate ...

Страница 27: ...le 1 to 99 EX Message No 1 2 Enter Message EX Message THANK YOU Note You can use lower case letter and special symbol by pressing shift ASCII code 3 Exit Menu If you want to exit press ESC key 2 2 13 Sales Message Menu code 1240 Sales message can be printed on PLU labels so long as the format that you use contains a Sales Message field This is a great tool for advertising and cross marketing produ...

Страница 28: ...he ESC key 1 Enter Origin No Origin number is available 1 to 500 EX Origin No 10 2 Enter Origin EX Origin KOREA 3 Exit Menu If you want to exit press ESC key 2 2 19 List Origin Menu code 1252 1 Set the List Range Set the range of origin that you wish to check EX 1 20 If you want to print list press the TEST key 1 Enter Origin No EX Delete Origin 10 2 2 20 Delete Origin Menu code 1253 2 2 21 Barcod...

Страница 29: ...ymbol No Symbol Description 1 I item code 2 N PLU number 3 P price 4 V price check digit It is created automatically 5 U unit price 6 W weight 7 Q quantity 8 D department 9 G group 10 K country code For future 11 A ticket counter Only for ticket 12 B scale transaction counter 13 C total barcode check sum It is created automatically 14 F PLU prefix character 15 T text character 16 R transaction cou...

Страница 30: ... Note You can program Tare manually or pre set value 2 2 26 New Edit Tare Menu code 1271 1 Enter Tare No This value can be from 1 to 99 EX Tare No 1 2 Tare Description EX Tare Description Container 3 Tare Type There are 2 types as below table EX Tare Type 1 Numeric Tare If you set Tare Type to 2 put a container on the platter and press the PRINT key after 2 3 seconds No Symbol Description 24 print...

Страница 31: ...tare Key EX Tare Key 1 2 2 29 Tare Key Menu code 1274 You can assign Tare Key There are 9 Tare keys and you have to set these keys in menu 1880 Key define See Chapter 2 14 22 Note can not set double click key 2 Enter tare number EX Tare No 1 1 Enter unit number This value can be from 1 to 8 EX Qty Unit No 1 2 2 30 Unit Symbol Menu code 1280 You can program the unit symbol to print label 2 2 31 New...

Страница 32: ...Unit Symbol Menu code 1283 1 Enter ingredient number This value can be from 1 to 999 EX Ingredient number 1 2 3 1 Ingredient Menu code 1310 2 3 2 New Edit Ingredient Menu code 1311 You can press the SAVE key at anytime to save the current data and if you want to exit without saving press the ESC key Programming PLU Data Table II 2 Enter ingredient EX Ingredient Line1 SALT EX To print SUGAR on next...

Страница 33: ...trition facts table Nutrition Facts Unit Calories Calories From Fat Total Fat G Saturated Fat G Cholesterol mg Sodium mg Total Carbohydrates G Dietary Fibers G Sugars G Protein G Vitamin A Calcium Vitamin C Iron Etc 2 3 6 New Edit Nutrition Facts Menu code 1321 You can press the SAVE key at anytime to save the current data and if you want to exit without saving press the ESC key You can use the PG...

Страница 34: ...erving Per Container 2 5 Calories EX Calories 230 6 Calories from fat EX Calories From Fat 120 7 Total Fat EX Total fat 14 g 8 Saturated fat EX Saturated fat 7 g 9 Cholesterol EX Cholesterol 40 mg 10 Sodium EX Sodium 950 mg 11 Total Carbohydrate EX Total Carbohydrate 16 g 12 Dietary Fibers EX Dietary Fiber 2 g ...

Страница 35: ...X Vitamin C 0 18 Iron EX Iron 6 19 Etc EX Etc 2 20 Exit menu If you want to exit press ESC key 1 Set the list range EX 1 10 If you want to print list press the TEST key 2 3 7 List Nutrition Facts Menu code 1322 1 Enter nutrition fact number to delete EX Delete nutrition facts no 1 2 3 8 Delete Nutrition Facts Menu code 1323 ...

Страница 36: ...price depending on number of items 2 Unit Price Discount By Weight PLU set discount of unit price depending on weight By Count PCS PLU set discount of unit price depending on number of items 3 Total Price Discount Set discount amount for total price 4 Total Price Discount Set discount of total price 5 Fixed Price Set a fixed amount for discount 6 Free Item Set free of charge item 7 Free Addition B...

Страница 37: ... Set weight limit for 1st stage of idscount 2 First Value Price Set the discount amount of unit price for the first weight limit 3 Second Target Weight Set weight limit for 2nd stage of discount 4 Second Value Price Set the discount amount of unit price for the second weight limit 5 Discount Condition 2 Set date and time If you set date and time to 0 it means discount all the time EX Start Date 04...

Страница 38: ... code 1137 1 Enter the department number and PLU number to delete EX Department number 2 EX Press 2 key to select Delete by Dept No DC 2 4 6 Delete by Dept No DC Menu code 1138 1 Enter the department number to delete EX Department number 2 EX Press 3 key to select Delete all DC 2 4 7 Delete ALL DC Menu code 1139 1 Enter the department number and PLU number to delete EX Press 1 key to select Delete...

Страница 39: ... No Discount No discount applied 1 PLU Discount PLU discount only applied 2 Global Discount Global discount only applied 3 No Discount in PLU discount is applied If there is no PLU discount PLU then Global apply global discount 2 5 3 Weight Count PCS Discount Menu code 1532 1533 1534 If you want to apply same discount regardless of PLU you can set discount information in menu code 1532 1533 and 15...

Страница 40: ...cal keys but using SHIFT key you can use up to 96 keys but for pole type there are 72 keys if you press the SHIFT key and then one of the 72 Speed keys then you can access Speed keys 73 through 144 EX1 Speed key no 1 EX2 Speed key no 49 3 PLU No Enter PLU no to assign speed key PLU should be belong to scale s department EX1 PLU 10 BEEF Traceability 2 7 1 Traceability Menu code 1330 You can set his...

Страница 41: ... hall number EX Cutting hall No 23 HAN S CUT 7 Exit menu If you want to exit press ESC key 2 7 3 List Traceability Menu code 1332 1 Set the list range Set the list range to check If you want to print list press the TEST key 2 7 4 Delete Traceability Menu code 1333 1 Enter traceability number to delete EX Delete traceability no 2 ...

Страница 42: ...ant to exit without saving press the ESC key 2 8 3 List Country Menu code 1342 1 Enter country number This value can be from 1 to 250 EX Country No 1 2 Enter country name EX Name KOREA 3 Exit menu If you want to exit press ESC key 1 Set the list range Set the list range to check EX 1 10 If you want to print list press the TEST key 2 8 4 Delete Country Menu code 1343 1 Enter country number to delet...

Страница 43: ... be from 1 to 99 EX Slaughter house No 1 2 Enter Slaughter House Enter slaughter house name or registered number EX Slaughter house registered no KSH12 3 Enter slaughter house country number You can use contry number which is programmed at menu 1341 EX Slaughter house Country No 1 KOREA 4 Exit menu If you want to exit press ESC key 2 9 3 List Slaughter House Menu code 1352 1 Set the list range Ent...

Страница 44: ...ing hall no 1 2 Enter cutting hall information Enter cutting hall name or registered number EX Cutting hall registered number KSH12 3 Cutting hall Country number You can use country number which is programmed at menu 1341 See page 74 EX Cutting Hall Country no 1 KOREA 4 Exit menu If you want to exit press ESC key 2 10 3 List Cutting Hall Menu code 1362 1 Set the list range Set the list range to ch...

Страница 45: ...ation EX TEL 2019339002 TEXT NJ CAS office This chapter explains how to access program STORE data table Price Look Up in CL5000 series 4 Press PRINT key and user may go back to STORE main menu by using ESC key 2 11 3 List Store Menu code 1412 This menu shows the list of STORE saved Press 2 in STORE menu to get into LIST STORE menu Press SAVE key to list all of STORE information saved 1 Set the lis...

Страница 46: ...ormation Customer information is to manage the specific customer s account receivable Customer registration is used for printing a receipt of credit transactions EX Pre paid costomer monthly payment etc 2 11 6 New Edit Customer Menu code 1421 1 Set the list range Set the list range to check EX 1 10 If you want to print list press the TEST key 2 11 7 List Customer Menu code 1422 This menu shows the...

Страница 47: ...se for scrolling message Y USE N NO USE 4 Set date of scroll message If you set Y 1 at Date Setting you can go to next screen to set day of week For example if you set M to 0 scroll message is not shown on Monday You have to enter date If you set Start Date to 00 00 00 it means that scroll message is shown from now and if you set End Date to 00 00 00 it means that scroll message is shown from now ...

Страница 48: ... Sign 5 Last Symbol Enter the last currency symbol to be changed EX No last symbol 6 Price Decimal Digit Enter the number of decimal digit EX Price Decimal point digit 2 Printing formats of currency symbol No Printing Format Remarks 0 100 00 0 12 1 100 00 0 12 2 100 00 0 12 3 100 00 c 0 12 c 4 100 00 c 12 c Greek When total amount is less than 1 only Last currency symbol shows up 5 100 00 0 12 6 1...

Страница 49: ...a specific free label format Refer to 4 2 Label format on Apperdix You can press the SAVE key at anytime to save the current data and if you want to exit without saving press the ESC key 1 Global Label If you use Global Label enter 1 If not enter 0 If you set it to 1 1st format number is ignored which is set in PLU programming 2nd label format is printed if it is set EX Use global label 2 Set PLU ...

Страница 50: ... barcode No 2 3 Set barcode number for by count PLU EX PLU Count barcode No 2 4 Set barcode number for by PCS PLU EX PLU PCS barcode No 2 5 Set barcode number for fixed PLU EX PLU fixed barcode No 2 7 Exit menu If you want to exit press ESC key 2 12 2 Barcode Format Menu code 1520 Global Barcode Setting provides all in one barcode setting by selecting nine different barcode options so that user do...

Страница 51: ...code 1710 If you set any of the items to N they will not be printed on any labels regardless of the label format You can use the PG UP and PG DOWN keys to navigate from page to page or you can use the Arrow keys to go through each page 1 line at a time You can press the SAVE key at anytime to save the current data and if you want to exit without saving press the ESC key PRINT Submenu No Submenus D...

Страница 52: ...Unit Price Total Price 2 13 3 Markdown Menu code 1720 Markdown is to select Yes or No to print both of original and discount information on the label There are 4 selectable sub menus on label Markdown Sub menu No Sub menu Description 1 Total Price Markdown Select Yes to display both of original total price and discount total price if any Otherwise select No 2 Unit Price Markdown Select Yes to disp...

Страница 53: ...el Paper type Set the extent of intensity of label ticket printed Set adjusting values of feed length This value can be from 200 to 200 You can change sign by pressing ZERO key value will print higher than THP Pressing TEST key automatically feeds to adjust the feed length You can set preprint length 2 13 5 Print Mode Menu code 1731 Select 0 for Label Mode 1 for Ticket Mode or 2 for Continuous Lab...

Страница 54: ...0mm higher Ex 40 will print 5mm lower 2 13 9 Print Intensity Menu code 1735 Enter any value from 0 to 20 Press TEST to test printing a label 2 13 11 Label Preprint Menu code 1737 2 13 12 Serial Number Format Menu code 1740 SERIAL NUMBER FORMAT programming is for numbering of label ticket issued printed on label ticket User may identify daily total counts of label ticket used up Press 4 to go to SE...

Страница 55: ... UP TOTAL menu in PRINT main menu Press 0 for No or 1 for Yes in EX Print Total Label Yes EX Print Item Label No Press PRINT key to save and go back to PRINT main menu ADD UP Setting ADD UP Setting Description Print Total Label Total label is printed when you press the PRINT key during add up sales Print Item Label Item label is printed whenever you press the ADD key It is applied to Label mode 2 ...

Страница 56: ... N In case of Yes selected user can go to List Ticket Item Item setting Print Total Barcode Printing total barcode on ticket Print Total Label Printing total amount on ticket Print duplicate ticket Printing duplicution ot ticket Print List duplicute ticket Printing List of items on dapliated ticket Note N Printing amout of only total price for duplicate ticket Print Store Name Printing store name ...

Страница 57: ...ale modes user may select an one stop setting for Clerk Operation Print and Prepack mode MODE Clerk Mode Operation Mode Print Mode Prepack Mode 1 REG Ticket Floating Floating Clerk Regist Ticket OFF 2 REG Label No Clerk Regist Label OFF 3 REG Prepack No Clerk Regist Label ON 4 REG Label Floating Floating Clerk Regist Label OFF 5 Manager Manager OFF OFF 6 Repack Repack OFF OFF 7 Self Service Label ...

Страница 58: ... selected in sales mode For example if current department selected is GROCERY user can call up items registered only in GROCERY department If user would like to use PLUs registered in other department than current department he she should change scale s department setting Store No represents Store Name or branch number on label ticket printed 1 Select DEPARTMENT No and STORE ID EX DEPARTMENT No 2 ...

Страница 59: ...password 011 and if any you cannot use it NEW EDIT USER in USER S Security Condition No Operation Modes Description 1 Clerk No This value can be from 1 to 95 2 Clerk Name This value is available up to 22 characters 3 Nickname This value is available up to 7 characters It can be printed on a label and displayed on the scale 4 Clerk Password 4 digit alphanumeric 5 Clerk Level 0 3 level Clerk level T...

Страница 60: ...1855 Permission level is related to clerk level and if the clerk level is lower than permission level this clerk cannot access that function Refer to clerk level on chapter 2 14 21 If permission level is 0 all clerks can access this function EX If you set permission level to 2 for price change key and clerk 1 is set to level 1 and clerk 2 is set to level 2 clerk 1 can not use this key but clerk 2 ...

Отзывы: