Carisma GT14B Скачать руководство пользователя страница 11

11

BATTERY PACK & CHARGER MENU

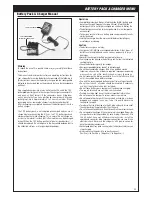
Battery Pack & Charger Manual

Operation

• 

Completely discharge a Nickel - Metal Hydride (NiMH) battery pack

   befor you charge it. Frequent charging a Nickel - Metal Hydride

   battery pack that is not fully discharged can shorten its battery life.

• 

The battery pack cannot be fully charged when it in low temperate

   environment.

• 

To charge a very hot after use battery pack can permanently lose its

   ability to charge.

• 

Unplug the charger from the mains outlet before attempting any 

   maintenance or cleaning.

7.2V 1200mAh NiMH

Rechargeable Battery Pack

7.2V 1200mAh NiMH

Rechargeable Battery Pack

7.2V  Battery Charger

7.2V  Battery Charger

Caution

• 

The battery charger is not a toy.

• 

Charger only Ni-MH type rechargeable batteries. Other types of

   batteries may explode and cause serious personally injury or

   damages.

• 

Never let the charger or battery pack get wet or damp.

• 

Overcharging can damage the battery pack. Follow the indicated

   recharging time.

• 

Check the batteries regularly for leakage.

• 

Non-rechargeable batteries are not to be recharged.

• 

Do not disassemble the charger. Take it to a qualified service

   technician when service or repair is required. Improper reassembly

   may result in a risk of fire, electric shock, or injury to persons.

• 

Do not recharge the battery pack while it is still hot after use. Wait

   until it has cooled down before recharge.

• 

Use only the recommended batteries or batteries of equal quality.

• 

Do not short circuit - all cables should be insulated. If necessary,

   use vinyl tape for insulation (not included).

• 

Do not leave battery pack charger unattended when charging.

• 

The supply terminals are not to be short-circuited.

• 

Packing has to be kept since it contains important information.

• 

Do not expose the charger to rain or excessive moisture.

• 

Do not operate the charger if it has received a sharp blow, or been 

   dropped or damaged in any way. Take it to qualified service 

   technician to repair.

• 

To reduce the risk of damage to the AC plug and cord, disconnect 

   the charger by pulling plug rather than the cord.

• 

Do not use an extension cord. It could result in fire or electric shock.

• 

Do not operate the charge if the cord or plug is damaged. Repair the 

   charger. Never alter the provided AC cord or plug. If does not fit in

   the AC outlet, have a qualified service technician install the 

   appropriate connector plug. Improper connection can result in an

   electrical shock. Never use the charger as a DC power source for 

   any other electrical equipments.

• 

Rechargeable battery pack can explode if under incorrectly or non

   stop charging.

• 

Always observe the polarity to correctly connect : 

   Positive (+) to Positive (+) Negative (-) to Negative (-).

Warning

To reduce the risk of fire, electric shock or injury, carefully follw these

instructions.

This manual contains important safety and operating instructions for 

your charger. Before using the battery charger, read all the following in 

this instructions manual on the battery chargers and the rechargeable 

batteries to be charged, and on the products that use the rechargeable 

batteries.

Plug supplied charger into mains outlet socket. Connect the 7.2V 

rechargeable battery pack to the charger. The charger’s connector fits 

only one way. Don’t force it! If the connectors do not fit together 

easily, be sure that you have positioned them properly. Average 

recharging time is approximately 2 to 3 hours maximum. When 

recharging is over, remove the charger from the household outlet. 

After recharging is completed, disconnect the battery pack from the 

battery charger.

The 7.2V battery pack is not supplied pre-charged and you must 

charge it before connecting the R/C car. The 7.2V battery pack and 

charger will get hot while charging.  This is normal. Do not charge on, 

or near to, a material / surface that is flammable or can be damaged 

by heat. When the 7.2V battery pack out of power ( dead battery ), it 

should be replaced. Do not dispose in the household garbage but to 

the collection stations or at a special garbage depot. 

Содержание GT14B

Страница 1: ...embly Diagrams GT14B Exploded Diagram Spare Parts List Option Parts List Set Up Sheet 2 3 4 6 7 8 MAN G00184 11 12 9 10 13 17 18 23 19 20 21 22 Length 309mm Width 213mm Wheelbase 190mm Front Tire 75 5...

Страница 2: ...with low transmitter batteries Carefully follow the directions and warnings for this product and any optional support equipments chargers rechargeable battery packs etc that you use Keep all chemicals...

Страница 3: ...y with other waste Thus the users are liable for disposing the wasted model by submitting them to designated collection stations speci c for recycling electronic and electric items Disposing of the wa...

Страница 4: ...CTX 2810 can be operated a few hours Installation Remove the battery compartment cover as shown below Install the batteries observing the polarity marked on battery compartment Then reinstall the bat...

Страница 5: ...e response direction when operating throttle trigger Pushing forward throttle trigger the model moves backward while pulling back the model moves forward If necessary you can just use a small screwdri...

Страница 6: ......

Страница 7: ...ramming During the battery type displaying 2 second as mentioned above user can press the key to select other battery type Cut off voltage will be automatically adjusted according to the battery type...

Страница 8: ...d Forward Once power on the GT14B Model Car turn on the transmitter by sliding the switch to On position If the rear wheels turn adjust the TH Trim knob located on the lower right of the steering whee...

Страница 9: ...erformance Camber can be adjusted by lengthening or shortening of the threaded turnbuckles or threaded rods Camber Toe in Out FRONT Wheels REAR Wheels Camber angle Toe In Negative Toe and Toe Out Posi...

Страница 10: ...is primarily used to absorb sudden impacts to the drivetrain when using more powerful motors and or battery packs In addition it can be used to limit the amount of wheel spin when running on an extrem...

Страница 11: ...qualified service technician to repair To reduce the risk of damage to the AC plug and cord disconnect the charger by pulling plug rather than the cord Do not use an extension cord It could result in...

Страница 12: ...Turn on the transmitter Switch on the ESC Receiver Replace new batteries Resynchronize transmitter and receiver Check Replace new AA batteries Let antenna pointing upward Charge up the battery and re...

Страница 13: ...SM1688A MASM1686A GT14B0806 GT14B0802 GT14B0801 MASM457A MASM053A MASM1687A RBP G00010 MASM053A RBP G00014 Ball Differential Assembly Diagram MASM033A MASM745A SSW G00370 MASM033A MASM589A GT14BP0902...

Страница 14: ...NG HUB REAR HUB ASSEMBLY DIAGRAM MASM487A MASM245A MASM733A SSW G00454 MASM245A MASM733A SSW G00454 GT14BP0305 GT14BP0305 GT14BP0507 GT14BP0507 MASM487A MASM1624A ME031A ME031A Steering Hub Assembly D...

Страница 15: ...15 STEERING UNIT SERVO UNIT ASSEMBLY DIAGRAM GT14BP0607 GT14BP0703 GT14BP0702 SSW G00284 SSW G00147 FRP G00029 MS903 SSW G00147 GT14BP0701 MASM693A...

Страница 16: ...crease speed and the motor will overheat To set the gear mesh loosen the motor screws and insert a small piece of paper between Pinion gear and Spur gear Push the gears together and re tighten the scr...

Страница 17: ...AM GT14B0602 GT14B0401 GT14B0507 MASM1629A MASM1628A SSW G00077 SSW G00053 SSW G00020 SSW G00077 GT14B0507 MASM1627A MASM733A GT14B0605 GT14B0402 MASM733A MASM269A MASM269A MASM245A MASM269A MASM245A...

Страница 18: ...5 GT14BP0511 R14P1102 R14P1102 R14P1101 01 R14P1101 01 GT14BP0604 GT14BP0605 MASM1632A MASM1632A MASM1632A MASM1629A MASM1622A MASM1624A ME031A ME031A GT14BP0301 GT14BP0402 MASM269A MASM269A MASM269A...

Страница 19: ...Mounts Battery Hold Post GT14BP0403 GT14BP0404 GT14BP0405 14730 Battery Hold Down Parts Rear Wing Mount 1 1 2 Center Drag Link Steering Mount Steering Arm GT14BP0501 GT14BP0505 GT14BP0512 14731 GT14B...

Страница 20: ...SSW G00077 SSW G00081 SSW G00100 SSW G00141 SSW G00144 SSW G00145 SSW G00147 SSW G00175 SSW G00193 SSW G00228 SSW G00266 SSW G00279 SSW G00284 SSW G00331 SSW G00370 SSW G00179 SSW G00454 14696 14683 8...

Страница 21: ...40 Tyre with Foam 14793 GT14B Carbon Fibre Main Chassis 14684 GT14B Carbon Fibre Upper Deck 14763 GT14B Turnbuckle 14764 GT14B Carbon Fibre Shock Tower 14685 GT14B 7 4V 2000mAh LiPo Battery 14761 GT14...

Страница 22: ...0 GT14B Hard Servo Spring GT14B Spur Gear 66T GT14B Spur Gear 68T 14796 GT14B Clear Body 14681 14775 14776 Descriptions Part No Descriptions Part No Soft Hard 68T 66T GT14B Pinion Gear 9T GT14B Pinion...

Страница 23: ...SETUP SHEET Servo Wing Front Tire Insert Rear Tire Insert Front Anti Roll Bar Rear Anti Roll Bar 23...

Страница 24: ...China 21 Floor Kingsway Industrial Building Phase 2 173 175 Wo Yi Hop Road Kwai Chung N T Hong Kong Tel 852 2427 5831 Fax 852 2480 3087 Email info matoys com 2010 Carisma All Rights Reserved Product s...

Отзывы: