background image


                               ~ 9 ~ 


© 2014 VAN OS MEDICAL UK Ltd., Excel House, Escrick Business Park, 

Escrick, York,YO19 6FD  -   

Tel. +44-(0)1904-720170, Fax +44-(0)1904-720398,  

E-mail: [email protected]

www.vanosmedical.com

[email protected]

, www.vanosmedical.com 

MAKING ADJUSTMENTS TO YOUR ROLLATOR CAN CAUSE BIG RISKS FOR YOUR 

SAFETY AND THE FUNCTION OF YOUR ROLLATOR. ADJUSTMENTS MADE BY 

YOURSELF ARE STRONGLY ADVISED AGAINST AND CARRIED OUT AT YOUR OWN 

RISK.


5  

INSTRUCTIONS FOR USE AND MOUNTING OPTIONS 


 In this chapter we will explore all the possibilities on your rollator.  
 

Your rollator is an Caremart EZ-lite 


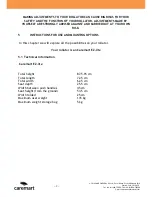
5.1 Technical information 


Caremart EZ-lite 


Total height 


87.5-95 cm  


Total length 


72.5 cm


Total width 


62.5 cm 


Seat depth 


25.5 cm 


Width between push handles 


45 cm


Seat height (from the ground) 


53.5 cm  


Width folded 


25 cm


Maximum user weight 


135 kg   

Maximum weight storage bag 


5 kg 


Содержание EZ-lite

Страница 1: ...CAREMART CAREMART CAREMA CA AREMART CAREMART User Manual Caremart EZ lite...

Страница 2: ...e the right therefore without proper notification to alter this guide It is important that you read this manual carefully The manual contains important information on the safe use and maintenance of y...

Страница 3: ...ick York YO19 6FD Tel 44 0 1904 720170 Fax 44 0 1904 720398 E mail sales vanosmedical com www vanosmedical cominfo vanosmedical nl www vanosmedical com Enter the information from your authorized deale...

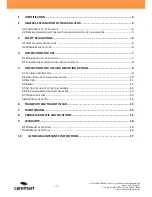
Страница 4: ...REGULATIONS 6 3 2 WARNINGS FOR SAFE USE 6 4 INSTRUCTIONS FOR USE 7 4 1 WALKING WITH YOUR ROLLATOR 7 4 2 CONFRONTING PAVEMENTS AND UNEQUAL SURFACES 8 5 INSTRUCTIONS FOR USE AND MOUNTING OPTIONS 9 5 1 T...

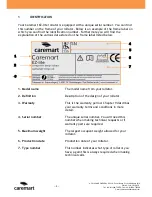
Страница 5: ...the explanation of the various data stored on the frame label listed below 1 Model name The model name from your rollator 2 Definition Description of the design of your rollator 3 Warranty This is the...

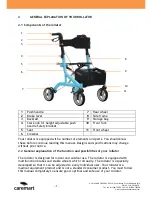
Страница 6: ...ur rollator is equipped with a number of elements and parts You should know these before continue reading this manual Designs and specifications may change without prior notice 2 2 General explanation...

Страница 7: ...ust keep your rollator in a good state to guarantee safe use 3 2 Warnings for safe use Warnings Avoid using your rollator on roads Use pavements if possible Do not use your rollator in sand rough area...

Страница 8: ...e in contact with the floor at all times during use This will ensure the rollator is properly balanced The parking brakes must be engaged before using the seat Do not use your rollator when it is dama...

Страница 9: ...rollator Tip the rollator so the front wheels are lifted When the front wheels are above the pavement you can let the rollator down Now you can push the rollator forwards and place the rear wheels on...

Страница 10: ...ATOR ADJUSTMENTS MADE BY YOURSELF ARE STRONGLY ADVISED AGAINST AND CARRIED OUT AT YOUR OWN RISK 5 INSTRUCTIONS FOR USE AND MOUNTING OPTIONS In this chapter we will explore all the possibilities on you...

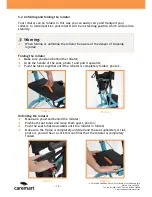
Страница 11: ...Folding the rollator Make sure you stand behind the rollator Grab the handle of the seat photo 1 and pull it upwards Push the tubes together until the rollator is completely folded photo 2 Unfolding t...

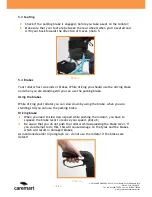
Страница 12: ...kes While driving you should use the driving brake and when you are standing still you can use the parking brake Using the brakes While driving your rollator you can slow down by using the brake when...

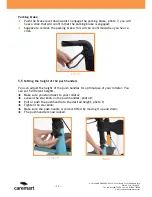
Страница 13: ...rking brake is engaged Squeeze to remove the parking brake this will be confirmed when you hear a click 5 5 Setting the height of the push handels You can adjust the height of the push handles for opt...

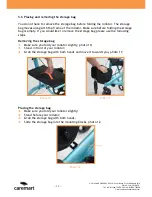
Страница 14: ...along with the frame of the rollator Make sure before folding the storage bag is empty If you would like to remove the storage bag please use the following steps Removing the storage bag Make sure yo...

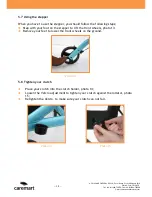
Страница 15: ...r When you have to use the stepper you should follow the following steps Step with your foot on the stepper to lift the front wheels photo 13 Remove your feet to lower the front wheels on the ground 5...

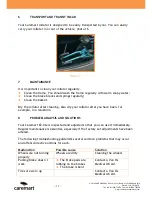
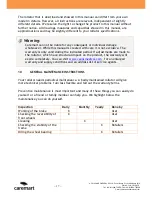
Страница 16: ...nd springs regularly Clean the basket Dry the rollator after cleaning Also dry your rollator after you have been for example in a rainstorm 8 PROBLEM ANALYSIS AND SOLUTIONS Your Caremart EZ lite is in...

Страница 17: ...date of purchase If within the warranty period your rollator will be defect it will be repaired or replaced However you do need to provide to Caremart a complete filled in warranty registration form a...

Страница 18: ...ated with care it is not exclusive The warranty is only valid during the indicated period If adjustments are made to the rollator which have structural impact on the product the warranty will expire c...

Страница 19: ...nbergen Country The Netherlands EU Representative Name W van Os Address Koperslagerij 3 4651 SK Steenbergen Country The Netherlands Function Director Technical constructed file Prepared by Name J M J...

Страница 20: ...C C CA CAR...
Отзывы: