Dear user,
We congratulate you on the purchase of this shower chair.
This shower chair makes showering easier and provides
more safety and comfort. Area of application: bathroom,
shower.
CONTENTS
The shower chair is delivered in a box. Please check that all
parts are included and in perfect condition.
- packaging and transport box
- shower chair
- this user manual
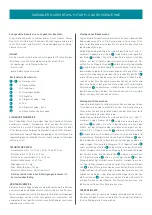
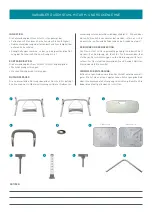
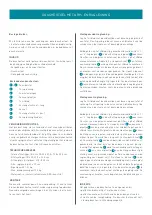
Parts of the shower chair:
1
+
2
2 frames
3
1 backrest
4
2 armrests
5
9 washers
6
1 seat
7
4 long wing bolts
8
4 feet
9
9 short wing bolts
10
2 backrest supports
SAFETY INSTRUCTIONS
Do not modify the product or combine it with other items. Do
not climb on the shower chair and do not use it as climbing
aid or step. This product is designed for home use and is not
suitable for clinics, hospitals or nursing homes. Please check
the shower chair and correct fastening of the bolts at regular
intervals.
TECHNICAL DATA
- total length (W x H x D): 53 x 69.5 – 79.5 x 50.5 cm
- seat (W x D): 40.5 x 33.5 cm
- adjustable seat height: 41.5 – 53.9 cm
- backrest: 42 x 17 cm
- weight: 3.1 kg
- max. load: 136 kg
- material: non-corrosive aluminium, ABS plastic
ASSEMBLY INSTRUCTIONS
Remove all items from the packaging. You can now decide
whether to use the shower chair with or without backrest.
Please follow the instructions below to properly assembly
the shower chair.
Assembly without backrest:
Place the seat face down on the floor or on a table. The trian-
gular recess indicates the front of the chair, please note this
during assembly.
Both legs and the seat are marked with numbers ‘1’ and ‘2’.
Place leg
2
in the hollow and place leg
1
on top. The num-
bers of the legs must correspond with the numbers on the
seat. Bolt the legs to the seat with 5 wing bolts
9
and one
washer
5
each. Insert and tighten the bolts in the respective
holes. Insert leg
8
in the opening at the end of the assembled
legs. Make sure that the press stud engages in one of the
holes and that all legs are adjusted at the same height. Place
the shower chair on its legs and install armrests
4
. Make
sure that the press studs of the armrests engage in the res-
pective holes.
Assembly with backrest:
Place the seat face down on a table or an elevated surface.
The triangular recess indicates the front of the chair, please
note this during assembly.
Both legs and the seat are marked with numbers ‘1’ and ‘2’.
Place leg
2
in the hollow and place leg
1
on top. The num-
bers of the legs must correspond with the numbers on the
seat. Bolt the legs to the seat in the hole in the middle only
with 1 wing bolt
9
and a washer
5
. Now place one of the
supports
10
on the legs so that the four holes match. Bolt the
support to the bottom of the seat with 2 wing bolts
7
and 2
washers
5
. Repeat this for the other support of the armrest.
Now bolt backrest
3
to the supports with 4 wing bolts
9
and 4 washers
5
. Make sure that the handle of the backrest
points upwards. Insert leg
8
in the opening at the end of the
assembled legs. Make sure that the press stud engages in
one of the holes and that all legs are adjusted at the same
height. Place the shower chair on its legs and install arm-
rests
4
. Make sure that the press studs of the armrests en-
gage in the respective holes.
INDICATION FOR USE
Use of the shower chair is indicated in the following cases:
• patients who are instable on their feet or unable to stand
• limited or impaired use of lower extremities is limited or
impaired
• weakness of the trunk so that use of the shower in a sitting
position is still possible
CONTRAINDICATION
Use of the shower chair is not indicated in case of
• perception disorders
• severe vestibular disorders
SHOWER CHAIR WITH ARM- AND BACKREST


