background image

Reconnecting the Intercom: 

If the 

scala rider Q2

 and its Intercom 

Buddy headset go out of range and disconnect from each other, the 

scala rider Q2

 will automatically try to reconnect to its Intercom 

Buddy for five minutes.

You can 

manually reconnect

 at any time by pressing the MC Button 

(single tap for Primary Buddy and double tap for Secondary Buddy).

Receiving Intercom calls

If you are not speaking with any one, once the other party tries to 

initiate a Buddy Intercom call, the call will begin immediately.

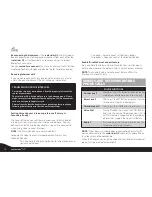
TROUBLESHOOTING THE INTERCOM: 

First, make sure your microphone is located properly in front of the 

center of your mouth.
The scala rider Q2 is designed for use in loud environments. Please 

make sure to test the Intercom functionality in a LOUD environment, 

such as next to an idling motorcycle.

Please also verify that the headsets were paired together properly by 

following the instructions in the relevant Setup sections.

Setting Voice Connect Intercom preference (Primary vs. 

Secondary Buddy)

The headset’s Voice Connect feature allows you to start a Buddy 

Intercom call by simply speaking into the microphone. You can 

define which of the two Buddy headsets you wish to connect to 

when using Voice Connect Intercom.

NOTE: 

The Primary Buddy has priority by default. 

To toggle the Voice Connect Intercom between Primary and 

Secondary Buddy:

Press and hold the Volume Up Button for three seconds and 

you will hear a beep:

• One beep – Voice Connect set to Primary Buddy

• Two beeps – Voice Connect set to Secondary Buddy

Enable/Disable Voice Connect feature

Press and hold the Volume Up and Down Buttons simultaneously 

until you hear a beep. The default status is Voice Connect enabled.

NOTE: 

The Enable/Disable Voice Connect feature affects the 

Intercom functionality only. 

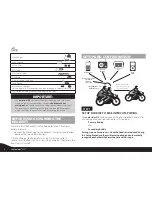
MAKING AND RECEIVING MOBILE 

PHONE CALLS

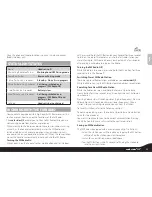
PHONE FUNCTIONS

Answer a call

Short press the CTRL Button or speak loudly any 

word of your choice during an incoming call.

Reject a call

Short press the MC Button or remain silent for 

15 seconds during an incoming call.

Terminate a call

Short press the CTRL Button to end a call.

Voice Dial

During Standby, short press the CTRL Button 

and state the name of the person you wish to 

call. This feature is supported only by mobile 

phones that support the Voice Dial feature.

Redial

Press and hold the Volume Down Button for 

three seconds during Standby.

NOTE:

 If your 

Bluetooth

 mobile phone is paired to a 

Bluetooth

 GPS 

device, not directly to the 

scala rider Q2

, some of the above Phone 

functions may not be compatible.
When the headset is on an active phone call, any Buddy Intercom call 

request will be rejected automatically.

10

scala rider

® 

Q2

Содержание Scala Rider Q2

Страница 1: ...Q2 Gebrauchsanleitung Guide d Utilisation Guida di Avvio Guia de Usario User Guide communication in motion...

Страница 2: ...The Bluetooth word mark and logos are owned by the Bluetooth SIG Inc and any use of such marks by Cardo Systems Inc is under license Other trademarks and trade names are those of their respective owne...

Страница 3: ...mpatible Bluetooth devices 4 FM Radio built in FM radio receiver with six preset stations 5 MP3 Connectivity Listen to your MP3 player while riding The scala rider Q2 can establish an audio connection...

Страница 4: ...urs before initial use 1 Connect the wall charger to the headset s Charging Jack located between the two Volume Buttons 2 While charging the Red Light turns on it may take up to 15 seconds until the R...

Страница 5: ...dset will return to Standby mode STEP 2 Optional SET UP FOR RIDER TO PASSENGER INTERCOM PAIRING There are two ways that the scala rider Q2 can be used for Driver to Passenger communication A Both Ride...

Страница 6: ...alternating 3 Search for Bluetooth devices on your phone by following the phone s instructions Please consult your phone s User Manual for more information 4 After a few seconds the phone will list th...

Страница 7: ...k Plate 2 Slide the Back Plate between the internal padding and the external shell of the helmet 3 Adjust the clamp s location so that the microphone is located opposite your mouth and then tighten th...

Страница 8: ...the exact spot on the internal padding of the helmet opposite your mouth where the microphone will be placed and proceed as follows a Peel the foil cover from the adhesive Velcro pad and place the Ve...

Страница 9: ...nnectivity A high priority Audio Source will always interrupt any lower priority Audio Source i e Mobile phone call interrupts Intercom call Intercom call interrupts FM Radio USINGTHEINTERCOM Making I...

Страница 10: ...m NOTE The Primary Buddy has priority by default To toggle the Voice Connect Intercom between Primary and Secondary Buddy Press and hold the Volume Up Button for three seconds and you will hear a beep...

Страница 11: ...n the radio The radio tunes in to the last radio station you were listening to With some phones you should wait a few seconds after ending a call before turning on the Radio Turning the FM Radio Off W...

Страница 12: ...t Clamp s jack inserting the cable through the MP3 cable holder Make sure that the cable plug clicks into place 7 Tuck the MP3 cable into the hook of the MP3 cable holder 8 In order to use your MP3 pl...

Страница 13: ...nnected Consult the dealer or an experienced radio TV technician for help Operation is subject to the following two conditions 1 this device may not cause interference and 2 this device must accept an...

Страница 14: ...nsume these substances before or during the use of the Device 4 You fully acknowledge our warnings and understand that a risks and dangers exist in using the Device while in traffic including but not...

Отзывы: