background image

| SCALA RIDER

®

 Q2

™ 

MultiSet

1. Place the 

SCALA RIDER Q2

 into Intercom Pairing mode following 

the instructions in the 

PRIMARY BUDDY PAIRING

 section above.

2. Once the Red Light begins flashing rapidly, press and hold Volume 

up for three seconds.

3. The Red and Blue Lights will flash five times, confirming that the 

Reset Pairing was successful.

STEP 3

SET UP FOR MOBILE PHONE CALLS: PAIRING 

If you have a 

Bluetooth

 enabled mobile phone and would like to 

make and receive phone calls using the 

SCALA RIDER Q2

, you must 

first pair your headset to the mobile phone.

NOTE:

 If you have a compatible 

Bluetooth

 GPS device you wish to 

use with the 

SCALA RIDER Q2

, please skip this step, and continue 

ahead to 

STEP 4: SET UP FOR BLUETOOTH GPS DEVICE.

Pairing is a one time process. Once the headset is paired to a 

specific mobile phone during this Setup Procedure, they will 

remain paired and automatically recognize each other whenever 

they are within range. If the connection between the phone and 

headset is lost, tap the CTRL button to reconnect the devices.

TO PAIR THE SCALA RIDER Q2 TO A 

BLUETOOTH


MOBILE PHONE

1. Turn on your phone and make sure its 

Bluetooth

 function is 

activated.

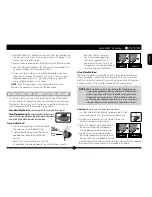
2. With the 

SCALA RIDER Q2

 headset turned ON, press and hold 

the CTRL Button for at least six seconds until the Red and Blue 

Lights begin rapidly alternating.

3. Search for 

Bluetooth

 devices on your phone by following the 

phone’s instructions. Please consult your phone’s User Manual 

for more information.

4. After a few seconds the phone will list the 

SCALA RIDER 

Q2

 as a discovered device. Select it and follow your phone’s 

instructions to accept the pairing.

5. When prompted enter 0000 (four zeros) as your PIN or passkey.
6. Your phone will confirm that pairing has succeeded and the 

headset will begin flashing slowly in Blue.

NOTE: 

If the Pairing process is not completed within two minutes the 

headset will return to Standby mode.

With some mobile phones, you may need to tap the CTRL button 

to connect the headset to the phone after pairing is complete. The 

SCALA RIDER Q2

 headset will automatically connect to the last 

phone connected to the headset.

STEP 4

SET UP FOR BLUETOOTH GPS DEVICE: PAIRING 

If you have a 

Bluetooth

 enabled GPS device and would like to transmit 

navigation instructions and sounds from the GPS device through the 

headset’s speakers, you must first pair your headset to the GPS device. 

NOTE: 

Not all 

Bluetooth

 enabled GPS devices allow connections to 

Bluetooth

 headsets like the 

SCALA RIDER Q2

. Please consult your 

GPS device’s User Manual for more information.

TO PAIR THE SCALA RIDER Q2 TO A 

BLUETOOTH

 GPS 

DEVICE:

1. Turn on your GPS device.

2. With the 

SCALA RIDER Q2

 headset turned ON, press and hold 

the CTRL Button for at least six seconds until the Red and Blue 

Lights begin rapidly alternating.

Содержание Scala Rider MultiSet Q2

Страница 1: ...UserGuideGebrauchsanleitung Guide d Utilisation Guida di Avvio Guia de Usario MultiSet...

Страница 2: ...SCALA RIDER Q2 MultiSet...

Страница 3: ...set worn by the passenger As a speaker that transmits GPS Navigation instructions from a compatible GPS device As a speaker that transmits audio from the embedded FM Radio As a speaker that transmits...

Страница 4: ...headset s Charging Jack located between the two Volume Buttons 2 While charging the Red Light turns on it may take up to 15 seconds until the Red Light turns on When charging is complete the Red Ligh...

Страница 5: ...FOR RIDER TO PASSENGER INTERCOM PAIRING There are two ways that the SCALA RIDER Q2 can be used for Rider to Passenger communication A Both Rider and Passenger are using SCALA RIDER Q2 headsets like t...

Страница 6: ...Lights begin rapidly alternating 3 Search for Bluetooth devices on your phone by following the phone s instructions Please consult your phone s User Manual for more information 4 After a few seconds t...

Страница 7: ...Adjust the Clamp s location so that the microphone is located opposite the center of your mouth and then tighten the screws You may need to reposition the Clamp repeatedly until you identify the best...

Страница 8: ...d B for the right ear You may want to use the supplied Velcro pad Using two speakers inside the helmet may be prohibited in certain jurisdictions If this is the case you should tuck away the long cord...

Страница 9: ...m calls To start a Buddy Intercom call with the Primary Buddy while the headset is on Standby you can either VOICE CONNECT Start talking A Buddy Intercom call will be established and stay on until bot...

Страница 10: ...and Secondary Buddy Press and hold the Volume Up Button for three seconds and you will hear a beep One beep Voice Connect set to Primary Buddy Two beeps Voice Connect set to Secondary Buddy Enable Dis...

Страница 11: ...eadset either mobile phone call or Intercom call press and hold the MC Button on your headset for three seconds to turn on the radio The radio tunes in to the last radio station you were listening to...

Страница 12: ...s com FAQ www cardosystems com faq or contact us at support cardosystems com Phone USA and Canada 1 800 488 0363 International 4989 450 36819 NOTICES Federal Communications Commission FCC Statement 15...

Страница 13: ...specific operating instructions for satisfying RF exposure compliance This transmitter must not be co located or operating in conjunction with any other antenna or transmitter European CE Notice The S...

Страница 14: ...understand that a risks and dangers exist in using the Device while in traffic including but not limited to injury or illness strains fractures partial and or total paralysis death or other ailments t...

Отзывы: