background image

46

En

g

lis

h

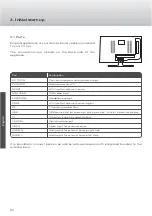
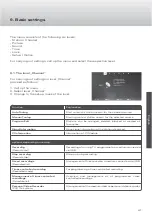
9.6. The level „Setup“

For carrying out settings in level „Setup“
proceed as follows: 

1. Call up the menu. 
2. Select level „Setup“. 
3. Change to the set-up mask of the level.

Function

Explanation 

OSD Language 

Defining the menu language.

Reset

Reset appliance to factory settings.

TT Language 

Defining the teletext language.

Hearing Impaired

Show or hide subtitles.

PVR File System

Management of the medium used as personal video recorder.

Aspect Ratio

Selection of different image formats.

Blue Screen

Blue screen on / off The blue screen shows if a program 
cannot be transmitted.

First Time Installation

Executing basic settings and starting automatic station 
search.

Software Update (USB)

Perform software update using a medium connected to the 
USB input. 

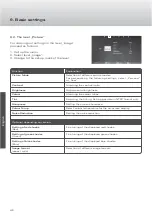
Optional, depending on version:

Audio language 

(Audio Language 1st/Audio Language 
2nd)

Defining the audio language 1 and 2 in case of multi-channel 
sound.

Country set-up 

(Country)

Select home country.

9. Basic settings

Содержание CAV190E

Страница 1: ...Caratec Vision CAV190E Bedienungsanleitung User s Manual Notice d utilisation ...

Страница 2: ... 14 8 1 Auswählen einer Quelle 14 9 Grundeinstellungen 15 9 1 Die Ebene Sender Kanal 15 9 2 Die Ebene Bild 16 9 3 Die Ebene Ton 17 9 4 Die Ebene Uhrzeit Zeit 18 9 5 Die Ebene Schutz Sperre 19 9 6 Die Ebene Einrichten Funktionen 20 10 Abspielen und Aufnehmen von Dateien 21 10 1 Abspielen und Verwalten von Media Daten 21 10 2 Aufnahme 21 10 2 1 Aufnahme des laufenden Programms 21 10 2 2 Timer Aufnah...

Страница 3: ...3 Deutsch Inhalt Seite 12 Beseitigung von Fehlern oder Störungen 25 13 Pixelfehler 26 14 Spezifikationen 27 Inhaltsverzeichnis ...

Страница 4: ... Sie sich dass die Montageschrauben nicht zu lang sind Die Schrauben dürfen max 10 mm in das Gerät ragen Gerät reinigen Vor dem Reinigen Netzanschluss trennen Keine Reinigungsmittel verwenden nur mit weichem angefeuchteten Tuch oder speziellem Reinigungsmittel für Flachbildschirme reinigen Hitze Feuchtigkeit Gerät sollte nicht extremer Hitze oder Wasser bzw Feuchtigkeit ausgesetzt sein LED Display...

Страница 5: ...fang Bitte stellen Sie sicher dass folgende Teile im Lieferumfang enthalten sind TV Gerät mit Standfuß Fernbedienung Anleitung Netzteil Netzanschluss leitung Anschlussleitung für Zigarettenanzünder optional je nach Version ...

Страница 6: ...e MINI YPbPr RGB Video Eingang EARPHONE Kopfhörerausgang HDMI A V Eingang für externe Quelle digital RF TV Antennenanschluss USB USB Anschluss zum Anzeigen Abspielen von Bild Musik Videodateien CI CI Slot zum Empfang verschlüsselter Sender COAXIAL digitaler Audioausgang VIDEO Videoeingang für externe Quelle AUDIO R Audioeingang für externe Quelle rechts AUDIO L Audioeingang für externe Quelle link...

Страница 7: ...f ein weiches Tuch unter Lösen Sie die beiden Schrauben auf der Rückseite und entfernen Sie den Standfuß 3 2 Befestigung am VESA Halter Um den Monitor an einem Halter zu befestigen kann der Standfuß wie folgt abgenommen werden 3 Inbetriebnahme Bitte beachten Sie bei der Montage an einen VESA Halter dass die Schrauben M4 max 10 mm in das Gerät ragen dürfen ...

Страница 8: ...tgelieferten Batterien AAA 2 x 1 5V entsprechend der Markierungen und ein 4 2 1 Tastenbelegung 01 Ein Aus 02 Zifferntasten 03 Kanalauswahl 1 oder 2 stellige Zifferntasten 04 ASPECT Formatumschaltung 05 Lautstärke VOL 06 Lautstärke VOL 07 Anzeige Information zum Modus 08 Navigationstaste nach oben 09 Navigationstaste bestätigen 10 Navigationstaste nach links 11 Navigationstaste nach unten 12 Anzeig...

Страница 9: ...analwahl Favoriten FAV 16 Anzeige Favoriten Menü 17 Teletextseite anhalten Seitenwechsel verhindern 18 Teletext 19 Teletextseite vergrößern 20 Zur Teletext Startseite zurückkehren 21 nicht belegt 22 Anzeige Media Menü 23 Aufnahme anhalten 24 Aufnahme starten 25 Grüne Auswahltaste 26 Rote Auswahltaste 27 Gelbe Auswahltaste 28 Blaue Auswahltaste 29 nicht belegt 30 nicht belegt 31 nicht belegt 32 nic...

Страница 10: ...r das Menü verschiedene Einstellungen vornehmen Auf das Menü können Sie über die Fernbedienung oder die Bedienleiste am Gerät zugreifen Das Menü besteht aus den folgenden sechs Ebenen Sender Kanal Bild Ton Uhrzeit Zeit Schutz Sperre Einrichten Funktionen In diesen Ebenen können alle wichtigen Grundeinstellungen vorgenommen werden s Grundeinstellungen S 15 ...

Страница 11: ... Maske einer Ebene wechseln CH runter T runter Die Einstellungs Maske einer Ebene verlassen MENU Menu Innerhalb der Einstellungs Maske navigieren CH hoch CH runter S hoch T runter Einstellungen verändern TV AV OK Einstellung bestätigen und Einstellungs Maske verlassen TV AV OK LED Menü verlassen MENU EXIT Bitte beachten Sie immer auch die Navigationshinweise am Bildschirm ...

Страница 12: ... Beim Wechsel eines Senders wird eine Infor mationsleiste eingeblendet Diese zeigt Ihnen zum Beispiel den Titel der aktuellen Sendung und die Sendezeit an Die Informationsleiste können Sie auch manuell durch Drücken der Display Taste an Ihrer Fernbedienung aufrufen ...

Страница 13: ...nz einfach im Menü Sender bzw Kanal durchgeführt werden Zum Starten des automatischen Sendersuchlaufes wählen Sie den Menüpunkt Automatische Abstimmung bzw Sendersuche aus Den manuellen Sendersuchlauf können Sie über den Menüpunkt Manuelle Abstimmung bzw Manuelle Sendersuche starten ...

Страница 14: ...hlen einer Quelle 8 Quellen Quelle CAV190E ATV analoges Fernsehen x DTV DVB T x Media x AV x PC x Component x Scart x HDMI x Aktion Bedienleiste Fernbedienung Quellenauswahl öffnen TV AV INPUT Quelle auswählen CH hoch CH runter S hoch T runter Auswahl bestätigen VOL vor OK ...

Страница 15: ... die ausgewählte Quelle starten Programme bearbeiten Sender können geordnet gelöscht gesperrt oder als Favoriten gekennzeichnet werden Signalinformation Signalinformationen zum Sender anzeigen lassen CI Informationen Informationen zum CI Modul optional je nach Version Aufnahme Aufnahme startet Laufendes Fernsehprogramm auf ein über USB angeschlossenes Medium aufnehmen Aufnahme anhalten Record stop...

Страница 16: ...stverhältnis anpassen Helligkeit Einstellen der Helligkeit Farbe Farbverhältnisse anpassen Farbton Farbton einstellen Einstellung nur im NTSC Format möglich Schärfe Bildschirmschärfe einstellen Farbtemperatur Farbtemperatur für die Bildschirmanzeige auswählen Rauschunterdrückung Rauschunterdrückung einstellen optional je nach Version Rottöne einstellen Rot Feinabstimmung der dargestellten Rottöne ...

Страница 17: ...e folgenden Einstellungen zu personalisieren wählen Sie Persönlich bzw Benutzer aus Höhen Höhen einstellen Bässe Bässe einstellen Balance Balance zwischen rechtem und linkem Lautsprecher einstellen Automatische Lautstärke Automatische Lautstärkeregelung ein bzw ausschalten SPDIF Mode Einstellung für den digitalen Audioausgang AD Switch AD Switch ein bzw ausschalten nur bei digitalem Audio Ausgang ...

Страница 18: ...it Die Uhrzeit wird automatisch vom System eingestellt Zeitzone Zeitzone auswählen Einschlaf Timer Zeit einstellen nach der der Fernseher sich automatisch ausschaltet Auto Standby Zeit festlegen nach der das Gerät automatisch in den Standby Betrieb geht OSD Timer Zeit festlegen nach der das LED Menü automatisch ausgeblendet wird optional je nach Version Schaltuhr aus Zeiteinstellung für verschiede...

Страница 19: ...Schutzfunktionen zu aktivieren und einzurichten ist die Eingabe eines Kennworts 0000 notwendig Kennwort setzen Werkseitiges Kennwort personalisieren Sender sperren Bestimmte Sender mit einem Kennwortschutz versehen Damit das laufende Programm eines kennwortgeschützten Senders angezeigt wird ist die Eingabe des Kennworts erforderlich Jugendschutz Altersgrenze für Jugendschutzeinstellungen festlegen...

Страница 20: ...itel ein bzw ausblenden PVR File System Verwaltung des als Personal Video Recorder genutzten Mediums Seitenverhältnis Auswahl verschiedener Bildformate Blauer Bildschirm Blauer Bildschirm ein ausschalten Der blaue Bildschirm wird angezeigt wenn ein Programm nicht übertragen werden kann Erste Installation Grundeinstellungen vornehmen und automatischen Sendersuchlauf starten Software Update USB Soft...

Страница 21: ... 4 5 Drücken Sie die Media Taste an Ihrer Fernbedienung oder wählen Sie Media als Quelle aus Es werden Ihnen die vier Kategorieren Foto Musik Film und Text angezeigt Wählen Sie die Kategorie aus in der sich Ihre Datei befindet und bestätigen Sie mit Ok Wählen Sie den Speicherplatz C des Mediums aus und ggf den Unterordner aus Die auf dem Medium vorhandenen Daten werden angezeigt Zum Abspielen einer...

Страница 22: ...len Startzeit Datum Uhrzeit Endzeit Datum Uhrzeit Modus Aufnahmerythmus Bestätigen Sie Ihre Einstellungen mit Ok oder Wählen Sie die gewünschte Quelle aus Rufen Sie das Menü Sender auf und wählen Sie den Punkt Aufnahmemodus aus Stellen Sie den gewünschten Sender die Start und Endzeit sowie den Aufnahmerythmus ein Bestätigen Sie Ihre Einstellungen mit Ok 10 Abspielen und Aufnehmen von Dateien Vorge...

Страница 23: ... 2 3 4 5 6 Wählen Sie den gewünschten Sender aus Drücken Sie die EPG Taste Ihrer Fernbe dienung Es wird Ihnen der Programmführer s Bild 1 angezeigt Wechseln Sie mit der X Taste in den Programmablauf Mit Hilfe der S T Tasten wählen Sie die gewünschte Sendung aus Aktivieren Sie die Timer Aufnahme durch Drücken der roten Taste an Ihrer Fernbedienung Bestätigen Sie die Einstellungen mit OK oder Wählen...

Страница 24: ...n gehen Sie wie in Punkt 10 3 beschrieben vor 11 3 Timer Aufnahmen verwalten Um die programmierten Timer Aufnahmen zu verwalten gehen Sie bitte wie folgt vor 11 EPG Menü Vorgehensweise Bildschirmansicht 1 2 Drücken Sie die EPG Taste an Ihrer Fern bedienung Die Aufnahme Übersicht öffnen Sie durch Drücken der gelben Taste an Ihrer Fernbedienung ...

Страница 25: ...ert ist Blauer Bildschirm Bitte stellen Sie sicher dass die entsprechende Quelle Input ausgewählt ist Gerät reagiert nicht auf Fernbedienung Bitte stellen Sie sicher dass die Batterien entsprechend der Polmarkierung eingelegt sind Falls notwendig Batterien bitte austauschen DTV DVB T Modus Fehlermeldung kein Signal Bitte überprüfen Sie den Antennenanschluss Bitte starten Sie den Programmsuchlauf e...

Страница 26: ...belle erläutert an der Anzahl der Pixelfehler und am spezifischen Fehlertyp Die Pixelfehlerzahl ist jeweils pro 1 Million Pixel definiert Es werden die folgenden drei Fehlertypen unterschieden Die ISO Fehlerklassen sind wie folgt definiert Anzahl Defekte Pixel pro 1 000 000 Pixel Ein ständig leuchtender Pixel Fehlertyp 1 stört den Anwender mehr als ein ständig schwarzer Pixel Fehlertyp 2 Am wenigsten...

Страница 27: ...a CI Slot Ja USB Anschluss Mediaplayer Recording Ja Digitaler Audioausgang Cinch Ja PC Audio 3 5 mm Ja PC VGA Ja Antennenanschluss analog DVB T Ja 12V Versorgungsspannung Ja Kopfhörer 3 5 mm Ja Netzgerät 100 240 V extern Ja VESA Befestigungsmöglichkeit Ja 100 mm Standfuß abnehmbar Ja 12V Anschlussleitung Ja Leistungsaufnahme Standby an 0 2 23 Watt Gewicht 3 2 kg Fernbedienung Ja Temperaturbereich ...

Страница 28: ...urces 40 8 1 Selecting a source 40 9 Basic settings 41 9 1 The level Station Channel 41 9 2 The level Image 42 9 3 The level Sound 43 9 4 The level Hour Time 44 9 5 The level Protection Lock 45 9 6 The level Setup Functions 46 10 Playing and recording of files 47 10 1 Playing and administrating media data 47 10 2 Recording 47 10 2 1 Recording the running programme 47 10 2 2 Timer controlled recordi...

Страница 29: ...29 English Content page 12 Removal of errors or faults 51 13 Pixel defect 52 14 Specification 53 Table of Contents ...

Страница 30: ...t the mounting screws are not too long The screws must not protrude into the appliance by more than 10 mm Cleaning the appliance Prior to cleaning disconnect the power supply line Do not use detergents do only clean with a soft humid cloth or special detergents for flat screens Heat Humidity The appliance should be exposed neither to extreme heat nor to water and humidity respectively LED display T...

Страница 31: ...sure that the following parts are included in the scope of supply TV set with foot Remote control Manual Power supply unit Power supply connection cable Power supply unit Connection cable for cigarette lighter optional depending on version ...

Страница 32: ...MINI YPbPr RGB video input EARPHONE Headphone output HDMI A V input for external source digital RF TV antenna connection USB USB connection for showing playing picture music video files display CI CI slot for receiving coded stations COAXIAL Digital audio output VIDEO Video input for external source AUDIO R Audio input for external source right side AUDIO L Audio input for external source left side...

Страница 33: ...from becoming scratched Remove the foot by unscrewing the two screws on the back side of the foot 3 2 Fastening on the VESA bracket For fastening the monitor on a bracket the foot can be removed as follows 3 Initial start up When mounting the VESA bracket please observe that the screws M4 must not protrude into the appliance by more than 10 mm max ...

Страница 34: ...pplied batteries AAA 2 x 1 5V according to the marks and 4 2 1 Assignment of keys 01 On Off 02 Numerical keys 03 Channel selection 1 or 2 digit numerical keys 04 ASPECT Format changeover 05 Volume VOL 06 Volume VOL 07 Display Mode information 08 Navigation button up 09 Navigation button confirmation 10 Navigation button to the left 11 Navigation button down 12 Display of the menu 13 Screen mode sel...

Страница 35: ...V 16 Display favourites menu 17 Stop teletext page prevent page change 18 Teletext 19 Magnification of teletext page 20 Back to teletext front page 21 not assigned 22 Display media menu 23 Stop recording 24 Start recording 25 Green selection button 26 Red selection button 27 Yellow selection button 28 Blue selection button 29 not assigned 30 not assigned 31 not assigned 32 not assigned 33 Display h...

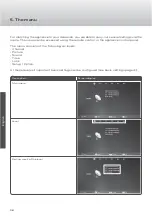
Страница 36: ...r demands you are able to carry out several settings via the menu The menu can be accessed using the remote control or the appliance control panel The menu consists of the following six levels Channel Picture Sound Time Lock Setup Option At these levels all important basic settings can be configured see basic settings page 41 ...
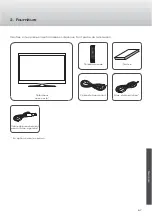
Страница 37: ...ng to the set up mask of a level CH down T down Exiting the setting mask of a level MENU Menu Navigating within the set up mask CH up CH down S up T down Change of settings TV AV OK Confirming settings and exiting the set up mask TV AV OK Exiting the LED menu MENU EXIT Please do also always observe the on screen displayed navigation information 5 The menu ...

Страница 38: ...n Screen display When changing a station an information bar is displayed It shows you for example the title of the current programme and the air time You can also call up the information bar by pressing the Display button on your remote control ...

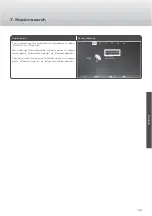
Страница 39: ...e station search can be easily carried out in menu Station or Channel For starting the automatic station search select menu point Automatic set up or Station search You can start the manual station search in menu point Manual tune in or Manual station search ...

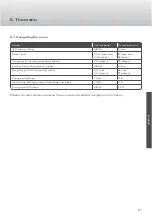
Страница 40: ... 8 1 Selecting a source 8 Sources Action Control panel Remote control Open source selection TV AV INPUT Select source CH up CH down S up T down Confirm selection VOL forward OK Source CAV190E ATV x DTV DVB T x Media USB x AV x PC x Component x Scart x HDMI x ...

Страница 41: ...it Stations can be arranged deleted blocked or marked as favourites Signal Information Have signal information of the station displayed CI Information Information of CI Module optional depending on version Recording Record start Recording of running TV programme to a medium connected via USB Stop recording Record stop Stop a running recording Saved recordings Recorded list Management of files saved...

Страница 42: ...of brightness Colour Matching the colour ratios Tint Adjusting the tinting Setting possible in NTSC format only Sharpness Setting the screen sharpness Colour Temp Select colour temperature for the on screen display Noise Reduction Setting the noise reduction Optional depending on version Setting of red shades Red Fine tuning of the displayed red shades Setting of green shades Green Fine tuning of ...

Страница 43: ...g the following settings select Personal or User Treble Treble setting Bass Bass setting Balance Setting the balance between right and left loudspeaker Auto Volume Switching the automatic volume control on or off SPDIF Mode Set up for the digital audio output AD Switch Switching the AD switch on or off only if digital audio output is present Optional depending on version Surround playback Surround...

Страница 44: ...ly set by the system Time Zone Select time zone Sleep Timer Setting the time for automatic switch off of the TV Auto Standby Setting the time for the appliance to automatically move into stand by mode OSD Timer Setting the time for automatically hiding the LED menu Optional depending on version Autotimer off Off Time Time setting for different switch off times Autotimer on On Time Time setting for...

Страница 45: ...of defined protective functions it is required to enter a password 0000 Set Password Personalizing the factory set password Block Program Tag defined stations with password protection For showing the running program of a station it is required to enter the password Parental Guidance Defining the age limit for youth protection settings Key Lock Activating or deactivating the key lock of the appliance ...

Страница 46: ...anagement of the medium used as personal video recorder Aspect Ratio Selection of different image formats Blue Screen Blue screen on off The blue screen shows if a program cannot be transmitted First Time Installation Executing basic settings and starting automatic station search Software Update USB Perform software update using a medium connected to the USB input Optional depending on version Aud...

Страница 47: ...Procedure Screen display 1 2 3 4 5 Press the Media button on your remote control or select Media as source The four categories Photo Music Film and Text are displayed Select the category where your file is located and confirm with Ok Select the storage space C of the medium and the subfolder if required The data saved on the medium are displayed For playing a file press the OK button for deleting a fi...

Страница 48: ... 10 2 2 Timer controlled recording For programming a timer controlled recording please proceed as follows For programming timer controlled recordings via the EPG menu please observe point 11 of this manual 10 3 Administering the recorded programmes For the administration of the data saved on the medium please proceed as follows 10 Playing and recording of files Procedure Screen display 1 2 Press th...

Страница 49: ... Procedure Screen display 1 2 3 4 5 6 1 2 3 4 5 6 Select the desired station Press the EPG button on your remote control The programme guide see Figure 1 is displayed With the button X change to the programme sequence Using the buttons S T select the desired programme Activate the timer controlled recording by pressing the red button on your remote control Confirm the settings with OK or Select the...

Страница 50: ...ceed as described in point 10 3 12 3 Management of timer controlled recordings For the administration of timer controlled recordings please proceed as follows Procedure Screen display 1 2 Press the EPG button on your remote control Open the timer controlled recording by pressing the yellow button on your remote control 11 EPG menu ...

Страница 51: ...Blue screen Please ensure that the according source Input is selected Appliance does not respond to remote control Please ensure that the batteries are inserted according to the marks for the poles Please replace the batteries if required DTV DVB T mode Error message no signal Please check the antenna connection Please restart the programme search PC mode The image is too small too large or displa...

Страница 52: ...specific defect type as explained in the following table The pixel defect number is defined each time per 1 million pixels Distinguished are the following three defect types The ISO defect classes are defined as follows Number defective pixels per 1 000 000 pixels A continuously shining pixel defect type 1 is more disturbing for thee user than a continuously black pixel defect class 2 The least evide...

Страница 53: ...Yes USB connection media player recording Yes Digital audio output cinch connector Yes PC audio 3 5 mm Yes PC VGA Yes Antenna connection analog DVB T Yes 12V supply voltage Yes Headphone 3 5 mm Yes Power supply unit 100 240 V external Yes VESA mounting option Yes 100 mm Foot detachable Yes 12V connection cable Yes Power consumption stand by ON 0 2 23 Watt Weight 3 2 kg Remote control Yes Temperatu...

Страница 54: ...es programmes 65 8 Sources 66 8 1 Sélection d une source 66 9 Réglages 67 9 1 Niveau Programme Canal 67 9 2 Niveau Image 68 9 3 Niveau Son 69 9 4 Niveau Heure 70 9 5 Niveau Protection Verrou 71 9 6 Niveau Installation Fonctions 72 10 Lecture et enregistrement de fichiers 73 10 1 Lecture et gestion des fichiers média 73 10 2 Enregistrement 73 10 2 1 Enregistrement immédiate du programme 73 10 2 2 Enr...

Страница 55: ...55 Français Table des matières page 12 Elimination des défauts ou dysfonctionnements 77 13 Défaut de Pixel 78 14 Spécification 79 Table des matières ...

Страница 56: ...r que les vis de montage ne sont pas trop longues Les vis ne doivent pas pénétrer plus de 10 mm dans l appareil Nettoyage de l appareil Débrancher l appareil de l alimentation avant de le nettoyer Ne pas utiliser de produits de nettoyage nettoyer l appareil uniquement avec un chiffon doux humide ou à l aide d un produit de nettoyage pour écrans plats Chaleur humidité Ne pas exposer l appareil aux ...

Страница 57: ... Vérifier si les pièces mentionnées ci dessous font partie de la livraison Téléviseur avec socle Télécommande Notice Bloc d alimentation Câble d alimentation Câble de branchement pour allume cigarette En option selon la version ...

Страница 58: ...e externe MINI YPbPr Entrée vidéo RGB EARPHONE Sortie écouteurs HDMI Entrée A V pour source externe numérique RF Connexion antenne TV USB Port USB pour affichage lecture de fichiers photos musique vidéo CI CI slot pour la réception de programmes cryptés COAXIAL Sortie audio numérique VIDEO Entrée vidéo pour source externe AUDIO R Entrée audio pour source externe côté droit AUDIO L Entrée audio pour ...

Страница 59: ...de pose pour éviter d égratigner l écran Desserrer les deux vis au dos du pied puis le retirer 3 2 Fixation au support VESA Le socle peut être retiré de la manière suivante pour fixer le moniteur à un support VESA 3 Mise en service Lors du montage à un support VESA veiller à ce que les vis M4 ne pénétrent pas plus de 10 mm dans l appareil ...

Страница 60: ...r les piles fournies AAA 2 x 1 5 V conformément aux repères et 4 2 1 Description des touches 01 Marche Arrêt 02 Touches numériques 03 Sélection du programme touches numériques à 1 ou 2 chiffres 04 ASPECT changement de format 05 Volume VOL 06 Volume VOL 07 Affichage information sur le mode 08 Touche de navigation vers le haut 09 Touche de navigation confirmation 10 Touche de navigation vers la gauche...

Страница 61: ...cage de la page télétexte et du défilement des pages 18 Télétexte 19 Agrandissement de la page télétexte 20 Retour à la page télétexte précédente 21 Libre 22 Affichage du menu média 23 Arrêt de l enregistrement 24 Démarrage de l enregistrement 25 Touche de sélection verte 26 Touche de sélection rouge 27 Touche de sélection jaune 28 Touche de sélection bleue 29 Libre 30 Libre 31 Libre 32 Libre 33 Affi...

Страница 62: ...e l adaptation de l appareil aux besoins personnels Le menu est accessible au moyen de la télécommande ou par la barre d utilisation à l appareil Le menu se compose des six niveaux suivants Canal chaines Image Son Temps horaire Verrouillage verrou Configuration options Ces niveaux permettent d effectuer tous les réglages importants voir Réglages page 67 ...

Страница 63: ... d un niveau CH vers le bas T vers le bas Sortie de l écran de réglage d un niveau MENU Menu Navigation à travers l écran de réglage CH vers le haut CH vers le bas S vers le haut T vers le bas Modification des réglages TV AV OK Confirmation du réglage et sortie de l écran de réglage TV AV OK Sortie du menu LED MENU EXIT Observer impérativement les recommandations de navigation indiquées sur l écran ...

Страница 64: ... sur l écran Lors du changement de chaîne une barre d informations sur le titre de l émission regardér ou la tranche horaire sera affichée Cette barre d informations peut également être affichée manuellement par pression sur la touche Display de la télécommande ...

Страница 65: ...es s effectue tout simplement dans le menu Programme ou Canal de la manière suivante Sélectionner la fonction Affinage automatique ou Recherche de programmes pour démarrer la recherche automatique La recherche manuelle est démarrée avec la fonction Affinage manuel ou recherche manuelle des programmes ...

Страница 66: ...rces Action Barre d utilisation Télécommande Ouverture de la sélection des sources TV AV INPUT Sélection de la source CH vers le haut CH vers le bas S vers le haut T vers le bas Confirmation de la source VOL suivant OK Source CAV190E ATV x DTV DVB T x Media USB x AV x PC x Component x Scart x HDMI x ...

Страница 67: ...peuvent être classées effacées verrouillés ou mises sous les favoris Informations signal Affichage des informations du signal de la chaîne Informations CI Information pour le slot CI En option selon la version Enregistrement Commencer Enregistrement Enregistrement immédiat d un programme télévisé sur un médium raccordé au port USB Interruption de l enregistrement Arrêt Enregistrement Arrêt de l enr...

Страница 68: ...e du contraste Luminosité Réglage de la luminosité Couleur Réglage de la couleur Ton Réglage de la teinte Réglage uniquement possible au format NTSC Netteté Réglage de la netteté de l image Température de Couleur Sélectionner le ton couleur de l image Réduction du bruit Réglage de la réduction des bruits parasites En option selon la version Réglage des tons rouges Rouge Affinage des tons rouges Rég...

Страница 69: ...sateur pour personnaliser les réglages suivants Aigus Réglage des aigus Graves Réglage des graves Balance Réglage de la balance entre les haut parleurs gauche et droit Volume auto Mise en marche arrêt du réglage automatique du volume du son SPDIF Mode Réglage de la sortie audio numérique Commutation AD Mise en marche arrêt du commutateur AD uniquement pour sortie audio numérique En option selon la...

Страница 70: ... automatiquement réglée par le système Fuseau horaire Sélection du fuseau horaire Veille automatique Réglage de l heure d arrêt automatique du téléviseur Veille Automatique Réglage de l heure de commutation de l appareil sur le mode de veille OSD Timer Réglage de l heure de suppression automatique du menu LED En option selon la version Heure arrêt Réglage de plusieurs heures d arrêt Horlage mis en...

Страница 71: ...activer et installer certaines fonctions de protection Set Password Personnalisation du mot de passe Blocquer programme Protection par mot de passe de programmes définis La vision du programme protégé n est possible qu avec l enregistrement d un mot de passe Accord Parental Définition de l âge pour les réglages concernant la protection des mineurs En option selon la version Verrouillage du panneau d...

Страница 72: ...le system Gestion du médium utilisé comme Personal Video Recorder Ratio d aspect Sélection des différents formats d écran Ecran bleu Mise en marche arrêt de l écran bleu L écran bleu s affiche lorsqu un programme ne peut pas être transmis First Time Installation Réglages de base et démarrage de la recherche automatique des programmes Mise a jour logiciel USB Mise à jour du logiciel par l intermédia...

Страница 73: ...écran 1 2 3 4 5 Appuyer sur la touche Media de la télécommande ou sélectionner la fonction Media comme source Les quatre catégories Photo Musique Film et Texte s affichent sur l écran Sélectionner la catégorie correspondant au type de fichier puis confirmer avec Ok Sélectionner le répertoire ou le sous répertoire de sauvegarde du fichier Les données sauvegardées sur le médium s affichent sur l écran Ap...

Страница 74: ...me d enregistrement Confirmer les réglages avec Ok 10 2 2 Enregistrement programmé Procéder de la manière suivante pour effectuer un enregistrement programmé Observer le point 11 de la notice pour programmer les enregistrements à l aide du menu EPG 10 4 Gestion des émissions enregistrées Procéder de la manière suivante pour gérer les données sauvegardées sur un médium 10 Lecture et enregistrement d...

Страница 75: ...menu EPG Procédure Affichage sur l écran 1 2 3 4 5 6 1 2 3 4 5 6 Sélectionner la chaîne désirée Appuyer sur la touche EPG de la télécommande Le guide des programmes voir figure 1 s affiche Appuyer sur la touche X pour accéder au déroulement du programme Sélectionner le programme désiré à l aide des touches S T Appuyer sur la touche rouge de la télécommande pour activer l enregistrement programmé Confi...

Страница 76: ...he 10 3 pour afficher les données du film mémorisées 11 3 Gestion des enregistrements programmés Procéder de la manière suivante pour gérer les enregistrements programmés Procédure Affichage sur l écran 1 2 Appuyer sur la touche EPG de la télécommande Appuyer sur la touche jaune de la télécommande pour ouvrir l aperçu des enregistrements 11 Menu EPG ...

Страница 77: ... activée Ecran bleu S assurer que la source correspondante Input á été sélectionnée L appareil ne réagit pas à la télécommande S assurer que les piles sont correctement insérées polarité Le cas échéant remplacer les piles Mode DTV DVB T Message de défaut pas de signal Vérifier le branchement de l antenne Redémarrer la fonction de recherche des programmes Mode PC Image trop petite trop grande ou déc...

Страница 78: ... et au type de défaut spécifique tel qu indiqué dans le tableau suivant Le nombre de défaut de Pixel est défini par 1 million de Pixel Trois types de défauts sont à différencier Les classes de défauts ISO sont définies comme suit Nombre Pixel défectueux par 1 000 000 de Pixel Un Pixel brillant en permanence type de défaut 1 gêne l utilisateur plus qu un Pixel noir en permanence type de défaut 2 Un so...

Страница 79: ...I Oui Port USB Mediaplayer Recording Oui Sortie audio numérique Cinch Oui PC Audio 3 5 mm Oui PC VGA Oui Raccord d antenne analogique DVB T Oui Alimentation en tension 12 V Oui Ecouteur 3 5 mm Oui Bloc d alimentation 100 240 V externe Oui Dispositif de fixation VESA Oui 100 mm Socle amovible Oui Câble de jonction 12V Oui Consommation mode de veille marche 0 2 23 Watt Poids CAV191LT LTS 3 2 kg Téléc...

Страница 80: ...Caratec GmbH Buschurweg 4 D 76870 Kandel 49 7275 913240 49 7275 913274 www caratec de 12 11 Änderungen und Irrtum vorbehalten ...

Отзывы: