


Instruction manual CR9209
21
Please keep this instruction manual for future reference
Cleaning the lower grill
Only applicable for ovens with lower grill
WARNING:
- Ensure all controls are in the“OFF”position and wait for the grill element to cool down.
- Support the front of the grill element while you remove the knurled screw. Lower the front of the element carefully to the
rest position.
- When cleaning the oven make sure do not apply any forces to the grill element
- When cleaning is complete, carefully remove any cleaning chemicals and water from the grill element.
- Carefully raise the front of the element into position and secure with the knurled screw.
- Never use the oven when grill element is hanging down or not properly secure
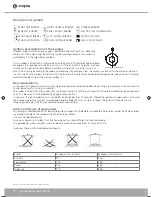
IMPORTANT:
Before using the oven and burners after cleaning please ensure:
- All parts are correctly positioned before igniting the burners again.
- All pan supports have rubber pads on and they are positioned correctly to increase stability and avoid scratches
INCORRECT
CORRECT
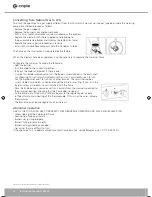
How to remove the oven door
For a more thorough clean you can remove the oven door.
According to different structure of oven door purchased proceed as follows:
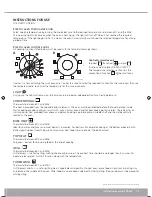
Oven door remove and assemble procedure:
- Open the door fully
- Lift up and turn the small levers situated on the two hinges
- Grip the door on the two external sides, shut it slowly but not completely
- Pull the door towards you pulling it out of its seat
- Reassemble the door by following the above procedures backwards.
Replacing the oven lamp
- Disconnect the oven from the power supply from the omni-polar switch used to connect the appliance to the electrical
mains.
- Remove the glass cover of the lamp
- Remove the lamp and replace with a heat resistant lamp ensuring it is suitable for temperatures up to 300˚C with the
following characteristics:
Voltage: 220-240V
Wattage: 25W
Type: E 14
· Replace the glass cover and reconnect the oven to the mains power supply.
3
2
1
3
2
1
CR9209 - Instruction Manual.indd 21
27/04/2017 10:38


