


44
EN
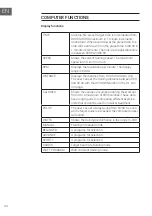
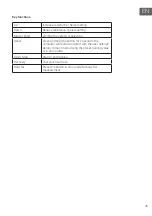
COMPUTER FUNCTIONS
Display functions
TIME
Countup: No preset target, time is incremented from
00:00 to 99:59 maximum in 1-minute increments.
Countdown: When exercising at the preset time, the
time will count down from the preset time to 00:00 in
1-minute increments. The maximum adjustable time
is between 00:00 and 99:00.
SPEED
Shows the current training speed. The maximum
speed is 99.9 km/h or mi/h.
RPM
Displays the revolutions per minute. The display
range is 0-999.
DISTANCE
Displays the distance from 0.00 to 99.99 km (mi).
The user can set the training distance between 0.00
and 99.90 with the UP/DOWN button in the 0.1 km/
mi range.
CALORIES
Shows the calorie consumption during the workout
from 0 to a maximum of 9999 calories. These data
are a rough guide for comparing different exercise
units that cannot be used in medical treatment.
PULSE
The user can set a target pulse from 0-230. As soon
as the target pulse is exceeded, the computer buzzer
will sound.
WATTS
Shows the training performance in the range 0~999.
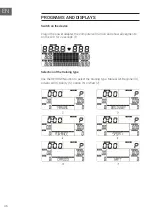
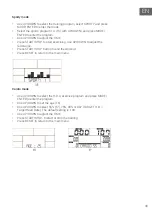
MANUAL
Training in manual mode.
BEGINNER
4 programs for selection.
ADVANCE
4 programs for selection.
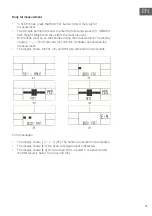
SPORTY
4 programs for selection.
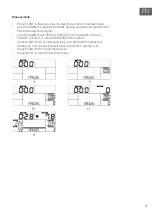
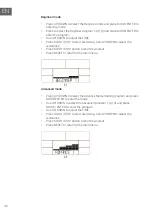
CARDIO
Target heart rate training mode.
WATT PROGRAM
Watt constant training mode.
Содержание 10035175
Страница 1: ...10035175 Evo Comfor Fahrrad Heimtrainer Exercise Bike Bicicleta Estática Vélo d exercice Cyclette ...
Страница 2: ......
Страница 13: ...13 DE 8 Schließen Sie das Netzteil 29 an den Hauptrahmen 48 an um den Zusammenbau abzuschließen ...
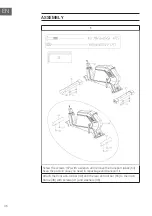
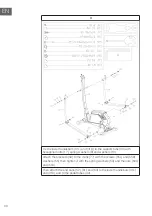
Страница 39: ...39 EN 4 Secure the pedals 51L and 51R to the pedal tubes 44 with hexagonal bolts 47 washers 38 and nuts 36 ...
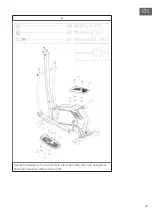
Страница 43: ...43 EN 8 Connect the power supply unit 29 to the main frame 48 to complete the assembly ...
Страница 73: ...73 ES 8 Conecte la fuente de alimentación 29 a la estructura principal 48 para finalizar el montaje ...
Страница 100: ...100 FR 5 Fixez les poignées 14L et 14R aux poignées inférieures 31L et 31R avec les vis 21 et les vis de blocage 22 ...
Страница 103: ...103 FR 8 Pur terminer l assemblage fixez l adaptateur secteur 29 au cadre principal 48 ...
Страница 129: ...129 IT 4 Fissare i pedali 51L e 51R ai tubi dei pedali 44 con viti esagonali 47 rondelle 38 e dadi 36 ...
Страница 133: ...133 IT 8 Collegare l alimentatore 29 al telaio principale 48 per concludere il montaggio ...
Страница 153: ......
Страница 154: ...154 IT ...
Страница 155: ...155 IT ...
Страница 156: ......


