10
1) To Add
a
Camera Site
1
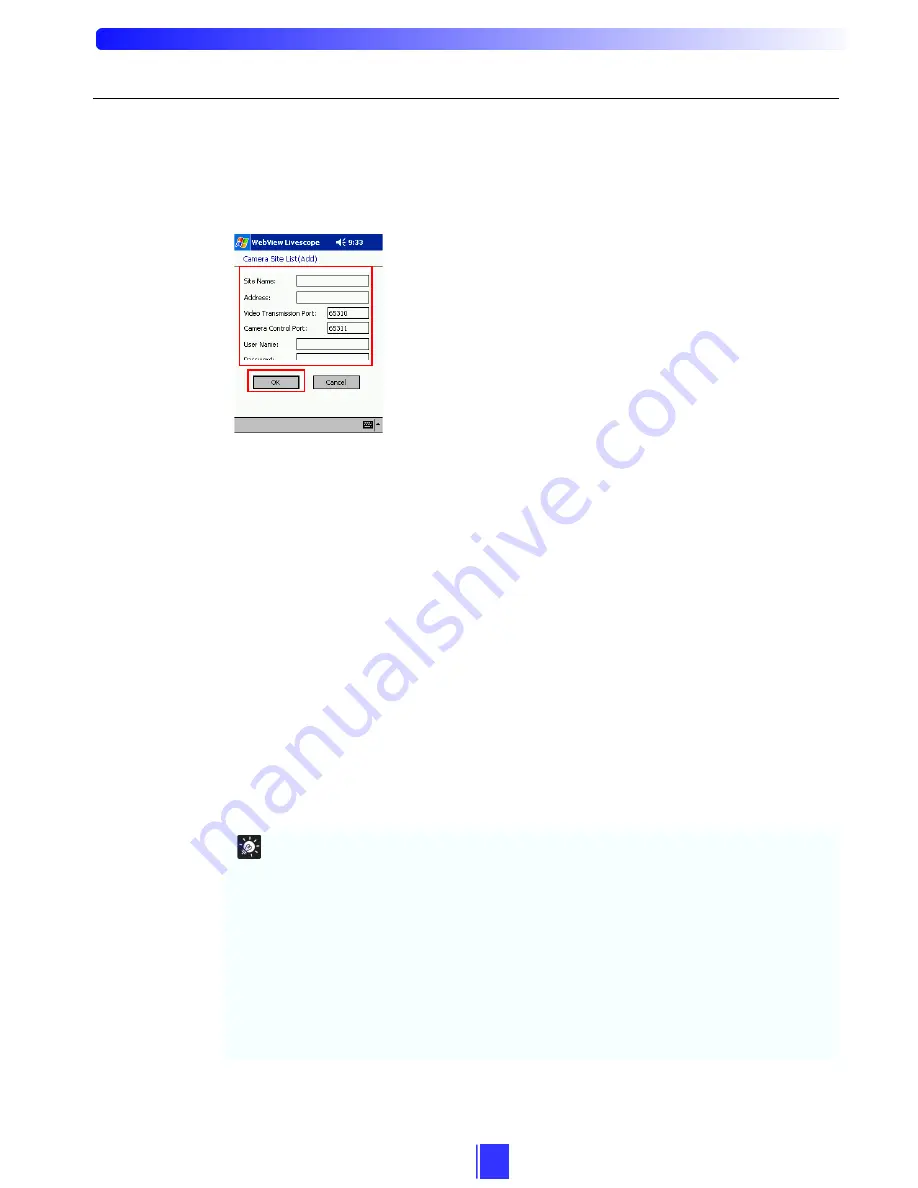
Tap the Add button on Camera Site List.
2
Enter each item correctly in the Camera Site List (Add) dialog box and tap the OK button.
Site Name:
Enter the name of the site that is displayed in Camera Site or the Address box.
Address:
Enter the IP address or host name of the server to connect.
Video Port No.:
Enter the video transmission port number of the camera server. Enter a value between
1 and 65535. Normally, there is no need to change this setting.
Camera Port No.:
Enter the camera control port number of the camera server. Enter a value between
1 and 65535. Normally, there is no need to change this setting.
User Name:
Enter the name of the user when access restrictions have been set at the camera server.
Password:
Enter the password when access restrictions have been set at the camera server.
Tip
z
A hundred camera sites can be registered.
z
The video transmission port and the camera control port settings are made at the camera
server. See the “WebView Livescope Settings Page” (if the VB101 is being used, it is
“Application Settings Page”) section in Chapter 3 of the user’s manual provided with the
camera server for details.
z
When access to the camera server is restricted, specify User Name and Password
beforehand for your convenience. Once User Name and Password are obtained, user
authentication (
Æ
P. 14) is executed automatically.
For details about setting access control of the camera server, refer to the “Access Control
Settings Page” section in Chapter 3 of the user’s manual provided with the camera server.
User Name and Password are the same as Account Name and Password in Authorized
User List registered in the camera server.
Содержание Viewer for Pocket PC RV-P1.0
Страница 1: ... ...


