4.
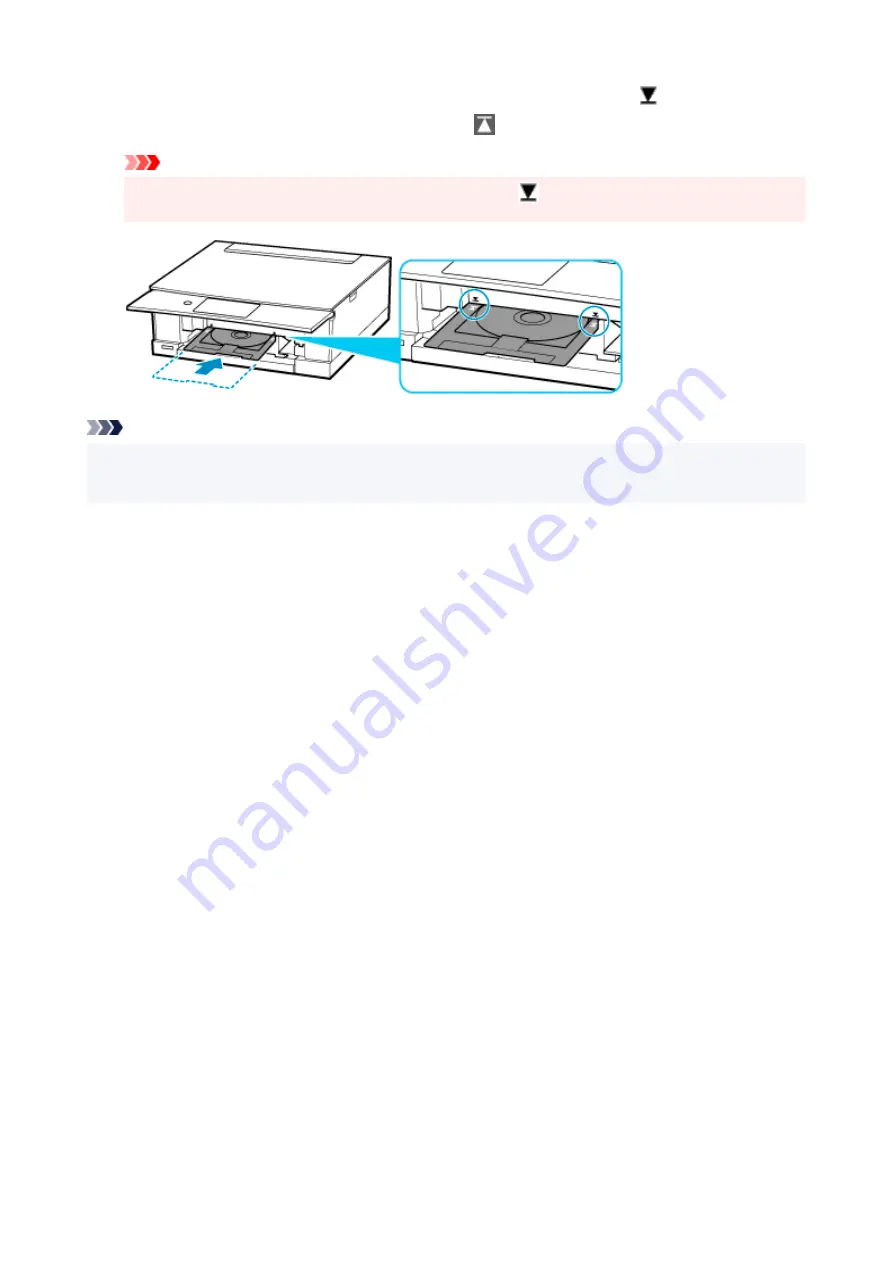
Insert multi-purpose tray straight in in horizontal direction until arrow (
) on multi-purpose
tray guide is approximately aligned with arrow (
) on multi-purpose tray.
Important
• Do not insert the multi-purpose tray beyond the arrow (
) on the multi-purpose tray guide.
Note
• The multi-purpose tray may be ejected after a certain amount of time passes. In such a case, follow the
on-screen instructions to place the multi-purpose tray again.
114
Содержание TS8250
Страница 1: ...TS8200 series Online Manual English...
Страница 88: ...Note This setting item is not available depending on the printer you are using 8 Click Set 88...
Страница 108: ...Placing Multi purpose Tray Cautions When Printing with Multi purpose Tray Placing a Printable Disc 108...
Страница 110: ...Placing a Printable Disc Before Placing a Printable Disc Placing a Printable Disc Removing a Printable Disc 110...
Страница 124: ...124...
Страница 125: ...Inserting the Memory Card Before Inserting the Memory Card Inserting the Memory Card Removing the Memory Card 125...
Страница 131: ...Replacing Ink Tanks Replacing Ink Tanks Checking Ink Status on the Touch Screen Ink Tips 131...
Страница 142: ...Adjusting Print Head Position 142...
Страница 163: ...Important Be sure to turn off the power and unplug the power cord before cleaning the printer 163...
Страница 165: ...Safety Safety Precautions Regulatory Information WEEE EU EEA 165...
Страница 189: ...Main Components and Their Use Main Components Power Supply Using the Operation Panel 189...
Страница 190: ...Main Components Front View Rear View Inside View Operation Panel 190...
Страница 203: ...The specification of the power cord differs depending on the country or region of use 203...
Страница 221: ...For more on setting items on the operation panel Setting Items on Operation Panel 221...
Страница 231: ...Language selection Changes the language for the messages and menus on the touch screen 231...
Страница 254: ...3 To complete the removal of paper dust brush the paper in the other direction from top to bottom 254...
Страница 265: ...Card 2 17 x3 58 55x91mm Card 2 17 x3 58 Custom Size Others 265...
Страница 275: ...Note Selecting Scaled changes the printable area of the document 275...
Страница 293: ...In such cases take the appropriate action as described 293...
Страница 309: ...Displaying the Print Results Before Printing 309...
Страница 328: ...Printing Using Canon Application Software Easy PhotoPrint Editor Guide 328...
Страница 329: ...Printing Using a Web Service Using PIXMA MAXIFY Cloud Link Printing with Google Cloud Print 329...
Страница 344: ...Other device settings 344...
Страница 345: ...Disc Label Printing Copying Label Side of Disc Basic Printing Photo from Memory Card onto Disc Label 345...
Страница 367: ...Note To set the applications to integrate with see Settings Dialog Box 367...
Страница 380: ...ScanGear Scanner Driver Screens Basic Mode Tab Advanced Mode Tab 380...
Страница 404: ...Scanning Using Smartphone Tablet Using PIXMA MAXIFY Cloud Link Printing Scanning with Wireless Direct 404...
Страница 409: ...Network Communication Problems Cannot Find Printer on Network Network Connection Problems Other Network Problems 409...
Страница 435: ...Other Network Problems Checking Network Information Restoring to Factory Defaults 435...
Страница 440: ...Problems while Printing Scanning from Smartphone Tablet Cannot Print Scan from Smartphone Tablet 440...
Страница 452: ...If the measures above do not solve the problem contact your nearest Canon service center to request a repair 452...
Страница 466: ...Scanning Problems Windows Scanning Problems 466...
Страница 467: ...Scanning Problems Scanner Does Not Work ScanGear Scanner Driver Does Not Start 467...
Страница 481: ...Errors and Messages An Error Occurs Message Support Code Appears 481...


