background image

6

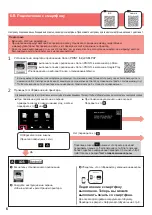
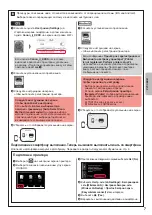
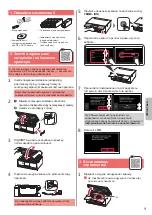
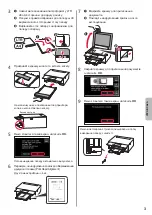
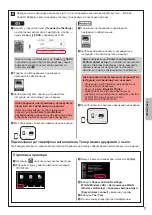
6-B

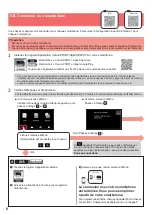
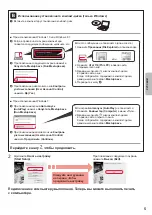
.  Подключение к смартфону 


Android

iOS

Настройку подключения необходимо выполнить для каждого смартфона. Продолжайте настройку для каждого смартфона, начиная с действия 

1.

Подготовка

•  Включите Wi-Fi на смартфоне.

•  При наличии маршрутизатора беспроводной сети установите соединение между смартфоном 

и маршрутизатором беспроводной сети, к которому вы хотите подключить принтер.

*  Для получения информации о том, как это сделать, см. руководство по эксплуатации смартфона и маршрутизатора 

беспроводной сети или обратитесь к их производителям.

Установите на смартфон приложение Canon PRINT Inkjet/SELPHY

.

 : выполните поиск приложения «Canon PRINT» в магазине App Store

.

 : выполните поиск приложения «Canon PRINT» в магазине Google Play

.

Или перейдите на веб-сайт Canon, отсканировав QR-код.

*  Если принтер подключается к смартфону напрямую, подключение смартфона к Интернету через беспроводную сеть 

невозможно. В этом случае с вас может взиматься дополнительная плата по условиям контракта с поставщиком услуг.

*  По беспроводной сети к принтеру можно напрямую подключить до 5 устройств одновременно.

Проверьте отображение на принтере.

Экран выключается, если устройство не используется в течение примерно 10 минут. Чтобы отобразить экран, легко коснитесь сенсорного экрана

.


■ При появлении указанного ниже экрана: 

проверьте значок в левом нижнем углу, а затем 

перейдите к п.   или 

.

Появление значка 

 означает, что принтер не может 

передавать данные по беспроводной сети. Для получения 

более подробной информации перейдите по ссылке «http://

ij.start.canon» в раздел 

Часто задаваемые вопросы

.


■ При появлении указанного ниже экрана: 

Перейдите к п. 

.

Нет )перейдите к п.  (.

ДА

Коснитесь установленного приложения.

Следуйте инструкциям на экране, 

чтобы выполнить регистрацию принтера.

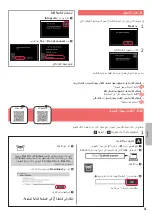
Убедитесь, что отображается указанный ниже экран.

Подключение к смартфону 

выполнено. Теперь вы можете 

выполнять печать со смартфона.

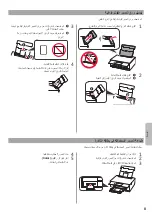
Для печати фотографий загрузите фотобумагу. 

Перейдите в раздел «Загрузка фотобумаги» на стр. 8

.

Отобразится такой значок. 

)Принтер подключен к сети.(

Содержание PIXMA TS9140

Страница 1: ...Canon Pixma TS9140 Black 2231C007AA...

Страница 2: ...D marrage Lire S curit et informations importantes addendum en premier Getting Started Read Safety and Important Information addendum irst...

Страница 3: ...age 1 Connexion avec un ordinateur et un smartphone ou une tablette page 4 Manipulation de l imprimante Vid os explicatives Installing the Printer page 1 Connecting with Computer and Smartphone Tablet...

Страница 4: ...d may cause malfunction 2 a Hook the hollows on the both sides of the printer with your ingers and open the scanning unit cover b Remove the orange tape b a 3 LIFT UP the scanning unit cover and then...

Страница 5: ...have installed an ink tank such as one with a different model number that is not supported by this printer Either install an ink tank for the correct color or use the provided ink tank for setup 5 Ins...

Страница 6: ...ure shows the state after the cassette is inserted Side 5 If the following screen appears select OK The paper output tray comes out automatically 6 Make sure that a pattern is printed for Print Head A...

Страница 7: ...the following URL and access the Canon website c Select Set Up d Input the model name of your printer and click OK You can select a model name from the list e Click Setup The procedures for Windows an...

Страница 8: ...on on the right side of the window If the contents of the CD ROM appear double click Msetup4 exe 4 Proceed to step d When using Windows 7 b When the AutoPlay screen appears click Run Msetup4 exe c If...

Страница 9: ...arged depending on the contract with your service provider Up to 5 devices can be connected to the printer via wireless LAN connection directly 2 Check the display on the printer The screen turns off...

Страница 10: ...ter the printer If a message saying Printer is not registered Perform printer setup does not appear see Preparation for Printer below to operate the printer and then wait for a while until the message...

Страница 11: ...a b 4 Close the feed slot cover Read the message on the printer s screen and register the information of the loaded paper 1 Make sure the printer is turned on 2 Load several sheets of photo paper 3 I...

Страница 12: ...a Placez vos doigts dans les cavit s de chaque c t de l imprimante et ouvrez l unit de num risation capot b Retirez la bande orange b a 3 SOULEVEZ l unit de num risation capot puis fermez la 4 Branche...

Страница 13: ...touche d encre non prise en charge par l imprimante par exemple une cartouche avec un num ro de mod le diff rent Installez une cartouche d encre de la bonne couleur ou utilisez la cartouche d encre fo...

Страница 14: ...s la igure suivante la cassette est ins r e C t 5 Si l cran suivant s afiche s lectionnez OK Le bac de sortie papier s ouvre automatiquement 6 Assurez vous qu un motif est imprim pour Alignement t te...

Страница 15: ...lectionnez Coniguration d Entrez le nom de mod le de votre imprimante et cliquez sur OK Vous pouvez s lectionner un nom de mod le partir de la liste e Cliquez sur Coniguration Les proc dures pour Wind...

Страница 16: ...partie droite de la fen tre Si le contenu du CD ROM s afiche double cliquez sur Msetup4 exe 4 Passez l tape d Si vous utilisez Windows 7 b Lorsque l cran Lecture automatique appara t cliquez sur Ex cu...

Страница 17: ...voir payer des frais en fonction du contrat avec votre fournisseur de services Jusqu 5 p riph riques peuvent tre connect s directement l imprimante via une connexion r seau sans il 2 V riiez l afichag...

Страница 18: ...imprimante Si le message L imprimante n est pas enregistr e Conigurer l imprimante ne s afiche pas reportez vous la section Pr paration de l imprimante ci dessous pour faire fonctionner l imprimante e...

Страница 19: ...de la fente d alimentation Lisez le message sur l cran de l imprimante et enregistrez les informations du papier charg 1 Assurez vous que l imprimante est sous tension 2 Chargez plusieurs feuilles de...

Страница 20: ...1 1 Windows 2 1 2 a b b a 3 4 5 ON 6 7 Canon Canon 8 OK 3 1 A A...

Страница 21: ...2 2 a b a b 3 Y 4 5 4 6 4 Print Head Alignment 1 a b a b 2 LTR A4...

Страница 22: ...3 3 a LTR A4 b c a b c 4 5 OK 6 Print Head Alignment 4 7 a b a b 8 OK 9 OK...

Страница 23: ...4 6 A Mac OS Windows 1 1 5 1 Next 2 a Stop b Do not connect Yes a b URL Canon c d OK e Windows Mac OS Windows Mac OS Chrome OS f g 6 A 6 B 6...

Страница 24: ...c Msetup4 exe Run Msetup4 exe d User Account Control Yes 1 File Explorer 2 This PC 3 Msetup4 exe 4 d Windows 7 b AutoPlay Msetup4 exe Run Msetup4 exe c User Account Control Continue AutoPlay 1 Comput...

Страница 25: ...6 6 B Android iOS 1 Wi Fi 1 Canon PRINT Inkjet SELPHY Canon PRINT App Store Canon PRINT Google Play Canon QR 5 2 10 http ij start canon a b c 8...

Страница 26: ...b c Auto Select Conn Method recommended d a b Printer is not registered Perform printer setup Register Printer A A TS9100 series xxx xxx xxx xxx B Direct xxxx TS9100series c 8 a b c No d LAN settings...

Страница 27: ...8 1 2 a b a b 3 a b a b 4 1 2 3 4 5 Color...

Страница 28: ...1 1 Windows 2 1 2 a b b a 3 4 5 ON 6 7 Canon Canon 8 OK 3 1 A A...

Страница 29: ...2 2 a b a b 3 Y 4 5 4 6 4 Print Head Alignment 1 a b a b 2 LTR A4...

Страница 30: ...3 3 a LTR A4 b c a b c 4 5 OK 6 Print Head Alignment 4 7 a b a b 8 OK 9 OK...

Страница 31: ...4 6 A Mac OS Windows 1 1 5 1 Next 2 a Stop b Do not connect Yes a b URL Canon c d OK e Windows Mac OS Windows Mac OS Chrome OS f g 6 A 6 B 6...

Страница 32: ...c Msetup4 exe Run Msetup4 exe d User Account Control Yes 1 File Explorer 2 This PC 3 Msetup4 exe 4 d Windows 7 b AutoPlay Msetup4 exe Run Msetup4 exe c User Account Control Continue AutoPlay 1 Comput...

Страница 33: ...6 6 B Android iOS 1 Wi Fi 1 Canon PRINT Inkjet SELPHY Canon PRINT App Store Canon PRINT Google Play Canon QR 5 2 10 http ij start canon a b c 8...

Страница 34: ...o Select Conn Method recommended d a b Printer is not registered Perform printer setup Register Printer A A TS9100 series xxx xxx xxx xxx B Direct xxxx TS9100series c 8 a b c No d LAN LAN settings WLA...

Страница 35: ...8 1 2 a b a b 3 a b a b 4 1 2 3 4 5 Color...

Страница 36: ...8 1 2 a b a b 3 a b a b 4 1 2 3 4 5 Color...

Страница 37: ...b c Auto Select Conn Method recommended d a b Printer is not registered Perform printer setup Register Printer A xxx xxx xxx xxx TS9100 series A Direct xxxx TS9100series B c 8 a b c No d Wireless Wire...

Страница 38: ...6 6 B Android iOS 1 Wi Fi 1 Canon PRINT Inkjet SELPHY App Store Canon PRINT Google Play Canon PRINT Canon 5 2 10 http ij start canon a b c 8...

Страница 39: ...c Msetup4 exe Run Msetup4 exe d Yes User Account Control File Explorer 1 This PC 2 3 Msetup4 exe d 4 Windows 7 AutoPlay b Run Msetup4 exe Msetup4 exe c Continue User Account Control AutoPlay Computer...

Страница 40: ...4 6 A Mac OS Windows 1 1 5 1 Next 2 a Stop b Yes Do not connect a b Canon URL c d e Mac OS Windows Windows Chrome OS Mac OS f Download g 6 A 6 6 B...

Страница 41: ...3 3 A4 LTR a b c a b c 4 5 OK 6 Print Head Alignment 4 7 a b a b 8 OK 9 OK...

Страница 42: ...2 2 a b a b 3 Y 4 5 4 6 4 Print Head Alignment 1 a b a b 2 A4 LTR...

Страница 43: ...1 1 Windows 2 1 2 a b b a 3 4 5 ON 6 7 Canon Canon 8 OK 3 1 A A...

Страница 44: ...RMC Regulatory Model Code K10455...

Страница 45: ...CANON INC 2017 XXXXXXXX Windows 10 Acc s au Manuel en ligne partir du site Web partir du raccourci du bureau Access Online Manual From Web site From desktop shortcut PRINTED IN XXXXXXXX QT6 1925 V01...

Страница 46: ...3D...
Отзывы: