4
3
1
2
3
1
2
4
5
1
2
Masukkan kertas
dengan sisi yang dapat dicetak menghadap bawah sampai berhenti
. Ketika
menggunakan kertas foto, setelan mesin untuk tipe media dan ukuran harus diatur. Untuk detil, rujuk ke
Petunjuk Elektronik
yang akan diinstal kemudian.
Mengeset
Kertas Biasa
Memuatkan
Kertas Foto
Periksa apakah Tatakan Keluaran
Kertas tertutup, kemudian tarik
Pendukung Kertas.
11
Geser Pemandu Kertas kanan ke
ujung.
Pemandu Kertas kiri bergerak serentak
dengan pemandu kanan.
22
Masukkan kertas sampai berhenti.
33
Atur Pemandu Kertas agar pas
dengan ukuran kertas yang
digunakan, kemudian buka
Perpanjangan Tatakan Keluaran.
44
Buka Tatakan Keluaran Kertas dan
Pendukung Keluaran Kertas.
55
Mencetak tanpa membuka Tatakan
Keluaran Kertas menyebabkan
kesalahan.
Untuk informasi tentang kertas, rujuk
ke
Petunjuk Elektronik
yang akan
diinstal kemudian.
Jika Anda menggunakan titik akses yang kompatibel dengan WPS, pilih
Start setup
pada layar untuk
menghubungkan ke LAN nirkabel, kemudian ikuti instruksi pada layar.
Jika Anda memilih setelan lainnya atau mengalami kesulitan dengan prosedur, pilih
Cancel for now
, kemudian
lanjutkan ke .
Pada , Anda dapat mengikuti instruksi pada layar komputer untuk menghubungkan ke LAN nirkabel atau jenis jaringan lain.
*
ใส่กระดาษ
โดยให้ด้านที่พิมพ์ได้ลงมาจนกระทั่งหยุด
เมื่อการใช้กระดาษรูปถ่ายการตั้งค่าเครื่องสำหรับชนิดสื่อสิ่งพิมพ์และขนาดควรจะปรับได้
สำหรับรายละเอียดให้ดู
คู่มืออิเลกทรอนิคส์
ที่จะถูกติดตั้งในภายหลัง
การตั้งค่ากระดาษ
ธรรมดา
การป้อนกระดาษภาพ
ถ่าย
ตรวจสอบว่าเทรย์ออกกระดาษปิดอยู่จากนั้น
ดึงฐานรองกระดาษออก
เลื่อนแถบกำหนดแนวกระดาษด้านขวาไปตอน
จบ
แถบกำหนดแนวกระดาษด้านซ้ายจะเคลื่อนที่โดย
พร้อมกันด้วยแถบด้านขวา
ใส่กระดาษโดยตรงจนกระทั่งหยุด
ปรับแถบกำหนดแนวกระดาษเพื่อให้พอดีกับ
ขนาดกระดาษจากนั้นเปิดส่วนขยายของเทรย์
ออกกระดาษ
เปิดเทรย์ออกกระดาษและสิ่งค้ำออกกระดาษ
สำหรับข้อมูลเกี่ยวกับกระดาษให้ดู
คู่มือ
อิเลกทรอนิคส์
ที่จะถูกติดตั้งในภายหลัง
การพิมพ์โดยไม่เปิดเทรย์ออกกระดาษทำให้เกิดข้อ
ผิดพลาด
หากคุณกำลังใช้จุดเข้าใช้งานที่ทำงานร่วมกันได้กับWPSเลือก
Start setup
บนหน้าจอเพื่อเชื่อมต่อLANแบบไร้สายจากนั้นทำตามคำแนะนำบน
หน้าจอ
หากคุณเลือกการตั้งค่าอื่นๆหรือได้รับความยากกับขั้นตอนเลือก
Cancel for now
จากนั้นดำเนินการตาม
ใน คุณสามารถทำตามคำแนะนำบนหน้าจอคอมพิวเตอร์เพื่อเชื่อมต่อLANแบบไร้สายหรือเครือข่ายชนิดอื่นๆ
*
1
2
5
4
3
裝入紙張時
列印面向下直至其停止
。使用相片紙時,應調整媒體類型和尺寸的本機設定。關於詳細資訊,請
參閱隨後安裝的
電子手冊
。
設定一般紙張
載入相片紙
確認出紙托盤已關閉,然後拉出托
紙架。
11
移動右紙張導引器至最右端。
左紙張導引器與右導引器同時移動。
22
裝入紙張直至其停止。
33
調整紙張導引器以符合所用紙張尺
寸,然後開啟出紙托盤擴展架。
44
開啟出紙托盤和出紙支架。
55
關於紙張資訊,請參閱隨後安裝的
電子
手冊
。
關閉出紙托盤時列印會發生錯誤。
如果正在使用相容
WPS
的存取點,請在螢幕上選擇
開始設定
(Start setup)
以連接至無線
LAN
,然後按照螢幕上的
說明操作。
如果選擇其他設定或執行此步驟時遇到問題,選擇
現在取消
(Cancel for now)
,然後繼續執行
。
在 中,請按照電腦螢幕上的說明操作連接至無線
LAN
或其他類型的網絡。
*
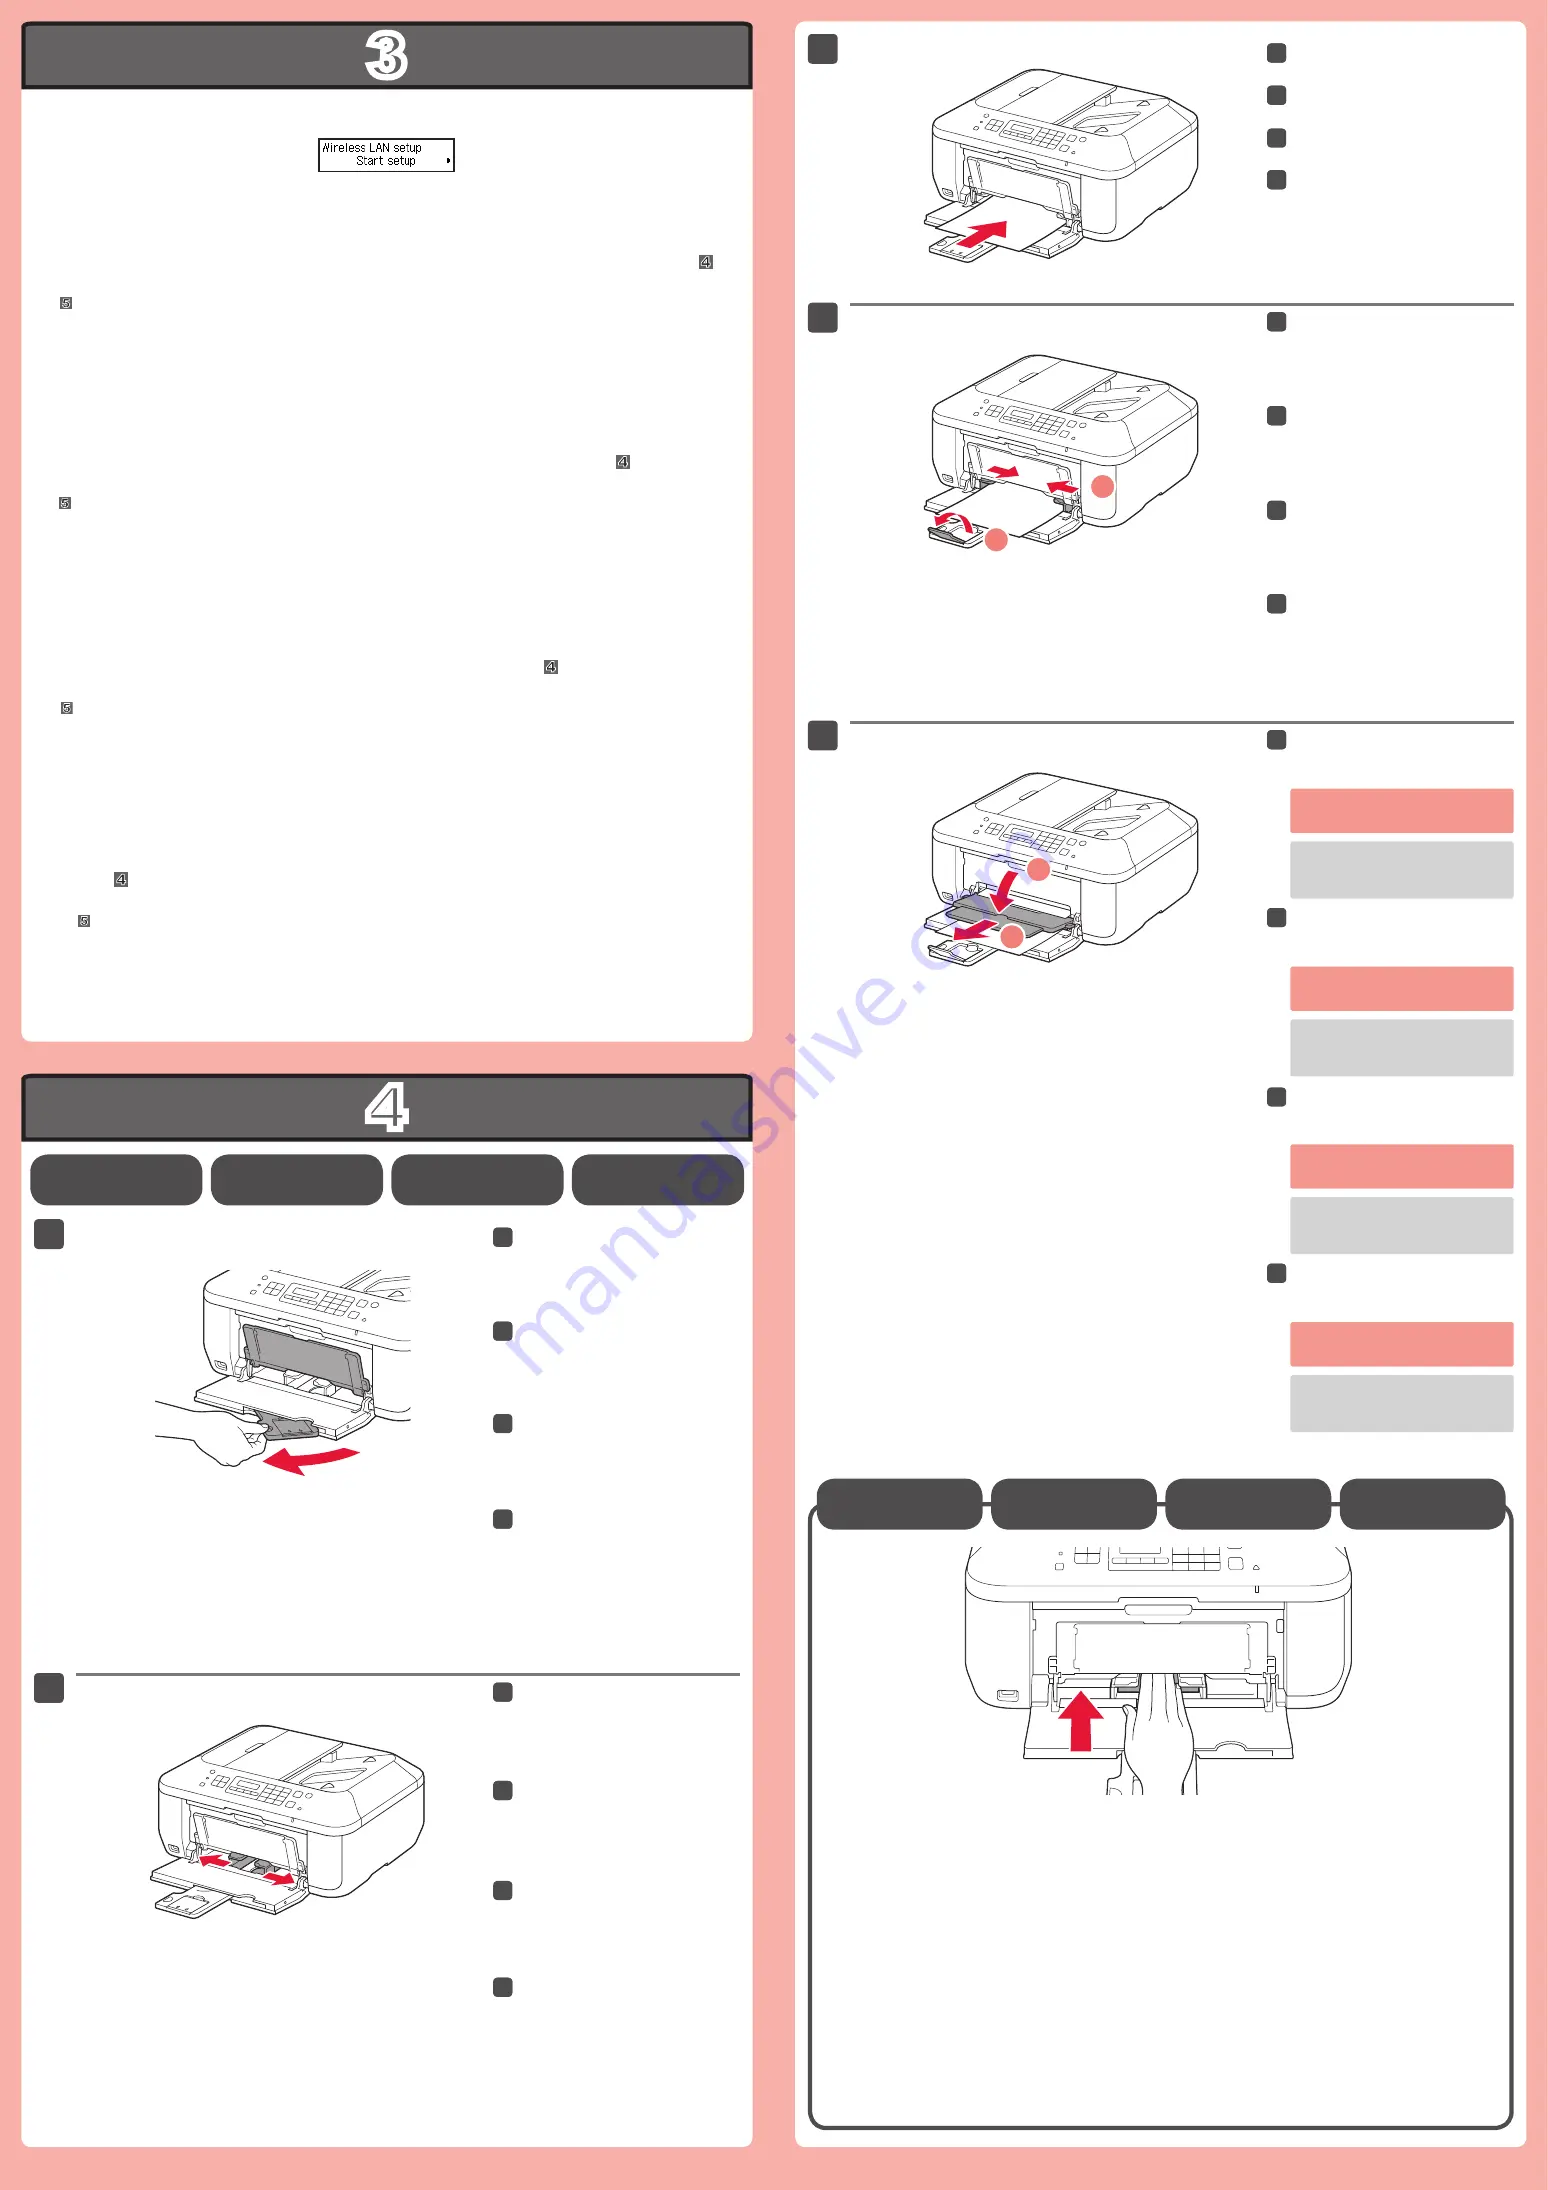
Check that the Paper Output Tray
is closed, then pull out the Paper
Support.
11
Slide the right Paper Guide to the
end.
The left Paper Guide moves
simultaneously with the right guide.
22
Insert paper until it stops.
33
Adjust the Paper Guide to fit the
paper size used, then open the
Output Tray Extension.
44
Insert paper
with the printable side down until it stops
. When using photo paper, machine settings for
media type and size should be adjusted. For details, refer to the
On-screen Manual
which will be installed
later.
Setting Plain
Paper
Loading Photo
Paper
Open the Paper Output Tray and
the Paper Output Support.
55
Printing without opening the Paper
Output Tray causes an error.
For information about paper, refer to
the
On-screen Manual
which will be
installed later.
If you are using a WPS-compatible access point, select
Start setup
on the screen to connect to wireless LAN,
then follow the on-screen instruction.
If you choose other settings or have difficulty with the procedure, select
Cancel for now
, then proceed to .
In , you can follow the instruction on the computer screen to connect to wireless LAN or other kind of network.
*


