6
5
3
1
2
Tekan tombol
OK
.
33
Masukkan CD-ROM ke dalam
komputer.
11
Jika kabel USB telah
terhubung, cabut kabel.
Jika pesan muncul pada
komputer, klik
Batal
(Cancel)
.
Jika CD-ROM tidak berjalan secara otomatis:
Klik dua kali
Komputer (Saya)((My) Computer)
> ikon CD-ROM >
MSETUP4.EXE
.
Klik dua kali ikon CD-ROM pada desktop.
Ikuti instruksi pada layar untuk melanjutkan.
Untuk memilih bahasa, klik
Bahasa(Language)
.
22
Baca Petunjuk Elektronik pada
Komputer
Memutuskan Kotak Kertas yang akan digunakan sesuai dengan ukuran kertas.
Set kertas dengan sisi yang dapat dicetak menghadap bawah.
Sebelum mencetak, ubah setelan mesin untuk tipe dan ukuran media. Untuk detil, rujuk ke
Petunjuk
Elektronik
yang akan diinstal kemudian.
Ukuran Kertas
dan Sisi
Pencetakan
Untuk informasi
tentang kertas, rujuk ke
Petunjuk Elektronik
yang akan diinstal
kemudian.
Layar mati jika mesin
tidak dioperasikan
selama sekitar 5 menit.
Untuk mengembalikan
tampilan, tekan tombol
apa pun (kecuali tombol
DAYA
) pada Panel
Operasi.
•
•
Untuk menghubungkan ke LAN nirkabel, pilih
Mulai pengesetan(Start setup)
pada layar, kemudian ikuti
instruksi pada layar.
Dalam kondisi berikut ini:
Jika Anda ingin menggunakan koneksi USB
Jika Anda mengalami kesulitan dengan prosedur
Pilih
Batal sekarang(Cancel for now)
, kemudian lanjutkan ke .
Anda dapat melakukan koneksi jaringan dengan mengikuti instruksi seperti ditunjukkan pada layar komputer di .
•
•
*
Kotak Tinta
Kompatibel
กดปุ่ม
OK
ใส่CD-ROMในคอมพิวเตอร์
หากสายเคเบิลUSBได้ถูกเชื่อม
ต่อแล้วให้ถอดออกหากข้อความ
ปรากฏขึ้นบนคอมพิวเตอร์คลิก
ยกเลิก(Cancel)
ปฏิบัติตามคำแนะนำบนหน้าจอเพื่อดำเนินการต่อ
ต้องการเลือกภาษาคลิก
ภาษา(Language)
หากCD-ROMไม่สามารถเรียกใช้อัตโนมัติ:
ดับเบิลคลิก
คอมพิวเตอร์(ของฉัน)((My)Computer)
>ไอคอนCD-ROM>
MSETUP4.EXE
ดับเบิลคลิกไอคอนCD-ROMบนเดสก์ท็อป
อ่านคู่มืออิเลกทรอนิคส์บนคอมพิวเตอร์
ตัดสินใจที่จะใช้กลักกระดาษอันไหนตามขนาดกระดาษ
ตั้งค่ากระดาษโดยให้ด้านที่พิมพ์ได้ลงมา
ก่อนการพิมพ์เปลี่ยนการตั้งค่าเครื่องสำหรับชนิดสื่อสิ่งพิมพ์และขนาดสำหรับรายละเอียดให้ดู
คู่มืออิเลกทรอนิคส์
ที่จะถูกติดตั้งในภายหลัง
ขนาดกระดาษและ
ด้านที่พิมพ์
สำหรับข้อมูลเกี่ยวกับกระดาษ
ให้ดู
คู่มืออิเลกทรอนิคส์
ที่จะ
ถูกติดตั้งในภายหลัง
หน้าจอจะปิดลงถ้าไม่ได้ใช้
เครื่องประมาณ5นาทีเมื่อ
ต้องการคืนค่าจอแสดงผลให้
กดปุ่มใดๆ(ยกเว้นปุ่ม
พลังงาน
)บนแผงการทำงาน
•
•
ต้องการเชื่อมต่อLANแบบไร้สายให้เลือก
Startsetup
บนหน้าจอจากนั้นทำตามคำแนะนำบนหน้าจอ
ในสภาวะต่อไปนี้:
หากคุณต้องการใช้การเชื่อมต่อUSB
หากคุณได้รับความยากกับขั้นตอน
เลือก
Cancelfornow
จากนั้นดำเนินการตาม
คุณสามารถปฏิบัติการเชื่อมต่อเครือข่ายตามคำแนะนำที่แสดงบนหน้าจอคอมพิวเตอร์ใน
•
•
*
ตลับหมึกที่ทำงานร่วม
กันได้
2
1
3
按
OK
按鈕。
33
將光碟插入電腦。
11
如果
USB
電纜線已連接,
請將其拔出。如果電腦
出現訊息,按一下
取消
(Cancel)
。
按照螢幕上的說明進行操作。
要選擇語言,按一下
語言
(Language)
。
22
如果光碟未自動運行:
按兩下
(
我的
)
電腦
((My) Computer)
>
光碟圖示
>
MSETUP4.EXE
。
按兩下桌面上的光碟圖示。
閱讀電腦上的電子手冊
根據紙張大小決定要使用的紙匣。
設定紙張列印面向下。
列印前,變更媒體類型和大小的本機設定。關於詳細資訊,請參閱隨後安裝的
電子手冊
。
紙張大小和列印面
關於紙張資訊,請參閱
隨後安裝的
電子手冊
。
如果本機停止工作大約
5
分鐘,螢幕將關閉。要
恢復顯示,請按操作面
板上除
電源
按鈕以外的
任何按鈕。
•
•
要連接至無線
LAN
,請選擇螢幕上的
開始設定
(Start setup)
,然後按照螢幕上的說明操作。
在以下情況下:
如果要使用
USB
連接
如果執行此步驟時遇到問題
選擇
現在取消
(Cancel for now)
,然後繼續執行 。
可以按照 中電腦螢幕上的說明執行網路連接。
•
•
*
相容墨水盒
For information about
paper, refer to the
On-
screen Manual
which
will be installed later.
The screen turns off
if the machine is not
operated for about 5
minutes. To restore
the display, press any
button (except the
ON
button) on the
Operation Panel.
•
•
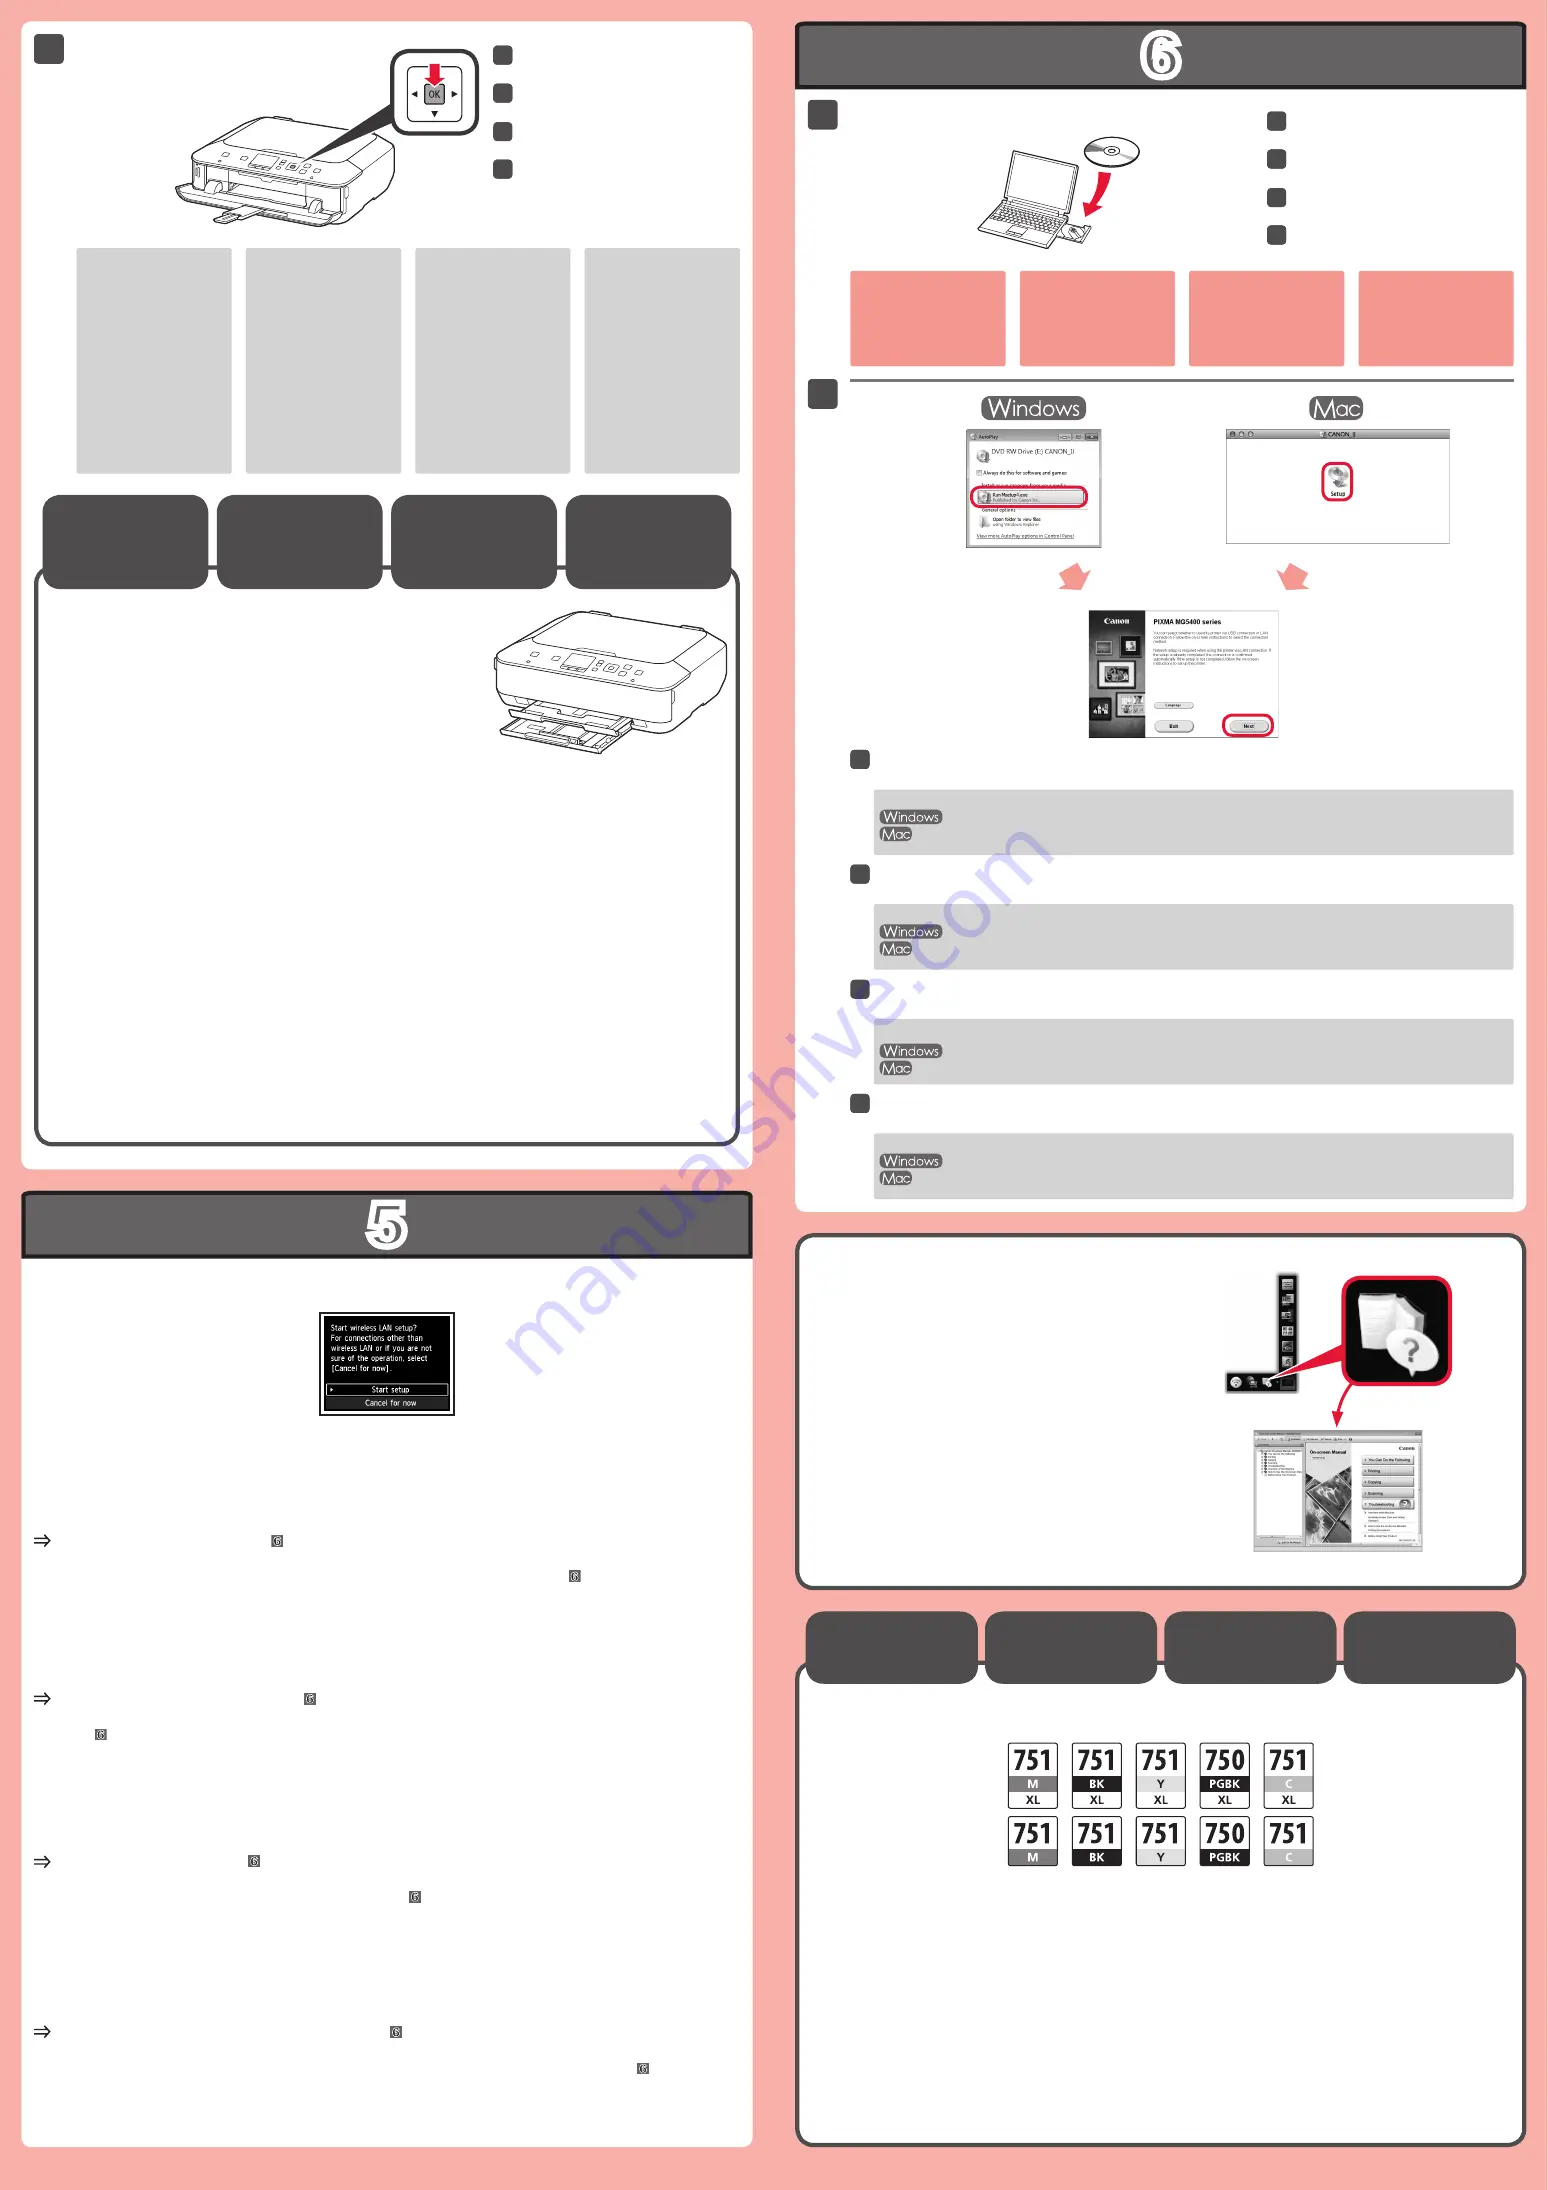
Press the
OK
button.
33
Insert the CD-ROM into the
computer.
11
If the USB cable is already
connected, unplug it. If a
message appears on the
computer, click
Cancel
.
Follow the on-screen instructions to proceed.
To select a language, click
Language
.
22
If the CD-ROM does not autorun:
Double-click
(My) Computer
> CD-ROM icon >
MSETUP4.EXE
.
Double-click the CD-ROM icon on the desktop.
Read the On-screen Manual on
the Computer
Decide which Cassette to use according to the paper size.
Set the paper with the printable side down.
Before printing, change the machine settings for media type and
size. For details, refer to the
On-screen Manual
which will be
installed later.
Paper Size
and Printing
Side
To connect to wireless LAN, select
Start setup
on the screen, then follow the on-screen instruction.
In the following conditions:
If you want to use USB connection
If you have difficulty with the procedure
Select
Cancel for now
, then proceed to .
You can perform network connection by following the instruction shown on the computer screen in .
•
•
*
Compatible Ink
Tanks
M: CLI-751XL<M>, CLI-751<M>
Y: CLI-751XL<Y>, CLI-751<Y>
C: CLI-751XL<C>, CLI-751<C>
BK: CLI-751XL<BK>, CLI-751<BK>
PGBK: PGI-750XL<PGBK>, PGI-750<PGBK>


