

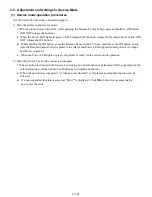


(4) Ink absorber counter setting
Before replacement of the logic board, check the ink absorber counter value, and register it to the replaced new
logic board. (The value can be set in 10% increments.)
In addition, according to the "
Guideline for Preventive Replacement of Ink Absorber
," replace the ink absorber.
When the ink absorber is replaced, reset the applicable ink absorber counter (to 0%). See
3-3. Adjustment and
Settings in Service Mode.
(5) Preventive replacement of ink absorber
Replace the ink absorber in accordance with the
"Guideline for Preventive Replacement of Ink Absorber"
even
when the ink absorber is not full. (Related Service Information #Q-12E/J-0188)
< Guideline for preventive replacement of ink absorber >
Replace the ink absorber when it falls in either Criteria 1 or Criteria 2.
* The estimated number of months until the ink absorber will become full
< How to judge >
Print the EEPROM information, and check the "D" (ink absorber counter) and "DF" (ink absorber life) values.
Step 1: Is "D" 80% or more?
Yes (80% or more) -> Replace the ink absorber.
No (less than 80%) -> Proceed to Step 2.
Step 2: Is "DF" 24 or more?
No (less than 24 months) -> Replace the ink absorber.
Yes (24 months or more) -> No need to replace the ink absorber.
Note: - If the "ST" (installation date) value is abnormal, the "DF" (ink absorber life) value may not be
correct. Skip Step 2
- The ink absorber life is an estimated value calculated based on the user's printer usage.
< How to read the EEPROM information print >
Criteria
Purpose
How to know the criteria values
Criteria 1:
The ink absorber life
*
is 2
years or less.
To avoid re-repair for ink
absorber replacement in a short
period of time after repair for
other reasons.
For 2009 2H or earlier products:
EEPROM information print and the
quick reference table (Service
Information #Q-12E/J-0188)
For 2010 1H and later products:
EEPROM information print
Criteria 2:
The ink absorber counter
value is 80% or more.
To prevent ink leakage during
return of the repaired printer to
users.
EEPROM information print
43 / 52
Содержание PIXMA iX6550
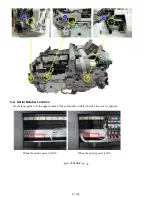
Страница 19: ...5 Remove the panel cover unit R 1 screw 15 52 ...
Страница 21: ...4 Remove the printer unit 6 screws Lift the printer unit Specific screw location 17 52 ...
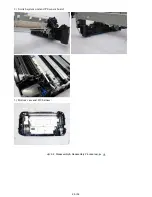
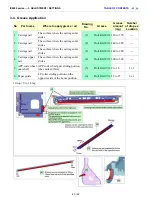
Страница 32: ... 10 Cable wiring and connection 1 Logic board and spur unit 28 52 ...
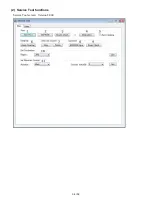
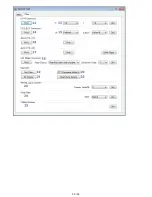
Страница 38: ... 2 Service Tool functions Service Tool screen Version 2 000 34 52 ...
Страница 39: ...35 52 ...
Страница 50: ...4 2 Integrated Inspection Pattern Print Print sample 46 52 ...
Страница 51: ...4 3 Ink Absorber Counter Value Print Print sample 4 VERIFICATION AFTER REPAIR 47 52 ...
Страница 54: ...50 52 ...