background image

8

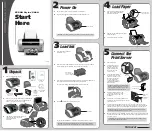
Відкрийте підпору для паперу й подовжувач 

підпори для паперу

.

Посуньте правий напрямник для паперу  

до кінця.

Завантажте папір стороною для друку догори.

Посуньте правий напрямник для паперу,  

щоб вирівняти його зі стороною стосу паперу.

a   

Витягніть лоток виведення паперу

.

b   

Відкрийте подовжувач вивідного лотка

.

a

b

Завантаження паперу

Щоб запобігти протіканню чорнила, 

переконайтеся, що обидві кнопки з’єднання 

натиснуто повністю.

Помістіть принтер у поліетиленовий пакет, 

оскільки чорнило може протікати.

•  Помістіть принтер у тверду коробку нижньою 

частиною принтера донизу коробки, використовуючи 

достатню кількість захисного матеріалу для 

гарантування безпечного транспортування.

•  Не нахиляйте принтер. Чорнило може витекти.

•  Поводьтеся з коробкою обережно та переконайтеся, 

що її стінки рівні, вона НЕ перевернута догори дном 

або набік, оскільки принтер може пошкодитись, 

а чорнило в ньому може витекти.

•  Напишіть на коробці із принтером «ЦИМ 

БОКОМ ДОГОРИ», щоб під час транспортування 

експедитор завжди тримав принтер нижньою 

стороною донизу. Також напишіть «КРИХКЕ» 

або «ПОВОДИТИСЬ ОБЕРЕЖНО».

Транспортування принтера

Під час переміщення принтера переконайтеся, що ви дотримуєтеся наведених нижче інструкцій. Щоб отримати 

докладніші відомості, див. документ 

Онлайновий посібник

.

Содержание PIXMA G4411

Страница 1: ...addendum en premier Para Come ar Leia Informa es Importantes e Sobre Seguran a adendo primeiro Gu a de inicio Lea primero Informaci n de seguridad e informaci n importante ap ndice Getting Started Re...

Страница 2: ...gina 1 Conectando a um computador e smartphone tablet p gina 4 Como segurar a impressora Filmes explicativos Instalaci n de la impresora p gina 1 Conexi n con el ordenador y con el tel fono inteligent...

Страница 3: ...e scanning unit cover b Remove the orange tape and the protective material and discard them a b 3 Installing the Cartridge 1 Open the cartridge locking cover 2 Take out each cartridge from the package...

Страница 4: ...ink bottle upright and remove the bottle cap 4 Insert the nozzle of the ink bottle into the inlet and stand the ink bottle upside down 5 Pour all ink into the ink tank Confirm that the ink has been fi...

Страница 5: ...d yet 2 Press the ON button 3 When the following screen appears use the and buttons to select a language and then press the OK button 4 If the following screen appears select your country or region an...

Страница 6: ...g Execute the downloaded file Proceed to step on the next page to continue 6 Preparing for Connection 1 Press the OK button Preparing the ink starts This takes about 5 to 6 minutes Proceed to the nex...

Страница 7: ...side of the window If the contents of the CD ROM appear double click Msetup4 exe 4 Proceed to step d When using Windows 7 b When the AutoPlay screen appears click Run Msetup4 exe c If the User Accoun...

Страница 8: ...ed depending on the contract with your service provider Up to 5 devices can be connected to the printer via wireless LAN connection directly 2 Check the display on the printer The screen turns off whe...

Страница 9: ...ethod recommended on the connection method selecting screen the appropriate connection method is selected automatically depending on your environment d Make sure that the following screen appears a Ta...

Страница 10: ...the printer in a sturdy box so that it is placed with its bottom facing down using sufficient protective material to ensure safe transport Do not tilt the printer Ink may leak Please handle with care...

Страница 11: ...de la impresora 2 a Abra la cubierta unidad de escaneado b Retire la cinta naranja y el material de protecci n y des chelos a b 3 Instalar el cartucho 1 Abra la tapa de bloqueo del cartucho 2 Saque c...

Страница 12: ...cia arriba y retire la tapa del frasco 4 Inserte el inyector del frasco de tinta en la entrada y coloque el frasco de tinta boca abajo 5 Vierta toda la tinta en el dep sito de tinta Confirme que se ha...

Страница 13: ...i n 2 Pulse el bot n ACTIVADO ON 3 Si aparece la siguiente pantalla use los botones y para seleccionar el idioma y pulse el bot n OK 4 Si aparece la siguiente pantalla seleccione su pa s o regi n y a...

Страница 14: ...rchivo descargado Vaya al paso en la p gina siguiente para continuar 6 Preparaci n para la conexi n 1 Pulse el bot n OK Preparando la inicializaci n de tinta Este proceso tardar de 5 a 6 minutos en co...

Страница 15: ...ntenido del CD ROM haga doble clic en Msetup4 exe 4 Contin e en el paso d Si utiliza Windows 7 b Cuando se muestre la pantalla Reproducci n autom tica AutoPlay haga clic en Ejecutar Msetup4 exe Run Ms...

Страница 16: ...enta seg n el contrato que tenga con el proveedor del servicio Se pueden conectar un m ximo de 5 dispositivos directamente a la impresora mediante la conexi n LAN inal mbrica 2 Compruebe la pantalla e...

Страница 17: ...autom m todo con recomendado Auto Select Conn Method recommended en la pantalla de selecci n del m todo de conexi n se seleccionar el m todo de conexi n adecuado seg n su ambiente d Aseg rese de que...

Страница 18: ...n una caja resistente y de modo que no quede boca abajo Utilice suficiente material de protecci n para garantizar un transporte seguro No incline la impresora De lo contrario es posible que la tinta s...

Страница 19: ...externa da impressora 2 a Abra a unidade de digitaliza o tampa b Remova a fita laranja e o material de prote o e descarte os a b 3 Instalando o cartucho 1 Abra a tampa de fixa o do cartucho 2 Retire...

Страница 20: ...i o vertical e remova a tampa da garrafa 4 Insira o bocal da garrafa de tinta na entrada e segure a garrafa de tinta de cabe a para baixo 5 Coloque toda a tinta no cartucho de tinta Confirme que a tin...

Страница 21: ...imenta o 2 Pressione o bot o ATIVADO ON 3 Quando a tela a seguir for exibida use os bot es e para selecionar um idioma e em seguida pressione o bot o OK 4 Se a tela a seguir for exibida selecione seu...

Страница 22: ...te o arquivo baixado Siga para a etapa na pr xima p gina para continuar 6 Preparando para a conex o 1 Pressione o bot o OK Preparando o come o da tinta Isso demora entre 5 a 6 minutos Prossiga para a...

Страница 23: ...conte do do CD ROM aparecer clique duas vezes em Msetup4 exe 4 Prossiga para a etapa d Ao usar Windows 7 b Quando a tela Reprodu o Autom tica AutoPlay for exibida clique em Executar Msetup4 exe Run Ms...

Страница 24: ...o voc poder ser cobrado dependendo do contrato com seu provedor de acesso At 5 dispositivos podem ser diretamente conectados impressora por meio de uma conex o de LAN sem fio 2 Verifique a tela da imp...

Страница 25: ...ndado Auto Select Conn Method recommended na tela de sele o do m todo de conex o o m todo de conex o ser selecionado automaticamente de acordo com o seu ambiente d Certifique se de que a tela a seguir...

Страница 26: ...sora em uma caixa resistente de modo que tenha sua parte inferior virada para baixo usando material de prote o suficiente para garantir o transporte seguro N o incline a impressora A tinta pode vazar...

Страница 27: ...rez l unit de num risation capot b Retirez la bande orange et le mat riau protecteur et jetez les a b 3 Installation de la cartouche 1 Ouvrez le couvercle de verrouillage de cartouche 2 Sortez chaque...

Страница 28: ...artouche d encre 3 Tenez la bouteille d encre bien droite et retirez le capuchon de la bouteille 4 Ins rez la buse de la bouteille d encre dans l arriv e et retournez la bouteille d encre 5 Versez tou...

Страница 29: ...entation 2 Appuyez sur le bouton MARCHE ON 3 Lorsque l cran suivant s affiche utilisez les boutons et pour s lectionner une langue puis appuyez sur le bouton OK 4 Si l cran suivant s affiche s lection...

Страница 30: ...ier de configuration g Ex cutez le fichier t l charg Passez avec l tape la page suivante pour continuer 6 Pr paration de la connexion 1 Appuyez sur le bouton OK La pr paration de l encre commence Cett...

Страница 31: ...a fen tre Si le contenu du CD ROM s affiche double cliquez sur Msetup4 exe 4 Passez l tape d Si vous utilisez Windows 7 b Lorsque l cran Lecture automatique appara t cliquez sur Ex cuter Msetup4 exe c...

Страница 32: ...des frais en fonction du contrat avec votre fournisseur de services Jusqu 5 p riph riques peuvent tre connect s directement l imprimante via une connexion r seau sans fil 2 V rifiez l affichage sur l...

Страница 33: ...lectionnez M thode s l auto conn recommand dans l cran de s lection de la m thode de connexion la m thode de connexion appropri e est s lectionn e automatiquement selon votre environnement d Assurez...

Страница 34: ...orientant la partie inf rieure vers le bas et en utilisant suffisamment de mat riau protecteur pour garantir un transport en toute s curit N inclinez pas l imprimante L encre risque de couler Manipule...

Страница 35: ...1 1 Windows 2 1 2 a b a b 3 1 2 3 4 C B 5 6...

Страница 36: ...2 4 1 2 3 4 5 A A 6 7 8 1 7 A A...

Страница 37: ...3 9 5 1 2 ON 3 OK 4 OK 5 6 Yes OK...

Страница 38: ...4 7 A macOS Windows 1 1 a b URL Canon c d OK e Windows macOS Chrome OS f g 6 1 OK 5 6 2 7 A 7 B 6 a Stop b Do not connect OK c Yes OK d...

Страница 39: ...c Msetup4 exe Run Msetup4 exe d User Account Control Yes 1 File Explorer 2 This PC 3 Msetup4 exe 4 d Windows 7 b AutoPlay Msetup4 exe Run Msetup4 exe c User Account Control Continue AutoPlay 1 Comput...

Страница 40: ...6 7 B iOS Android 1 Wi Fi 1 Canon PRINT Inkjet SELPHY Canon PRINT App Store Canon PRINT Google Play Canon QR 5 2 10 ON a b Copy a b c 8 http ij start canon...

Страница 41: ...nect OK c iOS Android a Settings Canon_ij_XXXX Wi Fi Canon_ij_XXXX a b c Auto Select Conn Method recommended d a b Printer is not registered Perform printer setup Register Printer A A G4010 series xxx...

Страница 42: ...8 1 2 3 4 5 a b a b...

Страница 43: ...1 1 Windows 2 1 2 a b a b 3 1 2 3 4 C B 5 6...

Страница 44: ...2 4 1 2 3 4 5 A A 6 7 8 1 7 A A...

Страница 45: ...3 9 5 1 2 ON 3 OK 4 OK 5 6 Yes OK...

Страница 46: ...4 7 A macOS Windows 1 1 a b URL Canon c d OK e Windows macOS Windows macOS Chrome OS f g 6 1 OK 5 6 2 7 A 7 B 6 a Stop b Do not connect OK c Yes OK d...

Страница 47: ...c Msetup4 exe Run Msetup4 exe d User Account Control Yes 1 File Explorer 2 This PC 3 Msetup4 exe 4 d Windows 7 b AutoPlay Msetup4 exe Run Msetup4 exe c User Account Control Continue AutoPlay 1 Comput...

Страница 48: ...6 7 B iOS Android 1 Wi Fi 1 Canon PRINT Inkjet SELPHY Canon PRINT App Store Canon PRINT Google Play Canon QR 5 2 10 ON a b Copy a b c 8 http ij start canon...

Страница 49: ...onnect OK c iOS Android a Settings Canon_ij_XXXX Wi Fi Canon_ij_XXXX a b c Auto Select Conn Method recommended d a b Printer is not registered Perform printer setup Register Printer A A G4010 series x...

Страница 50: ...8 1 2 3 4 5 a b a b...

Страница 51: ...8 1 1 2 2 3 3 4 4 5 5 a b a b...

Страница 52: ...t c c Android iOS a a Settings Wi Fi Canon_ij_XXXX Canon_ij_XXXX a b b c c Auto Select Conn Method recommended d d a a b b Printer is not registered Perform printer setup Register Printer A A G4010 se...

Страница 53: ...6 7 B iOS Android 1 Wi Fi 1 1 Canon PRINT Inkjet SELPHY App Store Canon PRINT Google Play Canon PRINT Canon 5 2 2 ON 10 a Copy b a a b b c c 8 http ij start canon...

Страница 54: ...c c Run Msetup4 exe Msetup4 exe d d Yes User Account Control File Explorer 1 This PC 2 3 Msetup4 exe d 4 Windows 7 AutoPlay b Run Msetup4 exe Msetup4 exe c Continue User Account Control AutoPlay Compu...

Страница 55: ...4 7 A macOS Windows 1 1 1 a a b b Canon URL c c d d e e macOS Windows macOS Windows Chrome OS f f Download g g 6 1 1 OK 6 5 2 2 7 A 6 7 B a a Stop b b OK Do not connect c c OK Yes d d...

Страница 56: ...3 9 9 5 1 1 2 2 ON 3 3 OK 4 4 OK 5 5 6 6 OK Yes...

Страница 57: ...2 4 1 1 2 2 3 3 4 4 5 5 A A 6 6 7 7 8 8 7 1 A A...

Страница 58: ...1 1 Windows 2 1 1 2 2 a b a b 3 1 1 2 2 3 3 4 4 C B 5 5 6 6...

Страница 59: ...RMC Regulatory Model Code K10472...

Страница 60: ...artir du navigateur Acesse o Manual On line Do navegador A partir do atalho da rea de trabalho Do navegador Acceso al Manual en l nea Desde el navegador Desde el acceso directo del escritorio Desde el...

Отзывы: