background image

Printing from a Paper Cassette

2-44

Loading and Deliv

er

ing P

aper

2

17

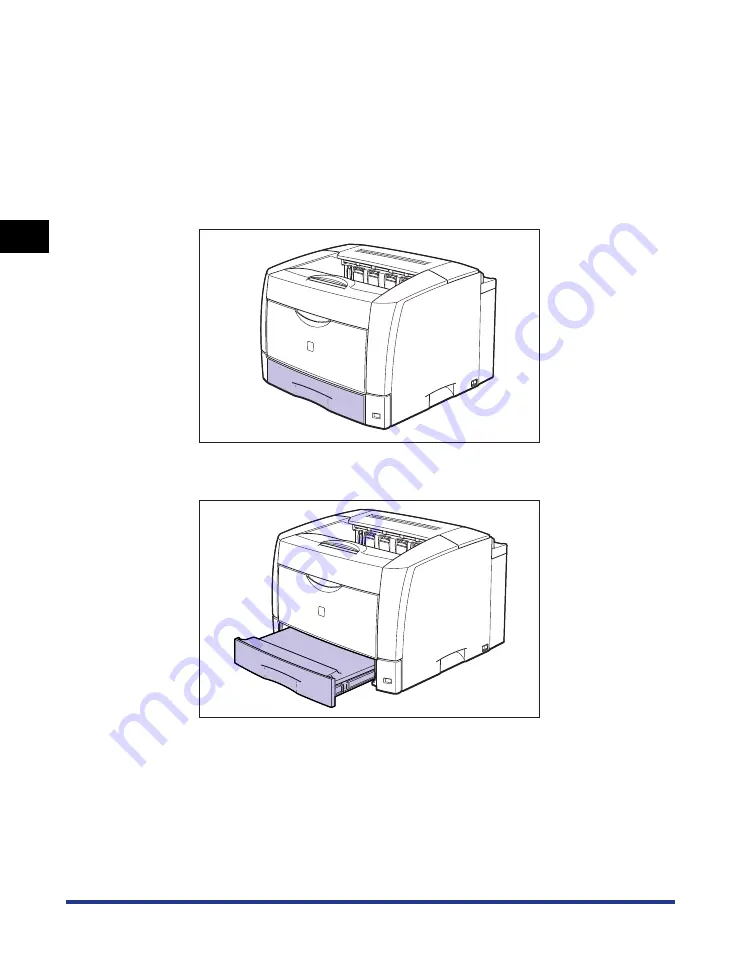
Set the paper cassette in the printer.

Set the paper cassette referring to the following figure.

If you cannot insert the paper cassette smoothly, check if the cassette cover is 
set properly. If the paper cassette is set when the cassette cover is not set 
properly, you may not be able to pull out the paper cassette.

If the paper cassette is not extended, push the paper cassette into the printer 
firmly until the front side of the cassette is flush with the front surface of the 
printer.

If the paper cassette is extended, the front side of the cassette is not flush with 
the front surface of the printer. Push the paper cassette gently until it stops.

Содержание LASER SHOT LBP-3600

Страница 1: ...ENG IMPORTANT Read this manual carefully before using your printer Save this manual for future reference User s Guide User s Guide Laser Beam Printer ...

Страница 2: ...LBP3600 Laser Printer User s Guide ...

Страница 3: ...the Network Environment for Printing Managing the Printer on the Network Environment Only when the optional network board is installed Network Guide CD ROM Operating Setting the Printer from the Web Browser Only when the optional network board is installed Remote UI Guide CD ROM To view the manual in PDF format Adobe Reader Adobe Acrobat Reader is required If Adobe Reader Adobe Acrobat Reader is n...

Страница 4: ...Routine Maintenance Optional Accessories Troubleshooting Appendix Chapter 1 Chapter 2 Chapter 3 Chapter 4 Chapter 5 Chapter 6 Chapter 7 Chapter 8 Considerable effort has been made to ensure that this manual is free of inaccuracies and omissions However as we are constantly improving our products if you need an exact specification please contact Canon ...

Страница 5: ...ges xi Important Safety Instructions xii Installation xii Power Supply xiii Handling xiv Maintenance and Inspections xv Consumables xvii Others xvii Chapter 1 Before You Start Using This Printer Features and Benefits 1 2 Parts and Their Functions 1 3 Main Unit 1 3 Front View 1 3 Rear View 1 4 Inner View 1 5 Indicators 1 6 Connecting the Power Cord 1 7 Turning the Printer ON OFF 1 10 Turning the Pr...

Страница 6: ...sette 2 3 or 4 2 27 Changing the Size of Paper in a Paper Cassette 2 32 Changing the Size of Paper in Cassette 1 2 33 Changing the Size of Paper in Cassette 2 3 or 4 2 45 Setting Up the Printer Driver and Printing 2 53 Printing from the Multi purpose Tray 2 57 Printing Paper Other than Envelopes 2 58 Printing Envelopes 2 67 2 sided Printing 2 76 Automatic 2 sided Printing 2 77 Loading Paper When P...

Страница 7: ...ng from CD ROM Setup 3 68 Installing from Add Printer Wizard 3 73 Installing from Windows Explorer 3 75 Uninstalling the CAPT Software 3 77 Chapter 4 Printing a Document Printing from the Application Software 4 3 Job Operations 4 7 Specifying the Printing Preferences 4 9 For Windows 98 Me 4 9 Displaying the Document Properties Dialog Box from the Application 4 10 Displaying the Printer Properties ...

Страница 8: ...ng Date 4 54 Selecting an Objective 4 55 Print with Mixed Paper Sizes Orientations 4 57 Gutter 4 59 Specifying the Finishing Method 4 60 Specifying the Paper Feed Method 4 63 Specifying the Print Quality 4 65 Grayscale Settings 4 67 Grayscale Settings 4 67 Printing Grayscale Sample Windows 2000 XP Server 2003 only 4 68 Specifying Profiles 4 71 Adding a Profile 4 71 Editing Deleting a Profile 4 73 ...

Страница 9: ...r Storing the Printer 5 46 Chapter 6 Optional Accessories Optional Accessories 6 2 Paper Cassette 6 2 Paper Feeder 6 3 Duplex Unit 6 4 Network Board 6 5 Paper Feeder 6 6 Installation Space 6 8 Parts and Their Functions 6 9 Removing the Packing Materials 6 9 Removing the Packing Materials from the 250 sheet Paper Feeder Unit PF 66 6 10 Removing the Packing Materials from the 250 sheet Paper Feeder ...

Страница 10: ...ervice Call Display 7 39 Print Quality Problems 7 41 Paper Problems 7 47 When Nothing is Printed 7 49 Installation Problems 7 50 When Uninstallation Fails 7 51 Uninstalling the USB Class Driver 7 53 Problems During Local Installation 7 56 Installation Problems When the Printer is Shared on a Network 7 57 Miscellaneous Problems 7 58 Confirming the Printer Features 7 60 Chapter 8 Appendix Specificat...

Страница 11: ...rmed correctly In order to use the printer safely always pay attention to these warnings CAUTION Indicates a caution concerning operations that may lead to injury to persons or damage to property if not performed correctly In order to use the printer safely always pay attention to these cautions IMPORTANT Indicates operational requirements and restrictions Be sure to read these items carefully in ...

Страница 12: ... needs Abbreviations Used in This Manual In this manual product names and model names are abbreviated as follows Microsoft Windows 95 operating system Windows 95 Microsoft Windows 98 operating system Windows 98 Microsoft Windows Millennium Edition operating system Windows Me Microsoft Windows 2000 operating system Windows 2000 Microsoft Windows XP operating system Windows XP Microsoft Windows Serv...

Страница 13: ...publication may be reproduced or transmitted in any form or by any means electronic or mechanical including photocopying and recording or by any information storage or retrieval system without the prior written permission of Canon Inc Disclaimers The information in this manual is subject to change without notice CANON INC MAKES NO WARRANTY OF ANY KIND WITH REGARD TO THIS MATERIAL EITHER EXPRESS OR...

Страница 14: ...print or otherwise reproduce any particular document and or of the use of the images scanned printed or otherwise reproduced you should consult in advance with your legal advisor for guidance Paper Money Travelers Checks Money Orders Food Stamps Certificates of Deposit Passports Postage Stamps canceled or uncanceled Immigration Papers Identifying Badges or Insignias Internal Revenue Stamps cancele...

Страница 15: ...able substances If flammable substances come into contact with electrical parts inside the printer it may result in a fire or electrical shock Do not place the following items on the printer If these items come into contact with a high voltage area inside the printer it may result in a fire or electrical shock If these items are dropped or slipped inside the printer immediately turn OFF the power ...

Страница 16: ...printer resulting in personal injury See Moving the Printer on p 5 37 Power Supply WARNING Do not damage or modify the power cord Also do not place heavy objects on the power cord or pull on or excessively bend it as this could cause electrical damage and result in a fire or electrical shock Keep the power cord away from a heat source failure to do this may cause the power cord coating to melt res...

Страница 17: ...ponents inside the printer which may result in a fire or electrical shock Electrical equipment can be hazardous if not used properly To avoid injury do not allow children access to the interior of any electrical product and do not let them touch any electrical contacts or gears that are exposed If the printer makes strange noises or emits smoke heat or unusual smells immediately turn OFF the power...

Страница 18: ...onfined within protective housings and external covers the laser beam cannot escape from the printer during any phase of user operation Read the following remarks and instructions for safety Never open covers other than those instructed in this manual Do not remove the caution label attached to the cover of the laser scanner unit If the laser beam escapes from the printer exposure may cause seriou...

Страница 19: ...ust only those controls that are covered in the operating instructions Improper adjustment could result in personal injury and or damage requiring extensive repair that may not be covered under your Limited Warranty The fixing unit and its surroundings inside the printer may become hot during use When removing jammed paper or when inspecting the inside of the printer do not touch the fixing unit a...

Страница 20: ...y cause toner remaining inside the cartridge to ignite and result in burns or a fire Do not store a toner cartridge or copy paper in places exposed to open flames as this may cause the toner or paper to ignite and result in burns or a fire CAUTION Keep toner and other consumables out of the reach of small children If these items are ingested consult a physician immediately Others WARNING The toner...

Страница 21: ...xviii ...

Страница 22: ...unctions of this printer Features and Benefits 1 2 Parts and Their Functions 1 3 Main Unit 1 3 Indicators 1 6 Connecting the Power Cord 1 7 Turning the Printer ON OFF 1 10 Turning the Printer ON 1 10 Turning the Printer OFF 1 11 Connecting to a Computer 1 13 Using a USB Cable 1 13 Using a LAN Cable 1 15 ...

Страница 23: ...as envelopes and as large as A3 size paper Moreover by installing the optional duplex unit you can perform automatic 2 sided printing on the paper loaded in the multi purpose tray standard size paper only or a paper cassette By doing so you can save paper and make the file space more efficient Low Power Consumption and Quick Startup By adopting On demand Fixing System LBP3600 achieves low power co...

Страница 24: ...ny ventilation slot is blocked the temperature inside the printer may rise resulting in a fire Front View The following are the parts on the front side of the printer and their functions a a a a Indicators Show the status of the printer See p 1 6 b b b b Top Cover Opened when removing paper jammed in the delivery area Before removing the jammed paper raise the top cover slowly and firmly and open ...

Страница 25: ...oaded in the multi purpose tray You can load paper up to the load limit marks on this tray k k k k Auxiliary Tray Pulled out so that paper will not hang over the edge when delivering long size paper such as A3 or B4 paper See p 2 16 Rear View The following are the parts on the rear side of the printer and their functions IMPORTANT Do not touch the duplex unit connector as this may result in damage...

Страница 26: ... k Ventilation Slot exhaust slot Exhausts air to cool the insides of the printer Inner View The following are the parts inside the printer and their functions IMPORTANT Do not touch the transfer roller as this may result in deterioration in print quality a a a a Toner Cover Release Button Press to open the toner cover See p 5 5 p 7 9 b b b b Delivery Guide Inner Cover When opened Opened when remov...

Страница 27: ...firm information on the printer status using the Printer Status Window from your computer For details on the Printer Status Window see Printer Status Window on p 4 79 a a a a Paper Indicator Red Blinking No paper or paper of an inappropriate size is loaded b b b b Alarm Indicator Red On Service call is occurring Blinking An error is occurring disabling printing c c c c Ready Indicator Blue On The ...

Страница 28: ...re or electrical shock Do not use power cords other than the power cord provided as this may result in a fire or electrical shock As a general rule do not use extension cords or plug extension cords to a multiple power strip If extension cords must be used or plugged to a multiple power strip however use them observing the following points on user s own authority If you use extension cords imprope...

Страница 29: ...the power plug so that it can be unplugged easily If objects are placed around the power plug you will be unable to unplug it in an emergency IMPORTANT Do not plug the power cord into the auxiliary outlet on a computer One AC power outlet should be used exclusively for the printer Do not connect this printer to an uninterruptible power source This may cause printer malfunction or breakdown at the ...

Страница 30: ...Connecting the Power Cord 1 9 Before You Start Using This Printer 1 2 Plug the supplied power cord into the power socket 3 Plug the power plug into the AC power outlet ...

Страница 31: ...inter ON After running a self diagnostic test on the main unit and optional accessories the printer will be ready to print IMPORTANT Do not turn the power ON immediately after turning it OFF After turning the power OFF wait for 3 seconds or longer before turning it ON again If the printer does not operate properly or an error message appears in the Printer Status Window see Troubleshooting on p 7 ...

Страница 32: ...ruction below to turn the power OFF IMPORTANT If the printer is used on a network make sure that it is not printing data from another computer before turning the power OFF If you turn the power of the printer OFF all print data remaining in the printer memory will be erased So wait for the necessary print data to be printed before turning the power OFF Do not turn the power OFF when the printer is...

Страница 33: ...er ON OFF 1 12 Before You Start Using This Printer 1 1 Press of the power switch on the printer IMPORTANT While of the power switch located on the right side of the printer is pressed the power consumption is 0 W OFF ON ...

Страница 34: ...arting up immediately after the computer is turned on While printing If you connect or disconnect the USB cable while the power of the computer and printer are turned ON after disconnecting the USB cable wait for 5 seconds or longer before connecting it again If you connect the USB cable immediately after disconnecting it this may result in a computer or printer error This printer performs two way...

Страница 35: ...er NOTE If a Wizard appears after connecting the USB cable by the Plug and Play automatic setup install the software for this printer using either one of the following procedures For more details see Installing the CAPT Software on p 3 4 Click Cancel and install the software from CD ROM Setup Install using Plug and Play If you are not sure about the USB cable that is supported by your computer con...

Страница 36: ...rk Guide Network Environment The optional network board supports 10BASE T 100BASE TX connection When connecting to a 10BASE T Ethernet network When connecting to a 100BASE TX Ethernet network IMPORTANT The network board for this printer cannot be connected to networks other than those listed above Make sure that there is a free port on the hub to which the printer will be connected An additional h...

Страница 37: ... such as hub LAN cable and network board for computer must support 100BASE TX For more details contact your local authorized Canon dealer 1 Connect the LAN cable to the LAN connector of the network board Connect a LAN cable that is compatible with the LAN connector of the network board according to the network 2 Connect the other end of the LAN cable to the hub ...

Страница 38: ...lecting a Paper Source 2 12 Paper Delivery Area 2 15 Output Tray 2 15 Paper Capacity for Paper Delivery Area 2 16 Printing from a Paper Cassette 2 17 Loading Paper in a Paper Cassette 2 18 Changing the Size of Paper in a Paper Cassette 2 32 Setting Up the Printer Driver and Printing 2 53 Printing from the Multi purpose Tray 2 57 Printing Paper Other than Envelopes 2 58 Printing Envelopes 2 67 2 si...

Страница 39: ...aper may result in deterioration in print quality or paper jams IMPORTANT Print speed may drop depending on the settings for the paper size paper type and print copies Envelope Approximately 6 ppm When continuously printing the paper of 279 4 mm wide Letter size or less the safety function that prevents damages caused by heat may slow the print speed down in stages It may be as slow as approximate...

Страница 40: ...mark indicates that the printing cannot be performed Paper Type Printer Driver Setting Paper Source Multi purpose Tray Cassette 1 Cassette2 Optional Cassette3 Optional Cassette4 Optional Plain paper 64 80 g m2 Plain Paper Plain Paper L 1 Heavy paper 81 90 g m2 2 91 105 g m2 Heavy Paper L O X X X X 106 128 g m2 Heavy Paper O X X X X Paper Source Multi purpose Tray Cassette 1 Cassette 2 Optional Cas...

Страница 41: ...A5 Ledger Letter Legal and Executive sizes Custom paper can be loaded in the multi purpose tray Heavy Paper This printer can print heavy paper that is 76 2 to 297 0 mm wide 127 0 to 431 8 mm long and that weighs between 81 and 128 g m2 including the standard size paper sizes A3 B4 A4 B5 A5 Ledger Legal Letter and Executive Heavy paper that weighs between 81 90 g m2 can be loaded in the paper casse...

Страница 42: ...ult in paper jams that are difficult to clear or may result in damage to the printer Envelopes with fasteners or snaps Envelopes with address windows Envelopes with adhesive on the surface Wrinkled or creased envelopes Poorly manufactured envelopes in which the glued parts are uneven Irregularly shaped envelopes Before loading the envelopes flatten the stack of envelopes to release any remaining a...

Страница 43: ... guide and paper feeders and on the paper size dials this printer cannot print on paper at sizes of A4R and Letter R Paper of A4 and Letter sizes can be loaded only in landscape orientation Printable Area The following shows the printable area of this printer Plain Paper Heavy Paper Transparency Label The areas within 5 mm from all sides of paper cannot be printed on Paper Size Marks on Paper Cass...

Страница 44: ... printers etc Labels with backing sheet that is easily peeled off Paper that has been already printed by a copy machine or another laser printer The reverse side of the paper is also unusable Using the multi purpose tray however you can perform 2 sided printing manually on the back of previously printed paper You cannot print on the printed side again Paper with jagged edges Wrinkled paper Paper w...

Страница 45: ...eds paper jams or deterioration in print quality Observe the following guidelines for storing and handling paper IMPORTANT Store paper away from moisture since paper quality deteriorates in a moist environment Paper wrappers help avoiding moisture and dryness Keep paper in the wrapper until it is ready to be used Store all unused paper in a wrapper Store paper on a flat surface Do not store paper ...

Страница 46: ...en insoluble adhesive is used Before using the adhesive test it with paper that is no longer required Confirm that the printouts are completely dry before placing one over another Toner may melt if they are placed together half dried Store paper on a flat surface Toner may peel when they are folded or creased Avoid storing printouts at high temperatures Otherwise toner may melt and blot Put printo...

Страница 47: ...ces Paper Source Capacity Multi purpose Tray 100 sheets 64 g m2 Cassette 1 250 sheets 64 g m2 Cassette 2 250 sheets 64 g m2 Cassette 3 250 sheets 64 g m2 Cassette 4 250 sheets 64 g m2 250 sheet Paper Feeder Unit PF 66 250 sheet Paper Feeder Unit PF 66E Be sure to install the 250 sheet Paper Feeder Unit PF 66 at the top among the optional paper feeder units More than one 250 sheet Paper Feeder Unit...

Страница 48: ...64 g m2 Approx 100 sheets Approx 250 sheets Approx 250 sheets Approx 250 sheets Approx 250 sheets Heavy Paper 90 g m2 Approx 50 sheets Approx 150 sheets Approx 150 sheets Approx 150 sheets Approx 150 sheets Heavy Paper 128 g m2 Approx 50 sheets X X X X Transparency Approx 50 sheets X X X X Label Approx 50 sheets X X X X Envelope Approx 10 sheets X X X X Multi purpose Tray Cassette 1 Cassette 2 Opt...

Страница 49: ...a Paper Source A paper source can be selected in the Paper Source sheet in the printer driver 1 Display the Paper Source sheet and specify the paper source To display the Paper Source sheet in the printer driver see Specifying the Printing Preferences on p 4 9 ...

Страница 50: ...t Paper can be selected for each page such as for printing the front cover on a different type of paper Different for First Second Others and Last Different for Cover and Others 1 Transparency Interleaving Allows you to place paper sheets between transparencies Paper Source Auto Multi purpose Tray Cassette 1 Cassette 2 2 Cassette 3 2 Cassette 4 2 Select a paper source Options to be specified diffe...

Страница 51: ... OK Pause when Printing from the Multi purpose Tray Specify whether the printer should pause a job and display a message or continue the job when feeding paper from the multi purpose tray Continue Printing with the Multi purpose Tray Specify whether the printer should switch the paper source to the multi purpose tray automatically when a cassette has run out of paper during a job and the paper spe...

Страница 52: ...at weighs between 105 and 128 g m2 take out one piece at a time each time it is delivered During 2 sided printing do not touch the paper until it is delivered onto the output tray completely During 2 sided printing the paper is first delivered partially after the front side is printed and then it is fed again to be printed on the reverse side NOTE Up to approximately 250 sheets of plain paper 64 g...

Страница 53: ... the number of sheets that can be delivered onto the output tray 1 Actual paper capacity varies depending on the installation environment or paper type 2 The paper capacity for A3 size heavy paper that weighs between 105 and 128 g m2 is 1 sheet Paper Type Output Tray 1 Plain Paper Ex 64 g m2 Approx 250 sheets 1 sided Printing Approx 200 sheets 2 sided Printing Heavy Paper Ex 90 g m2 Approx 150 she...

Страница 54: ...paper cassettes of the printer paper guide and paper feeders and on the paper size dials this printer cannot print on paper at sizes of A4R and Letter R Paper of A4 and Letter sizes can be loaded only in landscape orientation When printing heavy paper 81 90 g m2 from a cassette perform the following settings a Select Plain Paper for Paper Type in the Paper Source sheet b Click the Finishing Detail...

Страница 55: ...ain paper 64 80 g m2 and heavy paper 81 90 g m2 such as transparencies labels and envelopes For more details on the paper that can be loaded see Paper Requirements on p 2 2 Do not load paper with jagged edges creased or extremely curled paper Refill the cassette when paper runs out If the cassette is refilled when paper still remains in the cassette it may result in misfeeds Up to approximately 25...

Страница 56: ...tte 1 The installation procedure for the optional 250 sheet universal cassette UC 66B is the same as that for Cassette 2 3 and 4 Loading Paper in Cassette 1 NOTE If you want to change the paper size see Changing the Size of Paper in a Paper Cassette on p 2 32 1 Pull out the paper cassette If it is difficult to pull out the paper cassette lift it slightly and then pull it out horizontally Rubber pa...

Страница 57: ...aper cassette out of the printer before loading paper If paper is loaded while the paper cassette is partially pulled out the paper cassette may drop or the printer may become damaged resulting in personal injuries 2 Remove the cassette cover 3 Push down the plate of the paper cassette to lock it ...

Страница 58: ...ssette when the plate of the paper cassette is locked The plate may snap forcefully if the lock is released and may result in personal injuries 4 Load paper so that the edge of the paper is aligned with the front paper guide CAUTION When loading paper take care not to cut your hands with the edges of the paper Lock release lever Lock release lever ...

Страница 59: ...cording to the following instructions When loading paper in landscape orientation as when loading A4 B5 A5 Letter or Executive size paper load the paper so that the printing side is facing up and the top edge is toward the right of the printer when viewed from the front When loading paper in portrait orientation as when loading A3 B4 Ledger or Legal size paper load the paper so that the printing s...

Страница 60: ...Up to approximately 250 sheets of plain paper 64 g m2 or 150 sheets of heavy paper 90 g m2 can be loaded in the paper cassette Be sure that the paper stack does not exceed the load limit marks on the paper guides If the paper stack exceeds the load limit marks this may result in misfeeds 6 Align the paper with the left paper guide IMPORTANT Be sure to align the paper with the left paper guide If n...

Страница 61: ...ing into the cassette The paper cassette can be used without the cassette cover if it is not extended In this case keep the cassette cover 8 Set the paper cassette in the printer Set the paper cassette referring to the following figure If you cannot insert the paper cassette smoothly check if the cassette cover is set properly If the paper cassette is set when the cassette cover is not set properl...

Страница 62: ...he cassette is flush with the front surface of the printer If the paper cassette is extended the front side of the cassette is not flush with the front surface of the printer Push the paper cassette gently until it stops When a message indicating there is no paper appears in the Printer Status Window and the Paper indicator red blinks the printer resumes printing automatically ...

Страница 63: ...ting from a Paper Cassette 2 26 Loading and Delivering Paper 2 NOTE The printer looks as shown in the figure below when used with the paper cassettes of the main unit and the optional paper feeders extended ...

Страница 64: ...then lift up the front portion of the cassette to remove it b b b b CAUTION Be sure to take the paper cassette out of the paper feeder before loading paper If paper is loaded while the paper cassette is partially pulled out the paper cassette may drop or the printer may become damaged resulting in personal injuries IMPORTANT The paper cassette cannot be pulled out horizontally If you try to pull i...

Страница 65: ...the rear edge is aligned with the paper guide CAUTION When loading paper take care not to cut your hands with the edges of the paper IMPORTANT Double feeding may occur frequently if the edges of the paper stack are not aligned properly In this case align the edges of the stack on a hard flat surface ...

Страница 66: ...as when loading A4 B5 A5 Letter or Executive size paper load the paper so that the printing side is facing down and the top edge is toward the right of the printer when viewed from the front When loading paper in portrait orientation as when loading A3 B4 Ledger or Legal size paper load the paper so that the printing side is facing down and the top edge is toward the front of the printer when view...

Страница 67: ...he hooks and paper stack Take out some paper when there is no space IMPORTANT Up to approximately 250 sheets of plain paper 64 g m2 or 150 sheets of heavy paper 90 g m2 can be loaded in the paper cassette Be sure that the paper stack does not exceed the load limit marks on the paper guides If the paper stack exceeds the load limit marks this may result in misfeeds Hooks Hooks Load limit mark Load ...

Страница 68: ...d then gently push it horizontally into the paper feeder b b b b Push the paper cassette into the printer firmly until the front side of the cassette is flush with the front surface of the paper feeder When a message indicating there is no paper appears in the Printer Status Window and the Paper indicator red blinks the printer resumes printing automatically a b ...

Страница 69: ... loaded in the paper cassettes are A3 B4 A4 B5 A5 Legal Ledger Letter and Executive IMPORTANT Be sure to check if the paper size indicated on the paper guide and on the paper size dial matches that of the loaded paper If they do not match this may result in misfeeds or printer malfunction Although the marks A4R and LTR R are indicated on the paper cassettes of the printer paper guide and paper fee...

Страница 70: ...lt to pull out the paper cassette lift it slightly and then pull it out horizontally CAUTION Be sure to take the paper cassette out of the printer before loading paper If paper is loaded while the paper cassette is partially pulled out the paper cassette may drop or the printer may become damaged resulting in personal injuries 2 Remove the cassette cover ...

Страница 71: ...hen loading A4 B5 A5 Letter or Executive size paper shorten the paper cassette When loading paper in portrait orientation as when loading A3 B4 Ledger or Legal size paper extend the paper cassette To adjust the length of the paper cassette push up the lock release levers gently to release the lock slide the paper cassette by holding the rear portion of the paper cassette and then push down the loc...

Страница 72: ... the paper cassette to lock it CAUTION Do not touch the lock release levers located on each side of the paper cassette when the plate of the paper cassette is locked The plate may snap forcefully if the lock is released and may result in personal injuries Lock release lever Lock release lever ...

Страница 73: ... Paper 2 6 Tilt the paper guide in the front side of the paper guide backwards a a a a then remove it b b b b 7 Insert the hooks of the paper guide into the holes for the size of the paper to be loaded a a a a tilt the guide forward to lock it b b b b a b b a ...

Страница 74: ...d LTR R are indicated this printer cannot print paper at sizes of A4R and Letter R Paper of A4 and Letter sizes can be loaded only in landscape orientation 8 Align the side paper guides with the size mark for the paper to be loaded The side paper guides move together IMPORTANT Although the marks A4R and LTR R are indicated this printer cannot print paper at sizes of A4R and Letter R Paper of A4 an...

Страница 75: ...the paper is aligned with the front paper guide CAUTION When loading paper take care not to cut your hands with the edges of the paper IMPORTANT Double feeding may occur frequently if the edges of the paper stack are not aligned properly In this case align the edges of the stack on a hard flat surface ...

Страница 76: ... when loading A4 B5 A5 Letter or Executive size paper load the paper so that the printing side is facing up and the top edge is toward the right of the printer when viewed from the front When loading paper in portrait orientation as when loading A3 B4 Ledger or Legal size paper load the paper so that the printing side is facing up and the top edge is toward the back of the printer when viewed from...

Страница 77: ...Up to approximately 250 sheets of plain paper 64 g m2 or 150 sheets of heavy paper 90 g m2 can be loaded in the paper cassette Be sure that the paper stack does not exceed the load limit marks on the paper guides If the paper stack exceeds the load limit marks this may result in misfeeds 11 Align the paper with the left paper guide IMPORTANT Be sure to align the paper with the left paper guide If ...

Страница 78: ...et the paper size dial to This may result in printer malfunction If you have set the paper size dial to FREE install the optional 250 sheet universal cassette UC 66F a release date has not yet been set Set the paper size dial to FREE when loading a custom paper size in the paper cassette If the paper size dial is set to FREE when the 250 sheet universal cassette UC 66F that supports custom paper s...

Страница 79: ...ng from a Paper Cassette 2 42 Loading and Delivering Paper 2 14 Insert the paper size indicator for the size of the loaded paper into the paper size slot of the paper size cover 15 Close the paper size cover ...

Страница 80: ...ver is not set properly you may not be able to pull out the paper cassette NOTE If the paper cassette is extended set the cassette cover to prevent dust getting into the cassette The paper cassette can be used without the cassette cover if it is not extended In this case keep the cassette cover Cassette cover Paper cassette Make sure the cassette cover is flush against the front side of the paper ...

Страница 81: ...y If the paper cassette is set when the cassette cover is not set properly you may not be able to pull out the paper cassette If the paper cassette is not extended push the paper cassette into the printer firmly until the front side of the cassette is flush with the front surface of the printer If the paper cassette is extended the front side of the cassette is not flush with the front surface of ...

Страница 82: ...hown in the figure below when used with the paper cassettes of the main unit and the optional paper feeders extended Changing the Size of Paper in Cassette 2 3 or 4 1 Pull out the paper cassette gently until it stops a a a a then lift up the front portion of the cassette to remove it b b b b a b ...

Страница 83: ...paper is loaded while the paper cassette is partially pulled out the paper cassette may drop or the printer may become damaged resulting in personal injuries IMPORTANT The paper cassette cannot be pulled out horizontally If you try to pull it out forcefully this may result in damage to the paper cassette 2 Remove any paper that is left in the paper cassette ...

Страница 84: ... Legal size paper extend the paper cassette To adjust the length of the paper cassette push up the lock release levers gently to release the lock slide the paper cassette by holding the rear portion of the paper cassette and then push down the lock release levers to lock the cassette 4 While holding the lock release lever of the rear paper guide slide the guide to the size mark for the loaded pape...

Страница 85: ...tion 5 While holding the lock release lever of the side paper guide slide the guide to the size mark for the paper to be loaded The side paper guides move together IMPORTANT Although the mark A4R is indicated this printer cannot print paper at sizes of A4R and Letter R Paper of A4 and Letter sizes can be loaded only in landscape orientation 6 Load the paper stack so that the rear edge is aligned w...

Страница 86: ...In this case align the edges of the stack on a hard flat surface NOTE To print letterhead paper or paper printed with a logo load the paper in the proper orientation according to the following instructions When loading paper in landscape orientation as when loading A4 B5 A5 Letter or Executive size paper load the paper so that the printing side is facing down and the top edge is toward the right o...

Страница 87: ...it is loaded under the hooks on the side paper guides Make sure that there is sufficient space between the hooks and paper stack Take out some paper when there is no space IMPORTANT Up to approximately 250 sheets of plain paper 64 g m2 or 150 sheets of heavy paper 90 g m2 can be loaded in the paper cassette Be sure that the paper stack does not exceed the load limit marks on the paper guides If th...

Страница 88: ... size indicated by the paper size dial does not match this may result in printer malfunction Do not set the paper size dial to This may result in printer malfunction Although the marks A4R and LTR R are indicated on the paper size dial this printer cannot print paper at sizes of A4R and Letter R Paper of A4 and Letter sizes can be loaded only in landscape orientation 9 Attach the label for the siz...

Страница 89: ...per cassette obliquely into the paper cassette as shown in the figure a a a a and then gently push it horizontally into the paper feeder b b b b Push the paper cassette into the printer firmly until the front side of the cassette is flush with the front surface of the paper feeder a b ...

Страница 90: ... cassettes of the main unit and the optional paper feeders extended Setting Up the Printer Driver and Printing Follow the procedure below to setup the printer driver 1 Select Print from the File menu in the application Select this printer for Name or Printer Name and then click Properties The Properties dialog box for the printer is displayed ...

Страница 91: ...he application 3 From Output Size select the size of the loaded paper as needed Leave the setting at Match Page Size when the page size and the size of the paper loaded in the cassette are the same since there is no need to change the setting IMPORTANT If the settings for Page Size and Output Size are different the printer produces an enlarged or reduced print automatically ...

Страница 92: ...Other Pages when other than Same Paper for All Pages is selected for Paper Selection 5 Select Plain Paper for Paper Type IMPORTANT When printing heavy paper 81 90 g m2 from a cassette perform the following settings after selecting Plain Paper for Paper Type Click the Finishing Details button in the Finishing sheet and the Advanced Settings button in the Finishing Details dialog box and then select...

Страница 93: ...Paper Cassette 2 56 Loading and Delivering Paper 2 NOTE If paper curls excessively when printed with Plain Paper selected select Plain Paper L 6 Click OK to close the Properties dialog box 7 Click OK to start printing ...

Страница 94: ...e paper loading procedure varies depending on the paper type Refer to the respective procedures for each paper type Plain Paper Heavy Paper Transparency Label See Printing Paper Other than Envelopes on p 2 58 Envelope See Printing Envelopes on p 2 67 IMPORTANT Do not put anything other than the printing paper on the multi purpose tray Also do not press on top of or apply excessive force to the mul...

Страница 95: ...ing them as they may stick to each other Do not use the labels in the following conditions Using inappropriate labels may result in paper jams that are difficult to clear or may result in damage to the printer Peeled labels or partly used labels Coated labels that are easily peeled off from the backing sheet Labels with uneven adhesive 1 Open the multi purpose tray Holding the grip at the center o...

Страница 96: ...MPORTANT Be sure to fan the transparencies or labels thoroughly before loading them If they are not fanned enough this may result in double feeding or paper jams When fanning or aligning the transparencies try to hold the edges to avoid touching the printing surface Take care not to mark or stain the printing surface of the transparencies with fingerprints dust or oil This may result in poor print...

Страница 97: ...ack does not exceed the load limit marks Plain paper Approx 100 sheets 64 g m2 Heavy paper Approx 50 sheets 128 g m2 Transparency Approx 50 sheets Label Approx 50 sheets Load the paper so that it is straight If the rear edge of the paper stack is not properly aligned it may result in misfeeds or paper jams If the paper is curled or folded at corners flatten it before loading it in the printer Doub...

Страница 98: ... as when loading A4 B5 A5 Letter or Executive size paper load the paper so that the printing side is facing up and the top edge is toward the right of the printer when viewed from the front When loading paper in portrait orientation as when loading A3 B4 Ledger or Legal size paper load the paper so that the printing side is facing up and the top edge is toward the back of the printer when viewed f...

Страница 99: ...both sides of the stack IMPORTANT Be sure to align the paper guide with the width of the paper If the paper guide is too loose or too tight this may result in misfeeds or paper jams Do not touch the paper in the multi purpose tray or pull it out during printing This may result in an error in the printer ...

Страница 100: ...ering Paper 2 7 Lower the paper retaining lever Proceed to printer driver settings 8 Select Print from the File menu in the application Select this printer for Name or Printer Name and then click Properties The Properties dialog box for the printer is displayed ...

Страница 101: ...ze select the size of the loaded paper as needed Select A4 or Letter for printing transparencies or labels Leave the setting at Match Page Size when the page size and the size of the paper loaded in the multi purpose tray are the same since there is no need to change the setting IMPORTANT If the settings for Page Size and Output Size are different the printer produces an enlarged or reduced print ...

Страница 102: ... to ones such as First Page or Other Pages when other than Same Paper for All Pages is selected for Paper Selection NOTE When Transparency Interleaving is selected for Paper Selection you can interleave paper sheets between the transparencies 12 Select the paper type specified in Paper Type Select Plain Paper for plain paper Heavy Paper L for heavy paper 81 105 g m2 Heavy Paper for heavy paper 106...

Страница 103: ...Printing from the Multi purpose Tray 2 66 Loading and Delivering Paper 2 13 Click OK to close the Properties dialog box 14 Click OK to start printing ...

Страница 104: ...rinkled or creased envelopes Poorly manufactured envelopes in which the glued parts are uneven Irregularly shaped envelopes Before loading the envelopes flatten the stack of envelopes to release any remaining air and press the fold lines along the edges tight Do not print on the reverse side glued side of envelopes Printing speed drops when printing on envelops NOTE When printing envelopes they ma...

Страница 105: ...ting from the Multi purpose Tray 2 68 Loading and Delivering Paper 2 1 Open the multi purpose tray Holding the grip at the center of the printer open the multi purpose tray 2 Raise the paper retaining lever ...

Страница 106: ...he paper guide a little wider than the actual envelope width 4 Place the stack of envelopes on a flat surface flatten them to release any remaining air and be sure that the edges are pressed tightly CAUTION When loading paper take care not to cut your hands with the edges of the paper ...

Страница 107: ...y stiff corners of the envelopes and flatten curls as shown in the figure 6 Align the edges of the envelopes on a flat surface 7 Gently load the stack of envelopes with the address side facing up until it touches the back of the multi purpose tray as shown in the figure Load limit mark ...

Страница 108: ...he load limit marks You cannot print on the reverse side glued side of envelopes When loading envelopes at sizes of DL COM10 C5 or Monarch load them so that the flap is toward the left of the printer when viewed from the front When loading envelopes at size of Envelope B5 leave the flaps open and load them so that the bottom of the envelopes is toward the back of the printer when viewed from the f...

Страница 109: ...o space between the paper guide and the envelopes and be careful not to press the envelopes so hard that they are distorted They may result in misfeeds or paper jams Do not touch the envelopes in the multi purpose tray or pull them out during printing This may result in an error in the printer 9 Lower the paper retaining lever Proceed to printer driver settings ...

Страница 110: ...t from the File menu in the application Select this printer for Name or Printer Name and then click Properties The Properties dialog box for the printer is displayed 11 Display the Page Setup sheet then from Page Size select the size of a document that you have created in the application ...

Страница 111: ...appropriate paper type is automatically set 12 From Output Size select the size of the loaded paper as needed Leave the setting at Match Page Size when the page size and the size of the paper loaded in the multi purpose tray are the same since there is no need to change the setting IMPORTANT If the settings for Page Size and Output Size are different the printer produces an enlarged or reduced pri...

Страница 112: ...Printing from the Multi purpose Tray 2 75 Loading and Delivering Paper 2 13 Click OK to close the Properties dialog box 14 Click OK to start printing ...

Страница 113: ...he Paper Source sheet b Click the Finishing Details button in the Finishing sheet and the Advanced Settings button in the Finishing Details dialog box and then select Mode 4 for Fixing Mode in the Advanced Settings dialog box NOTE When the last page for the 2 sided printing is 1 sided printing the printer prints faster than normal 2 sided printing by clicking the Finishing Details button in the Fi...

Страница 114: ...he paper should be loaded in the opposite orientation to that for 1 sided printing When printing paper such as a letterhead in which faces and directional orientations specified see Loading Paper When Performing Automatic 2 sided Printing on p 2 80 2 Select Print from the File menu in the application Select this printer for Name or Printer Name and then click Properties The Properties dialog box f...

Страница 115: ...on 4 From Output Size select the size of the loaded paper as needed Leave the setting at Match Page Size when the page size and the size of the paper loaded in the multi purpose tray are the same since there is no need to change the setting IMPORTANT If the settings for Page Size and Output Size are different the printer produces an enlarged or reduced print automatically ...

Страница 116: ...2 sided Printing 2 79 Loading and Delivering Paper 2 5 Display the Finishing sheet and select 2 sided Printing for Print Style 6 Click OK to close the Properties dialog box ...

Страница 117: ...ation to that for 1 sided printing When printing paper such as a letterhead in which faces and directional orientations specified load the paper using the following procedure Loading Paper in a Paper Cassette When loading paper such as A4 or Letter size paper in landscape orientation in the standard cassette Cassette 1 Load the paper so that the printing side is facing down and the top edge is tow...

Страница 118: ... facing down and the top edge is toward the back of the printer when viewed from the front When loading paper such as A4 or Letter size paper in landscape orientation in the paper cassette of a paper feeder Cassette 2 3 or 4 Load the paper so that the printing side is facing up and the top edge is toward the right of the printer when viewed from the front A B C Feeding direction A B C Feeding dire...

Страница 119: ...e printing side is facing up and the top edge is toward the front of the printer when viewed from the front When Loading Paper in the Multi purpose Tray When loading paper such as A4 or Letter size paper in landscape orientation Load the paper so that the printing side is facing down and the top edge is toward the right of the printer when viewed from the front A B C Feeding direction ABC Feeding ...

Страница 120: ... cannot be applied NOTE If a paper jam occurs when printing the reverse side of previously printed paper click the Finishing Details button in the Finishing sheet and the Advanced Settings button in the Finishing Details dialog box and then place a checkmark for Print on the Back of Printed Paper from the Multi purpose Tray in the Advanced Settings dialog box When loading paper such as A4 or Lette...

Страница 121: ...2 When loading paper such as A3 or B4 size paper in portrait orientation in the multi purpose tray Load the paper so that the printing side is facing up and the top edge is toward the back of the printer when viewed from the front ABC Feeding direction ...

Страница 122: ...lling the Printer 3 2 Steps for Printing to Be Followed Each Time 3 2 Required System Environment 3 3 Installing the CAPT Software 3 4 For Windows 98 Me 3 5 For Windows 2000 3 21 For Windows XP Server 2003 3 36 After Completing Installation 3 52 Checking the Operations by Printer Status Print 3 54 Printing from a Network Computer by Sharing the Printer on a Network 3 57 Print Server Settings 3 58 ...

Страница 123: ...er and the computer connected with LAN See Network Guide Sharing the printer on a network See p 3 57 If you share this printer on a network and use it from a computer on the network you must specify the settings for the computer and install the printer driver on the client computers Steps for Printing to Be Followed Each Time The following shows the tasks that should be performed each time you pri...

Страница 124: ... guarantee printing in all cases System Requirements recommended Interface Environment USB USB 2 0 High Speed Windows 2000 XP Server 2003 only USB Full Speed USB 1 1 equivalent NOTE When using Sound a PC synthesizer and the driver for PCM synthesizer must be installed in your computer Do not use a PC Speaker driver speaker drv Your system environment is required to support two way communication Pe...

Страница 125: ...k space the following dialog box will appear during the installation In this case click OK to stop the installation and increase the free space and then install the CAPT software again NOTE For details on the procedure for installing the software when installing the optional network board and connecting the printer to the computer with LAN see Network Guide For details on procedure for installing ...

Страница 126: ...d appears by the Plug and Play automatic setup click Cancel and then install the CAPT software using this procedure 2 Turn the power of the computer on and start up Windows 98 Me 3 Insert the supplied LBP3600 User Software CD ROM into the CD ROM drive If the CD ROM is already set in the drive take it out and insert it into the drive again CD ROM Setup appears automatically IMPORTANT If CD ROM Setu...

Страница 127: ... for confirming the language is displayed 5 Confirm the language and click Yes After the preparation for installation is completed the CAPT Canon Advanced Printing Technology software installer starts up and the Setup Wizard dialog box appears 6 Click Next The License Agreement dialog box is displayed ...

Страница 128: ...ng Environment 3 7 Confirm the contents and select I accept the terms in the license agreement and then click Next 8 Select Manually Set Port to Install then click Next 9 Place a checkmark for Install Printer Driver through a USB Connection then click Next ...

Страница 129: ...In this case restart the computer and continue the installation 10 The message Installation cannot be stopped once it starts Do you want to continue is displayed Click Yes 11 After the window shown below is displayed connect the printer to the computer with the USB cable then turn the power of the printer ON Connect the printer to the computer with the USB cable ...

Страница 130: ...ver starts automatically NOTE If the printer is not recognized automatically even after the USB cable is connected see Installation Problems on p 7 50 12 The window that informs you the completion of the installation is displayed Select Restart my computer now then click Exit Windows restarts The installation of the USB class driver and the printer driver is completed OFF ON ...

Страница 131: ... Plug and Play make sure that the printer is properly connected to the computer and the power of the printer is turned ON 1 Turn the power of the computer on and start up Windows 98 Me The Add New Hardware Wizard dialog box appears For Windows Me If the following dialog box appears proceed to Step 2 If the following dialog box appears proceed to Step 9 ...

Страница 132: ...ick Next then proceed to Step 2 If the following dialog box appears click Next then proceed to Step 9 2 Select Specify the location of the driver Advanced then click Next For Windows 98 Select Search for the best driver for your device Recommended then click Next The dialog box for specifying the search location is displayed ...

Страница 133: ...emovable Media Floppy CD ROM place a checkmark for Specify a location and then click Browse For Windows 98 Remove the checkmarks from Floppy disk drives and CD ROM drive place a checkmark for Specify a location and then click Browse 5 Select D English USBPORT WinMe and then click OK For Windows 98 Select D English USBPORT Win98 and then click OK The CD ROM drive name is indicated as D in this manu...

Страница 134: ...g Environment 3 6 Make sure that the folder to be browsed is displayed for Specify a location and then click Next 7 Click Next Installation of the USB class driver starts 8 Click Finish The printer is detected automatically Please wait until it is completed ...

Страница 135: ...tion of the driver Advanced then click Next For Windows 98 Select Search for the best driver for your device Recommended then click Next The dialog box for specifying the search location is displayed 10 If the supplied LBP3600 User Software CD ROM is not in the CD ROM drive insert the LBP3600 User Software CD ROM into the CD ROM drive If CD ROM Setup appears click Exit ...

Страница 136: ...py CD ROM place a checkmark for Specify a location and then click Browse For Windows 98 Remove the checkmarks from Floppy disk drives and CD ROM drive place a checkmark for Specify a location and then click Browse 12 Select D English Win98_Me and then click OK The CD ROM drive name is indicated as D in this manual The CD ROM drive name may differ depending on the computer being used ...

Страница 137: ...r Specify a location and then click Next 14 Click Next 15 Enter a new name in Printer name if you want to change the printer name If another printer driver has been already installed in the computer the message Do you want your Windows based programs to use this printer as the default printer appears In this case select Yes or No ...

Страница 138: ...hen installing the CAPT software from Add Printer Wizard the USB port for connecting this printer has to have already been registered 1 From the Start menu select Settings Printers to open the Printers folder Then double click the Add Printer icon The Add Printer Wizard dialog box is displayed NOTE The Add Printer Wizard dialog box is also displayed using the following procedure Double click My Co...

Страница 139: ...g the CAPT Software 3 18 Setting Up the Printing Environment 3 2 Click Next 3 Select Local printer then click Next NOTE This window does not appear when the network settings are not configured 4 Click Have Disk ...

Страница 140: ...Exit 6 Select D English Win98_Me and then click OK The CD ROM drive name is indicated as D in this manual The CD ROM drive name may differ depending on the computer being used 7 Confirm the contents of Copy manufacturer s files from then click OK For example when your CD ROM drive is drive D it is displayed as D English Win98_Me Canon LBP3600 is displayed in the Add Printer Wizard dialog box ...

Страница 141: ...e USB port for connecting this printer and then click Next 10 Enter a new name in Printer name if you want to change the printer name If another printer driver has been already installed in the computer the message Do you want your Windows based programs to use this printer as the default printer appears In this case select Yes or No ...

Страница 142: ...ing from CD ROM Setup 1 Make sure that the printer is turned OFF and the computer and printer are not connected with a USB cable IMPORTANT Connect the USB cable at the appropriate point Step 12 on p 3 25 during the installation and then turn the power ON If a Wizard appears by the Plug and Play automatic setup click Cancel and then install the CAPT software using this procedure 2 Turn the power of...

Страница 143: ...p does not appear select Run from the Start menu enter D English CNAB1MNU exe and then click OK The CD ROM drive name is indicated as D in this manual The CD ROM drive name may differ depending on the computer being used 5 Click Install The dialog box for confirming the language is displayed 6 Confirm the language and click Yes After the preparation for installation is completed the CAPT Canon Adv...

Страница 144: ...e CAPT Software 3 23 Setting Up the Printing Environment 3 7 Click Next The License Agreement dialog box is displayed 8 Confirm the contents and select I accept the terms in the license agreement and then click Next ...

Страница 145: ...vironment 3 9 Select Manually Set Port to Install then click Next 10 Place a checkmark for Install Printer Driver through a USB Connection then click Next 11 The message Installation cannot be stopped once it starts Do you want to continue is displayed Click Yes ...

Страница 146: ... then turn the power of the printer ON Connect the printer to the computer with the USB cable Press of the power switch to turn the printer ON Installation of the USB class driver supplied with OS and the printer driver starts automatically NOTE If the printer is not recognized automatically even after the USB cable is connected see Installation Problems on p 7 50 OFF ON ...

Страница 147: ...r supplied with OS and the printer driver is completed Installing with Plug and Play IMPORTANT Before installing the CAPT software with Plug and Play make sure that the printer is properly connected to the computer and the power of the printer is turned ON 1 Turn the power of the computer on and start up Windows 2000 2 Log on as a user who is a member of Administrators NOTE Full Control Permission...

Страница 148: ...g the CAPT Software 3 27 Setting Up the Printing Environment 3 3 Click Next 4 Select Search for a suitable driver for my device recommended then click Next NOTE Unknown may be displayed as the name of the device ...

Страница 149: ...r Specify a location and then click Next 6 Insert the supplied LBP3600 User Software CD ROM into the CD ROM drive then click Browse If CD ROM Setup appears click Exit 7 Select D English Win2K_XP Then select CNAB1STK INF and click Open The CD ROM drive name is indicated as D in this manual The CD ROM drive name may differ depending on the computer being used ...

Страница 150: ...be browsed is displayed for Copy manufacturer s files from then click OK The dialog box for completing the search for a driver file is displayed 9 Click Next Copying files is started Then Completing the Found New Hardware Wizard appears NOTE If the Digital Signature Not Found dialog box appears click Yes ...

Страница 151: ... the printer is turned ON before installing the CAPT software NOTE When installing the CAPT software from Add Printer Wizard the USB port for connecting this printer has to have already been registered 1 Turn the power of the computer on and start up Windows 2000 2 Log on as a user who is a member of Administrators IMPORTANT If a Wizard appears by the Plug and Play automatic setup click Cancel and...

Страница 152: ...uble click Add Printer The Add Printer Wizard dialog box is displayed NOTE The Add Printer Wizard dialog box is also displayed by double clicking My Computer Control Panel Printers Add Printer 4 Click Next 5 Make sure that Local printer is selected then click Next NOTE Do not place a checkmark for Automatically detect and install my Plug and Play printer ...

Страница 153: ... the Printing Environment 3 6 Select the USB port for connecting this printer and then click Next 7 Click Have Disk 8 Insert the supplied LBP3600 User Software CD ROM into the CD ROM drive and then click Browse If CD ROM Setup appears click Exit ...

Страница 154: ... CD ROM drive name is indicated as D in this manual The CD ROM drive name may differ depending on the computer being used 10 Confirm the contents of Copy manufacturer s files from then click OK For example when your CD ROM drive is drive D it is displayed as D English Win2K_XP Canon LBP3600 is displayed in the Add Printer Wizard dialog box ...

Страница 155: ... Enter a new name in Printer name if you want to change the printer name then click Next If another printer driver has been already installed in the computer the message Do you want your Windows based programs to use this printer as the default printer appears In this case select Yes or No ...

Страница 156: ...g Environment 3 13 Click Next NOTE When sharing this printer on a network select Share as then click Next The window for entering Location and Comment is displayed Enter them as necessary then click Next 14 When printing a test page click Yes then click Next ...

Страница 157: ...d then turn the power of the printer ON The installation of the printer driver is completed For Windows XP Server 2003 The screen shots used in this section are from Windows XP Installing from CD ROM Setup 1 Make sure that the printer is turned OFF and the computer and printer are not connected with a USB cable IMPORTANT Connect the USB cable at the appropriate point Step 12 on p 3 40 during the i...

Страница 158: ...pplied LBP3600 User Software CD ROM into the CD ROM drive If the CD ROM is already set in the drive take it out and insert it into the drive again CD ROM Setup appears automatically IMPORTANT If CD ROM Setup does not appear select Run from the Start menu enter D English CNAB1MNU exe and then click OK The CD ROM drive name is indicated as D in this manual The CD ROM drive name may differ depending ...

Страница 159: ... the preparation for installation is completed the CAPT Canon Advanced Printing Technology software installer starts up and the Setup Wizard dialog box appears 7 Click Next The License Agreement dialog box is displayed 8 Confirm the contents and select I accept the terms in the license agreement and then click Next ...

Страница 160: ...vironment 3 9 Select Manually Set Port to Install then click Next 10 Place a checkmark for Install Printer Driver through a USB Connection then click Next 11 The message Installation cannot be stopped once it starts Do you want to continue is displayed Click Yes ...

Страница 161: ... then turn the power of the printer ON Connect the printer to the computer with the USB cable Press of the power switch to turn the printer ON Installation of the USB class driver supplied with OS and the printer driver starts automatically NOTE If the printer is not recognized automatically even after the USB cable is connected see Installation Problems on p 7 50 OFF ON ...

Страница 162: ...plied with OS and the printer driver is completed Installing with Plug and Play IMPORTANT Before installing the CAPT software with Plug and Play make sure that the printer is properly connected to the computer and the power of the printer is turned ON 1 Turn the power of the computer on and start up Windows XP Server 2003 2 Log on as a user who is a member of Administrators NOTE Full Control Permi...

Страница 163: ...he CD ROM drive Select Install from a list or specific location Advanced then click Next If CD ROM Setup appears click Exit 4 Select Search for the best driver in these locations remove the checkmark from Search removable media floppy CD ROM place a checkmark for Include this location in the search and then click Browse ...

Страница 164: ...his manual The CD ROM drive name may differ depending on the computer being used 6 Make sure that the folder to be browsed is displayed for Include this location in the search then click Next The installation process is displayed Then Completing the Found New Hardware Wizard is displayed NOTE If the Hardware Installation dialog box appears click Continue Anyway ...

Страница 165: ...rinter is turned ON before installing the CAPT software NOTE When installing the CAPT software from Add Printer Wizard the USB port for connecting this printer has to have already been registered 1 Turn the power of the computer on and start up Windows XP Server 2003 IMPORTANT If a Wizard appears by the Plug and Play automatic setup click Cancel and then install the CAPT software using this proced...

Страница 166: ...Professional Server 2003 From the Start menu select Printers and Faxes For Windows XP Home Edition From the Start menu select Control Panel then click Printers and Other Hardware Printers and Faxes 4 Click Add a printer For Windows Server 2003 Double click Add Printer The Add Printer Wizard dialog box is displayed 5 Click Next ...

Страница 167: ...t Local printer attached to this computer is selected then click Next NOTE Do not place a checkmark for Automatically detect and install my Plug and Play printer 7 Make sure that Use the following port is selected select the USB port to which this printer is connected and then click Next ...

Страница 168: ...g the CAPT Software 3 47 Setting Up the Printing Environment 3 8 Click Have Disk 9 Insert the supplied LBP3600 User Software CD ROM into the CD ROM drive and then click Browse If CD ROM Setup appears click Exit ...

Страница 169: ... CD ROM drive name is indicated as D in this manual The CD ROM drive name may differ depending on the computer being used 11 Confirm the contents of Copy manufacturer s files from then click OK For example when your CD ROM drive is drive D it is displayed as D English Win2K_XP Canon LBP3600 is displayed in the Add Printer Wizard dialog box ...

Страница 170: ... Enter a new name in Printer name if you want to change the printer name then click Next If another printer driver has been already installed in the computer the message Do you want your Windows based programs to use this printer as the default printer appears In this case select Yes or No ...

Страница 171: ... Environment 3 14 Click Next NOTE When sharing this printer on a network select Share name then click Next The window for entering Location and Comment is displayed Enter them as necessary then click Next 15 When printing a test page click Yes then click Next ...

Страница 172: ...ying files is started When printing a test page a dialog box will appear after printing Click OK to close the dialog box 17 If the printer and computer are not connected connect them with a USB cable and then turn the power of the printer ON The installation of the printer driver is completed ...

Страница 173: ...mpleting Installation When the installation of the CAPT software is completed the icon and folder for this printer will be created For Windows 98 Me 2000 The icon for this printer is displayed in the Printers folder Canon Printer Uninstaller is added to Programs under the Start menu ...

Страница 174: ...allation 3 53 Setting Up the Printing Environment 3 For Windows XP Server 2003 The icon for this printer is displayed in the Printers and Faxes folder Canon Printer Uninstaller is added to All Programs under the Start menu ...

Страница 175: ...r Load A4 size paper The screen shots used in this section are from Windows 2000 1 Display the Printers or Printers and Faxes folder For Windows 98 Me 2000 From the Start menu select Settings Printers For Windows XP Professional Server 2003 From the Start menu select Printers and Faxes For Windows XP Home Edition From the Start menu select Control Panel then click Printers and Other Hardware Print...

Страница 176: ...inting Environment 3 3 Display the Page Setup sheet then click Display Printer Status Window to start up the Printer Status Window NOTE For details on the Printer Status Window see Printer Status Window on p 4 79 4 From the Options menu select Utility Printer Status Print ...

Страница 177: ...the Printing Environment 3 5 Click OK Printer Status Print is printed IMPORTANT This is a sample of Status Print The contents may differ from the Status Print printed by your computer NOTE If Printer Status Print is not printed properly see Chapter 7 Troubleshooting ...

Страница 178: ...a network specify the settings in the following procedure Here the computer directly connected to the printer is called print server and the other computers which use the printer through the network are called clients Network Environments Print Server of Windows 98 Me Windows 98 Me Client Windows 98 Me Client Windows 2000 XP Server 2003 Client Windows 2000 XP Server 2003 Client Print Server of Win...

Страница 179: ...work Guide 2 Setting the Print Server Network For Windows 98 Me see p 3 58 For Windows 2000 XP Server 2003 see p 3 62 3 Setting the Print Server Printer Sharing For Windows 98 Me see p 3 61 For Windows 2000 XP Server 2003 see p 3 64 4 Installation on Clients See p 3 67 NOTE Using this printer on your network requires that both the print server and clients should be using Windows 98 Me or Windows 2...

Страница 180: ...2 Display the Configuration sheet then click Add The Select Network Component Type dialog box is displayed 3 Click the Service icon then click Add 4 Select File and printer sharing for Microsoft Networks then click OK The Select Network Component Type dialog box appears first then the Network dialog box reappears ...

Страница 181: ... Printing Environment 3 5 Click File and Print Sharing 6 Make sure that I want to be able to allow others to print to my printer s is selected then click OK 7 Display the Access Control sheet and select Share level access control or User level access control 8 Click OK then restart Windows ...

Страница 182: ...ng Environment 3 Printer Sharing Settings 1 From the Start menu select Settings Printers The Printers folder is displayed 2 Right click the icon for this printer then select Sharing from the pop up menu 3 Select Shared As Change Share Name if you want to then enter Comment and Password as needed ...

Страница 183: ...con For Windows 2000 XP Server 2003 NOTE The screen shots used in this section are from Windows 2000 Network Settings 1 From the Start menu select Settings Network and Dial up Connections For Windows XP From the Start menu select Control Panel then click Network and Internet Connections Network Connections For Windows Server 2003 From the Start menu select Control Panel Network Connections Local A...

Страница 184: ... Setting Up the Printing Environment 3 2 Right click the Local Area Connection icon then select Properties from the pop up menu The Local Area Connection Properties dialog box appears 3 Make sure that File and Printers Sharing for Microsoft Networks is selected then click OK ...

Страница 185: ...ngs require running Network Setup Wizard to enable the sharing settings For more details see Online Help for Windows 1 From the Start menu select Settings Printers For Windows XP Professional Server 2003 From the Start menu select Printers and Faxes For Windows XP Home Edition From the Start menu select Control Panel and then click Printers and Other Hardware Printers and Faxes The Printers folder...

Страница 186: ... 3 3 Select Shared as Change the share name as needed For Windows XP Server 2003 Select Share this printer NOTE You can also specify the sharing settings during the local installation Do not enter blank or special characters in Shared as 4 Click Additional Drivers The Additional Drivers dialog box is displayed ...

Страница 187: ...5 or 98 then click OK For Windows XP Server 2003 Place a checkmark for Windows 95 98 and Me and then click OK 6 Insert the supplied LBP3600 User Software CD ROM into the CD ROM drive If the Insert Disk dialog box appears click OK 7 Click Browse When your CD ROM drive is drive D select D English Win98_Me and then click OK Copying files is started ...

Страница 188: ... installation and download installation Local Installation See p 3 68 Installing the printer driver using the supplied CD ROM Download and Installation Installing the printer driver without using the supplied CD ROM but by downloading the printer driver from the print server There are the following two ways of download installation Installing from Add Printer Wizard See p 3 73 Installing from Wind...

Страница 189: ...Setup 1 Insert the supplied LBP3600 User Software CD ROM into the CD ROM drive If the CD ROM is already set in the drive take it out and insert it into the drive again CD ROM Setup appears automatically IMPORTANT If CD ROM Setup does not appear automatically select Run from the Start menu enter D English CNAB1MNU exe and then click OK The CD ROM drive name is indicated as D in this manual The CD R...

Страница 190: ...r the preparation for installation is completed the CAPT Canon Advanced Printing Technology software installer starts up and the Setup Wizard dialog box appears 4 Click Next The License Agreement dialog box is displayed 5 Confirm the contents and select I accept the terms in the license agreement and then click Next ...

Страница 191: ...ter by Sharing the Printer on a Network 3 70 Setting Up the Printing Environment 3 6 Select Manually Set Port to Install then click Next 7 Click Next NOTE Do not place a checkmark for Install Printer Driver through a USB Connection ...

Страница 192: ...a Network 3 71 Setting Up the Printing Environment 3 8 Select Use Network Printer for Port Settings then click Settings 9 Select the directory of the print server then click OK 10 Select whether or not to use this printer as the default printer then click Next ...

Страница 193: ... 11 Click Start 12 The message Installation cannot be stopped once it starts Do you want to continue is displayed Click Yes The installation of the printer driver starts 13 The window that informs you the completion of the installation is displayed Select Restart my computer now then click Exit Windows restarts ...

Страница 194: ...rinter icon For Windows XP Professional From the Start menu select Printers and Faxes Add a printer For Windows XP Home Edition From the Start menu select Control Panel and then click Printers and Other Hardware Printers and Faxes Add a printer For Windows Server 2003 From the Start menu select Printers and Faxes and then double click Add a printer The Add Printer Wizard dialog box is displayed 2 ...

Страница 195: ...Computer by Sharing the Printer on a Network 3 74 Setting Up the Printing Environment 3 4 Click Next For Windows 98 Me click Browse 5 Select the directory of the print server then click Next For Windows 98 Me Proceed to Step 7 ...

Страница 196: ... printer then click Next 7 Click Finish NOTE If the Digital Signature Not Found dialog box appears click Yes Installing from Windows Explorer 1 From the Start menu select Programs Accessories Windows Explorer For Windows XP Server 2003 From the Start menu select All Programs Accessories Windows Explorer For Windows 98 From the Start menu select Programs Windows Explorer ...

Страница 197: ...nting Environment 3 2 Select the print server from My Network Places from Network Computer for Windows 98 then double click the icon for this printer Or drag and drop the icon for this printer into the Printers folder 3 The Printers dialog box is displayed Follow the instructions on the screen ...

Страница 198: ...tors it cannot be uninstalled from the computer logged on by anyone other than users who are members of Administrators Be sure to log in as a user who is a member of Administrators before the uninstallation 1 Make sure to close all the files and programs listed below Help files Printer Status Window Control Panel Other applications 2 From the Start menu select Programs Canon Printer Uninstaller Ca...

Страница 199: ... is not on the list in the Delete Printer dialog box you can delete the file and information related to this printer by clicking the Delete button 5 Click Yes Uninstallation starts Please wait until it is completed 6 Click Exit The Delete Printer dialog box closes NOTE If the CAPT software cannot be uninstalled see When Uninstallation Fails on p 7 51 ...

Страница 200: ...g Print Output 4 43 Poster Printing 4 45 Watermark Printing 4 47 Specifying a Custom Paper Size 4 52 Printing Borders and Printing Date 4 54 Selecting an Objective 4 55 Print with Mixed Paper Sizes Orientations 4 57 Gutter 4 59 Specifying the Finishing Method 4 60 Specifying the Paper Feed Method 4 63 Specifying the Print Quality 4 65 Grayscale Settings 4 67 Specifying Profiles 4 71 PageComposer 4...

Страница 201: ...4 Printing a Document 4 2 Printing a Document 4 Resolve Error 4 85 Displaying Status When a Print Server is Used 4 85 ...

Страница 202: ...n the printer This section describes the procedure for printing from an application taking Adobe Reader 6 0 as an example 1 Load paper in the multi purpose tray or paper cassette See Printing from the Multi purpose Tray on p 2 57 Printing from a Paper Cassette on p 2 17 2 Open the PDF file to print with Adobe Reader and then select Print Setup from the File menu ...

Страница 203: ...lication Software 4 4 Printing a Document 4 3 Specify the paper size of the document and the printing orientation then click OK 4 Select Print from the File menu The printer driver starts up and the Print dialog box appears ...

Страница 204: ... and specify the printing preferences NOTE The printer name displayed in this dialog box can be changed in the Printers folder the Printers and Faxes folder for Windows XP Server 2003 6 If you want to specify more detailed printing preferences click Properties The Canon LBP3600 Properties dialog box is displayed ...

Страница 205: ...dialog box reappears NOTE It is recommended that you confirm the contents of the Page Setup sheet and the Paper Source sheet each time you print 8 Click OK The printer starts printing NOTE If you have any problems with printing see Chapter 7 Troubleshooting Using the Printing Functions See p 4 22 describes how to use the various functions of the printer and printer driver By specifying the setting...

Страница 206: ...pear depending on the settings for Display Printer Status Window in the Preferences menu in the Printer Status Window See Setting Preferences on p 4 82 2 When deleting or pausing the job click the Pause Job button in the Current Print Job tab or My Job Operation tab The following message is displayed and the My Job Operation tab is selected on the top by clicking the Pause Job button in the Curren...

Страница 207: ...ions 4 8 Printing a Document 4 3 Click the button for the desired operation from among the Job Operation buttons Deleting the job Click Delete Job Pausing the job Click Pause Job Resuming the job Click Resume Job ...

Страница 208: ...le for your operating system to display the Properties dialog boxes For Windows 98 Me If you display the Document Properties dialog box from your application you can specify the settings only for the job If you display the Printer Properties dialog box from the Printers folder the print options and default values for all jobs can be specified NOTE The Configuration sheet that allows you to specify...

Страница 209: ...ation This section describes the procedure taking Adobe Reader 6 0 as an example 1 Select Print from the File menu in the application The Print dialog box is displayed NOTE Printing procedures differ depending on your application For details on the printing procedures see the instruction manual supplied with your application ...

Страница 210: ...Specifying the Printing Preferences 4 11 Printing a Document 4 2 Select this printer for Name or Printer Name and click Properties The Document Properties dialog box is displayed ...

Страница 211: ...nting a Document 4 Displaying the Printer Properties Dialog Box from the Printers Folder 1 From the Start menu select Settings Printers The Printers folder is displayed 2 Select the icon for this printer then select Properties from the File menu ...

Страница 212: ... specify the default settings for all jobs If you display the Printer Properties dialog box from the Printers folder or the Printers and Faxes folder you can specify the printer options and add the frequently used options as Profiles NOTE Full Control Permission is required to specify the settings for the Printers folder or the Printers and Faxes folder If you cannot display the Document Propertie...

Страница 213: ...Document 4 Displaying the Document Properties Dialog Box from the Application This section describes the procedure taking Adobe Reader 6 0 as an example 1 Select Print from the File menu in the application 2 Confirm the printer name then click Properties ...

Страница 214: ...Box from the Printers Folder 1 From the Start menu select Settings Printers For Windows XP Professional Server 2003 From the Start menu select Printers and Faxes For Windows XP Home Edition From the Start menu select Control Panel then click Printers and Other Hardware Printers and Faxes The Printers folder or the Printers and Faxes folder is displayed ...

Страница 215: ...n for this printer then select Printing Preferences from the File menu The Document Properties dialog box is displayed NOTE The Document Properties dialog box can also be displayed by right clicking the icon for this printer and selecting Printing Preferences from the pop up menu ...

Страница 216: ...ngs Printers For Windows XP Professional Server 2003 From the Start menu select Printers and Faxes For Windows XP Home Edition From the Start menu select Control Panel then click Printers and Other Hardware Printers and Faxes The Printers folder or the Printers and Faxes folder is displayed 2 Select the icon for this printer then select Properties from the File menu ...

Страница 217: ...rences 4 18 Printing a Document 4 The Printer Properties dialog box is displayed NOTE The Printer Properties dialog box can also be displayed by right clicking the icon for this printer and selecting Properties from the pop up menu ...

Страница 218: ...t Perform the following steps each time you install the optional accessories 1 From the Start menu select Settings Printers For Windows XP Professional Server 2003 From the Start menu select Printers and Faxes For Windows XP Home Edition From the Start menu select Control Panel then click Printers and Other Hardware Printers and Faxes The Printers folder or the Printers and Faxes folder is display...

Страница 219: ...ter Properties dialog box is displayed NOTE The Printer Properties dialog box can also be displayed by right clicking the icon for this printer and selecting Properties from the pop up menu 3 Display the Device Settings for Windows 2000 XP Server 2003 or Configuration for Windows 98 Me sheet then specify the settings in Paper Source Options and Duplex Unit ...

Страница 220: ...Setting Printer Information Before Printing 4 21 Printing a Document 4 NOTE You can also obtain the printer status such as paper source options automatically by clicking Get Device Status 4 Click OK ...

Страница 221: ...abs across the top of the dialog box This section describes the types of printing preferences that can be specified in each sheet For Windows 98 Me Document Properties Dialog Box Page Setup Sheet Finishing Sheet Paper Source Sheet Quality Sheet Printer Properties Dialog Box General Sheet Details Sheet Sharing Sheet Page Setup Sheet Finishing Sheet Paper Source Sheet Quality Sheet Configuration She...

Страница 222: ... keyboard to select the item of which you want to display Help then press the F1 key Right click the item of which you want to display Help then click What s This from the pop up menu Click Help on Titlebar move the attached cursor to the item of which you want to display Help then click it Page Setup Sheet The Page Setup sheet allows you to specify the following printing preferences Page Size Dis...

Страница 223: ...age Size If you select a paper size that differs from Page Size the print will be automatically reduced or enlarged to fit on the page When printing data in which multiple paper sizes are specified in the application you can print at the same size as you specified in Output Size in the printer driver If you can specify the page size print copies and orientation in your application you do not have ...

Страница 224: ...different If you want to specify the scale factor manually select Manual Scaling then specify the value in the spin box You can specify from 25 to 200 Page Order You can select the page order when printing multiple pages on one sheet of paper Custom Paper Size See p 4 52 The dialog box shown below is displayed by clicking Custom Paper Size This dialog box allows you to specify the height and width...

Страница 225: ...is displayed by clicking Edit Watermark This dialog box allows you to add new watermarks and edit the added watermarks Layout Options See p 4 54 The dialog box shown below is displayed by clicking Layout Options This dialog box allows you to specify borders date and page numbers to be printed on the printouts ...

Страница 226: ...r 2 sided printing and booklet printing Booklet See p 4 56 The dialog box shown below is displayed by selecting Booklet Printing for Print Style and clicking Booklet This dialog box allows you to specify the settings for booklet printing Print with Mixed Paper Sizes Orientations See p 4 57 When printing a document of mixed paper sizes or orientations place a checkmark for Print with Mixed Paper Si...

Страница 227: ...hen printing a document of mixed paper sizes or orientations Binding Location See p 4 59 You can specify which edge of the printout is bound Gutter See p 4 59 The dialog box shown below is displayed by clicking Gutter This dialog box allows you to specify the width of the gutter and image processing method Finishing You can select the procedure for output from the following items Off Printouts of ...

Страница 228: ...dialog box allows you to specify the various options for job processing Advanced Settings See p 4 61 The dialog box shown below is displayed by clicking Advanced Settings in the Finishing Details dialog box This dialog box allows you to specify the finishing details Paper Source Sheet You can specify the following printing preferences in the Paper Source sheet ...

Страница 229: ... used only when either A4 or Letter is selected for Output Size in the Page Setup sheet Paper Source See p 4 63 Specify paper source or paper type according to the settings selected in Paper Selection Paper Type Specify the type of paper to be used Specify as follows When printing envelopes the printer automatically applies the appropriate print mode to the envelope type by specifying Output Size ...

Страница 230: ...ze in the Page Setup sheet is not loaded in any other cassette Quality Sheet The Quality sheet allows you to specify the following printing preferences Objective See p 4 65 Selecting the appropriate objective for the contents of the job allows you to perform optimum printing General Prints in the appropriate mode for printing documents or charts in a general format Graphics Prints in the appropria...

Страница 231: ...ok patchy Manual Grayscale Settings See p 4 67 Place a checkmark when customizing the grayscale To specify the grayscale in detail click the Grayscale Settings button to display the Grayscale Settings dialog box Grayscale Settings See p 4 67 The dialog box shown below is displayed by clicking Grayscale Settings This dialog box has the Grayscale Adjustment sheet and the Matching sheet Grayscale Adj...

Страница 232: ... performing specify the settings for the gamma correction that performs brightness of colors Print Grayscale Sample Windows 2000 XP Server 2003 only You can print an adjusted grayscale sample after specifying the settings in the Grayscale Adjustment sheet that is displayed when Grayscale Settings is clicked The after adjustment image is printed in the center of the paper and the images whose Brigh...

Страница 233: ...inting a Document 4 General Sheet This sheet displays the printer name Allows you to print a test page Details Sheet Windows 98 Me only This sheet allows you to specify the settings for the printer port spooling and others and add drivers ...

Страница 234: ...sheet does not appear if File and printer sharing for Microsoft Networks has not been added in the network settings See p 3 58 For Windows 2000 XP Server 2003 the Sharing sheet does not appear if the appropriate network settings have not been performed See p 3 62 Ports Sheet Windows 2000 XP Server 2003 only This sheet allows you to add delete and configure the printer port ...

Страница 235: ...t Windows 2000 XP Server 2003 only This sheet allows you to specify the detailed settings such as available time of the printer and the spooling settings Security Sheet Windows 2000 XP Server 2003 only This sheet allows you to confirm the access permissions for each user ...

Страница 236: ...led in the printer Duplex Unit See p 4 19 Place a checkmark when the optional duplex unit is installed in the printer Spooling at Host Windows 2000 XP Server 2003 only You can specify whether spooling is performed at the Host Show Icon in the Taskbar See p 4 81 When this option is checked an icon for displaying the Printer Status Window appears in the taskbar on the Windows screen Get Device Statu...

Страница 237: ...2000 XP Server 2003 only This sheet allows you to create and add new Profiles and edit the added Profiles Profile List Lists the available Profiles Name Displays the name of the Profile selected in Profile List Comment Displays a comment about the Profile selected in Profile List ...

Страница 238: ... want to edit Edit See p 4 71 The dialog box shown below is displayed by clicking Edit This dialog box allows you to enter Name Icon Comment and the printing preferences for the newly added Profile or the one that you want to edit Delete See p 4 71 Allows you to delete an added Profile Import See p 4 71 Allows you to import a Profile saved as a file and add it in the printer driver Export See p 4 ...

Страница 239: ...ure of Preview differs as follows When is selected You can specify Binding Location Page Layout and Print Style 1 sided Printing and 2 sided Printing only Left clicking the edge of the document image allows you to specify Binding Location The setting for Page Layout changes successively among 1 Page per Sheet 2 Pages per Sheet and 4 Pages per Sheet by repeatedly left clicking within the document i...

Страница 240: ...size or type of paper left click Auto at the bottom right on Preview Also right clicking on Preview specifies Finishing If Different for First Others and Last Different for First Second Others and Last or Different for Cover and Others is selected for Paper Selection you can specify the paper source for each page Printing Multiple Pages on One Sheet Multiple pages can be printed on one sheet of pa...

Страница 241: ...age Setup sheet then select the number of the pages to be printed on one sheet from Page Layout The number of pages that can be selected is 1 2 4 6 8 9 or 16 Pages per Sheet 3 When 2 4 6 8 9 or 16 pages per sheet is selected Page Order appears Select the desired page order ...

Страница 242: ... 4 Confirm the settings then click OK Scaling Print Output You can select a scale when 1 Page per Sheet is selected for Page Layout The scale factor will be adjusted automatically when Page Size and Output Size are different The scale factor can be specified manually You can specify from 25 to 200 Scaling a Document Automatically 1 Display the Page Setup sheet then specify the page size in Page Si...

Страница 243: ...ctor will be set automatically depending on the sizes specified in Page Size and Output Size Scaling a Document Manually 1 Display the Page Setup sheet then specify the page size in Page Size 2 Specify the paper size in Output Size 3 Place a checkmark for Manual Scaling then specify the value in the spin box 4 Confirm the settings then click OK ...

Страница 244: ...oster Printing You can magnify a single page image and print it out on more than one page You can join these printouts together to make one large poster 1 For Windows 2000 XP Server 2003 display the Device Settings sheet and select Auto from Spooling at Host ...

Страница 245: ...ut image of the printout appears on Preview 3 Confirm the settings then click OK IMPORTANT The printing order of the printouts separated into multiple pages becomes Upper Left to Right When you perform poster printing the watermark printing and layout options are disabled When you perform poster printing the setting for Page Order is disabled ...

Страница 246: ... in the application Select the desired character string from the list of the character strings registered as watermarks Also you can add new watermarks or edit the added watermarks by clicking Edit Watermark in the Page Setup sheet Watermark Printing 1 For Windows 2000 XP Server 2003 display the Device Settings sheet and select Auto from Spooling at Host ...

Страница 247: ...ns 4 48 Printing a Document 4 2 Display the Page Setup sheet and place a checkmark for Watermark 3 Select the character string to print as a watermark from the list on the right of Watermark 4 Confirm the settings then click OK ...

Страница 248: ...inting a Document 4 Editing Watermarks 1 For Windows 2000 XP Server 2003 display the Device Settings sheet and select Auto from Spooling at Host 2 Display the Page Setup sheet place a checkmark for Watermark and then click Edit Watermark ...

Страница 249: ...Using the Printing Functions 4 50 Printing a Document 4 The Edit Watermark dialog box is displayed ...

Страница 250: ...e added watermark to be displayed for Watermark in the Page Setup sheet Text Enter the characters to be printed as the watermark Font Select the font to be used for the watermark True Type fonts only Style Select the font style for the watermark Size Specify the font size for the watermark Color Specify the color for the watermark Since this printer is a monochrome printer all the watermark colors...

Страница 251: ... display the dialog box shown below For Windows 2000 XP Server 2003 Display the Document Properties dialog box in the Printers folder the Printers and Faxes folder for Windows XP Server 2003 For Windows 98 Me Display the Printer Properties dialog box in the Printers folder 1 Display the Page Setup sheet then click Custom Paper Size The Custom Paper Size Settings dialog box is displayed ...

Страница 252: ... then click OK Paper List Displays the names and sizes of standard paper and added custom paper Name of Custom Paper Size Enter the name of the custom paper size to be registered Up to 31 characters can be entered Unit Specify the unit Millimeter or Inch to be used when setting the custom paper size Paper Size Specify the height and width of the custom paper size Height Width Specify the custom pa...

Страница 253: ...Printing Borders and Printing Date You can print with borders printing date and or page numbers 1 For Windows 2000 XP Server 2003 display the Device Settings sheet and select Auto from Spooling at Host 2 Display the Page Setup sheet then click Layout Options ...

Страница 254: ... sided printing and booklet printing IMPORTANT For Windows 2000 XP Server 2003 Booklet Printing is unavailable when Disabled is selected for Spooling at Host in the Device Settings sheet Edging Select the type of edging to print as a border Print Date Prints the date Specify the printing position of the date from the list Print User Name Prints the user name that is registered in the computer Spec...

Страница 255: ...ng items as needed 1 sided Printing Prints on one side of paper 2 sided Printing Prints on both sides of paper using the optional duplex unit Booklet Printing Prints booklets using the optional duplex unit Booklet printing involves printing 2 pages on both sides of a sheet of paper in the appropriate order so that the printouts become a booklet when folded into two To perform detailed settings for...

Страница 256: ...et place a checkmark for Print with Mixed Paper Sizes Orientations and then click Details Booklet Printing Method Specify the unit for booklet printing printing all pages at once or by dividing into several portions Specify Booklet Gutter Place a checkmark when specifying the gutter on booklet printing Enter the value of the distance 0 to 30 mm from the center line fold line in the middle of the p...

Страница 257: ...d gutter values range from 0 to 30 mm When a gutter value is specified the print area is reduced Image Processing When Gutter is specified the position of the page image is adjusted to make room for the gutter At this point you can select whether to reduce the size of the image to fit the remaining space When Reduce and Arrange is selected the size of the image is automatically reduced to adjust t...

Страница 258: ...gutter is specified the position of the page image is adjusted to make room for the gutter At this point you can select whether to reduce the size of the image to fit the remaining space 1 Display the Finishing sheet specify the side on which the gutter is to be located in Binding Location and then click Gutter The Gutter Settings dialog box is displayed ...

Страница 259: ...g When Gutter is specified the position of the page image is adjusted to make room for the gutter At this point you can select whether to reduce the size of the image to fit the remaining space When Reduce and Arrange is selected the size of the image is automatically reduced to adjust the page image position so that the entire image remains in the print area When Stagger Image with Size as is is ...

Страница 260: ...ious job To resume the job click the Resolve Error button in the Printer Status Window or load the appropriate paper However for the job that takes place immediately after cycling the power or removing paper a message does not appear and the job uses the currently loaded paper regardless of the setting for Output Size Rotate Print Data 180 Degrees Prints by rotating the image 180 degrees This opti...

Страница 261: ...he toner fixing the most and Mode 2 and Mode 1 follow respectively Mode 4 enhances the toner fixing the least EMF Spooling Windows 2000 XP Server 2003 only Specify whether the print data is spooled in EMF meta file format When this option is checked the data is spooled in EMF format Print Last Page in 1 sided Mode when 2 sided Printing is Set When this option is checked and the last page for the 2...

Страница 262: ...the Paper Source sheet 2 Specify the following items as needed Paper Selection You can specify the paper feed method Paper Source First Page Second Page Cover Page Other Pages Last Page Interleaf Sheet You can specify the paper source Options that can be specified depend on the items selected in Paper Selection Paper Type Specify the type of paper to be used ...

Страница 263: ...displayed and the printer pauses the job Make sure that the paper size specified in the printer driver is the same as the size of paper in the multi purpose tray and click the Resolve Error button in the Printer Status Window Continue Printing with the Multi purpose Tray Specify whether the printer should switch the paper source to the multi purpose tray automatically when a cassette has run out o...

Страница 264: ...e Print Quality You can perform optimum printing by simply selecting the appropriate item from Objective 1 Display the Quality sheet then specify the settings for Objective For more detailed settings click the Details button The Detailed Settings dialog box is displayed ...

Страница 265: ...or appear broken in printouts You should be able to print thin lines finely Enable Image Correction When image data such as photographic images are printed at enlarged sizes in the application the printed images can look rough or jagged Specify the settings for smoothing the output of low resolution image data Toner Density Adjust the toner density for the print data Adjust the density by dragging...

Страница 266: ... checkmark for Manual Grayscale Settings and then click Grayscale Settings The Grayscale Settings dialog box is displayed 2 Display the Grayscale Adjustment sheet then specify the following items as needed Brightness Adjust the brightness for the print data Adjust the brightness by dragging the Brightness slider from side to side ...

Страница 267: ...rightness and Contrast are changed by graduation are each printed around the after adjustment image This is useful to adjust the grayscale of the printout Contrast Adjust the contrast for the print data Adjust the contrast by dragging the Contrast slider from side to side Matching Mode Specify the method for color correction Matching Method Specify which element is to be prioritized in matching Mo...

Страница 268: ...rinting a Document 4 1 For Windows 2000 XP Server 2003 display the Device Settings sheet and select Auto from Spooling at Host 2 Display the Quality sheet place a checkmark for Manual Grayscale Settings and then click Grayscale Settings ...

Страница 269: ...e a checkmark for Print Grayscale Sample 5 Confirm the settings then click the OK button IMPORTANT When printing a grayscale sample be sure that 1 Page per Sheet is selected for Page Layout in the Page Setup sheet 6 Click OK or Print The grayscale sample is printed IMPORTANT When you are finished with printing grayscale samples remove the checkmark from Print Grayscale Sample ...

Страница 270: ...ords to display the User Profiles sheet and then select Users can customize their preferences and desktop settings Windows switches to your personal settings when you log on For Windows 2000 XP Server 2003 up to 50 Profiles for each user account can be added If the printer name has been changed any saved Profiles cannot be imported To import the saved Profiles change the printer name to its previo...

Страница 271: ... for Name Icon allows you to select the icon for the Profile Enter any comments in Comment as needed NOTE Up to 31 characters for Name and 255 characters for Comment can be entered Confirming the Printer Settings Click View Settings When OK is clicked the Add Profile dialog box reappears ...

Страница 272: ...s dialog box reappears Check if the name of the added Profile is on the Profile list Editing Deleting a Profile You can change or save the Profile information or delete it from Profile List 1 Click Edit Profile The Edit Profile dialog box is displayed 2 Edit the Profile information ...

Страница 273: ...entation and Copies specified in the application are applied for printing The settings for these items in the application stay enabled even if the Profile is changed Deleting a Profile When Delete is clicked the Profile is deleted from the list IMPORTANT You can delete only custom Profiles You cannot delete default Profiles Also you cannot delete the Profile currently selected in each sheet PageCo...

Страница 274: ...Functions 4 75 Printing a Document 4 1 Select Edit and Preview from the list on the right of the Profile list 2 The message that the output method is going to be switched to the Edit and Preview mode is displayed Click OK ...

Страница 275: ...printing preferences in each sheet then click OK 4 Click OK or Print The Canon PageComposer dialog box is displayed and the job is displayed on a list 5 Repeat Step 1 to 4 for the jobs that you want to edit 6 Edit the jobs on the list in the Canon PageComposer dialog box ...

Страница 276: ...ing the Printer Settings Restoring the Default Settings You can view or restore the default settings for all the printing preferences specified in the Page Setup Finishing Paper Source Quality and Configuration Device Settings sheets at once Make sure that any one of the Page Setup Finishing Paper Source and Quality sheets is displayed then perform the following procedure NOTE A preview of the set...

Страница 277: ...eferences for each sheet in a list 2 Click OK The previous sheet reappears Restoring the Default Settings To restore the default settings click Restore Defaults You can restore the default settings only in the same sheet or dialog box as Restore Defaults displayed The settings in the Page Setup Finishing Paper Source Quality and Configuration Device Settings sheets cannot be restored all at once t...

Страница 278: ... driver for PCM synthesizer installed Functions on the Printer Status Window The functions on the Printer Status Window are the same on both Windows 98 Me and Windows 2000 XP Server 2003 For more details on operations see Online Help Refresh Button Message Area Auxiliary Resolve Error Button Menu Bar Icon Message Area Animation Area Progress Bar Status Bar Current Print Job Tab My Job Operation Ta...

Страница 279: ...rea Shows an animated graphic indicating the current printer status The graphic background changes from blue normal to orange when some user action is required or to red when a Warning is issued Refresh Button Obtains the printer status and refreshes the Printer Status Window display Resolve Error Button Allows you to resume a job when the job is paused for some reason Current Print Job Tab Progre...

Страница 280: ...w Icon in the Taskbar The icon for the Printer Status Window is displayed in the Windows taskbar Click the icon then click Canon LBP3600 to start up The Printer Status Window appears automatically during printing or when an error occurs If When Starting Printing is not selected in the Preferences dialog box in the Options menu the Printer Status Window does not appear during printing Job Informati...

Страница 281: ...is always on top of all the other windows on the desktop Monitor Printer Status Group Only while Displaying Printer Status Window The Printer Status Window monitors the printer status only while it is displayed Only while Printing The Printer Status Window monitors the printer status only while printing Always The Printer Status Window always monitors the printer status Notify the Printer of the T...

Страница 282: ...ing a Document 4 1 Select Preferences from the Options menu The Preferences dialog box is displayed 2 Confirm each of the settings then click OK NOTE For detailed information on operations for the Printer Status Window see Online Help ...

Страница 283: ...P IP settings For more details see Chapter 4 Troubleshooting in Network Guide Printing Position Adjustment Print Display the Printing Position Adjustment Print dialog box Select the paper source of which you want to check the printing position in the Printing Position Adjustment Print dialog box print the position adjustment page and then check the printing position For more details see Adjusting ...

Страница 284: ...ndow Resolve Error When a job is paused for some reason you can resume the job by selecting Resolve Error from the Job menu Resuming a job by selecting Resolve Error may cause unexpected print results Resolve Error is unavailable in any of the following cases When the job is paused due to printer error such as a paper jam and paper out condition When another user s job is paused Resolve Error is a...

Страница 285: ...nly from the client whose user name is verified by the print server NOTE To display the status for a job that is requested via a network an environment in which the TCP IP protocol can be used is required Current Print Job Tab My Job Operation Tab Job Operation Job Information Area Pause Job Button Job Information Area Job Operation Buttons Displays the first job Enabled 1 Displays the first job 2...

Страница 286: ...ner Cartridge 5 8 Precautions for Handling Toner Cartridges 5 18 Storing the Toner Cartridge 5 20 Cleaning the Fixing Roller 5 21 Cleaning the Transfer Roller and Photosensitive Drum 5 26 Adjusting the Printing Position 5 28 Checking the Printing Position 5 28 Adjusting the Printing Position 5 30 Cleaning the Printer 5 35 Moving the Printer 5 37 Handling the Printer 5 45 Precautions for Handling t...

Страница 287: ...print quality NOTE The cartridge designed for this printer EP 66 Cartridge has a life span of up to approximately 10 000 sheets of A4 size paper when loaded in landscape orientation This is based on printing typical word processing documents that have about 5 page coverage with the print density set to the default setting The life of your cartridge may vary depending on the type of documents print...

Страница 288: ...of the printer as this may result in burns or electrical shock The toner cartridge generates a low level magnetic field If you use a cardiac pacemaker and feel abnormalities please move away from the toner cartridge and consult your physician CAUTION Take care not to allow the toner to come into contact with your hands or clothing as this will dirty your hands or clothing If they become dirty wash...

Страница 289: ... high voltage contacts inside the toner cover as this may result in damage to the printer 1 Open the multi purpose tray Holding the grip at the center of the printer open the multi purpose tray NOTE If you are using the multi purpose tray remove any loaded paper High voltage contacts ...

Страница 290: ...ng the Toner Cartridge 5 5 Routine Maintenance 5 2 Open the toner cover Press the green toner cover release button as shown in the figure a Holding the green tab open the toner cover until it clicks b a Tab b ...

Страница 291: ... hands as shown in the figure 4 Hold the toner cartridge as shown in the figure and gently shake it 5 or 6 times to evenly distribute the toner inside Be careful not to spill the toner IMPORTANT If toner is not distributed evenly this may result in deterioration in print quality Be sure to shake the toner cartridge gently otherwise the toner may spill out ...

Страница 292: ...e inserting the toner cartridge open the toner cover completely The toner cartridge cannot be inserted when the toner cover is opened only partially 6 Close the toner cover Holding the center of the toner cover close the cover until it clicks IMPORTANT If you cannot close the toner cover check if the toner cartridge is installed properly If you try to close the toner cover forcefully this may resu...

Страница 293: ...flames as this may cause the toner remaining inside the cartridge to ignite resulting in burns or a fire There are some areas inside the printer which are subject to high voltages When removing jammed paper or when inspecting the inside of the printer do not allow necklaces bracelets or other metal objects to touch the inside of the printer as this may result in burns or electrical shock The toner...

Страница 294: ...ring use When replacing fixing unit do not touch the fixing unit as doing so may result in burns or electrical shock IMPORTANT Use only the toner cartridge designed for this printer Do not touch the high voltage contacts inside the toner cover as this may result in damage to the printer High voltage contacts ...

Страница 295: ...pen the multi purpose tray Holding the grip at the center of the printer open the multi purpose tray NOTE If you are using the multi purpose tray remove any loaded paper 2 Open the toner cover Press the green toner cover release button as shown in the figure a a ...

Страница 296: ...dge 5 11 Routine Maintenance 5 Holding the green tab open the toner cover until it clicks b 3 Pull out the toner cartridge partially by holding the grip and then remove the cartridge with both hands as shown in the figure Tab b ...

Страница 297: ...nto contact with a high voltage area inside the printer this may result in a fire or electrical shock IMPORTANT Do not touch the black transfer roller This may result in deterioration in print quality Be careful not to scratch the transparent sheet or peel it by force Do not use a cleaning agent such as mild detergent Be sure that no water or chipped paper is remaining on the transparent sheet or ...

Страница 298: ...the protective bag so as not to damage the toner cartridge IMPORTANT Keep the protective bag for the toner cartridge This may be required after taking out the toner cartridge for printer maintenance 6 Remove the tapes and packing materials attached to the toner cartridge Remove the tapes that are securing the packing materials a a a ...

Страница 299: ...teriorate if you touch or damage the drum Dispose of the packing materials according to local regulations 7 Hold the toner cartridge as shown in the figure and gently shake it 5 or 6 times to evenly distribute the toner inside IMPORTANT If toner is not distributed evenly this may result in deterioration in print quality Be sure to carry out this procedure properly Be sure to shake the toner cartri...

Страница 300: ... the sealing tape approx 70 cm in length gently while supporting the toner cartridge To pull out the sealing tape hold the end of it and pull it out straight CAUTION If the sealing tape is pulled out forcefully or stopped at midpoint toner may spill out If the toner gets into your eyes or mouth wash them immediately with cold water and immediately consult a physician ...

Страница 301: ...ome difficult to pull out completely Pull out the sealing tape completely from the toner cartridge If any tape remains in the toner cartridge this may result in poor print quality When pulling out the sealing tape be careful not to hold the drum protective shutter with your hands Dispose of the sealing tape according to local regulations Drum protective shutter ...

Страница 302: ...re inserting the toner cartridge open the toner cover completely The toner cartridge cannot be inserted when the toner cover is opened only partially 11 Close the toner cover Holding the center of the toner cover close the cover until it clicks IMPORTANT If you cannot close the toner cover check if the toner cartridge is installed properly If you try to close the toner cover forcefully this may re...

Страница 303: ...rn or throw a used toner cartridge into open flames as this may cause the toner remaining inside the cartridge to ignite resulting in burns or a fire The toner cartridge generates a low level magnetic field If you use a cardiac pacemaker and feel abnormalities please move away from the toner cartridge and consult your physician CAUTION Take care not to allow the toner to come into contact with you...

Страница 304: ...e not described in this procedure This may result in damage to the printer When handling the toner cartridge hold it properly by holding the grip with one hand while holding the cartridge with the other as shown in the figure Do not set it vertically or upside down Do not attempt to disassemble or modify the toner cartridge Condensation may form in and on a toner cartridge if it is brought into an...

Страница 305: ...n installed in the printer Do not store the toner cartridge in a place exposed to direct sunlight Do not store a cartridge in a hot or humid place or a place where the temperature and humidity can change significantly Storing temperature range 0 to 35 C 32 to 95 F Storing humidity range 35 to 85 RH no condensation Do not store the toner cartridge in a place where corrosive gases such as ammonia ar...

Страница 306: ...cleaning the fixing roller First print out a cleaning page using A4 size paper as shown in the figure Then clean the fixing roller by feeding the cleaning page from the multi purpose tray and delivering it to the output tray IMPORTANT A cleaning page cannot be printed on other than A4 size paper Be sure to use A4 size paper If A4 size paper is not loaded in the paper cassette load it in landscape ...

Страница 307: ...Roller 5 22 Routine Maintenance 5 1 Display the Printer Status Window For details on procedures for displaying the Printer Status Window see Printer Status Window on p 4 79 2 From the Options menu select Utility Cleaning 1 ...

Страница 308: ...nd the cleaning page is printed NOTE If A4 size paper is not loaded in any paper source a message that prompts you to replace paper appears Load A4 size paper in the multi purpose tray 4 Open the multi purpose tray Holding the grip at the center of the printer open the multi purpose tray 5 Raise the paper retaining lever ...

Страница 309: ...g Roller 5 24 Routine Maintenance 5 6 Align the paper guide with A4 7 Load the cleaning page with the printed side facing down and the arrow mark going into the multi purpose tray first 11x17 LGL A5 B4 B5 A3 A4 LTR EXEC ...

Страница 310: ...sent into the printer slowly to start cleaning the fixing roller NOTE Cleaning takes approximately 2 minutes The cleaning process cannot be canceled Please wait until it is completed When the front or back of printouts has smudge marks even after performing the procedure above perform Cleaning 1 again ...

Страница 311: ...nsfer roller and photosensitive drum of the printer using the following procedure By cleaning them you can prevent poor print quality IMPORTANT If the transfer roller and photosensitive drum are cleaned frequently it may decrease their life span 1 Display the Printer Status Window For details on procedures for displaying the Printer Status Window see Printer Status Window on p 4 79 ...

Страница 312: ...Options menu select Utility Cleaning 2 3 Click OK The message Cleaning is displayed in the Printer Status Window and cleaning of the transfer roller and photosensitive starts NOTE Cleaning takes approximately 15 seconds The cleaning process cannot be canceled Please wait until it is completed ...

Страница 313: ...e part will be missing in the printout NOTE Be aware when adjusting the printing position for 2 sided printing since the orientation of the images on the reverse pages in 2 sided printing varies depending on the printing orientation or setting for Binding Location in the Finishing sheet Checking the Printing Position Perform the printing position adjustment print and check the position to be adjus...

Страница 314: ...ion Adjustment Print The Printing Position Adjustment Print dialog box is displayed 3 In the Printing Position Adjustment Print dialog box select the paper source of which you want to check the printing position Place a checkmark for Check Duplex Unit Also when adjusting the printing position for 2 sided printing ...

Страница 315: ... arrow points the top edge of the printing position adjustment print Next check the printout results and specify the position to be adjusted in Adjusting the Printing Position See p 5 30 Adjusting the Printing Position The measurements of printed on paper are as below 5 mm 10 mm 5 mm 10 mm 5 mm from each edge of paper 10 mm for envelopes ...

Страница 316: ...per Source in the Printing Position Adjustment Print dialog box is described here In this case adjust the printing position 5 0 mm to the left NOTE The printing position can be adjusted within a range from 5 0 to 5 0 mm in the horizontal direction only 1 Display the Printer Status Window For details on procedures for displaying the Printer Status Window see Printer Status Window on p 4 79 ...

Страница 317: ...he Device Settings dialog box Next check the printout results of the printing position adjustment print and select the numerical value to adjust the position The printing position can be adjusted within a range from 5 0 to 5 0 mm The position is moved by the entered value Negative values move the position to the left and positive values to the right NOTE The printing position can be adjusted in 0 ...

Страница 318: ...justing the Printing Position 5 33 Routine Maintenance 5 4 Click OK 5 From the Options menu select Utility Printing Position Adjustment Print The Printing Position Adjustment Print dialog box is displayed ...

Страница 319: ...ustment Print dialog box select the paper source of which you checked the printing position 7 Click OK The printing position adjustment print in which the setting is changed is printed Check the printout results to confirm the printing position To make further adjustment repeat step 1 to 7 ...

Страница 320: ... benzene paint thinner or other flammable substances Check detergent for flammability prior to use If flammable substances come into contact with a high voltage area inside the printer this may result in a fire or electrical shock IMPORTANT Be careful not to use a cleaning agent other than water or a mild detergent diluted with water as this may deform or crack the plastic materials in the printer...

Страница 321: ...detergent diluted with water and wipe off the dirt If you use a mild detergent for cleaning be sure to wipe away the detergent with a soft cloth dampened with water 3 After wiping off the dirt wipe the printer with a dry cloth 4 When the printer is completely dry plug the power plug into the AC power outlet ...

Страница 322: ...ower cord or interface cables may be damaged resulting in a fire or electrical shock CAUTION This printer weighs approximately 20 4 kg Main unit Approx 18 4 kg Toner cartridge Approx 2 kg without the paper cassette attached The printer must be carried by two or more people and care must be taken to avoid hurting your back or other portions of your body when carrying the printer Be sure not to hold...

Страница 323: ...personal injuries Do not carry the printer with the paper cassette attached If you do so the paper cassette may drop resulting in personal injuries Do not carry the printer with the paper feeders installed If you do so the paper feeders may drop resulting in personal injuries IMPORTANT Make sure that the top cover and multi purpose tray are closed before carrying the printer Back portion is relati...

Страница 324: ...this may result in printer error When carrying the printer do not touch the top rear cover on the back of the printer If the top rear cover is not set properly an error message such as Duplex Unit is not attached correctly or Toner Cover Open appears in the Printer Status Window Connector Top rear cover ...

Страница 325: ...to the hole b 2 Set the top rear cover a a c b b a b 1 While pressing the top rear cover from both sides a and pressing the tabs on the top rear cover b remove the top rear cover c The top rear cover is set snapping Make sure that the tabs are inserted completely into the holes Be sure that the film of the top rear cover does not get creased when installing the top rear cover Film IMPORTANT While ...

Страница 326: ...he power plug from the AC power outlet b b b b 2 Remove all interface cables and the power cord NOTE If the optional duplex unit is installed remove it from the printer For details on removing the duplex unit see Removing the Duplex Unit on p 6 34 3 Pull out the paper cassette If it is difficult to pull out the paper cassette lift it slightly and then pull it out horizontally OFF ON a b ...

Страница 327: ...d in the printer place the paper feeders on the new installation site before carrying the printer to the site For details on the procedure for installing the paper feeders see Installing the Paper Feeders on p 6 20 5 Set the printer down carefully at the new installation site CAUTION Set the printer down slowly and carefully Be careful not to hurt your hands IMPORTANT Be sure that a space for inst...

Страница 328: ...il the front side of the cassette is flush with the front surface of the printer If the paper cassette is extended the front side of the cassette is not flush with the front surface of the printer Push the paper cassette gently until it stops NOTE If the optional duplex unit was previously installed reinstall it on the printer For details on the procedure for installing the duplex unit see Install...

Страница 329: ...he printer for reasons such as relocating remove the toner cartridge and store the printer and the parts in the package that they came in with the protective materials attached in order to prevent them from being damaged while being transported If the original package and packing materials are not available find an appropriate box and packing materials and pack the printer and the parts appropriat...

Страница 330: ...nter are also described in Important Safety Instructions See p xii Precautions for Handling the Printer Observe the following precautions so that high quality printing can be maintained constantly IMPORTANT Do not place any heavy objects on the printer trays or covers It may result in damage to the printer Do not leave any cover open longer than required Exposing the printer to direct sunlight or ...

Страница 331: ...read a blanket on the printer to prevent dust from entering the printer turn the power OFF and allow the printer to cool down sufficiently before covering the printer If you do not plan to use the printer for a long period of time unplug the power cord from the AC power outlet Do not use or store the printer in a room where chemicals are used Precaution for Storing the Printer If you do not plan t...

Страница 332: ... Functions 6 9 Removing the Packing Materials 6 9 Moving the Printer 6 15 Installing the Paper Feeders 6 20 Removing the Paper Feeders 6 25 Duplex Unit 6 28 Installation Space 6 29 Parts and Their Functions 6 30 Removing the Packing Materials 6 30 Installing the Duplex Unit 6 32 Removing the Duplex Unit 6 34 Network Board 6 38 Parts and Their Functions 6 40 Installing the Network Board 6 41 Settin...

Страница 333: ...rinter or optional paper feeders The optional 250 sheet universal cassette UC 66A is used by being replaced with the standard cassette of the printer The optional 250 sheet universal cassette UC 66B is used by being replaced with the paper cassette of an optional paper feeder Up to approximately 250 sheets of paper 64 g m2 at sizes of A3 B4 A4 B5 A5 Ledger Legal Letter and Executive can be loaded ...

Страница 334: ...ded in the 250 sheet paper cassette NOTE Up to 3 paper feeders can be installed as shown in the figure The paper feeder is designed for LBP3800 3700 3600 Paper feeders designed for other printers cannot be used For details on the procedure for installing the paper feeder see Paper Feeder on p 6 6 250 sheet Paper Feeder Unit PF 66 250 sheet Paper Feeder Unit PF 66E 250 sheet Paper Feeder Unit PF 66...

Страница 335: ...rinting on standard paper sizes A3 B4 A4 B5 A5 Ledger Legal Letter and Executive IMPORTANT You cannot perform automatic 2 sided printing on heavy paper 91 128 g m2 transparencies labels envelopes and custom paper sizes NOTE The duplex unit is designed for LBP3800 3700 3600 Duplex units designed for other printers cannot be used For details on the procedure for installing the duplex unit see Duplex...

Страница 336: ...rinter to LAN The network board enables the operation of the printer using a Web Browser Remote UI allowing you to specify settings and manage the printer from a computer on the network NOTE For details on Remote UI see Remote UI Guide For details on the procedure for installing the network board see Network Board on p 6 38 Network board Canon NB C1 ERR LNK 100 NB C1 ...

Страница 337: ...orized Canon dealer WARNING Be sure that the power of the printer is turned OFF the power cord is unplugged and all interface cables and power cord are disconnected from the printer before installing the paper feeders Otherwise the power cord or interface cables may be damaged resulting in a fire or electrical shock 250 sheet Paper Feeder Unit PF 66 Cassette protective cover Paper size labels 250 ...

Страница 338: ...ing Paper in Cassette 2 3 or 4 on p 2 27 Paper feed roller Connector Paper feed roller Connector 250 sheet Paper Feeder Unit PF 66 250 sheet Paper Feeder Unit PF 66E Be sure to install the 250 sheet Paper Feeder Unit PF 66 at the top among the optional paper feeder units More than one 250 sheet Paper Feeder Unit PF 66 cannot be installed Also it cannot be installed under the 250 sheet Paper Feeder...

Страница 339: ...Foot Positions 250 sheet Paper Feeder Unit PF 66 250 sheet Paper Feeder Unit PF 66E Dimensions of the Printer 100 The rubber feet are 5 4 mm high and 22 mm x 22 mm wide square 456 166 459 550 641 500 mm Cassette protective cover 1372 650 700 100 100 mm 400 911 1002 1093 Top cover Paper cassette Cassette protective cover 100 5 258 98 3 100 5 258 98 3 420 40 40 420 40 40 mm 100 5 258 98 3 100 5 258 ...

Страница 340: ...m excessive vibrations and shocks during delivery Remove the tapes and packing material before installing the paper feeders on the printer IMPORTANT If there is any packing material remaining inside the paper feeder this may result in misfeeds or damage to the printer when operating the printer Be sure to follow the procedure to remove all the packing materials The removed packing materials are re...

Страница 341: ...ove the tapes securing the paper feeder 3 locations and remove the packing material Remove the packing material by removing the tape that is securing it a and pulling it out vertically b 2 Pull out the paper cassette gently until it stops a a a a then lift up the front portion of the cassette to remove it b b b b a b a b ...

Страница 342: ...ly If you try to pull it out forcefully this may result in damage to the paper cassette 3 Remove the packing material by removing the tape a a a a and pulling out the tab vertically b b b b as shown in the figure 4 Remove the tapes and packing material in the paper cassette Remove the 2 tapes a b a a a ...

Страница 343: ...n the figure b remove the packing material c IMPORTANT The paper cassette is provided with the packing materials Be sure to pull out the paper cassette to remove all the packing materials Do not touch the black rubber pad in the paper cassette If you touch it this may result in misfeeds b b c Rubber pad ...

Страница 344: ...the tapes securing the paper feeder 1 location 2 Pull out the paper cassette gently until it stops a a a a then lift up the front portion of the cassette to remove it b b b b IMPORTANT The paper cassette cannot be pulled out horizontally If you try to pull it out forcefully this may result in damage to the paper cassette a b ...

Страница 345: ...Accessories 6 3 Remove the packing material by removing the tape a a a a and pulling out the tab vertically b b b b as shown in the figure 4 Remove the tapes and packing material in the paper cassette Remove the 2 tapes a b a a a ...

Страница 346: ...oving the Printer When installing the paper feeders in the printer after installing the printer move the printer to an appropriate location temporarily using the following procedure WARNING Be sure that the power is turned OFF the power cord is unplugged and all interface cables are disconnected from the printer before moving the printer Otherwise the power cord or interface cables may be damaged ...

Страница 347: ...t b b b b 2 Remove all interface cables and the power cord NOTE If the optional duplex unit is installed remove it from the printer For details on removing the duplex unit see Removing the Duplex Unit on p 6 34 3 Pull out the paper cassette If it is difficult to pull out the paper cassette lift it slightly and then pull it out horizontally OFF ON a b ...

Страница 348: ... approximately 20 4 kg Main Unit Approx 18 4 kg Toner Cartridge Approx 2 kg without the paper cassette attached The printer must be carried by 2 or more people and care must be taken to avoid hurting your back or other portions of your body when carrying the printer Be sure not to hold the top cover multi purpose tray or any portions other than the grips for moving the printer If you do so you may...

Страница 349: ...er and multi purpose tray are closed before carrying the printer Do not touch the connector on the back of the printer as this may result in printer error When carrying the printer do not touch the top rear cover on the back of the printer If the top rear cover is not set properly an error message such as Duplex Unit is not attached correctly or Toner Cover Open appears in the Printer Status Windo...

Страница 350: ...the hole b 2 Set the top rear cover a a c b b a b 1 While pressing the top rear cover from both sides a and pressing the tabs on the top rear cover b remove the top rear cover c The top rear cover is set snapping Make sure that the tabs are inserted completely into the holes Be sure that the film of the top rear cover does not get creased when installing the top rear cover Film IMPORTANT While pre...

Страница 351: ... do so the paper cassette may drop resulting in personal injuries Do not carry the printer with the paper feeders installed If you do so the paper feeders may drop resulting in personal injuries IMPORTANT When the paper feeders are installed be sure that the paper cassettes above the feeding paper feeder Cassette 2 3 or 4 are set before using it If those paper cassettes are not set paper cannot be...

Страница 352: ...ift up the front portion of the cassette to remove it b IMPORTANT The paper cassette cannot be pulled out horizontally If you try to pull it out forcefully this may result in damage to the paper cassette 2 Place the paper feeders at the installation site When carrying a paper feeder hold the grips on both sides with both hands as shown in the figure a b ...

Страница 353: ...t install the paper feeders on a platform that may warp from the weight of the printer and optional accessories or where the printer is liable to sink such as on a carpet or mat Secure enough space around the paper feeders so that you can install the printer and connect cords such as the power cord and interface cables Paper feed roller Connector Paper feed roller Connector ...

Страница 354: ...in Positioning pin Connector 250 sheet Paper Feeder Unit PF 66 250 sheet Paper Feeder Unit PF 66E Be sure to install the 250 sheet Paper Feeder Unit PF 66 at the top among the optional paper feeder units More than one 250 sheet Paper Feeder Unit PF 66 cannot be installed Also it cannot be installed under the 250 sheet Paper Feeder Unit PF 66E The 250 sheet Paper Feeder Unit PF 66E cannot be instal...

Страница 355: ...tioning pins and connector and gently set it down 5 Hook the cassette protective cover to the projections on the back of the paper feeder a a a a keeping it at angle and then set it down gently b b b b Attach the cassette protective cover securely until it snaps Positioning pin Positioning pin Connector a b a ...

Страница 356: ...AC power outlet NOTE After installing the paper feeders you have to specify the settings for the optional accessories in the Configuration Device Settings sheet in the printer driver You can obtain the status of the optional accessories automatically by clicking the Get Device Status button in the Configuration Device Settings sheet Removing the Paper Feeders Remove the paper feeders using the fol...

Страница 357: ...en moving or servicing the printer remove the paper feeders and paper cassettes 1 Press of the power switch to turn the printer OFF then unplug the power plug from the AC power outlet 2 Remove all interface cables and the power cord NOTE If the optional duplex unit is installed remove it from the printer For details on removing the duplex unit see Removing the Duplex Unit on p 6 34 ...

Страница 358: ...from the top 6 Move the paper feeders 7 Move back the main unit to the installation site 8 Set the paper cassette in the printer NOTE If the optional duplex unit was previously installed reinstall it on the printer For details on the procedure for installing the duplex unit see Installing the Duplex Unit on p 6 32 9 Connect all interface cables and the power cord to the printer 10 Plug the power p...

Страница 359: ... If any item is damaged contact your local authorized Canon dealer WARNING Be sure that the power switch of the printer is turned OFF the power cord is unplugged and all interface cables and power cord are disconnected from the printer before installing the duplex unit Otherwise the power cord or interface cables may be damaged resulting in a fire or electrical shock Duplex Unit DU 66 ...

Страница 360: ...duplex unit installed is indicated in the figure below Dimensions of the Printer Required Peripheral Space Front Surface 524 137 500 344 44 Duplex unit rear cover Duplex unit top cover Duplex unit rear cover 400 mm mm 1414 650 240 700 100 100 796 Paper cassette Top cover Duplex unit rear cover Duplex unit top cover Duplex unit rear cover ...

Страница 361: ...with tapes and packing material to be protected from excessive vibrations and shocks during delivery Remove the tapes and packing material before installing the duplex unit on the printer IMPORTANT If there is any packing material remaining inside the duplex unit this may result in misfeeds or damage to the printer when operating the printer Be sure to follow the procedure to remove all the packin...

Страница 362: ...Duplex Unit 6 31 Optional Accessories 6 1 Remove the tapes that are securing the duplex unit 2 Open the duplex unit top cover a a a a then remove the protective sheet inside the duplex unit b b b b b a ...

Страница 363: ...unplug the power plug from the AC power outlet b b b b 2 Remove all interface cables and the power cord 3 Remove the top rear cover of the printer As shown in the figure while pressing the top rear cover from both sides a and pressing the tabs on the top rear cover b remove the top rear cover c IMPORTANT Keep the top rear cover It is required after the duplex unit is removed OFF ON a b a a c b b ...

Страница 364: ...r the duplex unit is removed 5 Install the duplex unit by matching the positioning pins on the holes on the back of the printer Push the duplex unit firmly until it clicks CAUTION Install the duplex unit gently and carefully to avoid catching your hand between the printer and duplex unit as this may result in personal injuries Positioning pin ...

Страница 365: ...sories automatically by clicking the Get Device Status button in the Configuration Device Settings sheet Removing the Duplex Unit Remove the duplex unit using the following procedure Have ready the top rear cover and bottom rear cover removed from the printer when the duplex unit was installed WARNING Be sure that the power switch of the printer is turned OFF the power cord is unplugged and all in...

Страница 366: ...ove all interface cables and the power cord 3 Open the duplex unit rear cover 4 Push up the lock release levers on each side of the duplex unit then remove the duplex unit 5 Close the duplex unit rear cover 6 Set the top rear cover Fit up the upper left portion of the top rear cover a then insert the projection on the upper right into the hole b a b ...

Страница 367: ...sories 6 While pressing the tabs on the back of the top rear cover c insert the tabs into the holes d to set the top rear cover The top rear cover is set snapping Make sure that the tabs are inserted completely into the holes c c d d ...

Страница 368: ...et the top rear cover properly If the top rear cover is not set properly an error message such as Duplex Unit is not attached correctly or Toner Cover Open appears in the Printer Status Window 7 Set the bottom rear cover of the printer 8 Connect all interface cables and the power cord to the printer 9 Plug the power plug into the AC power outlet Film ...

Страница 369: ...twork Board The network board is to be installed into the expansion slot on the back of the printer By installing the optional network board you can use LBP3600 directly connected to a network ERR LNK 100 NB C1 Network board NB C1 Screws 2 pieces ...

Страница 370: ...andling the network board do not touch anything that generates static electricity such as the computer display Do not touch the network board parts printed wire or connectors with your hands To prevent the network board being affected by static electricity keep it in the protective bag until it is ready to be installed The protective bag is required after the network board is removed So keep the b...

Страница 371: ...onnects to the 10BASE T 100BASE TX LAN cable c c c c 100 Indicator Green Illuminates when the network board is connected to the network with 100BASE TX Does not illuminate when connected with 10BASE T d d d d LNK Indicator Green Illuminates when the network board is connected to the network properly e e e e ERR Indicator Orange Illuminates or blinks when the network board is not working properly f...

Страница 372: ...ze of the screws available 1 Press of the power switch to turn the printer OFF a a a a then unplug the power plug from the AC power outlet b b b b 2 Remove all interface cables and the power cord If there is not enough space to install the network board move the printer so that you can work easier NOTE If the optional duplex unit is installed remove it from the printer For details on removing the ...

Страница 373: ...hey will not get lost 4 Insert the network board into the expansion slot Hold the metal panel portions of the network board and insert the board while aligning it with the guide rail inside the expansion slot IMPORTANT Do not touch the network board parts printed wire or connectors with your hands Insert the printer connector of the network board securely into the connector inside the expansion sl...

Страница 374: ...f the network board according to the network NOTE This network board does not come with a LAN cable A Category 5 twisted pair cable is required for installing the network board and connecting the printer to a network Have a cable or hub available as needed If the optional duplex unit was previously installed reinstall it on the printer For details on the procedure for installing the duplex unit se...

Страница 375: ...and the power cord to the printer 8 Plug the power plug into the AC power outlet 9 Press of the power switch to turn the printer ON IMPORTANT If the printer does not operate properly or an error message appears in the Printer Status Window see Troubleshooting on p 7 1 OFF ON ...

Страница 376: ...stallation Setting the Network Board The default value of the network board is set at Auto detect Usually you do not need to change the setting since the transmission speed and transfer mode of 10BASE T 100BASE TX are detected automatically If the printer cannot communicate with other machines on the network set the DIP switches on the network board Before setting the DIP switches turn the power o...

Страница 377: ...ransmission Speed Transfer Mode and the DIP Switches ERR LNK 100 NB C1 ON OFF OFF 1 2 3 4 DIP switches Shown above is the Auto detect setting default setting Communication speed and Transmission mode of LAN 10BASE T Half duplex ON OFF ON OFF ON OFF ON OFF ON OFF Auto detect default setting 10BASE T Full duplex 100BASE TX Half duplex 100BASE TX Full duplex DIP switch setting OFF 1 2 3 4 OFF 1 2 3 4...

Страница 378: ...ork board parts printed wire or connectors with your hands 4 Set the DIP switches Set the DIP switches with the tip of a ball point pen etc For details on the setting procedure see the table on p 6 46 5 Insert the network board into the expansion slot Hold the metal panel portions of the network board and insert the board while aligning it with the guide rail inside the expansion slot IMPORTANT Do...

Страница 379: ...us Functions of Remote UI in Remote UI Guide and on FTP client see Chapter 5 Appendix in Network Guide Even if none of the above procedures work you can reset the settings for the network board by manipulating the DIP switches using the following procedure A Phillips screwdriver is required to reset the settings for the network board Have one that matches the size of the screws available 1 Press o...

Страница 380: ...rp object such as a mechanical pencil 5 Insert the network board into the expansion slot Hold the metal panel portions of the network board and insert the board while aligning it with the guide rail inside the expansion slot IMPORTANT Do not touch the network board parts printed wire or connectors with your hands Insert the printer connector of the network board securely into the connector inside ...

Страница 381: ...indicator illuminates and then press of the power switch to turn the printer OFF 10 Unplug the power plug from the AC power outlet 11 Remove the power cord 12 Remove the network board then reset the DIP switch 1 to OFF Set the DIP switches with the tip of a ball point pen etc IMPORTANT When setting the DIP switches be careful not to damage the main board with the tip of a ball point pen etc Do not...

Страница 382: ...wer of the printer is turned OFF and all interface cables and power cord are disconnected from the printer before removing the network board Replacing with the power ON or the cables and power cord connected may result in an electrical shock Be careful when handling the network board Touching the edges or a sharp portion of the network board may result in personal injuries 1 Press of the power swi...

Страница 383: ...em where they will not get lost 4 Attach the protective plate to the expansion slot and secure it with the screw NOTE If the optional duplex unit was previously installed reinstall it on the printer For details on the procedure for installing the duplex unit see Installing the Duplex Unit on p 6 32 5 Connect all interface cables and the power cord to the printer 6 Plug the power plug into the AC p...

Страница 384: ...Clearing Paper Jams 7 6 Service Call Display 7 39 Print Quality Problems 7 41 Paper Problems 7 47 When Nothing is Printed 7 49 Installation Problems 7 50 When Uninstallation Fails 7 51 Uninstalling the USB Class Driver 7 53 Problems During Local Installation 7 56 Installation Problems When the Printer is Shared on a Network 7 57 Miscellaneous Problems 7 58 Confirming the Printer Features 7 60 ...

Страница 385: ...Printer Status Window to remedy an error See Printer Status Window on p 4 79 The printer is installed in an adverse environment See the Getting Started Guide Other Problems See Paper Quality Problems on p 7 41 Paper Problems See Paper Problems on p 7 47 The printer is not connected to your computer See Connecting to a Computer on p 1 13 The power cord is not connected The power switch is turned OF...

Страница 386: ...printer the Alarm indicator red illuminates or blinks When the Alarm indicator is on a service error is occurring In this case see Service Call Display on p 7 39 When the Alarm indicator is blinking take measurements according to the direction of the Printer Status Window Paper Alarm Ready ...

Страница 387: ...jam occurs during printing WARNING There are some areas inside the printer which are subject to high voltages When removing jammed paper or when inspecting the inside of the printer do not allow necklaces bracelets or other metal objects to touch the inside of the printer as this may result in burns or electrical shock ...

Страница 388: ...impossible to remove the toner stains When removing a used toner cartridge from the toner cartridge slot remove the cartridge carefully to prevent the toner from scattering and entering your eyes or mouth If the toner enters your eyes or mouth wash them immediately with cold water and immediately consult a physician When removing jammed paper take care not to cut your hands with the edges of the p...

Страница 389: ...n removing jammed paper pull out the paper in the most appropriate direction judging from the position of the paper If paper is torn be sure to find and remove any remaining pieces of paper The error message may remain if jammed paper is removed without opening the top cover In this case open and close the top cover Procedure for Clearing Paper Jams Follow the instructions below to remove the jamm...

Страница 390: ...2 Pull out the paper cassette If it is difficult to pull out the paper cassette lift it slightly and then pull it out horizontally 3 Open the multi purpose tray Holding the grip at the center of the printer open the multi purpose tray ...

Страница 391: ...the multi purpose tray raise the paper retaining lever and then remove any loaded paper 5 Remove any paper jammed in the multi purpose tray IMPORTANT If the jammed paper cannot be removed easily proceed to the next step Do not try to remove it forcefully ...

Страница 392: ...Paper Jams 7 9 Troubleshooting 7 6 Lower the paper retaining lever 7 Open the toner cover Press the green toner cover release button as shown in the figure a a ...

Страница 393: ...0 Troubleshooting 7 Holding the green tab open the toner cover until it clicks b 8 Pull out the toner cartridge partially by holding the grip and then remove the cartridge with both hands as shown in the figure Tab b ...

Страница 394: ... toner cartridge into the protective bag 10 Turn the dial in the toner cover in the direction of the arrow to send any jammed paper 11 Remove any paper jammed in the toner cover Remove the jammed paper gently to prevent unfixed toner from spilling ...

Страница 395: ...er may cause deterioration in print quality 12 Remove any paper jammed in the output tray Remove the jammed paper gently to prevent unfixed toner from spilling IMPORTANT When rear edge of the paper remains in the fixing unit unfixed toner is on the paper Be careful not to spill the toner when removing the paper Toner that spilled inside the printer may stain the inside causing deterioration in pri...

Страница 396: ...r cover 14 Remove any jammed paper then close the delivery guide inner cover Remove the jammed paper gently IMPORTANT When top edge of the paper has been sent into the fixing unit unfixed toner is on the paper Be careful not to spill the toner when removing the paper Toner that spilled inside the printer may stain the inside causing deterioration in print quality ...

Страница 397: ...r of the toner cover close the cover until it clicks 16 Close the multi purpose tray IMPORTANT If you cannot close the multi purpose tray check if the toner cover is completely closed If you try to close the multi purpose tray forcefully this may result in damage to the printer ...

Страница 398: ...ter If a paper jam occurs when feeding paper from an optional paper feeder see Paper Jam in the Paper Feeders on p 7 21 18 Set the paper cassette in the printer If a paper jam occurs when performing 2 sided printing with the optional duplex unit see Paper Jam in the Duplex Unit on p 7 24 ...

Страница 399: ...s opened completely until it stops If any jammed paper is removed when the top cover is not opened completely it may result in damage to the printer 20 If the jammed paper is under the inner guide raise the inner guide a a a a then remove the jammed paper b b b b Raise the inner guide by holding the tab Pull out the jammed paper gently Inner guide a b Tab ...

Страница 400: ... Troubleshooting 7 21 Open the multi purpose tray Holding the grip at the center of the printer open the multi purpose tray 22 Open the toner cover Press the green toner cover release button as shown in the figure a a ...

Страница 401: ...ver until it clicks b 23 Take the toner cartridge out of the protective bag then install it in the printer Align the projections on each side of the toner cartridge with the toner cartridge guides inside the printer Push the toner cartridge completely into the printer Tab b ...

Страница 402: ...is set properly If you close the toner cover forcefully this may cause damage to the printer Do not leave the toner cover open for a long time after installing the toner cartridge 25 Close the multi purpose tray IMPORTANT If you cannot close the multi purpose tray check if the toner cover is completely closed If you try to close the multi purpose tray forcefully this may result in damage to the pr...

Страница 403: ...he paper sources or duplex unit does not disappear from the Printer Status Window even after closing the top cover pieces of torn paper may still be remaining somewhere in the paper feeders or duplex unit In this case see When the Message that Indicates the Paper Jam Does Not Disappear on p 7 29 to remove the jammed paper ...

Страница 404: ...ders Check the paper feeders and remove the jammed paper in the following procedure 1 Perform Step 1 to 17 of Procedure for Clearing Paper Jams See p 7 6 2 Open the rear transport guide Holding the green tab open the transport guide 3 Remove any jammed paper Tab ...

Страница 405: ...Paper Jams 7 22 Troubleshooting 7 4 Open the front transport guide Holding the green tab open the transport guide 5 Remove any jammed paper Tab ...

Страница 406: ...Paper Jams 7 23 Troubleshooting 7 6 Close the front transport guide 7 Close the rear transport guide 8 Remove the paper cassettes one at a time starting at the top and remove any jammed paper ...

Страница 407: ...ccurs when performing 2 sided printing with the optional duplex unit proceed to Paper Jam in the Duplex Unit See p 7 24 Paper Jam in the Duplex Unit Check the duplex unit and remove the jammed paper in the following procedure 1 Perform Step 1 to 18 of Procedure for Clearing Paper Jams See p 7 6 2 Open the duplex unit rear cover Holding the grip at the center of the printer open the duplex unit rea...

Страница 408: ...Paper Jams 7 25 Troubleshooting 7 3 Close the top cover 4 Open the duplex unit top cover ...

Страница 409: ...Paper Jams 7 26 Troubleshooting 7 5 Remove any paper jammed in the duplex unit top cover 6 Close the duplex unit top cover ...

Страница 410: ... If you see the jammed paper inside the duplex unit rear cover simply pull out the paper to remove it 8 If you cannot see the jammed paper inside the duplex unit rear cover rotate the knob a a a a to send and remove the paper b b b b a b ...

Страница 411: ... and firmly and open it completely until it stops If any jammed paper is removed when the top cover is not opened completely it may result in damage to the printer 10 Close the duplex unit rear cover Proceed to Step 19 of Procedure for Clearing Paper Jams See p 7 16 to remove the jammed paper ...

Страница 412: ... cover area and remove the jammed paper in the following procedure IMPORTANT In case you remove jammed paper when the duplex unit is installed in the printer the data being printed will be deleted because you have to turn the power of the printer OFF After removing the jammed paper print again When the duplex unit is not installed 1 Open the top cover IMPORTANT Raise the top cover slowly and firml...

Страница 413: ...Paper Jams 7 30 Troubleshooting 7 5 Remove the bottom rear cover 6 Make sure that there is no paper remaining in the area from the back to the inside of the printer ...

Страница 414: ...ting 7 7 Set the bottom rear cover 8 Set the paper cassette 9 Open the multi purpose tray open the toner cover and then install the toner cartridge 10 Close the toner cover then close the multi purpose tray 11 Close the top cover ...

Страница 415: ... the power cord 3 Open the top cover IMPORTANT Raise the top cover slowly and firmly and open it completely until it stops If any jammed paper is removed when the top cover is not opened completely it may result in damage to the printer 4 Pull out the paper cassette 5 Open the multi purpose tray open the toner cover and then remove the toner cartridge 6 Close the toner cover then close the multi p...

Страница 416: ...Paper Jams 7 33 Troubleshooting 7 7 Open the duplex unit rear cover Holding the grip at the center of the printer open the duplex unit rear cover ...

Страница 417: ...Paper Jams 7 34 Troubleshooting 7 8 Push up the lock release levers on each side of the duplex unit a a a a then remove the duplex unit b b b b b a a ...

Страница 418: ...Paper Jams 7 35 Troubleshooting 7 9 Close the duplex unit rear cover then place the duplex unit on a flat surface as shown in the figure 10 Open the duplex unit bottom cover ...

Страница 419: ...Paper Jams 7 36 Troubleshooting 7 11 Remove any jammed paper 12 Close the duplex unit bottom cover ...

Страница 420: ...ake sure that there is no paper remaining in the area from the back to the inside of the printer 14 To install the duplex unit hold it upright and match the positioning pins on the holes on the back of the printer Push the duplex unit firmly until it clicks Positioning pin ...

Страница 421: ...he toner cover and then install the toner cartridge 17 Close the toner cover then close the multi purpose tray 18 Close the top cover 19 Connect all interface cables and the power cord to the printer 20 Plug the power plug into the AC power outlet 21 Press of the power switch to turn the printer ON ...

Страница 422: ...ce call shown in the figure appears If the service call appears cycle the power of the printer using the following procedure The message may disappear 1 Turn the power OFF wait for 3 seconds or longer then turn it ON again If the message does not reappear the printer is functioning properly If the error message still appears proceed to the next step On Paper Alarm Ready OFF ON OFF ON OFF ON ...

Страница 423: ...Printer Status Window 3 Turn the power of the printer printer OFF a a a a then unplug the power plug from the AC power outlet b b b b 4 Contact your local authorized Canon dealer When contacting your Canon dealer please report the problems and the error code that you have noted OFF ON a b ...

Страница 424: ... printer shake it gently 5 or 6 times to evenly distribute the toner and then reinstall the toner cartridge If this does not solve the problem replace the toner cartridge with a new one See Replacing the Toner Cartridge on p 5 2 Cause 2 The transport roller is dirty Remedy Clean the transport roller See Replacing the Toner Cartridge on p 5 2 Cause 3 The transfer roller or photosensitive drum in th...

Страница 425: ...aper or transparencies and print again See Paper Requirements on p 2 2 Cause 2 The photosensitive drum in the toner cartridge is deteriorating Remedy Replace the toner cartridge with a new one See Replacing the Toner Cartridge on p 5 2 Cause 3 Paper of a wider width was printed just after paper with a width of Letter wide 279 4 mm or narrower was printed continuously Remedy To lower the temperatur...

Страница 426: ...to evenly distribute the toner and then reinstall the toner cartridge If this does not solve the problem replace the toner cartridge with a new one See Replacing the Toner Cartridge on p 5 2 Cause 2 Paper is too moist or too dry Remedy Change the paper with appropriate one and print again See Paper Requirements on p 2 2 Cause 3 The toner cartridge is deteriorating or damaged Remedy Replace the ton...

Страница 427: ...priate scale factor according to the paper size to be used In order to specify the setting for Manual Scaling open the Page Setup sheet Cause 2 The position of the paper is incorrect Remedy Load the paper properly See Printing from a Paper Cassette on p 2 17 Printing from the Multi purpose Tray on p 2 57 Cause 3 A document with no margins was printed Remedy Data cannot be printed within a 5 mm mar...

Страница 428: ...few sheets of paper were fed at a time Remedy Align the paper stack in the paper cassette or multi purpose tray properly and load it again If you are using transparencies or labels fan them thoroughly and load them again See Printing from a Paper Cassette on p 2 17 Printing from the Multi purpose Tray on p 2 57 Cause 3 A problem has occurred inside the printer Remedy 1 If Service Error is displaye...

Страница 429: ...nced Settings dialog box Mode 3 enhances the toner fixing the most and Mode 2 and Mode 1 follow respectively Mode 4 enhances the toner fixing the least Colored lines and text come out faint Cause Thin lines or text are being used Remedy Place a checkmark for Print Colored Text and Lines in Black in the printer driver In order to specify the setting for Print Colored Text and Lines in Black click t...

Страница 430: ... with this printer See Paper Requirements on p 2 2 Cause 2 The Paper Type setting does not match the loaded paper Remedy Select Plain Paper L for Paper Type in the printer driver In order to specify the setting for Paper Type open the Paper Source sheet White dust is attached to the printed transparencies Cause The transparencies were printed just after another type of paper was printed continuous...

Страница 431: ...hen performing 2 sided printing manually Cause This kind of phenomenon may occur when using curled or thin paper Remedy Place a checkmark for Print on the Back of Printed Paper from the Multi purpose Tray in the printer driver In order to specify the setting for Print on the Back of Printed Paper from the Multi purpose Tray click the Finishing Details button in the Finishing sheet and the Advanced...

Страница 432: ...d install it again See Uninstalling the CAPT Software on p 3 77 2 Print a test page Click Print Test Page in the General sheet in the Printer Properties dialog box When the test page is printed correctly Printing can be performed from the CAPT software Check your application to make sure that all the settings are specified properly When the test page cannot be printed Uninstall the CAPT software r...

Страница 433: ...oftware with Uninstaller See Uninstalling the CAPT Software on p 3 77 Uninstall the CAPT software with Uninstaller See Uninstalling the CAPT Software on p 3 77 Install the CAPT software again See Installing the CAPT Software on p 3 4 Install the CAPT software again See Installing the CAPT Software on p 3 4 Uninstall the CAPT software with Uninstaller See Uninstalling the CAPT Software on p 3 77 Un...

Страница 434: ...move Programs For Windows Server 2003 From the Start menu select Control Panel Add or Remove Programs 2 Select the name for this printer in the Add Remove Programs dialog box then click Change Remove For Windows XP Server 2003 Select the name for this printer in the Add or Remove Programs dialog box then click Change Remove For Windows 98 Me Select the name for this printer in the Add Remove Progr...

Страница 435: ...blems 7 52 Troubleshooting 7 3 Select the name for this printer then click Delete 4 Click Yes Uninstallation starts Please wait until it is completed 5 Click Exit The Delete Printer dialog box closes 6 Restart Windows ...

Страница 436: ...wer of the printer is turned ON 2 From the Start menu select Settings Control Panel and then double click Add Remove Programs For Windows Server XP From the Start menu select Control Panel and then click Add or Remove Programs For Windows Server 2003 From the Start menu select Control Panel Add or Remove Programs 3 Make sure that Canon LBP3600 is not displayed in the Add Remove Programs dialog box...

Страница 437: ...ver 2003 4 From the Start menu select Settings Control Panel and then double click the System icon For Windows XP Professional Server 2003 From the Start menu select Control Panel and then click System For Windows XP Home Edition From the Start menu select Control Panel and then click Printers and Other Hardware System 5 Click Hardware Device Manager and then double click Universal Serial Bus cont...

Страница 438: ...ly According to your operating system select and delete any one of Canon LBP3600 Canon CAPT USB Device or Unknown devices Never delete other devices or device drivers If you delete them by mistake Windows may not operate properly If the USB class driver is not installed properly USB Printing Support for Windows 2000 XP Server 2003 Canon CAPT USB Device for Windows Me or Canon LBP3600 for Windows 9...

Страница 439: ...rinter is turned OFF Remedy Turn the power of the printer ON Cause 3 The USB cable is not connected properly Remedy Make sure that the printer and computer are connected with the USB cable properly Cause 4 An inappropriate USB cable is being used Remedy Use a USB cable appropriate for the USB interface environment of this printer The USB interface environment of this printer is USB 2 0 High Speed ...

Страница 440: ... The print server has not been started up Remedy Start up the print server Cause 2 The printer is not specified as a shared printer Remedy Specify the printer as a shared printer in the Printer Properties dialog box Cause 3 The user does not have permission to access the print server or printer Remedy Ask your network administrator to change the user permissions ...

Страница 441: ...t exceeded a certain degree limit by a continuous job especially by printing paper of a narrow width Remedy Wait for a while The printer automatically cools down the fixing unit The printer resumes the paused job after cooling down the fixing unit Cause 2 In case paper of a wider width is printed after paper of a narrower width is printed the printer cools down the fixing unit to keep the print qu...

Страница 442: ...Remedy Close the toner cover If you cannot close the toner cover check if the toner cartridge is set properly If you close the toner cover forcefully this may cause damage to the printer Cause 2 The top rear cover is not set properly Remedy Check if the top rear cover is set properly If the top rear cover is not set properly take the cover out once and then set it again properly See Moving the Pri...

Страница 443: ...s Network Status Print that allows you to confirm the version of the optional network board or TCP IP settings Use these functions when required after installing and connecting the printer for example when you want to check the operation NOTE Printer Status Print is designed to be printed on A4 size paper Load A4 size paper For details on Network Status Print see Chapter 4 Troubleshooting in Netwo...

Страница 444: ...us Print is printed 4 Confirm the contents of the Printer Status Print Printer Status Print prints information as shown in the following figure You can confirm the optional settings of the printer settings for Device Settings in the Options menu in Printer Status Window and the current printer status such as the total number of printouts ...

Страница 445: ...Confirming the Printer Features 7 62 Troubleshooting 7 IMPORTANT This is a sample of Status Print The contents may differ from the Status Print printed by your computer ...

Страница 446: ...chapter describes the printer specifications and index Specifications 8 2 Hardware Specifications 8 2 Software Specifications 8 3 Dimensions of Each Part 8 4 Print Monitor Installer 8 7 Index 8 8 Location of the Serial Number 8 13 ...

Страница 447: ...heets 64 g m2 Cassette 2 Optional A3 B4 A4 B5 A5 Ledger Legal Letter Executive Paper capacity approx 250 sheets 64 g m2 Cassette 3 Optional A3 B4 A4 B5 A5 Ledger Legal Letter Executive Paper capacity approx 250 sheets 64 g m2 Cassette 4 Optional A3 B4 A4 B5 A5 Ledger Legal Letter Executive Paper capacity approx 250 sheets 64 g m2 Multi purpose tray Width 76 2 297 0 mm Length 127 0 431 8 mm Custom ...

Страница 448: ...ss when all the optional accessories are installed However the instantaneous peak on startup shall not be counted Consumables Toner cartridge EP 66 Cartridge Number of printable pages approx 10 000 pages When performing 1 sided printing on A4 size paper at 5 printing ratio Weight Printer unit excluding the toner cartridge approx 19 9 kg Toner cartridge approx 2 0 kg 250 sheet universal cassette UC...

Страница 449: ... the duplex unit installed Paper cassette when extended Multi purpose tray Auxiliary tray Top cover Paper size cover mm Front Surface 355 52 344 130 500 196 456 68 39 456 166 459 550 641 500 mm Cassette protective cover Front Surface Duplex unit rear cover Duplex unit top cover Duplex unit rear cover 524 137 500 344 44 mm Front Surface ...

Страница 450: ...nd duplex unit installed 250 sheet Paper Feeder Unit PF 66 250 sheet Paper Feeder Unit PF 66E mm Front Surface 524 98 39 Cassette protective cover 500 Duplex unit rear cover 459 550 641 Duplex unit top cover Duplex unit rear cover 44 mm 111 136 622 500 mm 88 127 622 500 ...

Страница 451: ...Dimensions of Each Part 8 6 Appendix 8 Duplex Unit DU 66 mm 135 209 326 494 386 190 327 ...

Страница 452: ...nnecting your computer to the printer on a TCP IP network as well as the printing software CAPT For details on Canon CAPT Print Monitor see Network Guide NOTE When the printer driver is installed from CD ROM Setup the port Canon CAPT Print Monitor is created automatically Use Print Monitor Installer as needed when you want to create the port without using CD ROM Setup ...

Страница 453: ...Monitor 8 7 Canon Printer Uninstaller 3 52 CAPT Canon Advanced Printing Technology 3 4 Cleaning Fixing Roller 5 21 Photosensitive Drum 5 26 Printer 5 35 Transfer Roller 5 26 Client 3 57 3 67 Configuration Sheet Windows 98 Me 4 37 Continue Printing with the Multi purpose Tray 4 31 Contrast 4 68 Copies 4 24 Custom Paper Size 4 25 4 52 D Delete Job 4 7 Delivery Guide Inner Cover 1 5 Details 4 28 4 32...

Страница 454: ...allation Windows 2000 3 21 Windows 98 Me 3 5 Windows XP Server 2003 3 36 Installation on Clients 3 67 Installation Problems 7 50 L Label 2 4 2 58 LAN Cable 1 15 Connector 6 40 Laser Beam xv Layout Options 4 26 Left Cover 1 5 LNK Indicator 6 40 Loading Paper Envelope 2 67 Heavy Paper 2 17 2 58 Label 2 58 Multi purpose Tray 2 57 Paper Cassette 2 17 Transparency 2 58 Local Installation 3 57 Local Pri...

Страница 455: ...than Envelopes 2 61 Paper Problems 7 47 Paper Retaining Lever 1 4 Paper Selection 4 30 4 63 Paper Size Abbreviations of Paper Sizes 2 6 Change 2 32 List 2 3 Paper Size Cover 1 5 Paper Size Dial 1 5 Paper Size Guide 1 4 Paper Size Slot 1 5 Paper Source 4 30 Paper Source Paper Capacity 2 11 Selection 2 12 Type 2 10 Paper Source Options 4 19 4 37 Paper Source Sheet 4 29 Paper Type 4 30 Paper Type Lis...

Страница 456: ...esh 4 85 Resolve Error 4 85 Utility Menu 4 84 Printing 4 3 Printing Date 4 54 Printing Operation 4 7 Printing Orientation 4 24 Printing Preferences 4 9 Problems Installation 7 50 Others 7 58 Paper 7 47 Print Quality 7 41 When Nothing is Printed 7 49 Profile Add 4 39 Allow Profile Selection 4 40 Allow Setting Edition 4 40 Comment 4 38 Delete 4 39 Edit 4 39 Export 4 39 Import 4 39 Name 4 38 Profile ...

Страница 457: ... Cover 1 3 Top Rear Cover 1 4 Transfer Roller 1 6 Transparency 2 4 2 58 Troubleshooting Map 7 2 U Uninstallation 3 77 Unusable Paper 2 7 Usable Paper 2 2 USB Cable 1 13 Class Driver 3 9 3 13 3 25 3 40 Connector 1 4 Use Toner Save 4 32 4 66 V Ventilation Slot 1 5 Ventilation Slot Air Intake Slot 1 5 Ventilation Slot Exhaust Slot 1 5 W Watermark 4 25 4 47 When Nothing is Printed 7 49 ...

Страница 458: ...serial number for service or maintenance Be sure not to peel them off Rear View Outside View of the Packaging Box Serial number Serial No XXXXX000000 F188200 CF5 FL2 1096 50 60Hz 6 7A 100V MADE IN XXXX XXXXXXXXXX CAN ON INC Mad e in Chin a Fabr iqué en Chin e CAN ON INC Mad e in Chin a Fabr iqué en Chin e La se rB ea mPrin te r La se rB ea mPr inter L a s e rB e a m P ri n te r LBP3600 9120A006 AA...

Страница 459: ...FA7 5909 000 CANON INC 2004 ...

Отзывы: