3
ENGLISH
7
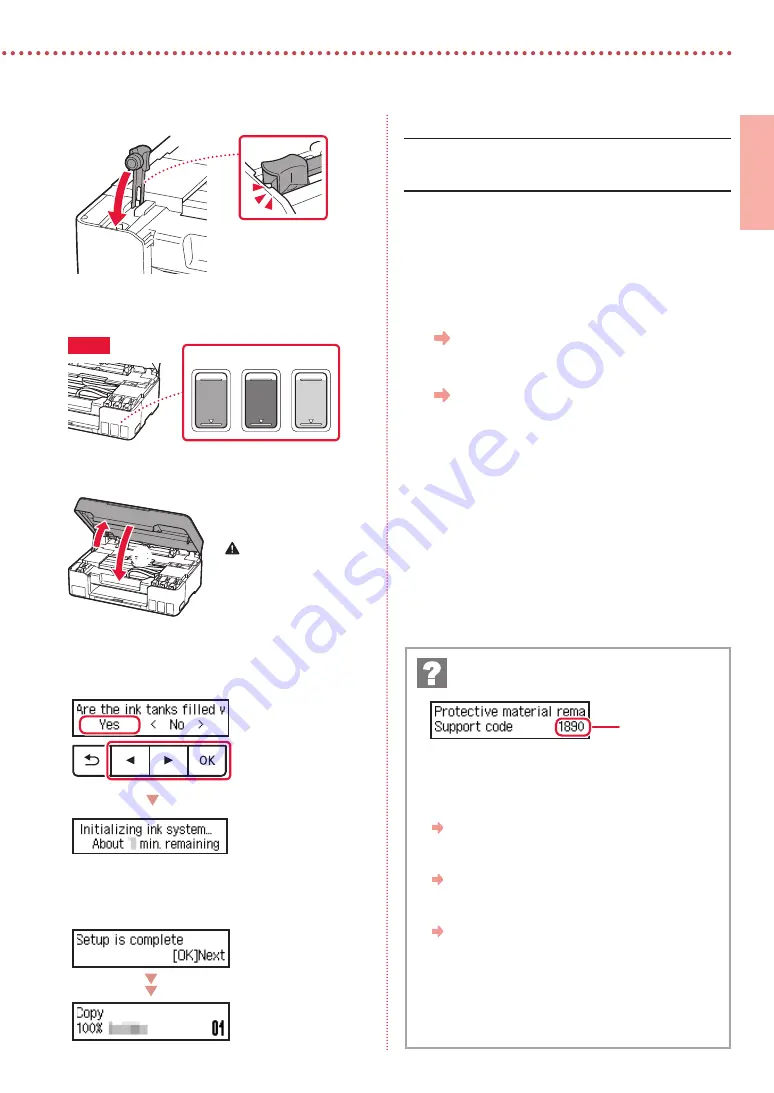
Replace the tank cap
securely
.
8
Repeat steps 2 through 7 to pour all ink into the
corresponding ink tanks on the right.
C
M
Y
Check!
9
Close the scanning unit / cover.
•
Open the scanning unit / cover fully and then close it.
b
a
Caution
Watch your fingers.
10
When the following screen appears, use the
[
and
]
buttons to select
Yes
, and then press the
OK
button.
•
Please wait momentarily until the following screen
appears. Follow the on-screen instructions, and then
press the
OK
button.
If you will use the printer without connecting any other
devices, setup is now complete.
Select the connection method that best matches how you
will use the printer.
•
To use the printer without connecting to any other
devices
Setup is now complete.
•
To use the printer connecting to a computer or
smartphone
Proceed to the next page.
Check the support code, and then follow the
instructions if the displayed code is written below.
•
1890
Protective material remaining.
"2. Removing Packing Materials" on page 1
•
1470
Print heads are not installed correctly.
"3. Installing the Print Heads" on page 1
•
1471
Print heads cannot be recognized.
"3. Installing the Print Heads" on page 1
•
5200
Ink system preparation was not completed successfully.
Press the
ON
button to restart the printer, and then see "5.
Pouring Ink" on page 2.
For all other cases, refer to the
Online Manual
.
If an error message (support code) appears on
the screen
Support code


