background image

88

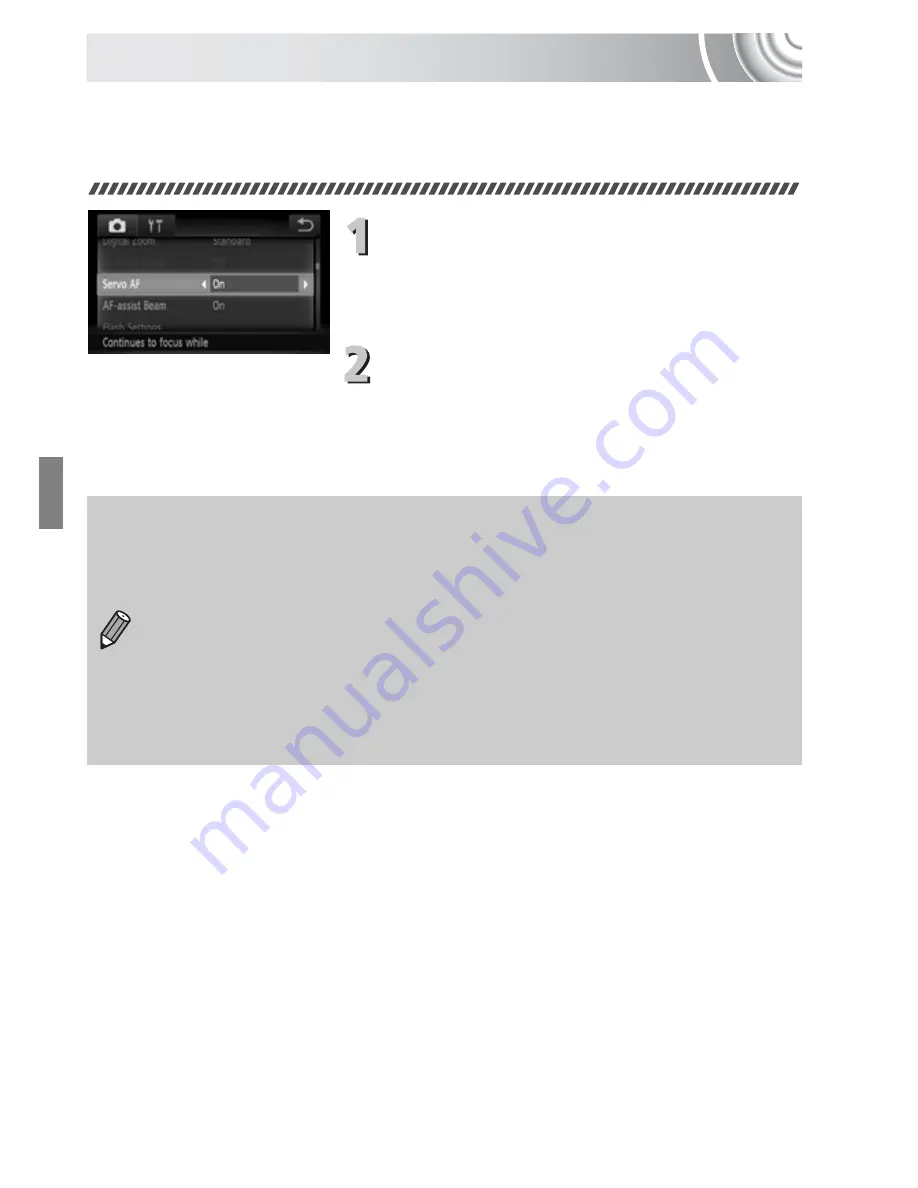
Shooting with Servo AF

While the shutter button is pressed halfway, the focus and exposure will 
continue to adjust, allowing you to take pictures of moving subjects without 
missing a shot.

Choose [Servo AF].

Touch 

ø

, then 

n

 and choose 

the 

4

 tab and touch [Servo AF], then 

touch 

qr

 to choose [On].

Focus.

The focus and exposure will be 
maintained where the blue AF frame 
appears while you press the shutter 
button halfway.

The camera may not be able to focus in some conditions.

If a correct exposure cannot be obtained, the shutter speed and 
aperture value appear in orange. Release your finger from the shutter 
button, then press it again halfway.

In low light conditions, AF frames may not turn blue even after pressing 
the shutter button halfway. In this case, the focus and exposure are 
locked.

The [AF-Point Zoom] option in the 

4

 tab is not available in Servo AF 

mode.

Not available when using Self-Timer 

(pp. 68

80

81)

.

Содержание IXUS 210

Страница 1: ...ENGLISH Make sure you read this guide before using the camera Store this guide safely so that you can use it in the future Camera User Guide...

Страница 2: ...photos Personal Printing Guide Read when you want to connect the camera to a printer sold separately and print Software Guide Read when you want to use the included software A memory card is not inclu...

Страница 3: ...hot for personal use Warranty Limitations For information on your camera s warranty please refer to the Canon Warranty System Booklet supplied with your camera For Canon Customer Support contacts plea...

Страница 4: ...or black and white pictures 79 Add effects and shoot Fish eye Effect Miniature Effect Creative Light Effect 57 58 59 Change the size of picture I want to take recording pixels 73 Take pictures continu...

Страница 5: ...on a computer 34 Quickly search pictures 106 108 Erase pictures 30 120 Protect pictures from accidental erasure 118 Shoot movies 31 View movies 33 102 Easily print pictures 132 Save images to a compu...

Страница 6: ...9 Returning the Camera to Default Settings 50 Low Level Memory Card Formatting 51 Power Saving Function Auto Power Down 52 Shooting in Various Conditions 54 Adding Effects and Shooting 57 Detecting a...

Страница 7: ...98 AE Lock Exposure Shift 100 Other Shooting Functions 101 Playback Functions 102 Editing 103 Quickly Searching Images 106 Viewing Images in Filtered Playback 108 Viewing Slideshows 109 Checking the F...

Страница 8: ...Index 173 Conventions Used in this Guide Icons are used in the text to represent the camera buttons and switches Language that displays on the screen appears inside square brackets Things you should b...

Страница 9: ...d a child s neck could result in asphyxiation Memory card Dangerous if swallowed If this occurs contact a doctor immediately Do not attempt to disassemble or alter any part of the equipment unless exp...

Страница 10: ...as pins or keys to contact the charger terminals or plug This could result in fire or electrical shock Do not play the supplied CD ROM s in any CD player that does not support data CD ROMs Playing the...

Страница 11: ...ce anything such as cloth on top of the battery charger while it is charging Leaving the unit plugged in for a long period of time may cause it to overheat and distort resulting in fire Remove and sto...

Страница 12: ...12...

Страница 13: ...ins how to shoot and view movies and transfer images to a computer Attaching the Strap Holding the Camera Be sure to attach the supplied strap to the camera and wrap it around your wrist when shooting...

Страница 14: ...ations such as switching to the next image or moving the displayed location of magnified images Since the camera uses a pressure sensitive touch panel the camera may not recognize touch operations if...

Страница 15: ...ug and plug the charger into a power outlet For CB 2LYE Plug the power cord into the charger then plug the other end into a power outlet X The charge lamp lights red and charging starts X The charge l...

Страница 16: ...eries continue to discharge naturally even if they are not used How to store the battery for long periods Deplete and remove the battery from the camera Attach the terminal cover and store the battery...

Страница 17: ...is required to use Eye Fi cards in many countries or regions Without approval use of the card is not permitted If it is unclear whether the card has been approved for use in the area please check with...

Страница 18: ...shown until it locks into place with a click Be sure the memory card is oriented correctly Inserting the memory card in the wrong direction could damage the camera Close the cover Close the cover and...

Страница 19: ...wly release it X The memory card will pop up Approximate Number of Shots per Memory Card Values are based on the default settings The number of shots that can be taken will vary depending on camera se...

Страница 20: ...Touch the option you want to set X op will appear Touch op to set a value Complete the setting Touch X Once the date and time have been set the Date Time screen will close Pressing the ON OFF button w...

Страница 21: ...ime settings to be retained for about three weeks after the battery pack has been removed By inserting a charged battery or connecting an AC adapter kit sold separately p 39 the date time battery can...

Страница 22: ...quate caution before formatting the memory card Before formatting an Eye Fi card be sure to install the software contained on the card to a computer Display the menu Touch then touch n Choose Format T...

Страница 23: ...asing data on a memory card merely changes the file management information on the card and does not ensure its contents are completely erased Be careful when transferring or disposing of a memory card...

Страница 24: ...ode Set the mode switch to A When you point the camera toward the subject the camera will make a slight noise as it determines the scene X The icon for the determined scene will appear in the upper le...

Страница 25: ...l play the shutter sound and shoot The flash will automatically fire in low light conditions X The image will appear on the screen for about two seconds You can take a second picture even while an ima...

Страница 26: ...Blue Skies Sunsets Dark Subject Backlit Backlit WhenUsing Tripod People When Moving Non Human Subjects Landscapes Close Subjects Icon Background Color Gray Light Blue Orange Dark Blue Under certain c...

Страница 27: ...zoom lever toward i and hold it until the lens stops moving The camera will be at its maximum telephoto setting and you can shoot within the effective flash range of approximately 90 cm 2 0 m 3 0 6 6...

Страница 28: ...s in the order they were taken from oldest to newest If you touch the left edge of the screen inside frame on the screen at the left q will appear and images will display in the reverse order they wer...

Страница 29: ...ound your wrist and hold the camera firmly to avoid dropping it Depending on the way you tap the camera images may not switch Switch to next image Switch to previous image Tilt the camera to switch im...

Страница 30: ...on X The last image you took will appear Choose an image to erase Drag horizontally across the screen to choose an image Erase the image Drag across the screen as shown X Erase will appear Touch Erase...

Страница 31: ...warm This is not a malfunction Enter E mode Set the mode switch to E Compose the shot Moving the zoom lever toward i will zoom in on your subject making it appear larger Moving the lever toward j will...

Страница 32: ...ly again X The camera will beep once and stop shooting the movie X The movie will record to the memory card X Shooting will automatically stop when the memory card fills Estimated Shooting Times Shoot...

Страница 33: ...ol panel will appear on the screen Drag vertically up or down the screen during playback to adjust the volume X After the movie finishes appears What if you can t play back movies on a computer Instal...

Страница 34: ...on computers with built in USB ports CPU Viewing images Pentium 1 3 GHz or higher Viewing movies Core2 Duo 1 66 GHz or higher RAM Windows 7 64 bit 2 GB or more Windows 7 32 bit Windows Vista 1 GB or...

Страница 35: ...allation Click Easy Installation and follow the on screen instructions to proceed with the installation If the User Account Control window appears follow the on screen instructions to proceed When the...

Страница 36: ...he user guide provided with the computer Turn on the camera Press the 1 button to turn on the camera Open CameraWindow Windows Click Downloads Images From Canon Camera using Canon CameraWindow X Camer...

Страница 37: ...k bar In the screen that appears click the link to modify the program Click Downloads Images From Canon Camera using Canon CameraWindow then click OK Double click You can transfer images without insta...

Страница 38: ...Cover Battery Charger CB 2LY CB 2LYE Card Reader Windows Macintosh Memory Card Inkjet Printers Compact Photo Printers SELPHY series Canon Brand PictBridge Compliant Printers TV Video Also available f...

Страница 39: ...LY CB 2LYE An adapter for charging Battery Pack NB 6L Battery Pack NB 6L Rechargeable lithium ion battery Other Accessories HDMI Cable HTC 100 Use this cable to connect the camera to the HDMI terminal...

Страница 40: ...Canon accessories is recommended This product is designed to achieve excellent performance when used with genuine Canon accessories Canon shall not be liable for any damage to this product and or acc...

Страница 41: ...41 2 Learning More This chapter explains the parts of the camera and what appears on the screen as well as the basic operating instructions...

Страница 42: ...I Terminal p 116 Strap Mount p 13 A V OUT Audio Video Output DIGITAL Terminal pp 36 114 132 Lens Lamp pp 60 62 68 145 Flash pp 64 71 Speaker Screen LCD Monitor p 43 Tripod Socket DC Coupler Terminal C...

Страница 43: ...Information Display Touching while in Playback mode will hide all image information and icons but you can still switch images pp 28 29 Touching the center of the screen will restore the original displ...

Страница 44: ...is called the histogram The histogram shows the distribution of brightness in an image horizontally and the amount of brightness vertically When the graph approaches the right side the image is brigh...

Страница 45: ...hoose an option to set Drag vertically up or down the menu on the right or touch an item to choose it You can also choose menu items by dragging on the screen outside of the menu Touch the menu item y...

Страница 46: ...enu items differ depending on the mode pp 166 169 Display the menu Touch then touch n Choose a tab Touch a tab or move the zoom lever p 42 left or right to choose a tab Touch a menu item to choose it...

Страница 47: ...option For items that display qr to the left and right touch qr to change settings For items that display a bar touch the spot on the bar where you want to make the setting Complete the setting Touch...

Страница 48: ...Drag vertically up or down the screen to choose Mute then touch qr to choose On Adjusting the Volume Display the menu Touch then touch n Choose Volume Touch the 3 tab Drag vertically up or down the sc...

Страница 49: ...the screen brightness Display the menu Touch then touch n Choose LCD Brightness Touch the 3 tab Drag vertically up or down the screen to choose LCD Brightness Change the brightness Touch the point on...

Страница 50: ...lly up or down the screen to touch Reset All Reset the settings Touch OK X The camera will return to default settings Are there functions that cannot be reset The Date Time p 143 in the 3 tab Language...

Страница 51: ...K X A confirmation screen will appear Touch OK X Low level formatting starts X When low level formatting ends Memory card formatting complete will appear Touch OK About low level formatting If the Mem...

Страница 52: ...ed After about 2 more minutes the lens will retract and the power will turn off When the screen has turned off but the lens has not yet retracted pressing the shutter button halfway p 23 turns on the...

Страница 53: ...Shooting mode that matches a particular set of conditions the camera will automatically select any necessary settings All you need do is press the shutter button to take an optimized picture This cha...

Страница 54: ...e desired shooting mode Touch G Touch qr or drag quickly across the screen horizontally to display other scene modes Choose the desired shooting mode X A summary of the chosen shooting mode will appea...

Страница 55: ...ets without missing photo opportunities Take indoor shots Indoor Lets you shoot indoors with natural colors Take shots in low light conditions Low Light Depending on the scene the ISO speed will be se...

Страница 56: ...t mode attach the camera to a tripod to prevent the camera from moving and blurring the image Additionally you should set IS Mode to Off p 147 In F V or mode images may appear coarse because the ISO...

Страница 57: ...shoot with the distorting effect of a fish eye lens Choose Choose in Steps 1 2 on p 54 Choose an effect Touch X Effect Level will appear on the screen Touch qr to choose an option X You can check the...

Страница 58: ...s 1 2 on p 54 X A white frame the area that will not be blurred appears on the screen Set the frame position and size To change the frame position touch the screen To change the frame size touch to ch...

Страница 59: ...use the flash when shooting Choose Choose in Steps 1 2 on p 54 Choose a shape and size Touch X Select Effect will appear on the screen Touch the desired shape Touch op to change the size Touch Shoot S...

Страница 60: ...uch as when shooting moving points of light the chosen shape may not show and the brightness may be different than expected Smile detection On Off Number of shots switching modes pp 61 62 What if a sm...

Страница 61: ...alfway and confirm that a green frame appears around the face of the person who will wink Press the shutter button fully X The camera will enter shooting stand by and Wink to take picture will appear...

Страница 62: ...hite frames appear on other faces Press the shutter button fully X The camera will enter shooting stand by and Look straight at camera to start count down will appear on the screen X The lamp will bli...

Страница 63: ...and two seconds later the shutter will release To cancel shooting with the timer after countdown has started touch the screen Changing the number of shots After touching in the screen in Step 1 touch...

Страница 64: ...e set will appear on the screen To turn the flash back on follow the steps above to return the setting to What if a flashing appears When you press the shutter button halfway in low light conditions w...

Страница 65: ...st possible zoom factor without image deterioration has been reached and the zoom factor will appear when you release the zoom lever Move it toward i again X The digital zoom will zoom in even further...

Страница 66: ...choose Digital Zoom Accept the setting Touch qr to choose a zoom factor Touching restores the settings screen X The view will be enlarged and the zoom factor will appear on the screen To return to sta...

Страница 67: ...s the settings screen X Once set DATE will appear on the screen Shoot X The shooting date or time will be recorded in the image s lower right corner To restore to the original setting choose Off in St...

Страница 68: ...the screen Shoot Press the shutter button halfway to focus on the subject then press it fully X When the self timer starts the lamp blinks and the self timer sound plays X Two seconds before the shutt...

Страница 69: ...progressively advance your shooting skills This chapter assumes that the mode switch is set to 4 and the camera is in G mode G stands for Program AE Before attempting to shoot using a function explai...

Страница 70: ...2 on p 54 Adjust the settings according to your purposes pp 71 81 Shoot What if the shutter speed and aperture value appear in orange If a correct exposure cannot be obtained when pressing the shutter...

Страница 71: ...bar where you want to make a setting or drag horizontally to adjust the brightness then touch X The exposure compensation amount will appear on the screen Turning the Flash On You can make the flash f...

Страница 72: ...on you want to set Touch the option once more to complete the setting When the zoom lever is moved toward j and held until the lens stops moving which is the maximum wide angle setting of the lens Sho...

Страница 73: ...u chose again to complete the setting X The setting you chose will appear on the screen Changing the Compression Ratio Image Quality You can choose from the following two levels of compression ratio i...

Страница 74: ...ts For printing on wide size paper Recording Pixels Compression Ratio Single Image Data Size Approx KB Number of Recordable Images 4 GB 16 GB Large 14M 4320 x 3240 3597 1058 4334 1719 2194 8985 Medium...

Страница 75: ...ine weather conditions outdoor shooting Cloudy Twilight Nightscapes Dark interiors Changing the ISO speed Lowering the ISO speed results in sharper images but there may be an increased chance of image...

Страница 76: ...ppear Touch the item you chose again to complete the setting X The setting you chose will appear on the screen Auto Automatically sets the optimal white balance for the shooting conditions Day Light F...

Страница 77: ...te balance under the light source of the actual scene you will shoot In Step 2 on p 76 choose Make sure the entire screen is filled with a plain white colored subject then touch on the right X The tin...

Страница 78: ...ong as you hold the shutter button down the camera will shoot successive images Cannot be used with the self timer pp 68 80 81 or pp 60 62 Continuous shooting speed increases in p 55 For a certain int...

Страница 79: ...a vivid impression Neutral Tones down the contrast and color saturation for neutral hues Sepia Sepia tones B W Black and white Positive Film Combines the effects of Vivid Red Vivid Green and Vivid Blu...

Страница 80: ...effect gets the more to the left the weaker lighter fairer skin tone the effect gets Touch to make the setting Shooting Using the Two Second Self Timer The camera will shoot approximately two seconds...

Страница 81: ...ot What if the number of shots is set to two or more shots Exposure and white balance settings are set with the first shot When you set the time delay for more than 2 seconds the self timer lamp and s...

Страница 82: ...and exposure are locked You can now recompose and shoot This is called Focus Lock Focus Center the subject you want in focus and press the shutter button halfway Confirm that the AF Frame is green Rec...

Страница 83: ...at the mode switch is set to 4 and the camera is in G mode The sections Shooting Long Exposures p 94 and Changing the Color and Shooting p 95 assume you have set the mode switch to 4 and chosen the co...

Страница 84: ...ge When the shutter button is pressed halfway up to 9 green frames will appear on faces on which the camera focuses If a face is not detected when Servo AF is set to On the AF frame will appear in the...

Страница 85: ...ll appear magnified X In Fixed frame p 85 the contents of the AF frame will appear magnified You can reduce the AF frame size Touch then n to choose the 4 tab then touch AF Frame Size and choose Small...

Страница 86: ...ocus even if the subject moves If the camera does not detect the subject however will blink for a few seconds and then disappear The camera will return to the normal shooting screen if it cannot detec...

Страница 87: ...n and touch the screen again AF lock will cancel and will disappear Compose the scene and shoot The camera may not be able to track the subject if the subject is too small moves too quickly or if the...

Страница 88: ...AF frame appears while you press the shutter button halfway The camera may not be able to focus in some conditions If a correct exposure cannot be obtained the shutter speed and aperture value appear...

Страница 89: ...omplete the setting X The setting will appear on the screen Evaluative Suitable for standard shooting conditions including back lit shots Automatically adjusts the exposure to match the shooting condi...

Страница 90: ...nd touch the screen again will cancel and will disappear Compose the scene and shoot Shooting with the FE Lock Just as with the AE lock above you can lock the exposure for shooting with the flash FE s...

Страница 91: ...when shooting Also when the overall image is lacking in contrast the camera will automatically correct the image for a sharper impression when shooting Choose i Contrast Touch then n to choose the 4 t...

Страница 92: ...s the possibility that people have their eyes shut appears Choose Blink Detection Touch then n to choose the 4 tab Touch Blink Detection then touch qr to choose On Shoot X When a person with shut eyes...

Страница 93: ...o brighten the background that the light from the flash cannot reach Choose Touch then touch Touch again to make the setting X Once set will appear on the screen Shoot Even if the flash fires ensure t...

Страница 94: ...firm the exposure When you press the shutter button halfway the exposure for the chosen shutter speed will appear on the screen The brightness of the image may differ from the brightness of the screen...

Страница 95: ...and the Color Accent image will both display The color for default settings is green Specify the color Position the center frame so it is filled with the color you want and touch the frame at the bot...

Страница 96: ...t the bottom left of the screen X The specified color will be recorded Specify the target color Position the center frame so it is filled with the color you want and touch the frame at the bottom righ...

Страница 97: ...This chapter provides more advanced information than the Shooting Movies and Viewing Movies sections of Chapter 1 This chapter assumes that the mode switch is set to E Press the 1 button to enter Pla...

Страница 98: ...mage quality settings Choose the image quality setting Touch then drag vertically up or down the menu to the left to choose E Standard Normal mode Color Accent These Shooting modes let you change all...

Страница 99: ...number of recording pixels is smaller the image quality will appear coarse when compared with but you can record three times the length Image Quality Shooting Time 4 GB 16 GB 21 min 23 sec 1 hr 27 mi...

Страница 100: ...of 2 before shooting Focus Press the shutter button halfway to focus Lock the exposure After releasing the shutter button touch b to lock the exposure The exposure shift bar appears Touch to release t...

Страница 101: ...or you should adjust the optical zoom to the maximum before shooting The sound of the zoom will be recorded Using the Self Timer p 68 Changing the Focus Range Macro Infinity p 72 Adjusting the White B...

Страница 102: ...TV p 116 Protecting Images p 118 Erasing All Images p 120 Organizing Images by Category My Category p 122 Tagging Images as Favorites p 123 Rotating Images p 125 Summary of Movie Control Panel in Vie...

Страница 103: ...the screen Even if you touch when it appears only the portion from the nearest to the left will be trimmed when Cut Beginning is chosen Only the portion from the nearest to the right will be trimmed...

Страница 104: ...chosen in Step 4 the unedited movie is overwritten with the edited movie erasing the original When there is not enough space left on the memory card only Overwrite can be chosen If the battery is depl...

Страница 105: ...s the 1 button to enter Playback mode before operating the camera It may not be possible to play back or edit images that have been edited on a computer had their file name changed or have been taken...

Страница 106: ...ce the number of images Switch the displayed images If you drag vertically up or down the screen images will switch with the movement of your finger Choose an image Touching an image will display that...

Страница 107: ...by dragging horizontally across the screen Continuously dragging quickly across the screen will display the screen on the left Scroll Display In this display drag horizontally across the screen to cho...

Страница 108: ...ose again to complete the setting View the filtered images Touch the desired filter then touch it again except for X Filtered playback starts and a yellow frame appears If you drag horizontally across...

Страница 109: ...ouch the screen to stop the slideshow Filtered Playback You can filter images during a slideshow p 109 so that only certain images will play back You can also use the following functions in filtered p...

Страница 110: ...m six transition effects when switching between images Choose Slideshow Touch then n to choose the 1 tab and touch Slideshow Make the setting Touch an item then touch qr to make the setting If you tou...

Страница 111: ...The area within the orange frame appears magnified Switch frames Move the zoom lever toward k once X The screen shown to the left will appear Touch to move to a different frame when multiple frames ap...

Страница 112: ...original size You can also tap the side of the camera gently p 29 to switch between images at the same zoom factor Active Display Changing Image Transitions You can choose from three transition effec...

Страница 113: ...gging across the screen as shown you can also call up the functions registered to and You can change the functions registered to Touch Actions Changing Touch Actions Registered Functions You can regis...

Страница 114: ...fully into the video input terminals as shown in the illustration Favorites Tag or untag images as favorites Next Favorite Switch to the next image tagged as a favorite Previous Favorite Switch to th...

Страница 115: ...he images don t properly display on the TV Images will not display correctly if the camera s video output setting NTSC PAL does not match the TV system Touch then n to choose the 3 tab then choose Vid...

Страница 116: ...MI terminal Fully insert the cable plug into the TV s HDMI terminal Follow Steps 3 and 4 on p 114 to display the images You can only perform the following operations when connected to a high definitio...

Страница 117: ...ose an image Touch the image you want to view next X The image you chose will display in the center of the screen and the next four possible choices will appear If you touch the image in the center of...

Страница 118: ...unlock an image touch again then drag vertically up or down the screen to choose Using the Menu Choose Protect Touch then n to choose the 1 tab and touch Protect Choose a selection method Touch a sele...

Страница 119: ...age and disappears To choose multiple images repeat the above operation Protect If you touch a confirmation screen will appear Touch OK X The images will be protected Choose All Images Choose All Imag...

Страница 120: ...a selection method Touch a selection method Touch to return to the menu screen Choosing Images Individually Choose Select Follow Step 2 above touch Select Drag across the screen horizontally to choos...

Страница 121: ...121 Erasing All Images Choose All Images Choose All Images Follow Step 2 on p 120 touch All Images Erase Touch OK...

Страница 122: ...ag horizontally across the screen to choose an image Touch the desired category X The chosen category will appear in orange Touch the category again to cancel and it will turn white To choose multiple...

Страница 123: ...rag as shown X When you view a tagged image in Detailed Information Display will appear on the screen Drag again to untag the image If you use Windows 7 or Windows Vista and transfer tagged images to...

Страница 124: ...again then drag vertically up or down the menu to the left to choose Using the Menu Choose Favorites Touch then n to choose the 1 tab and touch Favorites Choose images Drag across the screen horizont...

Страница 125: ...or down the menu to the left to choose Rotate the image Touch or and the image will rotate in the chosen direction in 90 increments Touch to accept the setting Movies with a resolution of cannot be ro...

Страница 126: ...een to choose an image then touch OK Choose an image size Touch or then touch OK X The Save new image screen will appear Save the new image Touch OK X The image will be saved as a new file Display the...

Страница 127: ...ower right If you move the zoom lever touch or the image at the bottom right of the screen you can change the frame size If you drag on the image at the upper left or the image at the bottom right you...

Страница 128: ...options Touch OK X The Save new image screen will appear Save as a new image and display Follow Steps 4 and 5 on p 126 Images with a recording pixel setting of or p 74 or images resized as cannot be...

Страница 129: ...le Choose i Contrast Touch then n to choose the 1 tab and touch i Contrast Choose an image Drag horizontally across the screen to choose an image then touch OK Choose a menu item Touch qr to choose an...

Страница 130: ...detected by the camera will be corrected and a frame will appear around the corrected portion You can magnify or reduce the size of the image using the procedures in Magnifying Images p 112 Save as a...

Страница 131: ...plains how to choose images for printing and print using a PictBridge compliant printer sold separately p 40 Please also refer to the Personal Printing Guide SELPHY series Inkjet Printers Canon Brand...

Страница 132: ...nter For connection details refer to the user guide provided with the printer Turn on the printer Turn on the camera Press the 1 button to turn on the camera Choose an image to print Drag horizontally...

Страница 133: ...the Print List Choose an image Drag horizontally across the screen to choose an image Choose c videos will be excluded Touch then drag vertically up or down the menu at the left to choose 2 Print lis...

Страница 134: ...pecify settings such as the number of copies so that they can be printed together or processed at a photo developer service These selection methods comply with the DPOF Digital Print Order Format stan...

Страница 135: ...standard and index formats Date On Prints the shooting date Off File No On Prints the file number Off Clear DPOF data On Removes all print settings after printing Off Some printers or photo developer...

Страница 136: ...frame again will disappear Touch to complete the setting and return to the menu screen Set All Images to Print Once Choose Select All Images Touch Select All Images in Step 1 on p 135 Make print setti...

Страница 137: ...can customize various settings to suit your shooting preferences The first part of this chapter explains convenient and commonly used functions The latter part explains how to change shooting and pla...

Страница 138: ...s Touch Sound Options Drag vertically up or down the screen to choose an option then touch qr to choose a setting Turning off Hints Tips You can turn off this function However hints and tips for menus...

Страница 139: ...d set the camera to Playback mode you can register recorded images Touch Start up Image Touch 2 then touch Drag horizontally across the screen to choose an image then touch OK X The Register screen wi...

Страница 140: ...s camera sounds and start up images to the camera using the included software Refer to the Software Guide for details Continuous Even if you shoot using a new memory card the file numbers are assigned...

Страница 141: ...minute after pressing the 1 button when in a Shooting mode p 28 If you want the lens to retract immediately when you press the 1 button set the retract time to 0 sec Choose Lens Retract then touch qr...

Страница 142: ...nded to choose less than 1 min Using the World Clock When traveling abroad you can record images with local dates and times simply by switching the time zone setting If you pre register the destinatio...

Страница 143: ...in Step 1 Touch Choose the world time zone Touch World then touch X will appear in the Time Zone or shooting screen p 162 Changing the Date and Time You can change the date and time settings Touch Dat...

Страница 144: ...alibrate the touch panel accurately Touch Calibration Use the toggle attached to the strap to touch that appears on the screen p 14 Follow the on screen instructions and touch the screen four times in...

Страница 145: ...AF assist Beam then touch qr to choose Off Turning Off the Red Eye Reduction Function The red eye reduction lamp lights in order to reduce the red eye effect that occurs when shooting in dark conditi...

Страница 146: ...can change the way the image displays right after shooting Choose Review Info then touch qr to choose an option 2 10 sec Displays images for the set time Hold The image displays until you press the s...

Страница 147: ...rid Lines will not be recorded on the image The gray areas displayed with 3 2 Guide are the areas that will not be printed The actual image recorded will include the portion in the gray areas Continuo...

Страница 148: ...order Drag the icon you want to move to the desired location X The icon will move The icon you are dragging will switch places with any icon that is already in the spot you are moving to Exit Touch E...

Страница 149: ...isplay pp 29 112 so that gently tapping the side of the camera or tilting the camera does not cause images to switch Choose Active Display then touch qr to choose Off Choosing the Image that First Dis...

Страница 150: ...150...

Страница 151: ...ation This chapter introduces how to use the AC adapter kit and Eye Fi card both sold separately troubleshooting tips and contains lists of functions and items that appear on the screen The index also...

Страница 152: ...ick Close the cover p 18 Plug the cord into the coupler Open the cover and fully insert the plug into the coupler Connect the power cord Connect the power cord to the compact power adapter then plug t...

Страница 153: ...Disable p 154 the Eye Fi card may transmit radio waves Be sure to remove the Eye Fi card from the camera before entering areas that prevent unauthorized transmission of radio waves such as hospitals a...

Страница 154: ...bling Eye Fi Transfer You can set the card to disable Eye Fi transfer Choose Eye Fi trans then Disable Touch then n to choose the 3 tab and touch Eye Fi Settings Choose Eye Fi trans then touch qr to c...

Страница 155: ...minal cover on Lens will not retract Do not open the memory card battery cover while the power is on After closing the memory card battery cover turn the power on then back off p 18 TV output Image is...

Страница 156: ...ocus Subject is too dark Set the flash to h p 71 Adjust the brightness with exposure compensation p 71 Adjust the image with i Contrast pp 91 129 Use the AE lock or spot metering to shoot pp 89 90 Sub...

Страница 157: ...settings for shooting functions or FUNC menu The items in which settings can be made differ depending on the shooting mode pp 164 167 Shooting movies Correct shooting time does not display or stops F...

Страница 158: ...ations do not work as expected Since the camera uses a pressure sensitive touch panel try touching the screen slightly harder or use the toggle attached to the strap p 14 Calibrate the touch panel p 1...

Страница 159: ...is not enough free space on the memory card to shoot pp 24 53 69 83 or edit images pp 126 130 Erase the images pp 28 105 to open space for new images or insert an empty memory card p 18 Touch AF unav...

Страница 160: ...transferred to the computer or printed due to the large amount of images approx 1000 stored on the memory card Use a commercially available USB card reader to transfer the images Insert the memory car...

Страница 161: ...wipe the camera or screen Use a commercially available blower brush to remove dust from the lens For stubborn dirt contact the closest Canon Customer Support Help Desk as listed in your Warranty Syste...

Страница 162: ...ce p 76 My Colors p 79 i Contrast p 91 Drive Mode p 78 Exposure Compensation p 71 Camera Shake Warning p 156 Battery Charge Indicator p 16 Compression Image Quality p 73 Recording Pixels pp 73 99 Stil...

Страница 163: ...ity p 73 Movies Recording Pixels p 73 Eye Fi Transfer Complete p 153 Battery Charge Indicator p 16 Metering Modes p 89 Folder Number File Number p 140 Displayed image number Total number of images Shu...

Страница 164: ...d 3 Fixed to Shooting modes Function A 4 G I F V Exposure Compensation p 71 Exposure Shift p 100 Flash pp 64 71 94 3 1 2 Self Timer pp 68 80 81 Touch AF p 86 AF Lock p 87 AE Lock pp 90 100 FE Lock p 9...

Страница 165: ...165 Functions Available in Each Shooting Mode Selectable or set automatically Not selectable 4 E T Y w O P t E z 2 2 FUNC Menu 3...

Страница 166: ...ndard Off Digital Tele converter 1 7x 2 1x AF Point Zoom p 85 On Off Servo AF p 88 On Off 3 AF assist Beam p 145 On Off Flash Settings pp 92 145 Red Eye Corr On Off Red Eye Lamp On Off i Contrast p 91...

Страница 167: ...167 Menus Selectable or set automatically Not selectable 4 E T Y w O P t E z 1 1 2 4 5...

Страница 168: ...y card erasing all data pp 22 51 File Numbering Continuous Auto Reset p 140 Create Folder Monthly Daily p 141 Lens Retract 1 min 0 sec p 141 Power Saving Auto Power Down On Off Display Off 10 20 or 30...

Страница 169: ...portions of still images p 127 Resize Resizes and saves still images p 126 My Colors Adjusts colors in still images p 122 Active Display On Off p 149 Scroll Display On Off p 107 Resume Last seen Last...

Страница 170: ...or Spot Exposure Compensation 2 stops in 1 3 stop increments ISO speed Auto ISO 80 100 200 400 800 1600 Standard Output Sensitivity Recommended Exposure Index White Balance Auto Day Light Cloudy Tung...

Страница 171: ...yback Slideshow Active Display Scroll Display Smart Shuffle Touch Action Editing Function Erase Protect My Category Resize My Colors i Contrast Trimming Favorites Rotate Red Eye Correction Direct Prin...

Страница 172: ...x 21 g 0 74 oz Battery Charger CB 2LY CB 2LYE Rated input 100 240 V AC 50 60 Hz 0 085 A 100 V 0 05 A 240 V Rated output 4 2 V DC 0 7 A Charge time Approx 1 hour 55 min Operating temperature 0 40 C 32...

Страница 173: ...142 Date and Time J Date Time Default Settings 50 Deleting J Erasing DIGITAL CAMERA Solution Disk 2 Digital Tele Converter 66 Digital Zoom 65 Display Language 21 Display Overlay 147 Double Tap 14 DPOF...

Страница 174: ...e Mode 55 L Lamp 42 68 145 Low Light Scene Mode 55 M Macro 72 Magnified Display 112 Manual White Balance 76 Memory Card J Card Memory Cards 17 Available Shots 19 74 Formatting 22 51 Menu Basic Operati...

Страница 175: ...ime J Date Time Shutter Button 23 Slideshow 109 Smart Shuffle 117 Smart Shutter Scene Mode Face Self Timer 62 Smile 60 Wink Self Timer 61 Snow Scene Mode 56 Software DIGITAL CAMERA Solution Disk 2 Sof...

Страница 176: ...trations and screenshots in this guide may differ slightly from the actual equipment Every effort has been made to ensure that the information contained in this guide is accurate and complete However...

Отзывы: