
background image

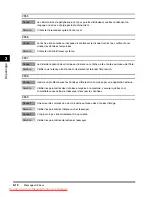
Feuille de contrôle périodique du disjoncteur

4-6

Anne

x

e

4

Feuille de contrôle périodique du disjoncteur

Copier cette page pour utilisation ultérieure, et la conserver avec soin près de la machine afin 
de répertorier les contrôles périodiques du disjoncteur.

Inspection régulière du disjoncteur

Suivre la procédure décrite à la section Contrôle périodique du disjoncteur, p. xxiii, une ou deux fois par 
mois.

Utilisation de la feuille de contrôle

Indiquer la date du contrôle et le nom du contrôleur.
Si le contrôle réussit, cocher la case dans la colonne OK.
Sinon, contacter le revendeur agréé Canon local. (De plus, cocher la case de la colonne NG (No Good, 
ou incorrect).)

Date du

contrôle

Date du

contrôle

Contrôleur

Contrôleur

RESULTAT

RESULTAT

OK

NG

OK

NG

Downloaded from ManualsPrinter.com Manuals

Содержание iR3025

Страница 1: ...sance de son contenu le garder à portée de main à titre de référence Anwenderhandbuch Bitte lesen Sie dieses Handbuch zuerst Bitte lesen Sie dieses Handbuch bevor Sie mit dem Produkt arbeiten Nachdem Sie das Handbuch gelesen haben bewahren Sie es zum Nachschlagen an einem sicheren Ort auf Guida per l utente Leggere questa guida Leggere questa guida prima di iniziare ad utilizzare il prodotto Dopo ...

Страница 2: ...Downloaded from ManualsPrinter com Manuals ...

Страница 3: ...iR3045 iR3045N iR3035 iR3035N iR3025 iR3025N User s Guide Downloaded from ManualsPrinter com Manuals ...

Страница 4: ...earn the various functions of the machine Tutorial CD CD ROM Basic Information User s Guide This Document Basic Operations Troubleshooting Reference Guide CD ROM Copying and Mail Box Instructions Copying and Mail Box Guide CD ROM Sending Fax Instructions Sending and Facsimile Guide CD ROM Installing the CD ROM Software and Setting Up the Network Connection Network Quick Start Guide Remote User Int...

Страница 5: ... Applications and Using the Login Service MEAP SMS Administrator Guide CD ROM To view the manual in PDF format Adobe Reader Adobe Acrobat Reader is required If Adobe Reader Adobe Acrobat Reader is not installed on your system please download it from the Adobe Systems Incorporated website Considerable effort has been made to ensure that this manual is free of inaccuracies and omissions However as w...

Страница 6: ...mables xix Other Warnings xix About the Instruction Manual CD ROM xx Contents of Instruction Manual CD ROM xx Instruction Manual CD ROM xx Super G3 FAX Board CD ROM Universal Send Kit CD ROM xx User Manual CD ROM Menu xxi System Requirements xxi Using The CD ROM Menu xxii Periodic Inspection of the Breaker xxiii Checking the Breaker xxiii Chapter 1 Before You Start Using This Machine Installation ...

Страница 7: ... Time 1 26 Registering Your Machine s Fax Number 1 27 Registering Sender Names 1 28 Registering the Unit s Name 1 29 Displaying a Help Screen 1 31 Chapter 2 Routine Maintenance Loading Paper 2 2 Replacing the Toner Cartridge 2 6 Chapter 3 Troubleshooting Clearing Paper Jams 3 2 List of Error Messages 3 6 List of Error Codes without Messages 3 6 Chapter 4 Appendix Multifunctional Operations 4 2 Ava...

Страница 8: ...s restrictions handling precautions and instructions that should be observed for safety WARNING Indicates a warning concerning operations that may lead to death or injury to persons if not performed correctly To use the machine safely always pay attention to these warnings CAUTION Indicates a caution concerning operations that may lead to injury to persons or damage to property if not performed co...

Страница 9: ...ins input 230 V 50 Hz although the rated input of the product is 220 to 240 V 50 60 Hz Use of shielded cable is necessary to comply with the technical EMC requirements of EC Directive Laser Safety This product is certified as a Class 1 laser product under IEC60825 1 2007 and EN60825 1 2007 This means that the product does not produce hazardous laser radiation Since radiation emitted inside the pro...

Страница 10: ...hown below are attached to the Paper Drawer s Right Cover and Toner Supply Port Cover This Product has been classified under IEC60825 1 2007 and EN60825 1 2007 which conform to the following classes CLASS 1 LASER PRODUCT LASER KLASSE 1 APPAREIL Á LASER DE CLASSE 1 APPARECCHIO LASER DI CLASSE 1 PRODUCTO LÁSER DE CLASE 1 APARELHO A LASER DE CLASSE 1 LUOKAN 1 LASER TUOTE LASERPRODUKT KLASS 1 CAUTION ...

Страница 11: ...gnated collection point e g on an authorized one for one basis when you buy a new similar product or to an authorized collection site for recycling waste electrical and electronic equipment EEE and batteries and accumulators Improper handling of this type of waste could have a possible impact on the environment and human health due to potentially hazardous substances that are generally associated ...

Страница 12: ...ssential requirements of EC Directive 1999 5 EC and is usable in EU Only for models with facsimile functionality For Europe Only Canon Inc Canon Europa N V Super G3 is a phrase used to describe the new generation of fax machines that use ITU T V 34 standard 33 6 Kbps modems Super G3 High Speed Fax machines allow transmission times of approximately 3 seconds per page which results in reduced teleph...

Страница 13: ...ct to conditions 1 through 9 below unless the other conditions accompany the software and or software modules In such cases these software and or software modules are subject to the other conditions 1 You agree that you will comply with any applicable export control laws restrictions or regulations of the countries involved in the event that the SOFTWARE is shipped transferred or exported into any...

Страница 14: ...se of such images as scanned printed or otherwise reproduced by your product may be prohibited by law and may result in criminal and or civil liability A non exhaustive list of these documents is set forth below This list is intended to be a guide only If you are uncertain about the legality of using your product to scan print or otherwise reproduce any particular document and or of the use of the...

Страница 15: ...cal shock Do not place the following items on the machine If these items come into contact with a high voltage area inside the machine it may result in a fire or electrical shock If these items are dropped or spilled inside the machine immediately turn OFF the main power switch and disconnect the power cord from the power outlet Then contact your local authorized Canon dealer Necklaces and other m...

Страница 16: ...is may result in a fire or electrical shock Insert the power plug completely into the power outlet as failure to do so may result in a fire or electrical shock Do not use power cords other than the power cord provided as this may result in a fire or electrical shock As a general rule do not use extension cords Using an extension cord may result in a fire or electrical shock If an extension cord mu...

Страница 17: ...machine Also do not spill water liquids or flammable substances alcohol benzene paint thinner etc inside the machine If these items come into contact with a high voltage area inside the machine it may result in a fire or electrical shock If these items are dropped or spilled inside the machine immediately turn OFF the main power switch and disconnect the power cord from the power outlet Then conta...

Страница 18: ...tapling is performed near the rollers when a finisher is attached as this may result in personal injury The laser beam can be harmful to human bodies Since radiation emitted inside the product is completely confined within protective housings and external covers the laser beam cannot escape from the machine during any phase of user operation Read the following remarks and instructions for safety N...

Страница 19: ...ertified as a Class 1 laser product under IEC60825 1 2007 If the laser beam escapes from the machine exposure may cause serious damage to your eyes Controlling adjusting or operating the machine in ways not mentioned in this manual may cause dangerous radiation to escape from the machine Downloaded from ManualsPrinter com Manuals ...
Страница 20: ...n or throw used toner cartridges into open flames as this may cause the toner remaining inside the cartridges to ignite resulting in burns or a fire CAUTION The fixing unit and its surroundings inside the machine may become hot during use When removing jammed paper or when inspecting the inside of the machine do not touch the fixing unit and its surroundings as doing so may result in burns or elec...

Страница 21: ...scarding used toner cartridges put the cartridges in a bag to prevent the toner remaining inside the cartridges from scattering and dispose of them in a location away from open flames CAUTION Keep toner and other consumables out of the reach of small children If these items are ingested consult a physician immediately Do not dismantle the toner cartridge as doing so may cause toner to fly out and ...

Страница 22: ...Additional Functions screen Reference Guide Contains the basic operation instructions daily maintenance and troubleshooting instructions Copying and Mail Box Guide Contains the Copying and Mail Box function instructions Remote UI Guide Contains the Remote User Interface instructions Network Guide Contains the Network Connectivity and setup instructions Super G3 FAX Board CD ROM Universal Send Kit ...

Страница 23: ...figuration of your computer some functions may not operate correctly If the PDF manual does not open from the CD ROM Menu open the PDF file directly from the uk_english or asia pacific_english folder on the User Manual CD ROM Windows Macintosh OS Windows 98 Me Windows 2000 Service Pack 3 or later Windows XP Service Pack 1a Windows Server 2003 Mac OS 9 x Mac OS X Memory The memory required to run t...

Страница 24: ...cintosh users double click the START icon to start the CD ROM Menu The Language Selection screen is displayed The screen shot shown above may differ from the one you actually see depending on the machine you are using a BROWSE MANUAL You can read any of the listed guides by clicking on the desired guide After clicking on the desired guide a PDF reading software such as Acrobat Reader starts and th...

Страница 25: ... of a ball point pen or similar object IMPORTANT Briefly push the test button NOTE The breaker is located on the left side of the machine For more information on the location of the breaker see External View and Internal View on p 1 15 2 Confirm that the breaker lever is switched to the OFF side position IMPORTANT Do not use the test button to turn the power ON and OFF If the breaker lever does no...

Страница 26: ...ch the breaker lever to ON I side 4 Press the main power switch to the I side 5 Fill in the check sheet located on p 4 6 to document your periodic inspections of the breaker ON I side OFF side 3 side side Downloaded from ManualsPrinter com Manuals ...

Страница 27: ...tion and Parts 1 13 Optional Equipment 1 13 External View and Internal View 1 15 Control Panel Parts and Functions 1 17 Touch Panel Display 1 18 Main Power and Control Panel Power 1 21 How to Turn ON the Main Power 1 21 Things You Must Do Before Using This Machine 1 25 Selecting the Type of Telephone Line 1 25 Setting the Current Date and Time 1 26 Registering Your Machine s Fax Number 1 27 Regist...

Страница 28: ...e Following Locations Avoid locations subject to extremes of temperature and humidity whether low or high For example avoid installing the machine near water faucets hot water heaters humidifiers air conditioners heaters or stoves Avoid installing the machine in direct sunlight If this is unavoidable use curtains to shade the machine Be sure that the curtains do not block the machine s ventilation...

Страница 29: ... in poorly ventilated rooms It is recommended that the room be appropriately ventilated sufficient to maintain a comfortable working environment in areas of machine operation Avoid locations where a considerable amount of dust accumulates Avoid locations where ammonia gas is emitted Avoid locations near volatile or flammable materials such as alcohol or paint thinner Avoid locations that are subje...

Страница 30: ... by the machine during printing can adversely affect the operation of such equipment Avoid installing the machine near televisions radios or similar electronic equipment The machine might interfere with sound and picture signal reception Insert the power plug into a dedicated power outlet and maintain as much space as possible between the machine and other electronic equipment Do not remove the ma...

Страница 31: ...ot connect other electrical equipment to the same power outlet to which the machine is connected Do not connect the power cord to a multiplug power strip as this may cause a fire or electrical shock The power cord may become damaged if it is often stepped on or if heavy objects are placed on it Continued use of a damaged power cord can lead to an accident such as a fire or electrical shock Downloa...

Страница 32: ...restricted operation No option is attached 1 158 mm 1 035 mm 100 mm or more The optional Feeder DADF N1 Finisher S1 and Paper Deck Q1 are attached 1 087 mm 1 553 mm 100 mm or more The optional Feeder DADF N1 Saddle Finisher AE2 Puncher Unit L1 Buffer Pass Unit E2 and Paper Deck Q1 are attached 1 169 mm 2 082 mm 100 mm or more Downloaded from ManualsPrinter com Manuals ...
Страница 33: ...eforehand Do not attempt to move the machine yourself Handling Precautions Do not attempt to disassemble or modify the machine Some parts inside the machine are subject to high voltages and temperatures Take adequate precautions when inspecting the inside of the machine Do not carry out any inspections not described in this manual Downloaded from ManualsPrinter com Manuals ...
Страница 34: ...hock Also avoid placing objects around the power plug so that the machine can be disconnected whenever necessary Do not turn the main power switch OFF or open the front covers while the machine is in operation This might result in paper jams Do not use flammable sprays such as spray glue near the machine There is a danger of ignition This machine generates a slight amount of ozone during normal us...

Страница 35: ... machine will not be used for an extended period of time such as during consecutive holidays CAUTION Canon recommends that data stored on the product s hard disk drive be duplicated or backed up to prevent its loss in the event of failure or other malfunction of the hard disk drive Neither Canon nor any service provider will be liable for damages for loss of data stored on the product s hard disk ...

Страница 36: ...he Reference Guide Copying See the Copying and Mail Box Guide In addition to normal copying functions convenient new functions such as Sample Set which helps to avoid copy errors Booklet for making copies into booklets and Different Size Originals for copying originals of different sizes together in one copy operation are provided to increase your productivity Mail Box Function See the Copying and...

Страница 37: ...ly reducing transmission costs as compared to conventional facsimile machines In a mobile environment you can also receive faxes remotely from the machine outside of the office If the optional Super G3 FAX Board and FAX Driver are installed you can send facsimiles from your computer Printing See the PS PCL UFR II Printer Guide If the UFR II PCL Printer Kit is activated you can upgrade this machine...

Страница 38: ... to use the iR3045 iR3045N iR3035 iR3035N iR3025 iR3025N as a conventional scanner You can scan a document using the machine and read the data in an application you are using on your computer To use this function the machine is required to be connected to a network equipped with the Printer function standard equipped for the iR3045N iR3035N iR3025N and Network ScanGear to be installed on your comp...

Страница 39: ...System Configuration and Parts 1 13 Before You Start Using This Machine 1 System Configuration and Parts Optional Equipment b c d f g e a Main Unit j k i h Downloaded from ManualsPrinter com Manuals ...
Страница 40: ...der C1 d Copy Tray J1 e Paper Deck Q1 f Cassette Feeding Unit Y3 g Inner 2 Way Tray D1 h Envelope Feeder Attachment C2 i Puncher Unit Q1 j Finisher S1 k Additional Finisher Tray B1 l Buffer Pass Unit E2 m Puncher Unit L1 n Staple Cartridge D2 D3 o Staple J1 p Saddle Finisher AE q Finisher AE1 Downloaded from ManualsPrinter com Manuals ...
Страница 41: ...onal Feeder DADF N1 and Cassette Feeding Unit Y3 are attached a Feeder DADF N1 Optional b Control Panel c Main Unit s Upper Right Cover d Stack Bypass e Main Power Switch f Test Button g Breaker h Paper Drawer s Right Cover i Paper Drawer 2 j Paper Drawer 1 k Output Tray l Output Paper Tray Guide Downloaded from ManualsPrinter com Manuals ...

Страница 42: ...art Using This Machine 1 m Platen Glass n Fixing Unit s Upper Cover o Duplexing Unit p Toner Supply Port Cover q Toner Cartridge m n o p q The optional Feeder DADF N1 and Cassette Feeding Unit Y3 are attached Downloaded from ManualsPrinter com Manuals ...
Страница 43: ...act your local authorized Canon dealer g Processing Data Indicator Flashes or blinks green when the machine is performing operations and maintains a steady green light when fax data is stored in memory h Clear key Press to clear entered values or characters i Numeric keys Press to enter numerical values j ID Log in Out key Press when setting or enabling Department ID Management k Display Contrast ...

Страница 44: ... customize the order of the function keys in Function Display Settings in Common Settings f System Monitor Press this key to change check or cancel jobs and to check or print the job log g Job Print Status Display Area The progress of jobs and copy operations and the status of devices and consumables are displayed here Also depending on the login service you are using the current Department ID or ...

Страница 45: ...iR3025N The following table indicates the various combination of function keys displayed on the touch panel display for the iR3045N iR3035N iR3025N Attached Optional Equipment Displayed Function Keys None Universal Send Kit UFR II PCL Printer Kit Universal Send Kit and UFR II PCL Printer Kit Super G3 FAX Board and UFR II PCL Printer Kit Universal Send Kit UFR II PCL Printer Kit and Web Access Soft...

Страница 46: ...Status Display Area on the bottom left of the screen is described below Icon Type of Job Description Copy Job Send Fax Job Mail Box Job Printer Job Report Job Network Scan Job Remote Copy Job Additional Functions Job Icon Machine Status Description Error Paper Jam Staple Jam Replace Toner Cartridge Downloaded from ManualsPrinter com Manuals ...
Страница 47: ...ARNING Do not connect or disconnect the power cord with wet hands as this may result in electrical shock 2 Press the main power switch to the I side The main power switch is located on the back right side of the machine The main power indicator on the control panel lights when the main power switch is turned ON IMPORTANT If the main power indicator on the control panel does not light even though t...

Страница 48: ...pplication other than MEAP is selected as the initial function in Common Settings from the Additional Functions screen The Start Up screen is displayed until the machine is ready to scan If a message is displayed on the touch panel display proceed to step 4 The screen on the right is displayed when the machine is ready to scan The machine is ready to scan in approximately 30 seconds after the scre...

Страница 49: ...n Common Settings from the Additional Functions screen The Start Up screen is displayed until the machine is ready to scan After the Start Up screen disappears the MEAP Start Up screen is displayed You can press to switch to the Copy Mail Box etc functions even if the MEAP Start Up screen is still displayed The MEAP Application screen is displayed Downloaded from ManualsPrinter com Manuals ...

Страница 50: ...s before turning the main power back ON Do not turn the main power OFF if you want to be able to send or receive fax or I fax documents Also do not turn the main power OFF if the optional Super G3 FAX Board is installed and you want to be able to send or receive fax documents Sending or receiving I fax or fax documents cannot be done when the power is turned OFF If SSO or SDL is set as the login s...

Страница 51: ...rk settings have to be specified in order to send scanned documents to an e mail address an I fax address or a file server See the Network Guide Selecting the Type of Telephone Line Set the type of telephone line that is connected to the machine If this setting is incorrect you will be unable to communicate with other machines Be sure to check the type of telephone line that you are using and make...

Страница 52: ...g four digits including zeros Enter all four digits of the year and the time in 24 hour notation as four digits including zeros without a space If you are setting the Time Zone Press the Time Zone drop down list select the time zone where the machine is located GMT The time at the Greenwich Observatory in England is called GMT Greenwich Mean Time Time Zone The standard time zones of the world are ...

Страница 53: ...You must store the machine s fax number This number is printed on the document that you fax to the receiving party The number may also be displayed on the touch panel display of the receiving party s machine depending on their type of machine NOTE For this setting the optional Super G3 FAX Board is required 1 Press Communications Settings User Settings under Fax Settings Unit Telephone 2 Enter the...

Страница 54: ...play and print the sender s name instead of the name stored as the unit s name with the Sender s Names setting from the Send Settings screen For this setting the optional Super G3 FAX Board is required 1 Press Communications Settings TX Settings under Common Settings Sender s Names TTI 2 Select the number under which you want to register the sender s name press Register Edit You can store up to 99...

Страница 55: ...ress of the login user registered for SDL or the Local Device Authentication user authentication system of SSO is displayed in the Sender field See Sending an I Fax in the Sending and Facsimile Guide If the Domain Authentication user authentication system of SSO including when performing Domain Authentication with the Domain Authentication Local Device Authentication user authentication system is ...

Страница 56: ...t Do Before Using This Machine 1 30 Before You Start Using This Machine 1 1 Press Communications Settings TX Settings under Common Settings Unit Name 2 Enter a name press OK Downloaded from ManualsPrinter com Manuals ...

Страница 57: ...on you want to perform An explanation of the function and how to set it is displayed Main Menu This is the first screen displayed when you press Press Using the Help Function to display an explanation of how to use the Help NOTE Press after selecting a mode of the Copying or Mail Box function may bring up a guidance screen with an explanation of that mode List Screen Displays a list of the functio...

Страница 58: ...ress Display more detailed settings to display more detailed information and related topics NOTE The Try It key is only displayed on the Explanation Screen for some Copy functions Example The procedure for copying on a nonstandard paper size 1 Press Making Copies Copying on a Nonstandard Paper Size 2 Check the detailed information for the function Press Try It Yes to try using the function Downloa...

Страница 59: ...CHAPTER 2 1 2 Routine Maintenance This chapter describes how to load paper and replace toner Loading Paper 2 2 Replacing the Toner Cartridge 2 6 Downloaded from ManualsPrinter com Manuals ...
Страница 60: ... of paper well before loading it and align the edges of the paper stack on a flat surface Never place paper or any other items in the empty part of the drawer next to the paper stack Doing so may cause paper jams NOTE If a message prompting you to load paper appears during printing the remaining prints are automatically made after you load the correct paper If you select another paper drawer the r...

Страница 61: ... 2 3 Routine Maintenance 2 1 Press and release the button on the paper drawer in which you want to load paper 2 Grip the handle and pull out the paper drawer until it stops Downloaded from ManualsPrinter com Manuals ...

Страница 62: ...ewly opened paper package 4 Load the paper stack into the paper drawer Even out the edges of the paper stack Load the paper stack against the right wall of the paper drawer Make sure that the paper size setting on the paper drawer matches the size of the paper that is loaded When loading paper into the paper drawer for the first time set the paper size dial to match the paper size being loaded See...

Страница 63: ...ence Guide 5 Gently push the paper drawer back into the machine until it clicks into place in the closed position CAUTION When returning the paper drawer to its original position be careful not to get your fingers caught as this may result in personal injury IMPORTANT You will not be able to make copies or print if you load paper that exceeds the loading limit or if the paper drawer is not complet...

Страница 64: ... the touch panel display and the procedure described below to help you replace the toner cartridge If you press Recover Later you can continue certain operations such as setting modes and scanning originals even if you do not replace the toner cartridge immediately WARNING Do not burn or throw used toner cartridges into open flames as this may cause the toner remaining inside the cartridges to ign...

Страница 65: ... 10 of the toner is left It is recommended that you get a new toner cartridge ready for replacement before the toner runs out Complete instructions on how to replace the toner cartridge can be accessed by pressing Previous or Next on the touch panel display If toner runs out during a print job the remaining prints are made after you replace the toner cartridge 1 Open the toner supply port cover 2 ...

Страница 66: ...may cause the toner remaining inside the cartridges to ignite resulting in burns or a fire CAUTION If the toner cartridge cannot be pulled out check that the knob is turned all the way to the appropriate position 4 Twist the red protective cap of the new toner cartridge in the direction of the arrow counterclockwise to remove it CAUTION Do not touch the tip of the toner cartridge or subject it to ...

Страница 67: ...her hand 6 Push the locking lever down IMPORTANT Make sure that the on the lever is aligned with the of the Lock position NOTE If you insert a toner cartridge intended for use in a different machine the locking lever will not move 7 Close the toner supply port cover CAUTION When closing the cover be careful not to get your fingers caught as this may result in personal injury Downloaded from Manual...

Страница 68: ...Replacing the Toner Cartridge 2 10 Routine Maintenance 2 Downloaded from ManualsPrinter com Manuals ...

Страница 69: ...ing This chapter explains what to do in response to a paper jam and an error message display Clearing Paper Jams 3 2 List of Error Messages 3 6 List of Error Codes without Messages 3 6 Downloaded from ManualsPrinter com Manuals ...
Страница 70: ...ater Washing them with warm water will set the toner and make it impossible to remove the toner stains When removing paper which has become jammed inside the machine remove the jammed paper gently to prevent the toner on the paper from scattering and getting into your eyes or mouth If the toner gets into your eyes or mouth wash them immediately with cold water and immediately consult a physician T...

Страница 71: ...m detection of paper jams in the paper drawers is not possible after the power is turned back ON Clear paper jams without turning the power OFF If a paper jam occurs inside the main unit See the instructions on the following pages a Fixing Unit See Fixing Unit Inside the Main Unit in the Reference Guide b Duplexing Unit See Duplexing Unit Inside the Main Unit in the Reference Guide c Stack Bypass ...

Страница 72: ...he Reference Guide b Paper Deck Q1 See Paper Deck Q1 Optional in the Reference Guide c Feeder DADF N1 See Feeder DADF N1 in the Reference Guide d Finisher S1 See Finisher S1 Optional in the Reference Guide e Inner 2 Way Tray D1 See Inner 2 Way Tray D1 Optional in the Reference Guide f Copy Tray J1 See Copy Tray J1 Optional in the Reference Guide a b c d e f Downloaded from ManualsPrinter com Manua...

Страница 73: ...After you have removed all of the jammed paper at the locations indicated on the touch panel display restore all levers and covers to their original positions 3 Continue to follow the procedure and instructions displayed on the touch panel display Once you have removed all of the jammed paper in locations other than the feeder printing or copying resumes If there is paper that still needs to be re...

Страница 74: ...ocedures according to the error code NOTE If a send job is cancelled STOP is printed in the Results column on the Send report 001 Cause 1 Differently sized originals were scanned and the Different Size Originals mode was not set Remedy Place your originals specify the Different Size Originals mode and try scanning again Cause 2 Differently sized originals were scanned in the 2 Sided mode and the D...

Страница 75: ...he Department ID or password was changed while the machine was processing a job or Allow Printer Jobs with Unknown IDs is set to Off Remedy Contact your System Manager 703 Cause The hard disk is full and no more images can be scanned Remedy 1 Wait a few moments and try scanning again after other send jobs are complete Remedy 2 Erase documents stored in inboxes If the machine still does not operate...

Страница 76: ...otal has been reached Remedy Contact your System Manager 817 Cause A communication error occurred between your machine and a remote copy printer Remedy Check the network connection and try again If communication errors continue contact your System Manager 823 Cause Unable to connect to a remote copy printer Remedy Check the network connection and try again If the machine still does not operate nor...

Страница 77: ...leted or the password has been changed Remedy Contact your System Manager or make sure that the Department ID and password set in the host machine match the ones registered in the remote copy printer 849 Cause Device information could not be delivered because the client machine is processing a job Remedy Try delivering device information again after the client machine finishes processing the job 8...

Страница 78: ... Documents in the Sending and Facsimile Guide and Chapter 2 Introduction to the Mail Box Functions in the Copying and Mail Box Guide Cause 3 The document cannot be stored because there are more than 1 500 documents in the specified inbox Remedy If there are a large number of documents delete the unnecessary ones from the specified inbox 852 Cause An error occurred because the main power switch was...

Страница 79: ...apter 3 Using a TCP IP Network in the Network Guide Cause 4 The maximum number of receivable data exceeds the receive limit See Chapter 6 Receiving Documents in the Sending and Facsimile Guide Remedy Try printing the documents again after all current jobs are complete If you still cannot print check the sent data Cause 5 The number of secured documents exceeded the maximum limit that can be reserv...

Страница 80: ...he job was canceled at the host Remedy Check that the network is functioning properly and then try printing again 858 Cause There is a problem with the print data sent from an external application Remedy Check the settings of the data sent to the machine make sure they are compatible with the machine and try sending the data again 859 Cause 1 A compression error occurred with the image data Remedy...

Страница 81: ...om a computer Cause 2 Color data was sent from the external controller to the billing device as monochrome data Remedy Change the print data or print settings and try printing again 862 Cause 1 The saddle finisher trays have exceeded their stacking limits See Chapter 9 Appendix in the Reference Guide Remedy Change the print data or print settings and try printing again Cause 2 A combination of set...

Страница 82: ...g 3 863 Cause An error occurred while processing PDL data or image data Remedy Check the settings and try printing again 865 Cause The Mail Box function is restricted Remedy Contact your System Manager Downloaded from ManualsPrinter com Manuals ...

Страница 83: ... Appendix This chapter provides other useful information Multifunctional Operations 4 2 Available Paper Stock 4 4 Check Sheet for the Periodic Inspection of the Breaker 4 6 Downloaded from ManualsPrinter com Manuals ...

Страница 84: ... operations Available Unavailable Available but with conditions Receive Send Scan Print Copy Scan and Print via Network via Fax Print Data via Network via Fax Copy Mail Box Send Copy RX Document Print Data Receive via Network via Fax Print Data 3 3 3 3 3 Send via Network via Fax 3 1 1 3 1 3 1 3 1 Scan Copy Mail Box 1 1 1 Send 3 1 3 1 3 1 3 Print Copy 2 2 RX Document 3 1 3 1 1 3 2 2 3 2 3 2 Print D...

Страница 85: ...alternately for each job When an optional finisher is not attached one page is output alternately for each job 3 The machine s processing speed may be slower NOTE The machine s performance may be affected if several network send and receive jobs are being carried out at the same time The operation of printing data from an inbox is included in Print Data under Print in the table The operation of pr...

Страница 86: ... Plain and Recycled paper are from 64 to 90 g m2 Load paper heavier than 90 g m2 in the stack bypass 2 Heavy paper is from 91 to 128 g m2 3 Some types of tracing paper cannot be used 4 Use only A4 transparencies made especially for this machine 5 If the optional Envelope Feeder Attachment C2 is attached to Paper Drawer 1 envelopes can be loaded Paper Type Paper Source Paper Drawer 64 to 90 g m2 St...

Страница 87: ... Using the Stack Bypass in the Reference Guide Paper Drawers 3 4 and the Paper Deck Q1 is optional Paper Size Width x Length Paper Source Paper Drawer 1 Paper Drawer 2 3 4 Stack Bypass Paper Deck optional A3 297 mm x 420 mm A4 297 mm x 210 mm A4R 210 mm 297 mm A5R 148 mm x 210 mm Envelope COM 10 No 10 104 7 mm x 241 3 mm 1 Monarch Catalog Glove No 8 98 4 mm x 190 5 mm 1 DL 110 mm x 220 mm 1 ISO B5...

Страница 88: ...odically Follow the procedure described in Periodic Inspection of the Breaker on p xxiii once or twice a month How to Fill in This Check Sheet Fill in the date of inspection and the name of the inspector When the inspection is completed successfully write a check mark under OK If not contact your local authorized Canon dealer Also write a check mark under NG No Good Date of Inspection Date of Insp...

Страница 89: ...iR3045 iR3045N iR3035 iR3035N iR3025 iR3025N Guide de l utilisateur Downloaded from ManualsPrinter com Manuals ...

Страница 90: ...e CD du didacticiel CD ROM Instructions de base Guide de l utilisateur Le présent document Opérations de base Dépannage Guide de référence CD ROM Principes de la copie et de la fonction boîte aux lettres Guide des fonctions copie et boîte aux lettres CD ROM Principes de l envoi et de la télécopie Guide des fonctions envoi et télécopie CD ROM Configuration de la connexion réseau et installation du ...

Страница 91: ... service de connexion Guide de l administrateur MEAP SMS CD ROM Pour visualiser le manuel au format PDF Adobe Reader Adobe Acrobat Reader est nécessaire Si Adobe Reader Adobe Acrobat Reader n est pas installé sur votre système Il est possible de le télécharger depuis le site Web d Adobe Systems Incorporated Un soin particulier a été apporté à la rédaction de ce guide afin d éviter les inexactitude...

Страница 92: ...les xix Autres points importants xix A propos du CD ROM de documentation xx Contenu du CD ROM de documentation xx CD ROM de documentation xx CD ROM de la Carte FAX Super G3 CD ROM du Kit fonctions envoi xx Menu du CD ROM de documentation utilisateur xxi Configuration système xxi Utilisation du menu du CD ROM xxii Contrôle périodique du disjoncteur xxiii Contrôle du disjoncteur xxiii Chapitre 1 Ava...

Страница 93: ...de fax de la machine 1 27 Enregistrement d un nom d expéditeur 1 28 Enregistrement des informations concernant l émetteur 1 29 Affichage d un écran d aide 1 31 Chapitre 2 Entretien périodique Approvisionnement en papier 2 2 Remplacement de la cartouche d encre 2 6 Chapitre 3 Dépannage Elimination des bourrages papier 3 2 Messages d erreur 3 6 Liste des codes d erreur sans messages 3 6 Chapitre 4 A...

Страница 94: ...ventions adoptées Des symboles sont utilisés dans ce guide pour attirer l attention sur les procédures restrictions précautions d emploi et consignes de sécurité à observer AVERTISSEMENT Point pouvant présenter un danger pour l utilisateur si les instructions ne sont pas respectées Ces recommandations sont à respecter rigoureusement ATTENTION Point important pour la sécurité de l utilisateur ou qu...

Страница 95: ...minale de 230 V 50 Hz avec une tension nominale de 220 V 240 V 50 60 Hz L utilisation de câble blindé est nécessaire pour satisfaire aux exigences techniques CEM de la directive européenne Faisceau laser Canon certifie que ce produit est un produit laser de Classe 1 d après les normes IEC60825 1 2007 et EN60825 1 2007 ce qui signifie qu il n émet pas de rayonnements laser dangereux Le système opti...

Страница 96: ...ées ci dessous figurent à l intérieur du capot droit de la cassette et du couvercle d approvisionnement d encre D après les normes IEC60825 1 2007 et EN60825 1 2007 ce produit correspond aux catégories suivantes CLASS 1 LASER PRODUCT LASER KLASSE 1 APPAREIL Á LASER DE CLASSE 1 APPARECCHIO LASER DI CLASSE 1 PRODUCTO LÁSER DE CLASE 1 APARELHO A LASER DE CLASSE 1 LUOKAN 1 LASER TUOTE LASERPRODUKT KLA...

Страница 97: ... un point de collecte agréé pour le recyclage équipements électriques ou électroniques EEE et des piles et accumulateurs Le traitement inapproprié de ce type de déchet risque d avoir des répercussions sur l environnement et la santé humaine du fait de la présence de substances potentiellement dangereuses généralement associées aux équipements électriques ou électroniques Votre coopération envers l...

Страница 98: ...xplorer sont des marques commerciales ou déposées de Microsoft Corporation aux Etats Unis et ou dans d autres pays Les autres noms de produits ou de sociétés cités dans le présent guide peuvent être des marques de leurs propriétaires respectifs Copyright Copyright 2013 Canon Inc Tous droits réservés Aucune partie de ce document ne peut être reproduite ou transmise sous quelque forme et par quelque...

Страница 99: ...r la présente par le concédant de licence de Canon pour toute propriété intellectuelle des CONCÉDANTS DE LICENCE 3 Vous pouvez utiliser le LOGICIEL exclusivement avec le produit Canon que vous avez acheté le PRODUIT 4 Vous ne pouvez attribuer concéder en sous licence commercialiser distribuer ou transférer le LOGICIEL à un tiers sans le consentement écrit préalable de Canon et des CONCÉDANTS DE LI...

Страница 100: ... et ou pénale Vous trouverez ci dessous une liste non exhaustive des documents dont la reproduction peut être interdite Cette liste a uniquement vocation à vous servir de guide Si vous avez un doute sur la légalité de l utilisation de votre produit pour numériser imprimer ou reproduire de quelque manière que ce soit un document particulier et ou sur la légalité de l utilisation des images ainsi nu...

Страница 101: ...les objets ci dessous En effet s ils venaient au contact d un élément haute tension à l intérieur de celle ci ils risqueraient de provoquer un incendie ou une électrocution Si l un de ces objets tombe dans la machine ou si un liquide est renversé dessus mettre immédiatement l interrupteur principal sur Arrêt et débrancher la fiche d alimentation de la prise secteur Contacter ensuite le revendeur a...

Страница 102: ...e en position repliée car cela pourrait provoquer un incendie ou une électrocution Il y a danger d incendie ou d électrocution si la fiche du cordon électrique n est pas introduite à fond dans la prise secteur Ne pas utiliser de cordon électrique autre que celui fourni avec la machine car cela pourrait provoquer un incendie ou une électrocution En règle générale ne pas utiliser de rallonge L emplo...

Страница 103: ...llique dans la machine Ne pas non plus renverser à l intérieur de liquide ou de substance inflammable alcool benzine diluant etc En effet s ils venaient au contact d un élément haute tension à l intérieur de celle ci ils risqueraient de provoquer un incendie ou une électrocution Si l un de ces objets tombe dans la machine ou si un liquide est renversé dessus mettre immédiatement l interrupteur pri...

Страница 104: ...e où s effectue l agrafage près des rouleaux sous peine de se blesser Le rayonnement laser peut être dangereux Le système optique étant conçu de sorte que les rayonnements émis demeurent captifs des capots de protection et des portes externes à aucun moment du cycle de fonctionnement le faisceau laser ne risque de rayonner hors de la machine Lire les remarques et instructions qui suivent concernan...

Страница 105: ... IEC60825 1 2007 Si le laser n était plus confiné à l intérieur de la machine il pourrait provoquer des lésions oculaires graves en cas d exposition Des radiations dangereuses pourraient s échapper de la machine si des opérations de contrôle de paramétrage ou d utilisation étaient effectuées selon des méthodes qui ne seraient pas mentionnées dans ce guide Downloaded from ManualsPrinter com Manuals...

Страница 106: ...r les risques de brûlure ou d électrocution Ne pas brûler ni jeter les cartouches d encre au feu car l encre restante pourrait s enflammer et occasionner des brûlures ou un incendie ATTENTION L ensemble de fixation et la zone voisine à l intérieur de la machine peuvent chauffer en cours d utilisation Lors de l élimination d un bourrage à l intérieur de la machine ou de toute autre inspection inter...

Страница 107: ...un incendie Les cartouches d encre usagées doivent être placées dans un sac afin d éviter que l encre restante ne se disperse et être conservés à l abri des flammes ATTENTION Conserver l encre et les autres consommables hors de portée des enfants En cas d ingestion consulter immédiatement un médecin Ne pas tenter de démonter la cartouche d encre sous peine de disperser l encre et de la voir pénétr...

Страница 108: ...ode utilisateur Guide de référence Instructions d utilisation de base d entretien quotidien et de dépannage Guide des fonctions copie et boîte aux lettres Instructions des fonctions copie et boîte aux lettres Guide du logiciel d administration Instructions d utilisation de l interface utilisateur distante Guide de mise en réseau Instructions de connexion et de configuration du réseau CD ROM de la ...

Страница 109: ...l ordinateur certaines fonctions risquent de ne pas fonctionner correctement Si le manuel au format PDF ne s ouvre pas depuis le menu du CD ROM il faut l ouvrir directement depuis le dossier français du CD ROM de documentation Windows Macintosh Système d exploitation Windows 98 Me Windows 2000 Service Pack 3 ou version ultérieure Windows XP Service Pack 1a Windows Server 2003 Mac OS 9 x Mac OS X M...

Страница 110: ...s utilisateurs Windows NOTE Les utilisateurs Macintosh doivent double cliquer sur l icône START pour lancer le menu du CD ROM L écran de sélection de la langue s affiche L écran ci dessus peut être différent de celui qui s affiche en fonction de la machine utilisée a PARCOURIR GUIDE Cliquer sur un des manuels répertoriés pour le lire Acrobat Reader ou un autre logiciel compatible PDF démarre alors...

Страница 111: ...similaire pour appuyer sur le bouton de test REMARQUE Appuyer brièvement sur le bouton de test NOTE Le disjoncteur se trouve sur le côté gauche de la machine Pour plus d informations sur l emplacement du disjoncteur voir Vue externe et vue interne p 1 15 2 Vérifier que le levier du disjoncteur se met en position Arrêt côté REMARQUE Ne pas utiliser le bouton de test pour mettre la machine sous et h...

Страница 112: ...r du disjoncteur sur la position Marche côté I 4 Mettre l interrupteur principal sur la position I 5 Remplir la feuille de contrôle périodique du disjoncteur qui se trouve p 4 6 3 MARCHE côté I ARRET côté côté I côté Downloaded from ManualsPrinter com Manuals ...

Страница 113: ...hériques en option 1 13 Vue externe et vue interne 1 15 Panneau de commande 1 17 Afficheur tactile 1 18 Interrupteur principal et interrupteur du panneau de commande 1 21 Mise sous tension de la machine 1 21 Avant d utiliser cette machine 1 25 Sélection du type de ligne téléphonique 1 25 Réglage de la date et de l heure 1 26 Enregistrement du numéro de fax de la machine 1 27 Enregistrement d un no...

Страница 114: ... et humide ou emplacement chaud et sec Proximité immédiate d une source de chaleur chaudière radiateur etc d une source d humidité robinet chauffe eau à gaz humidificateur ou dans un froid excessif local non chauffé en hiver contre un climatiseur etc Exposition directe au soleil Si c est inévitable prévoir un rideau Vérifier que les rideaux ne bloquent pas les ouvertures et les grilles d aération ...

Страница 115: ...ocive L ozone peut gêner en cas d utilisation prolongée dans une pièce peu aérée ou de réalisation d un grand nombre de copies Il est recommandé d ouvrir régulièrement portes et fenêtres du local pour travailler dans des conditions plus agréables Poussière Vapeurs d ammoniac Proximité de substances inflammables alcool diluants ou autres solvants Emplacement soumis à de fortes vibrations Sol instab...

Страница 116: ...nuire au bon fonctionnement de ces appareils A côté d un récepteur d ondes hertziennes télévision radio équipements électroniques similaires La machine risque de provoquer des interférences Prévoir une bonne distance et un branchement sur circuit électrique séparé Ne pas retirer les cales de maintien de la machine Une fois la machine installée ne pas retirer les cales de maintien de la machine Ce ...

Страница 117: ...on stable La prise secteur doit être exclusivement réservée à l alimentation de la machine Il y a danger d incendie ou d électrocution si l on branche la machine sur une prise multiple ou sur une rallonge avec prise multiple Le fait de marcher sur le cordon d alimentation ou de poser dessus un objet lourd peut l endommager et causer un accident Un cordon abîmé ne doit jamais rester en service Down...

Страница 118: ...ire en option n est installé 1 158 mm 1 035 mm 100 mm ou plus Le Chargeur CRV N1 le Module de Finition interne S1 et le Magasin Papier Latéral Q1 en option sont installés 1 087 mm 1 553 mm 100 mm ou plus Le Chargeur CRV N1 le Module de Finition P A C AE2 l Unité de perforation 2 Trous L1 4 Trous N1 le Module de liaison E2 et le Magasin Papier Latéral Q1 en option sont installés 1 169 mm 2 082 mm 1...

Страница 119: ... Ne jamais essayer de déplacer la machine vous même Précautions d emploi Ne jamais essayer de démonter ni de modifier la machine Quand il est nécessaire d accéder à l intérieur de la machine se rappeler que celle ci comporte des parties extrêmement chaudes et sous haute tension Ne tenter aucune intervention non indiquée dans le présent guide Downloaded from ManualsPrinter com Manuals ...

Страница 120: ...tion Laisser un espace suffisant autour de la prise secteur pour pouvoir la débrancher en cas de nécessité Ne pas éteindre la machine ni ouvrir les portes avant en cours de fonctionnement Un bourrage pourrait s ensuivre Ne pas utiliser de produit aérosol au contenu inflammable tel que de la colle à proximité de la machine Cela pourrait provoquer un incendie En cours de fonctionnement la machine gé...

Страница 121: ...plus longue plusieurs jours de congés consécutifs etc ATTENTION Canon recommande de dupliquer ou de sauvegarder les données stockées sur le disque dur du produit afin d éviter toute perte en cas de défaillance ou autre dysfonctionnement de ce disque Ni Canon ni aucun prestataire de services ne sera responsable des préjudices éventuels liés à la perte des données stockées sur le disque dur du produ...

Страница 122: ...Guide des fonctions copie et boîte aux lettres En plus des fonctions de copie normales de nouvelles fonctions pratiques sont disponibles telles que Echantillon pour éviter les erreurs de copie Brochure pour réaliser des copies sous forme de brochures ou encore Mélange d originaux pour copier en même temps des originaux de formats différents ce qui accroît encore la productivité Fonction de boîte a...

Страница 123: ...par rapport aux télécopieurs classiques Dans un environnement mobile il est également possible de recevoir des télécopies à distance depuis des machines situées en dehors du bureau Il est possible d envoyer des télécopies depuis un ordinateur si la Carte Super G3 en option et le pilote de télécopie sont installés Impression Voir le Guide de l impression PS PCL UFR II Il est possible de transformer...

Страница 124: ...es de la série iR3045 iR3045N iR3035 iR3035N iR3025 iR3025N comme un scanner classique Il est possible de lire un document en utilisant cette machine et de lire les données dans une application installée sur un ordinateur Pour utiliser cette fonction il faut connecter la machine à un réseau sur lequel est configuré la fonction d impression installée en standard sur les machines iR3045N iR3035N iR3...

Страница 125: ...tème et nomenclature 1 13 Avant de commencer à utiliser la machine 1 Configuration du système et nomenclature Périphériques en option b c d f g e a j k i h Machine proprement dite Downloaded from ManualsPrinter com Manuals ...

Страница 126: ...éral Q1 f Socle double cassettes Y3 g Bac Séparateur D1 h Module enveloppes C2 i Unité de Perforation 2 Trous Q1 j Module de Finition interne S1 k Réceptacle supplémentaire de Finition interne B1 l Module de liaison E2 m Unité de Perforation 2 Trous L1 4 Trous N1 n Cartouche d agrafes D2 D3 o Agrafes J1 p Module de Finition P A C AE q Module de Finition AE1 Downloaded from ManualsPrinter com Manua...

Страница 127: ...cle double cassettes Y3 en option sont montés a Chargeur CRV N1 en option b Panneau de commande c Capot supérieur droit de la machine d Plateau d alimentation e Interrupteur principal f Bouton de test g Disjoncteur h Capot droit de cassette i Cassette n 2 j Cassette n 1 k Réceptacle de sortie l Guide du réceptacle de sortie Downloaded from ManualsPrinter com Manuals ...
Страница 128: ...ser la machine 1 m Vitre d exposition n Capot supérieur de l ensemble de fixation o RVC p Couvercle d approvisionnement d encre q Cartouche d encre m n o p q Le Chargeur CRV N1 et le Socle double cassettes Y3 en option sont montés Downloaded from ManualsPrinter com Manuals ...
Страница 129: ... Canon agréé local g Témoin Traitement Données Lumière verte qui clignote lorsque la machine effectue des opérations et qui est statique lorsque des données de télécopie sont stockées dans la mémoire h Touche Correction Pour effacer les erreurs de saisie i Clavier numérique Pour saisir des valeurs numériques j Touche code confidentiel Log In Out Pour configurer ou activer le mode de gestion des nu...

Страница 130: ... dans la zone Réglages d affichage de fonction dans les Réglages communs f Moniteur syst Pour modifier vérifier ou annuler des tâches et pour afficher ou imprimer le journal des tâches g Zone d affichage du statut de la tâche de l impression L état d avancement des tâches et des opérations de copie ainsi que le statut des périphériques et des consommables s affichent ici En fonction du service de ...

Страница 131: ...3035N iR3025N Le tableau ci dessous indique les différentes combinaisons de touches de fonction affichées sur l afficheur tactile des modèles iR3045N iR3035N iR3025N Périphérique s installé s Touches de fonction affichées Aucun Kit fonctions envoi Kit d impression UFR II PCL Kit fonctions envoi et Kit d impression UFR II PCL Carte Super G3 et Kit d impression UFR II PCL Kit fonctions envoi Kit d i...

Страница 132: ... bas à gauche de l écran est la suivante Icône Type de tâche Description Tâche de copie Tâche d envoi fax Tâche de boîte aux lettres Tâche d impression Tâche de rapport Tâche de lecture réseau Tâche de copie à distance Tâche du mode Utilisateur Icône Statut machine Description Erreur Bourrage papier Bourrage dans l ensemble d agrafage Remplacer la cartouche d encre Downloaded from ManualsPrinter c...

Страница 133: ...en enfichée dans la prise secteur AVERTISSEMENT Ne pas brancher ni débrancher le cordon d alimentation avec des mains humides car cela pourrait provoquer une électrocution 2 Mettre l interrupteur principal sur la position I Il se trouve sur le côté droit à l arrière de la machine Le témoin d alimentation situé sur le panneau de commande s allume lorsque l interrupteur principal est sur Marche REMA...

Страница 134: ... pas définie alors qu une application autre que MEAP est sélectionnée comme fonction initiale dans les Réglages communs en mode Utilisateur L écran de démarrage s affiche jusqu à ce que la machine soit prête à lire Si un message apparaît sur l écran tactile passer à l étape 4 L écran ci contre s affiche quand la machine est prête à lire Après l affichage de l écran illustré à droite il faut compte...

Страница 135: ...fonction initiale dans Réglages communs en mode Utilisateur L écran de démarrage s affiche jusqu à ce que la machine soit prête à lire Une fois l écran de démarrage disparu l écran de démarrage MEAP s affiche Il est possible d appuyer sur pour afficher les fonctions de copie et de boîte aux lettres même si l écran de démarrage MEAP est toujours affiché L écran des applications MEAP est affiché Dow...

Страница 136: ...moins 10 secondes avant de le remettre sur Marche Ne pas mettre la machine hors tension si l on souhaite envoyer ou recevoir des télécopies ou des I Fax Ne pas la mettre hors tension non plus si la Carte FAX Super G3 en option est installée et si l on souhaite envoyer ou recevoir des télécopies L envoi ou la réception de documents I fax ou de télécopies est impossible lorsque la machine est hors t...

Страница 137: ...mail I Fax ou à un serveur de fichiers les réglages réseau doivent avoir été paramétrés Voir le Guide de mise en réseau Sélection du type de ligne téléphonique Définir le type de ligne raccordé à la machine Si ce réglage est erroné la communication avec d autres machines sera impossible Veiller à vérifier le type de ligne téléphonique utilisée et effectuer le réglage approprié NOTE La Carte FAX Su...

Страница 138: ...t l heure à l aide des touches numériques Saisir le mois et le jour en entrant quatre chiffres zéros compris Saisir les quatre chiffres de l année et l heure sur 24 heures sur quatre chiffres zéros compris sans espaces Pour définir le fuseau horaire Dérouler la liste Fuseau horaire sélectionner le fuseau horaire dans lequel se situe la machine GMT Heure de l observatoire de Greenwich Angleterre ou...

Страница 139: ... Il s imprime en effet sur le document reçu par le destinataire Ce numéro peut aussi s inscrire sur l afficheur tactile de la machine destinataire si celle ci prévoit cette fonction NOTE La Carte FAX Super G3 en option est nécessaire pour ce réglage 1 Appuyer sur Réglages de communication Réglages de l utilisateur sous Réglages fax N de téléphone émetteur 2 Saisir le numéro de téléphone de l émett...

Страница 140: ...u du nom de l émetteur peuvent être activés à l aide de la rubrique Nom s de l expéditeur de l écran des réglages d envoi La Carte FAX Super G3 en option est nécessaire pour ce réglage 1 Appuyer sur Réglages des communications Réglages TX sous Réglages communs Nom s d expéditeur ITE 2 Sélectionner un numéro sous lequel enregistrer le nom de l expéditeur appuyer sur Mémoriser Modifier Il est possib...

Страница 141: ...hamp De de la machine du destinataire du document I fax et l adresse e mail de l utilisateur enregistrée pour SDL ou le service SSO d authentification du périphérique local s affiche dans le champ Expéditeur Voir la section Envoi d un I Fax du Guide des fonctions envoi et télécopie Si le système d authentification du domaine du service SSO y compris la combinaison Domain Authentication Local Devic...

Страница 142: ...e machine 1 30 Avant de commencer à utiliser la machine 1 1 Appuyer sur Réglages des communications Réglages TX sous Réglages communs Nom d émetteur 2 Saisir un nom appuyer sur OK Downloaded from ManualsPrinter com Manuals ...
Страница 143: ...s instructions à l écran L explication de la fonction et de son réglage s affiche Menu principal Il s agit du premier écran qui s affiche en appuyant sur Pour afficher l explication sur l aide appuyer sur Utilisation de l Aide NOTE Appuyer sur après sélection d un mode dans la fonction Copie ou Bte lettres pour afficher un écran expliquant ce mode Ecran de liste des fonctions Affiche une liste des...

Страница 144: ...formations détaillées et des rubriques connexes appuyer sur Afficher plus de réglages détaillés NOTE La touche Essayer s affiche dans l écran d explication pour certaines fonctions uniquement Exemple Procédure pour réaliser une copie sur un papier au format non standard 1 Appuyer sur Copie Copie sur format de papier non standard 2 Il est possible de consulter les informations détaillées de la fonc...

Страница 145: ...en périodique Ce chapitre explique la procédure d approvisionnement en papier et de remplacement de l encre Approvisionnement en papier 2 2 Remplacement de la cartouche d encre 2 6 Downloaded from ManualsPrinter com Manuals ...

Страница 146: ...vant de les charger Ne pas introduire de feuilles ou d autres objets dans les parties de la cassette non occupées par la pile de papier Un bourrage papier pourrait se produire NOTE Si un message invitant à mettre du papier s affiche avant la fin du tirage les impressions restantes sont automatiquement effectuées après chargement du type de papier approprié Si l on sélectionne une autre cassette il...

Страница 147: ...3 Entretien périodique 2 1 Appuyer sur le bouton de la cassette à approvisionner puis le relâcher 2 En la tenant par sa poignée tirer la cassette vers soi jusqu à ce qu elle vienne en butée Downloaded from ManualsPrinter com Manuals ...

Страница 148: ...Déramer aussi le papier après avoir déballé une ramette 4 Charger la pile de papier dans la cassette Egaliser les bords de la pile Bien taquer le bord des feuilles et aligner le papier sur le bord droit de la cassette Veiller à ce que le format défini au niveau de la cassette corresponde à celui du papier chargé Lors du premier chargement de papier dans la cassette régler la molette de réglage du ...

Страница 149: ...elle du papier du Guide de référence 5 Repousser doucement la cassette dans son logement jusqu à ce qu un déclic se fasse entendre ATTENTION Lorsque l on remet la cassette dans sa position initiale veiller à ne pas se blesser en se pinçant les doigts REMARQUE Il n est pas possible de faire des copies lorsque la limite de chargement de papier est dépassée ou quand la cassette est mal insérée dans l...

Страница 150: ...ite pour remplacer la cartouche d encre Si l on sélectionne Plus tard on peut effectuer certaines opérations réglages de modes ou lecture d originaux par exemple même si la cartouche d encre n est pas remplacée immédiatement AVERTISSEMENT Ne pas brûler ni jeter les cartouches d encre au feu car l encre restante pourrait s enflammer et occasionner des brûlures ou un incendie ATTENTION Conserver l e...

Страница 151: ...e se procurer une nouvelle cartouche d encre avant que la cartouche actuelle ne soit vide Appuyer sur les touches Précédent ou Suivant de l afficheur tactile pour obtenir des instructions sur la procédure de remplacement de la cartouche d encre Si l encre vient à manquer en cours de tirage les impressions restantes sont automatiquement effectuées après le remplacement de la cartouche 1 Ouvrir le c...

Страница 152: ...tante pourrait s enflammer et occasionner des brûlures ou un incendie ATTENTION S il est impossible de sortir la cartouche d encre vérifier que le levier se trouve dans la bonne position 4 Tourner le capuchon de protection rouge de la nouvelle cartouche d encre dans le sens de la flèche sens des aiguilles d une montre pour le retirer ATTENTION Ne pas toucher la pointe de la cartouche d encre ou la...

Страница 153: ... levier de blocage dans sa position initiale REMARQUE S assurer que le symbole sur le levier est aligné avec le symbole de la position Verrouillage NOTE Si l on insère une cartouche conçue pour un autre modèle il est impossible de déplacer le levier de blocage 7 Fermer le capot de l orifice d approvisionnement en encre ATTENTION Lors de la fermeture veiller à ne pas se blesser en se pinçant les do...

Страница 154: ...Remplacement de la cartouche d encre 2 10 Entretien périodique 2 Downloaded from ManualsPrinter com Manuals ...
Страница 155: ...ue comment éliminer un bourrage papier et comment procéder en cas d affichage d un message d erreur Elimination des bourrages papier 3 2 Messages d erreur 3 6 Liste des codes d erreur sans messages 3 6 Downloaded from ManualsPrinter com Manuals ...
Страница 156: ...élébile Lors de l élimination d un bourrage à l intérieur de la machine dégager doucement les feuilles afin d éviter que de l encre ne se détache du papier et ne pénètre dans les yeux ou la bouche Si cela se produit rincer immédiatement à l eau froide et consulter un médecin L ensemble de fixation et la zone voisine à l intérieur de la machine peuvent chauffer en cours d utilisation Lors de l élim...

Страница 157: ...s la remise sous tension Il faut donc éliminer les bourrages éventuels avant la mise hors tension de la machine Si un bourrage se produit dans la machine Voir les instructions des pages suivantes a Ensemble de fixation Voir la section Ensemble de fixation dans la machine du Guide de référence b RVC Voir la section RVC dans la machine du Guide de référence c Plateau d alimentation Voir la section P...

Страница 158: ...Q1 Voir la section Magasin Papier Latéral Q1 en option du Guide de référence c Chargeur CRV N1 Voir la section Chargeur CRV N1 du Guide de référence d Module de Finition interne S1 Voir la section Module de Finition interne S1 en option du Guide de référence e Bac Séparateur D1 Voir la section Bac Séparateur D1 en option du Guide de référence f Réceptacle J1 Voir la section Réceptacle J1 en option...

Страница 159: ...ité de Perforation 2 Trous L1 4 Trous N1 voir la section Unité de Perforation 2 Trous L1 4 Trous N1 en option du Guide de référence 2 Après avoir retiré le papier bloqué aux endroits indiqués sur l afficheur tactile remettre tous les leviers capots et portes dans leur position initiale 3 Suivre les instructions de l afficheur tactile L impression ou la copie peut reprendre dès que le papier bloqué...

Страница 160: ...r le code d erreur NOTE Si une tâche d envoi est annulée la mention STOP apparaît dans la colonne Résultats du rapport d émission 001 Cause 1 Des originaux de différentes tailles ont été lus alors que le mode Mélange d originaux n était pas activé Solution Placer les originaux activer le mode Mélange d originaux et relancer la lecture Cause 2 Des originaux de différentes tailles ont été lus en mod...

Страница 161: ...té modifié pendant le déroulement de la tâche ou l option Autoriser les impressions sans code confid est réglée sur Non Solution Contacter l administrateur système 703 Cause Le disque dur est plein et aucune autre image ne peut être lue Solution 1 Attendre quelques instants et recommencer la lecture lorsque les autres tâches d envoi sont terminées Solution 2 Effacer les documents stockés dans les ...

Страница 162: ...pages a été atteint Solution Contacter l administrateur système 817 Cause Une erreur de communication s est produite entre la machine et une imprimante distante Solution Vérifier la connexion réseau et réessayer Si le problème persiste contacter l administrateur système 823 Cause Impossible d établir une connexion à une imprimante distante Solution Vérifier la connexion réseau et réessayer Si la m...

Страница 163: ...é supprimés ou bien le mot de passe a été modifié Solution Contacter l administrateur système ou vérifier si le numéro de service et le mot de passe définis sur la machine hôte correspondent à ceux enregistrés sur l imprimante distante 849 Cause Les informations de périphérique n ont pas pu être distribuées car la machine client est en train de traiter une tâche Solution Essayer à nouveau ultérieu...

Страница 164: ...ions envoi et télécopie et le chapitre 2 Introduction aux fonctions de boîte aux lettres du Guide des fonctions copie et boîte aux lettres Cause 3 Le document ne peut pas être mémorisé car la boîte spécifiée contient déjà plus de 1 500 documents Solution Si la boîte spécifiée en contient beaucoup supprimer ceux qui sont inutiles 852 Cause Une erreur s est produite car l interrupteur principal a ét...

Страница 165: ...tilisation d un réseau TCP IP du Guide de mise en réseau Cause 4 Le nombre maximal de données recevables autorisé a dépassé la limite de réception Voir le chapitre 6 Réception de documents du Guide des fonctions envoi et télécopie Solution Relancer l impression une fois toutes les tâches en cours terminées Si le problème persiste vérifier que les données envoyées sont correctes Cause 5 Le nombre m...

Страница 166: ...tâche a été annulée au niveau de l hôte Solution Vérifier que le réseau fonctionne correctement et relancer l impression 858 Cause Il existe un problème avec les données d impression envoyées par une application externe Solution Vérifier les paramètres des données envoyées à la machine s assurer qu elles sont compatibles avec celle ci et réessayer d envoyer les données 859 Cause 1 Une erreur de co...

Страница 167: ...rôleur externe vers le périphérique de facturation en tant que données noir et blanc Solution Remplacer les données d impression ou modifier les réglages d impression et relancer l impression 862 Cause 1 Les réceptacles du module de finition ont dépassé leur capacité Voir le chapitre 9 Annexe du Guide de référence Solution Remplacer les données d impression ou modifier les réglages d impression et...

Страница 168: ...s du traitement des données PDL ou des données d image Solution Vérifier les réglages et relancer l impression 865 Cause Des restrictions ont été appliquées à la fonction boîte aux lettres Solution Contacter l administrateur système Downloaded from ManualsPrinter com Manuals ...

Страница 169: ... 4 Annexe Ce chapitre fournit d autres informations utiles Opérations multifonctions 4 2 Types de papier disponibles 4 4 Feuille de contrôle périodique du disjoncteur 4 6 Downloaded from ManualsPrinter com Manuals ...
Страница 170: ...s certaines conditions Réception Envoi Fax Lire Imprimante Copie Lecture et impression via Réseau via Fax Données d impression via Réseau via Fax Copie Boîte aux lettres Envoi Copie Document RX Données d impression Réception via Réseau via Fax Données d impression 3 3 3 3 3 Envoi Fax via Réseau via Fax 3 1 1 3 1 3 1 3 1 Lire Copie Boîte aux lettres 1 1 1 Envoi 3 1 3 1 3 1 3 Imprimante Copie 2 2 Do...

Страница 171: ...produit alternativement Lorsque aucun module de finition en option n est installé 1 page de chaque tâche est produite alternativement 3 La durée de traitement de la machine peut être plus lente NOTE Les performances de la machine peuvent être affectées si plusieurs tâches d envoi et de réception réseau ont lieu en même temps L impression de données depuis une boîte est traitée dans le tableau sous...

Страница 172: ... et recyclé varie de 64 à 90 g m2 Charger le papier dont le grammage est supérieur à 90 g m2 dans le plateau d alimentation 2 Le grammage du papier épais varie de 91 à 128 g m2 3 Certains types de papier calque ne peuvent pas être utilisés 4 Utiliser uniquement les transparents de format A4 conçus spécialement pour cette machine 5 Si le Module enveloppes C2 est installé sur la Cassette 1 il est po...

Страница 173: ...ssion depuis le plateau d alimentation dans le Guide de référence Les cassettes 3 4 et le Magasin Papier Latéral Q1 sont en option Format papier Largeur x Longueur Source d alimentation Cassette n 1 Cassette 2 3 4 Plateau d alimentation Magasin papier en option A3 297 mm x 420 mm A4 297 mm x 210 mm A4R 210 mm x 297 mm A5R 148 mm x 210 mm Enveloppe COM 10 No 10 104 7 mm x 241 3 mm 1 Monarch Catalog...

Страница 174: ...Suivre la procédure décrite à la section Contrôle périodique du disjoncteur p xxiii une ou deux fois par mois Utilisation de la feuille de contrôle Indiquer la date du contrôle et le nom du contrôleur Si le contrôle réussit cocher la case dans la colonne OK Sinon contacter le revendeur agréé Canon local De plus cocher la case de la colonne NG No Good ou incorrect Date du contrôle Date du contrôle ...

Страница 175: ...iR3045 iR3045N iR3035 iR3035N iR3025 iR3025N Anwenderhandbuch Downloaded from ManualsPrinter com Manuals ...

Страница 176: ...Funktionen des Systems zu erläutern Tutorium CD CD ROM Grundlegende Informationen Anwenderhandbuch Dieses Dokument Grundlegende Funktionen Störungsbeseitigung Referenzhandbuch CD ROM Anleitungen zum Nutzen der Kopier und Mailboxfunktionen Handbuch Kopier und Mailboxfunktionen CD ROM Anleitungen zu den Sendefunktionen und Faxfunktionen Handbuch Sendefunktionen und Faxfunktionen CD ROM Einrichten de...

Страница 177: ...lieren der MEAP Anwendungen und zum Verwenden des Login Service MEAP SMS Administratorhandbuch CD ROM Zum Ansehen des Handbuchs im PDF Format benötigen Sie Adobe Reader Adobe Acrobat Reader Wenn Adobe Reader Adobe Acrobat Reader nicht auf Ihrem System installiert ist laden Sie es bitte von der Website von Adobe Systems Incorporated herunter Wir haben uns bemüht sicherzustellen dass diese Anleitung...

Страница 178: ...mzufuhr xiv Handhabung xv Wartung und Inspektion xviii Verbrauchsmaterialien xix Andere Warnhinweise xix Hinweise zur CD ROM mit den Bedienungsanleitungen xx Inhalte der CD ROM mit den Bedienungsanleitungen xx CD ROM mit Bedienungsanleitungen xx CD ROM zur Super G3 FAXkarte zum Universal Send Kit xx Anwenderhandbuch CD ROM Menü xxi Systemanforderungen xxi Das Verwenden des CD ROM Menüs xxii Die re...

Страница 179: ... Registrieren der Rufnummer Ihres Systems 1 27 Das Registrieren von Absendernamen 1 28 Das Registrieren des Namens der Einheit 1 29 Das Aufrufen eines Infodisplays 1 31 Kapitel 2 Regelmäßige Wartungsarbeiten Das Einlegen von Papier 2 2 Das Einsetzen einer neuen Tonerpatrone 2 6 Kapitel 3 Störungsbeseitigung Das Entfernen von Papierstaus 3 2 Liste der Fehlermeldungen 3 6 Liste mit Fehlercodes ohne ...

Страница 180: ...kungen und Vorsichtsmaßnahmen sowie Sicherheitshinweise verwendet Bitte beachten Sie solche Hinweise aus Gründen der Sicherheit WARNUNG Wenn Sie eine so gekennzeichnete Warnung nicht beachten können ernsthafte Verletzungen oder Tod die Folge sein Bitte beachten Sie diese Warnungen unbedingt um den sicheren Betrieb zu gewährleisten ACHTUNG So wird eine Vorsichtsmaßnahme gekennzeichnet die Sie ergre...

Страница 181: ... dieses Produkt mit den EMC Anforderungen der EU Richtlinie zu Stromversorgungsnetzen von 230V 50 Hz genügt obwohl die Nennlast des Produktes bei 220 bis 240V 50 60 Hz liegt Die Verwendung von abgeschirmten Kabeln ist notwendig um die technischen EMC Anforderungen der EU Richtlinie zu erfüllen Sicherheit des Lasers Dieses Produkt wurde unter IEC60825 1 2007 und EN60825 1 2007 klassifiziert als Las...

Страница 182: ...d an der rechten Abdeckung der Kassetten und der Tonernachfüllöffnung angebracht Dieses System entspricht der Europanorm IEC60825 1 2007 und EN60825 1 2007 und stimmt mit folgenden Richtlinien überein CLASS 1 LASER PRODUCT LASER KLASSE 1 APPAREIL Á LASER DE CLASSE 1 APPARECCHIO LASER DI CLASSE 1 PRODUCTO LÁSER DE CLASE 1 APARELHO A LASER DE CLASSE 1 LUOKAN 1 LASER TUOTE LASERPRODUKT KLASS 1 ACHTUN...

Страница 183: ...mmelstelle für die Wiederaufbereitung von Elektro und Elektronik Altgeräten sowie Batterien und Akkumulatoren geschehen Der unsachgemäße Umgang mit Altgeräten kann aufgrund potenziell gefährlicher Stoffe die häufig in Elektro und Elektronik Altgeräten enthalten sind negative Auswirkungen auf die Umwelt und die menschliche Gesundheit haben Durch Ihre Mitarbeit bei der sachgemäßen Entsorgung dieses ...

Страница 184: ...on in den USA und oder anderen Ländern Andere Firmen oder Produktnamen die in diesem Handbuch verwendet werden und nicht in dieser Liste erwähnt sind können Warenzeichen der entsprechenden Firmen sein Copyright Copyright 2013 Canon Inc Alle Rechte vorbehalten Die Reproduktion und Übertragung aller Teile dieser Bedienungsanleitung ist unzulässig egal mit welchen Mitteln oder in welcher Form elektro...

Страница 185: ...n werden 5 Ungeachtet des Vorangegangenen darf die SOFTWARE nur dann an Dritte übertragen werden wenn a Sie alle Rechte am PRODUKT und alle Rechte und Verpflichtungen im Rahmen dieser Bestimmungen an den Übernehmer abtreten und b dieser Übernehmer sich verpflichtet sämtliche dieser Bestimmungen einzuhalten 6 Der Code der SOFTWARE darf nicht dekompiliert durch Reverse Engineering rekonstruiert zerl...

Страница 186: ... Sie ein Dokument rechtlich unbedenklich mit Hilfe Ihres Scanners einlesen und reproduzieren dürfen und oder auch das Ausdrucken einer solchen Reproduktion unbedenklich ist sollten Sie sich vorher den Rat einer zuständigen Stelle einholen Papiergeld Schecks oder Urkunden Steuermarken gültig oder entwertet Zahlungsanweisungen Führerscheine und Fahrzeugbriefe Schuldverschreibungen oder andere Bürgsc...

Страница 187: ...en Bitte legen Sie keinen der folgenden Gegenstände auf das System Ein Kontakt solcher Materialien mit den Hochspannungsbereichen im System kann zu Feuer oder elektrischem Schlag führen Sollten solche Materialien Substanzen in das System geraten sein schalten Sie es bitte sofort aus und ziehen den Netzstecker Dann nehmen Sie bitte Kontakt zu Ihrem Canon Servicepartner auf Halsketten oder andere Me...

Страница 188: ...noten es da das einen elektrischen Schlag verursachen kann Bitte stecken Sie den Netzstecker vollständig in die Steckdose es kann sonst zu Feuer oder elektrischem Schlag kommen Bitte verwenden Sie ausschließlich das mitgelieferte Netzkabel da es sonst zu Feuer oder elektrischem Schlag kommen kann Verwenden Sie im Allgemeinen keine Verlängerungskabel für den Anschluss des Systems an die Stromversor...

Страница 189: ...önnte das Stromkabel oder das Schnittstellenkabel beschädigt werden und es kann ein Brand oder Elektrischer Schlag verursacht werden Bitte achten Sie darauf dass keine Heftklammern oder andere Metallgegenstände in das System geraten Auch Wasser Flüssigkeiten oder brennbare Substanzen Alkohol Benzin Verdünner etc dürfen nicht in Kontakt mit dem Systeminneren kommen Ein Kontakt solcher Materialien m...

Страница 190: ...re Hände nicht in den Bereich im Fach in dem geheftet wird in der Nähe der Walzen da Sie sich dabei verletzen können Der Laserstrahl ist schädlich für den menschlichen Körper Da die Strahlung im System vollständig durch Schutzgehäuse und Abdeckungen abgeschirmt ist kann er während der normalen Bedienung durch den Anwender in keiner Phase nach außen gelangen Lesen Sie zu Ihrer Sicherheit folgende I...

Страница 191: ...s ein Klasse 1 Laserprodukt unter IEC60825 1 2007 Wenn Laserlicht aus dem System austritt und in Kontakt mit Ihren Augen kommt können ernste Verletzungen und Schäden auftreten Durch Einstellungen Justagen oder Programmierungen die nicht Thema dieses Handbuchs sind kann gefährliche Strahlung aus dem System austreten Downloaded from ManualsPrinter com Manuals ...

Страница 192: ...der elektrischem Schlag kommen kann Bitte werfen Sie verbrauchte Tonerpatronen nie in offenes Feuer weil sich dadurch der noch in den Flaschen befindliche Resttoner entzünden und Verbrennungen oder einen Brand verursachen kann ACHTUNG Die Fixiereinheit und ihre Umgebung werden sehr heiß während das System in Gebrauch ist Wenn Sie Papierstaus entfernen oder andere Arbeiten im Systeminneren ausführe...

Страница 193: ...ken Sie die Alttonerbehälter zum Entsorgen in einen Beutel um ein Verstreuen von Toner zu vermeiden und lagern Sie ihn dann nicht in der Nähe von offenem Feuer ACHTUNG Bitte bewahren Sie Toner außerhalb der Reichweite von kleinen Kindern auf Sollten Verbrauchsmaterialien verschluckt oder eingeatmet worden sein ziehen Sie bitte sofort einen Arzt zu Rate Bauen Sie die Tonerpatrone nicht auseinander ...

Страница 194: ...uch enthält grundlegende Anleitungen zum Arbeiten mit dem System sowie Informationen zur Wartung und zur Störungsbeseitigung Handbuch Kopier und Mailboxfunktionen Dieses Handbuch enthält Anleitungen zu den Kopier und Mailboxfunktionen Handbuch Remote UI Dieses Handbuch enthält Anleitungen zum Arbeiten mit dem Remote User Interface Netzwerkhandbuch Dieses Handbuch enthält Informationen zur Einbindu...

Страница 195: ...on Ihres Computers können einige Funktionen möglicherweise nicht genutzt werden Wenn sich das PDF Handbuch nicht aus dem CD ROM Menü öffnen lässt öffnen Sie die PDF Datei direkt über die Taste Deutsch auf der Anwenderhandbuch CD ROM Windows Macintosh OS Windows 98 Me Windows 2000 Service Pack 3 oder höher Windows XP Service Pack 1a Windows Server 2003 Mac OS 9 x Mac OS X Speicher Der Speicher den ...

Страница 196: ...te mit Doppelklick auf das Icon START und starten so das CD ROM Menü Damit rufen Sie das Display zur Auswahl der Sprache auf Das Aussehen des Displays kann von der Abbildung abweichen Es richtet sich nach dem verwendeten System a HANDBUCH DURCHSUCHEN Sie können sich alle aufgeführten Handbücher durch Anklicken des jeweiligen Handbuchs ansehen Nachdem Sie das Icon des gewünschten Handbuchs angeklic...

Страница 197: ...einem spitzen Gegenstand wie z B der Mine eines Kugelschreibers ein WICHTIG Drücken Sie den Testknopf kurz HINWEIS Der Schutzschalter befindet sich an der linken Seite der Einheit Nähere Informationen zur Position des Schutzschalters finden Sie im Abschnitt Außenansicht und Innenansicht auf Seite 1 15 2 Stellen Sie sicher dass sich der Schutzschalter in der Position AUS Seite befindet WICHTIG Bitt...

Страница 198: ...zschalters auf EIN I Seite 4 Kippen Sie den Hauptschalter in die Stellung I 5 Füllen Sie das auf Seite 4 6 abgebildete Prüfprotokoll aus um Ihre regelmäßigen Inspektionen des Schutzschalters zu dokumentieren 3 EIN I Seite AUS Seite I Seite Seite Downloaded from ManualsPrinter com Manuals ...

Страница 199: ... 1 13 Zusatzausstattung 1 13 Außenansicht und Innenansicht 1 15 Das Bedienfeld Aufbau und Funktionen 1 17 Sensordisplay 1 18 Die Stromzufuhr für System und Bedienfeld 1 21 Das Ein und Ausschalten des System am Hauptschalter 1 21 Eingaben vor Einsatz der Faxfunktionen 1 25 Die Auswahl des Wählverfahrens Telefonleitung 1 25 Das Einstellen von aktuellem Datum aktueller Zeit 1 26 Das Registrieren der ...

Страница 200: ...olgenden Orte Vermeiden Sie die Installation an besonders kalten und trockenen oder an extrem heißen und feuchten Orten Vermeiden Sie z B die Installation in der Nähe von Wasseranschlüssen Heißwasserbereitern Luftbefeuchtern Heizkörpern Öfen Klimaanlagen etc Vermeiden Sie die Aufstellung in direkter Sonnenbestrahlung Schützen Sie das iR System mit einem Vorhang falls erforderlich Achten Sie aber b...

Страница 201: ...n nachdem Sie einige Zeit am System gearbeitet haben Wenn Sie das System in einem schlecht belüfteten Raum aufstellen müssen sorgen Sie bitte in regelmäßigen Abständen für Frischluftzufuhr um ein angenehmes Arbeitsklima zu erhalten Vermeiden Sie bitte Aufstellungsorte an denen es staubig oder schmutzig ist Meiden Sie Orte an denen sich Ammoniakgas entwickelt Installieren Sie ihn nicht in der Nähe ...

Страница 202: ...System erzeugt können den Betrieb solcher Systeme beeinträchtigen Bitte installieren Sie das System nicht in der Nähe von Fernsehgeräten Radios oder anderen elektronischen Geräten Das System kann den Empfang des Ton und Bildsignals stören Bitte schließen Sie die Einheit an eine separate Steckdose an und lassen so viel Abstand wie möglich zu anderen elektronischen Geräten Die Fixierstopper für sich...

Страница 203: ...icht weitere Geräte über die gleiche Steckdose mit der Stromversorgung Bitte schließen Sie das System nicht über eine Mehrfachsteckdose oder Verlängerungskabel an es könnte sonst ein Brand oder elektrischer Schlag entstehen Das Kabel kann beschädigt werden wenn häufig darauf getreten wird oder schwere Objekte darauf platziert werden Der fortgesetzte Gebrauch beschädigter Kabel kann zu Unfällen wie...

Страница 204: ...n zu gewährleisten Ohne Element der Zusatzausstattung 1 158 mm 1 035 mm mindestens 100 mm Mit Einzug DADF N1 Finisher S1 und Papiermagazin Q1 alles Zusatzausstattung 1 087 mm 1 553 mm mindestens 100 mm Mit Einzug DADF N1 Finisher mit Sattelheftung AE2 Locher Einheit L1 Glättungseinheit E2 und Papiermagazin Q1 alles Zusatzausstattung 1 169 mm 2 082 mm mindestens 100 mm Downloaded from ManualsPrinte...

Страница 205: ...ebspartner auf Bitte versuchen Sie nicht das System selbst zu transportieren Handhabung Bitte versuchen Sie nicht das System auseinander zu bauen oder zu verändern Im System sind Bereiche mit hohen Temperaturen und Hochspannung Bitte gehen Sie entsprechend vorsichtig vor wenn Sie im Inneren der Einheit arbeiten Nehmen Sie bitte außerdem nie Arbeiten vor die nicht Thema dieser Bedienungsanleitung s...

Страница 206: ...e leicht an den Netzstecker kommen Bitte schalten Sie das System nie aus oder öffnen die vorderen Abdeckungen während es arbeitet Das kann Papierstaus verursachen Bitte verwenden Sie in der Nähe des Systems keine entflammbaren Sprays wie beispielsweise Sprühkleber Diese könnten sich entzünden Das System erzeugt während des Betriebs Ozon in geringer Menge Auch wenn man berücksichtigt dass die Sensi...

Страница 207: ...UNG Die auf der Festplatte des Systems registrierten Daten können nicht gespeichert werden Canon empfiehlt Ihnen daher ein Backup der Originaldateien auf Ihrem PC anzufertigen bzw Kopien oder Ausdrucke unabhängig vom System aufzubewahren Weder Canon noch ein Serviceunternehmen ist für Schäden durch Verlust von Daten verantwortlich die auf der Festplatte des Systems gespeichert sind Lesen Sie dazu ...

Страница 208: ... Kopieren Vgl Handbuch Kopier und Mailboxfunktionen Außer den herkömmlichen Kopierfunktionen bietet das System Ihnen neue Funktionen wie z B Mustersatz zum Vermeiden von Fehlkopien Broschüre zum Zusammenfassen von Einzelkopien zu Broschüren und Unterschiedliche Originalformate zum gemeinsamen Kopieren von Originalen unterschiedlicher Formate Mit diesen Funktionen wird Ihre Produktivität noch weite...

Страница 209: ...somit die Telefonkosten gegenüber konventionellen Faxgeräten erheblich senken können In einer mobilen Umgebung können Sie außerdem Faxdokumente per Fernbedienung von einem System außerhalb des Büros empfangen Wenn die optionale Super G3 FAXkarte und der Faxtreiber installiert sind können Sie Faxdokumente von Ihrem Computer aus senden Drucken Vgl PS PCL UFR II Druckerhandbuch Wenn das UFR II PCL Pr...

Страница 210: ...R3045N iR3035 iR3035N iR3025 iR3025N als konventionellen Scanner verwenden Sie können Dokumente mit dem System einscannen und Daten in Anwendungen auf Ihrem Computer einlesen Wenn Sie diese Funktion verwenden wollen muss das System an ein Netzwerk angeschlossen und über die Druckerfunktion Standardausstattung für den iR3045N iR3035N iR3025N verfügen außerdem muss Network ScanGear auf Ihrem Compute...

Страница 211: ...Konfiguration und Aufbau des Systems 1 13 Vor dem Start 1 Konfiguration und Aufbau des Systems Zusatzausstattung b c d f g e a j k i h Haupteinheit Downloaded from ManualsPrinter com Manuals ...

Страница 212: ...g J1 e Papiermagazin Q1 f Kassetteneinheit Y3 g Internes Zusatzausgabefach D1 h Einzug für Briefumschläge C2 i Locher Einheit Q1 j Finisher S1 k Zusätzliches Finisherfach B1 l Glättungseinheit E2 m Locher Einheit L1 n Heftklammern D2 D3 o Heftklammern J1 p Finisher mit Sattelheftung AE q Finisher AE1 Downloaded from ManualsPrinter com Manuals ...

Страница 213: ... Kassetteneinheit Y3 beides Zusatzausstattung a Einzug DADF N1 Zusatzausstattung b Bedienfeld c Obere rechte Abdeckung der Haupteinheit d Stapelanlage e Hauptschalter f Testknopf g Schutzschalter h Rechte Abdeckung der Kassetten i Kassette 2 j Kassette 1 k Ausgabefach l Führung am Ausgabefach Downloaded from ManualsPrinter com Manuals ...

Страница 214: ...tart 1 m Vorlagenglas n Obere Abdeckung der Fixiereinheit o Duplexeinheit p Abdeckung für die Öffnung der Tonerzufuhr q Tonerpatrone m n o p q Mit Einzug DADF N1 und Kassetteneinheit Y3 beides Zusatzausstattung Downloaded from ManualsPrinter com Manuals ...

Страница 215: ...vicepartner g Datenkontrolle Diese Kontrolllampe blinkt grün wenn das System arbeitet und leuchtet grün wenn Faxdaten im Speicher sind h Korrekturtaste Durch Betätigen dieser Taste können Sie irrtümlich eingegebene Werte oder Zeichen löschen i Zahlentasten Hier geben Sie Zahlenwerte ein j ID Log In Out Taste Diese Taste betätigen Sie wenn die Verwaltung mit Abteilungs IDs aktiv ist k Kontrastregle...

Страница 216: ...in der die Funktionstasten auf dem Display der Allgemeinen Einstellungen angeordnet sind f Systemmonitor Über diese Taste rufen Sie den Systemmonitor zum Ändern Prüfen oder Abbrechen eines Jobs oder Ausdrucken des Logs auf g Job Druckmonitoranzeige Hier wird der aktuelle Status der Jobs und Kopiervorgänge sowie der Einheiten und der Verbrauchsmaterialien angezeigt Abhängig vom verwendeten Login Se...

Страница 217: ...olgenden Tabelle finden Sie die verschiedenen Möglichkeiten zum Kombinieren der Funktionstasten die auf dem Display des iR3045N iR3035N iR3025N angezeigt werden Angeschlossene Zusatzausstattung Angezeigte Funktionstasten Ohne Universal Send Kit UFR II PCL Printer Kit Universal Send Kit und UFR II PCL Printer Kit Super G3 FAXkarte und UFR II PCL Printer Kit Universal Send Kit UFR II PCL Printer Kit...

Страница 218: ...kstatus unten links im Display wird unten beschrieben Icon Jobtyp Beschreibung Kopierjob Sende Faxjob Mailboxjob Druckjob Berichtjob Netzwerkscanjob Remotekopierjob Job aus den Zusatzfunktionen Icon Status der Einheit Beschreibung Fehler Papierstau Heftklammerstau Tonermangel Downloaded from ManualsPrinter com Manuals ...

Страница 219: ...r nicht mit nassen oder feuchten Händen in die Steckdose oder ziehen ihn heraus es kann zu elektrischem Schlag kommen 2 Kippen Sie den Hauptschalter in die Stellung I Der Hauptschalter befindet sich hinten an der rechten Seite des Systems Nach dem Einschalten des Systems leuchtet die Bereitschaftsanzeige auf dem Bedienfeld WICHTIG Wenn die Bereitschaftsanzeige auf dem Bedienfeld nicht leuchtet obw...

Страница 220: ...dere Anwendung als MEAP in den Allgemeinen Einstellungen Menü Zusatzfunktionen als ursprüngliche Funktion gewählt wurde Das Startdisplay wird so lange angezeigt bis das System scanbereit ist Wenn eine Meldung auf dem Display angezeigt wird lesen Sie bei Schritt 4 weiter Das links abgebildete Display erscheint wenn das System scanbereit ist Das System ist ca 30 Sekunden nachdem oben abgebildetes Di...

Страница 221: ...en Menü Zusatzfunktionen gewählt wurde Das Startdisplay wird so lange angezeigt bis das System scanbereit ist Nach dem Startdisplay wird das MEAP Startdisplay angezeigt Durch Berühren der Taste können Sie zu den Systemfunktionen Kopie Mailbox etc umschalten auch wenn das MEAP Startdisplay noch angezeigt wird Das Menü mit der MEAP Anwendung wird angezeigt Downloaded from ManualsPrinter com Manuals ...

Страница 222: ... einschalten Schalten Sie das System nicht am Hauptschalter AUS wenn Sie weiterhin Fax oder I Faxdokumenten senden und empfangen wollen Schalten Sie das System außerdem nicht am Hauptschalter AUS wenn die optionale Super G3 FAXkarte installiert ist und Sie weiterhin Faxdokumente senden oder empfangen wollen Das Senden und Empfangen von Fax und I Faxdokumenten ist nur möglich wenn das System am Hau...

Страница 223: ...eren Vgl Netzwerkhandbuch Die Auswahl des Wählverfahrens Telefonleitung Stellen Sie den Typ der Telefonleitung ein über die Ihr System an das öffentliche Netz angeschlossen ist Wenn diese Einstellung nicht stimmt können Sie nicht mit anderen Systemen kommunizieren Bitte prüfen Sie daher unbedingt vor dem Verwenden des Systems an welchen Typ Telefonleitung das System angeschlossen ist und programmi...

Страница 224: ...ie den Tag und den Monat mit vier Stellen einschließlich Nullen ein Geben Sie alle vier Stellen für das Jahr und die Uhrzeit entsprechend der 24 Stundenuhr vierstellig und ohne Leerzeichen aber mit Nullen ein Bei Auswahl der Zeitzoneneinstellungen Berühren Sie die Auswahlliste zu den Zeitzonen Wählen Sie die Zeitzone in der das System installiert ist aus der Auswahlliste GMT Die Zeit im Greenwich ...

Страница 225: ...er wird dann auf jedem Faxdokument eingedruckt das Sie absenden Abhängig vom Typ des Empfangssystems kann diese Rufnummer auch beim Empfänger auf dem Display des Faxgeräts angezeigt werden HINWEIS Für diese Einstellung benötigen Sie die Super G3 FAXkarte 1 Betätigen Sie die Taste Berühren Sie nacheinander die Tasten Kommunikationseinstellungen Anwendereinstellungen unter Faxeinstellungen Eigene Ru...

Страница 226: ...n Angabe zu Name Firma angezeigt und gedruckt wird Für diese Einstellung benötigen Sie die Super G3 FAXkarte 1 Betätigen Sie die Taste Berühren Sie nacheinander die Tasten Kommunikationseinstellungen Sendeeinstellungen unter Allgemeine Einstellungen Absendername TTI 2 Wählen Sie die Nummer unter der Sie den Absendernamen registrieren wollen Berühren Sie die Taste Speichern Bearbeiten Sie können bi...

Страница 227: ...em zur Authentisierung der lokalen Einheit von SSO registriert haben erscheint im Absenderfeld auf dem I Fax Empfängersystem Vgl Handbuch Sendefunktionen und Faxfunktionen Abschnitt Das Senden von I Faxdokumenten Wenn das System der Domain Authentisierung in der Anwenderauthentisierung von SSO aktiv einschließlich Domain Authentisierung mit Domain Authentisierung Authentisierung der lokalen Einhei...

Страница 228: ...etätigen Sie die Taste Berühren Sie nacheinander die Tasten Kommunikationseinstellungen Sendeeinstellungen unter Allgemeine Einstellungen Name der Firma 2 Geben Sie den Namen ein Bestätigen Sie durch Berühren der Taste OK Downloaded from ManualsPrinter com Manuals ...

Страница 229: ...tion und zu ihrer Aktivierung wird angezeigt Hauptmenü Dieses Display erscheint sofort nach Berühren der Taste Berühren Sie die Taste Hilfefunktion verwenden um Erläuterungen zum Anzeigen der Infos aufzurufen HINWEIS Nachdem Sie eine Funktion der Kopier und Mailboxfunktionen ausgewählt haben betätigen Sie die Taste und rufen Sie so eine Erklärung zu dieser Funktion auf das Display Display Liste Hi...

Страница 230: ...n können Sie sich weitere Detailinformationen oder verwandte Themen anzeigen lassen HINWEIS Die Taste Versuch wird nur auf dem Erläuterungsdisplay einiger Kopierfunktionen angezeigt Beispiel Vorgehen beim Kopieren auf Papier in einem Sonderformat 1 Berühren Sie nacheinander die Tasten Kopieren Kopieren auf nicht standardisiertem Papierformat 2 Prüfen Sie die Detailinformationen zu dieser Funktion ...

Страница 231: ...iten In diesem Abschnitt finden Sie Informationen zum Einlegen von Papier in die Kassetten sowie zum Ergänzen des Tonervorrats Das Einlegen von Papier 2 2 Das Einsetzen einer neuen Tonerpatrone 2 6 Downloaded from ManualsPrinter com Manuals ...

Страница 232: ...läche aus Legen Sie nie Papier oder irgendwelche anderen Gegenstände in den freien Bereich der Kassette neben den Papierstapel Dadurch können Sie Papierstaus verursachen HINWEIS Wenn die Aufforderung zum Einlegen von Papier während des Druckvorgangs angezeigt wird werden die restlichen Drucke automatisch erstellt nachdem Sie das richtige Papier eingelegt haben Wenn Sie einen anderen Zufuhrort wähl...

Страница 233: ...arbeiten 2 1 Drücken Sie den Entriegelungsknopf zum Lösen der Kassette in die Sie Papier legen wollen ein und lassen Sie ihn dann los 2 Fassen Sie die Kassette am Griff und ziehen sie bis zum Anschlag heraus Downloaded from ManualsPrinter com Manuals ...

Страница 234: ...den kann Fächern Sie Papier bitte auch auf wenn Sie es aus einer neuen Verpackung genommen haben 4 Legen Sie den Papierstapel in die Kassette Glätten Sie bitte die Kanten des Papierstapels Lassen Sie das Papier in die Kassette gleiten und richten Sie es an der rechten Kassettenkante aus Vergewissern Sie sich dass die Einstellungen für das Papierformat auf der Kassette mit dem eingelegten Papierfom...

Страница 235: ...ben Sie sie langsam wieder in das System bis sie mit einem Klicken einrastet ACHTUNG Schieben Sie die Kassette bitte vorsichtig in ihre Originalposition zurück damit Sie sich nicht die Finger klemmen Sie können sich verletzen WICHTIG Wenn der Papierstapel in der Kassette höher ist als die Höhenmarkierung oder wenn die Kassette nicht vollständig im System ist können Sie nicht kopieren oder drucken ...

Страница 236: ... Später fixieren können Sie mit einigen Funktionen wie beispielsweise Einstellungen vornehmen oder Originale Scannen fortfahren auch wenn Sie die Tonerpatrone nicht sofort ersetzen WARNUNG Bitte werfen Sie verbrauchte Tonerpatronen nie in offenes Feuer weil sich dadurch der noch in der Patrone befindliche Resttoner entzünden und Verbrennungen oder einen Brand verursachen kann ACHTUNG Lagern Sie To...

Страница 237: ...he sind Es ist ratsam sich eine neue Tonerpatrone zu besorgen bevor der Resttoner verbraucht ist Durch Berühren der Tasten Zurück oder Weiter auf dem Sensordisplay erhalten Sie eine genaue Erklärung zum Austauschen der Tonerpatrone Wenn der Tonervorrat während eines laufenden Druckvorgangs erschöpft ist werden die restlichen Exemplare gedruckt nachdem Sie Toner nachgefüllt haben 1 Öffnen Sie die A...

Страница 238: ...er noch in den Flaschen befindliche Resttoner entzünden und Verbrennungen oder einen Brand verursachen kann ACHTUNG Wenn sich die Tonerpatrone nicht herausziehen lässt vergewissern Sie sich dass der Knopf vollständig herum gedreht wurde und in der richtigen Position steht 4 Drehen Sie die rote Schutzkappe der neuen Tonerpatrone in Pfeilrichtung gegen den Uhrzeigersinn und entfernen Sie sie so ACHT...

Страница 239: ...unten WICHTIG Vergewissern Sie sich dass die Markierung auf dem Hebel mit der Markierung der Position Verriegeln ausgerichtet ist HINWEIS Wenn Sie eine Tonerpatrone einsetzen die für ein anderes Modell gebaut wurde lässt sich der Verschlusshebel nicht bewegen 7 Schließen Sie die Abdeckung der Tonernachfüllöffnung ACHTUNG Bitte schließen Sie die Abdeckungen vorsichtig und achten Sie darauf dass Sie...

Страница 240: ...Das Einsetzen einer neuen Tonerpatrone 2 10 Regelmäßige Wartungsarbeiten 2 Downloaded from ManualsPrinter com Manuals ...

Страница 241: ...nen zum Vorgehen bei Auftreten eines Papierstaus in der Haupteinheit und in Elementen der Zusatzausstattung und Fehlermeldungen Das Entfernen von Papierstaus 3 2 Liste der Fehlermeldungen 3 6 Liste mit Fehlercodes ohne Meldungen 3 6 Downloaded from ManualsPrinter com Manuals ...

Страница 242: ...den oder Kleidung haben waschen Sie ihn sofort mit kaltem Wasser aus Wenn Sie warmes Wasser verwenden fixieren Sie den Toner so dass er sich unter Umständen nicht mehr entfernen lässt Bitte ziehen Sie gestautes Papier vorsichtig aus dem System um zu vermeiden dass der Toner herunter weht und Ihnen in Mund oder Augen gerät Sollte Toner in Mund oder Augen gelangen spülen Sie sofort mit kaltem Wasser...

Страница 243: ...u in den Kassetten nicht mehr erkannt nachdem Sie das System wieder eingeschaltet haben Bitte entfernen Sie den Papierstau ohne das System auszuschalten Wenn Papier in der Haupteinheit gestaut ist Informationen finden Sie auf den folgenden Seiten a Fixiereinheit Vgl Referenzhandbuch Abschnitt Fixiereinheit Inneres der Haupteinheit b Duplexeinheit Vgl Referenzhandbuch Abschnitt Duplexeinheit Innere...

Страница 244: ...ng b Papiermagazin Q1 Vgl Referenzhandbuch Abschnitt Papiermagazin Q1 Zusatzausstattung c Einzug DADF N1 Vgl Referenzhandbuch Abschnitt Einzug DADF N1 d Finisher S1 Vgl Referenzhandbuch Abschnitt Finisher S1 Zusatzausstattung e Internes Zusatzausgabefach D1 Vgl Referenzhandbuch Internes Zusatzausgabefach D1 Zusatzausstattung f Kopienauffang J1 Vgl Referenzhandbuch Abschnitt Kopienauffang J1 Zusatz...

Страница 245: ...s gestaute Papier aus den Positionen entfernt haben die auf dem Display angezeigt werden stellen Sie bitte alle Hebel und Abdeckungen in ihre ursprüngliche Position zurück 3 Arbeiten Sie nun weiter und folgen Sie den Anleitungen auf dem Display Nachdem Sie alles gestaute Papier aus allen Positionen außer dem Einzug entfernt haben wird der Kopier bzw Druckvorgang wieder aufgenommen Wenn noch gestau...

Страница 246: ... wird wird im Journal und Sendebericht in der Spalte Ergebnis die Bemerkung STOPP gedruckt 001 Grund 1 Originale mit unterschiedlichen Formaten wurden gescannt und die Funktion Unterschiedliche Originalformate war nicht aktiv Lösung Legen Sie Ihre Originale ein auf aktivieren Sie die Funktion Unterschiedliche Originalformate und versuchen Sie erneut zu scannen Grund 2 Originale mit unterschiedlich...

Страница 247: ...ngs ID oder das Passwort wurde geändert während ein Auftrag bearbeitet wurde oder die Einstellung Druckaufträge mit unbekannter ID zulassen steht auf Aus Lösung Benachrichtigen Sie Ihren Systemmanager 703 Grund Die Festplatte ist voll und Sie können keine Bilder mehr scannen Lösung 1 Warten Sie einen Moment und versuchen Sie erneut zu scannen nachdem andere Sendejobs abgeschlossen sind Lösung 2 Lö...

Страница 248: ...gen Sie Ihren Systemmanager 817 Grund Ein Kommunikationsfehler ist zwischen Ihrem System und einem Remote Drucker aufgetreten Lösung Prüfen Sie die Netzwerkverbindungen und versuchen Sie es noch einmal Wenn der Kommunikationsfehler weiter besteht benachrichtigen Sie Ihren Systemmanager 823 Grund Die Verbindung zu einem Remotedrucker ist nicht möglich Lösung Prüfen Sie die Netzwerkverbindungen und ...

Страница 249: ...Passwort verändert wurde Lösung Benachrichtigen Sie Ihren Systemmanager oder vergewissern Sie sich dass die Angaben zu Abteilungs ID und Passwort im Host System und im Remotedrucker übereinstimmen 849 Grund Die Informationen zur Einheit konnten nicht weitergeleitet werden da das Auftraggebersystem einen Auftrag bearbeitet Lösung Versuchen Sie nochmals die Information zur Einheit weiterzuleiten wen...

Страница 250: ...Das Empfangen von Dokumenten und Handbuch Kopier und Mailboxfunktionen Kapitel 2 Einführung in die Mailboxfunktionen Grund 3 Das Dokument konnte nicht gespeichert werden weil sich in der ausgewählten Box bereits mehr als 1 500 Dokumente befinden Lösung Wenn bereits viele Dokumente gespeichert sind löschen Sie unnötige Dokumente aus der definierten Box 852 Grund Ein Fehler ist aufgetreten weil das ...

Страница 251: ...ch Kapitel 3 Das Arbeiten in einem TCP IP Netzwerk Grund 4 Die maximale Anzahl der zu empfangenden Daten übersteigt den definierten Grenzwert Vgl Handbuch Sendefunktionen und Faxfunktionen Kapitel 6 Das Empfangen von Dokumenten Lösung Versuchen Sie erneut die Dokumente zu drucken nachdem alle laufenden Jobs abgeschlossen sind Wenn Sie noch immer nicht drucken können prüfen Sie die Sendedaten Grund...

Страница 252: ...Sie sich dass das Netzwerk richtig funktioniert und versuchen Sie dann noch einmal zu drucken 858 Grund Ein Problem mit den Druckdaten die von einer externen Anwendung gesendet wurden ist aufgetreten Lösung Prüfen Sie die Einstellungen der Daten die an das System gesendet werden vergewissern Sie sich dass sie mit der Einheit kompatibel sind und versuchen Sie die Daten noch einmal zu senden 859 Gru...

Страница 253: ...rden Farbdaten als monochrome Daten vom externen Controller an die Rechnungswerteinheit gesendet Lösung Verändern Sie die Druckdaten oder die Druckeinstellungen und versuchen Sie noch einmal zu drucken 862 Grund 1 Die maximale Anzahl Blätter ist in den Fächern des Finishers mit Sattelheftung Vgl Referenzhandbuch Kapitel 9 Anhang Lösung Verändern Sie die Druckdaten oder die Druckeinstellungen und v...

Страница 254: ...arbeitung von PDL Daten oder Bilddaten ist ein Fehler aufgetreten Lösung Prüfen Sie die Einstellungen und versuchen Sie noch einmal zu drucken 865 Grund Die Mailboxfunktion ist eingeschränkt Lösung Benachrichtigen Sie Ihren Systemmanager Downloaded from ManualsPrinter com Manuals ...

Страница 255: ...el enthält weitere nützliche Informationen Die multifunktionalen Operationen 4 2 Geeignete Kopier und Druckmaterialien 4 4 Das Prüfblatt für die regelmäßige Inspektion des Schutzschalters 4 6 Downloaded from ManualsPrinter com Manuals ...

Страница 256: ...Operation Verfügbar Nicht verfügbar Unter bestimmten Bedingungen verfügbar Empfang Senden Scannen Drucken Kopie Scannen und Drucken per Netzwerk via Fax Druck daten per Netzwerk per Fax Kopie Mailbox Senden Kopie EM Dokument Druck daten Empfang per Netzwerk via Fax Druckdaten 3 3 3 3 3 Senden per Netzwerk via Fax 3 1 1 3 1 3 1 3 1 Scannen Kopie Mailbox 1 1 1 Senden 3 1 3 1 3 1 3 Drucken Kopie 2 2 ...

Страница 257: ... abwechselnd ein Satz ausgegeben Ohne Finisher Zusatzausstattung Von jedem Job wird abwechselnd eine Seite ausgegeben 3 Die Arbeitsgeschwindigkeit des Systems kann verlangsamt sein HINWEIS Wenn mehrere Netzwerk Sende und Empfangsjobs gleichzeitig ausgeführt werden kann es zu Leistungsstörungen im System kommen Die Angaben zur Funktion Drucken aus einer Box sind in der Tabelle unter Druckdaten oder...

Страница 258: ...em Gewicht von 90 g m2 und mehr führen Sie über die Stapelanlage zu 2 Schweres Papier mit einem Gewicht von 91 bis 128 g m2 3 Sie können einige Sorten Pauspapier nicht verwenden 4 Verwenden Sie nur A4 OHP Folien die speziell für dieses System hergestellt wurden 5 Wenn der optionale Einzug für Briefumschläge C2 in Kassette 1 eingebaut ist können Sie hier Briefumschläge einlegen Papiertyp Papierzufu...

Страница 259: ...elanlage Vgl Referenzhandbuch Abschnitt Das Kopieren über die Stapelanlage Kassette 3 4 und das Papiermagazin Q1 sind Elemente der Zusatzausstattung Papierformat Breite x Länge Papierzufuhrort Kassette 1 Kassette 2 3 4 Stapel anlage Papiermagazin Zusatz ausstattung A3 297 mm x 420 mm A4 297 mm x 210 mm A4R 210 mm x 297 mm A5R 148 mm x 210 mm Brief umschlag COM 10 Nr 10 104 7 mm x 241 3 mm 1 Monarc...

Страница 260: ...en Sie den Anweisungen in Abschnitt Die regelmäßige Überprüfung des Schutzschalters auf Seite xxiii ein bis zweimal im Monat Ausfüllen dieses Prüfblattes Tragen Sie das Datum der Überprüfung und den Namen des Prüfers ein Eine vollständig erfolgreiche Überprüfung kennzeichnen Sie in der Spalte OK Wenn die Überprüfung nicht erfolgreich war benachrichtigen Sie bitte Ihren Canon Servicepartner Tragen ...

Страница 261: ...iR3045 iR3045N iR3035 iR3035N iR3025 iR3025N Guida per l utente Downloaded from ManualsPrinter com Manuals ...

Страница 262: ...istruzioni assistite CD ROM Informazioni principali Guida per l utente Questo documento Operazioni principali Individuazione e soluzione dei problemi Guida di riferimento CD ROM Istruzioni per l utilizzo della funzione di copiatura e Mailbox Guida alla copiatura e alla funzione Mailbox CD ROM Istruzioni per la trasmissione e per l invio la ricezione di fax Guida alla funzione di trasmissione e Fax...

Страница 263: ...elle applicazioni MEAP e utilizzo del servizio di login Guida dell amministratore SMS MEAP CD ROM Per visualizzare i manuali in formato PDF occorre utilizzare Adobe Reader Adobe Acrobat Reader Se Adobe Reader Adobe Acrobat Reader non è installato nel sistema utilizzato scaricarlo dal sito Adobe Systems Incorporated Per la stesura del presente manuale è stato fatto uno sforzo considerevole per evit...

Страница 264: ...ltre avvertenze xix Informazioni sul CD ROM del manuale di istruzioni xx Contenuto del CD ROM del manuale di istruzioni xx CD ROM del manuale istruzioni xx CD ROM della Super G3 FAX Board CD ROM del Universal Send Kit xx Menu del CD ROM del manuale utente xxi Requisiti di sistema xxi Uso del menu del CD ROM xxii Controllo periodico dell interruttore di sicurezza xxiii Controllo dell interruttore d...

Страница 265: ...dell ora correnti 1 26 Registrazione del numero di fax della macchina 1 27 Registrazione dei nomi di mittente 1 28 Registrazione del nome dell unità 1 29 Visualizzazione di una videata di guida 1 31 Capitolo 2 Manutenzione periodica Caricamento della carta 2 2 Sostituzione della cartuccia di toner 2 6 Capitolo 3 Individuazione e soluzione dei problemi Eliminazione degli inceppamenti carta 3 2 Elen...

Страница 266: ...cedure limiti precauzioni e operazioni da eseguire per utilizzare la macchina in condizioni di sicurezza ATTENZIONE Indica operazioni che potrebbero provocare gravi incidenti se non eseguite correttamente Per utilizzare la macchina in condizioni di sicurezza prestare pertanto attenzione a queste avvertenze AVVERTENZA Indica operazioni che potrebbero provocare danni a persone o a cose se non esegui...

Страница 267: ...nsione nominale di ingresso di 230V 50 Hz sebbene la tensione nominale di questo prodotto sia 220 240V 50 60 Hz L uso di un cavo schermato è necessario per conformità ai requisiti tecnici di compatibilità elettromagnetica EMC della Direttiva CE Sicurezza del raggio laser Questo prodotto è certificato come apparecchio laser di Classe 1 secondo le direttive IEC60825 1 2007 e EN60825 1 2007 Ciò signi...

Страница 268: ...cate sul pannello destro del gruppo cassetti e sul coperchio dell alloggiamento della cartuccia di toner Questo prodotto è stato classificato sotto IEC60825 1 2007 e EN60825 1 2007 ed è conforme alle seguenti classi CLASS 1 LASER PRODUCT LASER KLASSE 1 APPAREIL Á LASER DE CLASSE 1 APPARECCHIO LASER DI CLASSE 1 PRODUCTO LÁSER DE CLASE 1 APARELHO A LASER DE CLASSE 1 LUOKAN 1 LASER TUOTE LASERPRODUKT...

Страница 269: ...o simile oppure un centro di raccolta autorizzato per il riciclaggio di rifiuti di apparecchiature elettriche ed elettroniche RAEE nonché di batterie e accumulatori Un trattamento improprio di questo tipo di rifiuti può avere conseguenze negative sull ambiente e sulla salute umana a causa delle sostanze potenzialmente nocive solitamente contenute in tali rifiuti La collaborazione dell utente per i...

Страница 270: ...registrati negli Stati Uniti e in altri paesi Microsoft Windows Windows Vista Windows Server e Internet Explorer sono marchi di fabbrica o marchi registrati di Microsoft Corporation negli Stati Uniti e o in altri paesi Gli altri nomi di prodotto e di azienda indicati nel manuale sono marchi di fabbrica dei rispettivi proprietari Questa apparecchiatura F145400 F143300 risponde ai requisiti essenzia...

Страница 271: ... quanto espressamente indicato in questo documento il concessore di licenza Canon non vi trasferisce o concede alcuna licenza o diritto in modo esplicito o implicito su alcuna proprietà intellettuale dei concessori di licenza 3 Potete usare il SOFTWARE unicamente con il prodotto Canon che avete acquistato il PRODOTTO 4 Non vi è permesso assegnare fornire a vostra volta in licenza commercializzare ...

Страница 272: ...duzioni così ottenute possono essere vietati dalla legge ed essere perseguibili penalmente e o civilmente Di seguito viene riportato un elenco dei documenti che è vietato riprodurre L elenco va inteso unicamente come guida In caso di dubbi sulla legalità dell utilizzo del prodotto per acquisire stampare o riprodurre un particolare documento e o sull uso delle immagini acquisite stampate o riprodot...

Страница 273: ...inare alla macchina gli oggetti indicati di seguito Se uno di questi oggetti o di queste sostanze dovesse entrare a contatto di un area ad alta tensione all interno della macchina può causare incendi o scosse elettriche Se un oggetto dovesse cadere nella macchina o una sostanza versarsi all interno della macchina spegnere subito l apparecchiatura con l interruttore principale e scollegare il cavo ...

Страница 274: ...nti si possono verificare incendi o scosse elettriche Se non si inserisce la spina del cavo a fondo nella presa di corrente si possono verificare incendi o scosse elettriche Non utilizzare cavi di alimentazione diversi da quello fornito altrimenti si possono verificare incendi o scosse elettriche Come regola generale non utilizzare prolunghe L uso di un cavo di prolunga può causare incendi o scoss...

Страница 275: ...i oggetti in metallo Fare inoltre attenzione a non versare acqua liquidi o sostanze infiammabili alcool benzene diluenti ecc all interno della macchina Se uno di questi oggetti o di queste sostanze dovesse entrare a contatto di un area ad alta tensione all interno della macchina può causare incendi o scosse elettriche Se un oggetto dovesse cadere nella macchina o una sostanza versarsi all interno ...

Страница 276: ...china Quando è installato un finisher non avvicinare le mani all area del vassoio in cui avviene la pinzatura vicino ai rulli in caso contrario si possono subire lesioni personali Il raggio laser può essere pericoloso Dato che le radiazioni laser vengono generate all interno di aree schermate e protette il raggio laser non può filtrare all esterno durante il funzionamento della macchina Leggere le...

Страница 277: ... prodotto laser di Classe 1 secondo le norme IEC60825 1 2007 Se il raggio laser fuoriesce dalla macchina l esposizione può causare seri danni alla vista I controlli le regolazioni o l utilizzo della macchina non in conformità a quanto riportato nel presente manuale possono causare la fuoriuscita di radiazioni pericolose Downloaded from ManualsPrinter com Manuals ...

Страница 278: ...occhino delle parti all interno della macchina per evitare ustioni o scosse elettriche Non bruciare le cartucce di toner usate i residui di toner all interno della cartuccia potrebbero prendere fuoco e causare ustioni o incendi AVVERTENZA Il gruppo di fissaggio e le aree vicine al gruppo di fissaggio raggiungono temperature molto elevate Quando si estraggono dei fogli inceppati o si eseguono dei c...

Страница 279: ...to per raccogliere gli eventuali residui di toner che possono fuoriuscire dalla cartuccia quindi riporre il sacchetto in un luogo lontano da fiamme in attesa dello smaltimento AVVERTENZA Tenere il toner e gli altri materiali di consumo fuori dalla portata dei bambini In caso di ingestione di questi materiali consultare immediatamente un medico Non aprire le cartucce di toner il toner potrebbe disp...

Страница 280: ...u come eseguire le operazioni principali sulla manutenzione periodica e su come individuare la causa di un problema e gli interventi da effettuare per risolverlo Guida alla copiatura e alla funzione Mailbox Contiene istruzioni sulla copiatura e sulla funzione Mailbox Guida Interfaccia Utente Remota Contiene istruzioni relative all interfaccia utente remota Guida per la rete Contiene istruzioni su ...

Страница 281: ...on alcune configurazioni di computer alcune funzioni potrebbero non operare correttamente Se non si riesce ad aprire il manuale in PDF dal menu del CD ROM aprire il file PDF direttamente dalla cartella italiano nel CD ROM del manuale per l utente Windows Macintosh Sistema operativo Windows 98 Me Windows 2000 Service Pack 3 o versione successiva Windows XP Service Pack 1a Windows Server 2003 Mac OS...

Страница 282: ...T per avviare il menu del CD ROM Viene visualizzata la videata di selezione della lingua Con alcune macchine la videata mostrata sopra potrebbe essere diversa da quella effettivamente visualizzata a BROWSE MANUAL SFOGLIA MANUALE Per visualizzare uno dei manuali elencati fare clic sul manuale desiderato Dopo avere selezionato il manuale desiderato si avvia un programma di lettura dei file PDF come ...

Страница 283: ...unta di una penna a sfera o un oggetto analogo il pulsante di test dell interruttore IMPORTANTE Premere velocemente il pulsante di test dell interruttore NOTA L interruttore di sicurezza si trova sul lato posteriore destro della macchina Per maggiori informazioni sulla posizione dell interruttore di sicurezza vedere Parti interne ed esterne a p 1 15 2 Assicurarsi che la levetta dell interruttore d...

Страница 284: ...evetta dell interruttore di sicurezza 4 Portare l interruttore principale alla posizione I 5 Compilare il foglio di verifica riportato a p 4 6 indicando il risultato dei controlli effettuati sull interruttore di sicurezza 3 ON lato I OFF lato lato I lato Downloaded from ManualsPrinter com Manuals ...

Страница 285: ...i 1 13 Accessori opzionali 1 13 Parti interne ed esterne 1 15 Componenti del pannello comandi 1 17 Display del pannello digitale 1 18 Interruttore principale di accensione e interruttore sul pannello comandi 1 21 Come accendere la macchina con l interruttore principale 1 21 Operazioni da effettuare prima di iniziare ad utilizzare la macchina 1 25 Selezione del tipo di linea telefonica 1 25 Imposta...

Страница 286: ...senza delle condizioni indicate Evitare luoghi dove la temperatura e l umidità sono eccessivamente alte o basse Ad esempio non installare la macchina vicino a rubinetti d acqua scaldabagni umidificatori condizionatori caloriferi o stufe Non installare la macchina in un luogo esposto alla luce solare diretta Se questo non fosse possibile montare delle tende alle finestre per proteggere la macchina ...

Страница 287: ... un uso prolungato della macchina o un lungo ciclo di lavoro in particolare se l ambiente non è ben aerato Si raccomanda quindi di aerare il locale in modo da garantire un ambiente di lavoro confortevole Evitare di installare la macchina in locali dove si accumula molta polvere Evitare luoghi dove vengono generate esalazioni d ammoniaca Evitare luoghi dove vengono utilizzate sostanze volatili o in...

Страница 288: ... elettriche e le vibrazioni generate dalla macchina durante la stampa possono compromettere il corretto funzionamento di queste apparecchiature Evitare di installare la macchina vicino a televisori radio o apparecchiature elettroniche analoghe La macchina potrebbe interferire con la buona ricezione del segnale audio video Collegare il cavo di alimentazione ad una presa dedicata e lasciare più spaz...

Страница 289: ...ollegare altre apparecchiature elettriche alla presa a cui è collegata la macchina Non collegare il cavo di alimentazione ad una presa multipla altrimenti si possono verificare incendi o scosse elettriche Il cavo di alimentazione potrebbe subire dei danni se viene calpestato spesso o se si appoggiano oggetti pesanti sul cavo L uso continuato di un cavo danneggiato può causare incidenti quali incen...

Страница 290: ...nte alle varie parti Quando non sono installati accessori opzionali 1 158 mm 1 035 mm 100 mm o più Quando sono installati l alimentatore DADF N1 il Finisher S1 ed il Paper Deck Q1 opzionali 1 087 mm 1 553 mm 100 mm o più Quando sono installati l alimentatore DADF N1 il Saddle Finisher AE2 la Puncher Unit L1 la Buffer Pass Unit E2 ed il Paper Deck Q1 opzionali 1 169 mm 2 082 mm 100 mm o più Downloa...

Страница 291: ...spostare la macchina senza procedere come indicato Precauzioni per l uso Non tentare di smontare o di modificare la macchina Alcune parti all interno della macchina sono soggette ad alta tensione o raggiungono temperature elevate Prestare pertanto attenzione quando si eseguono dei controlli delle parti interne della macchina Non eseguire operazioni non contemplate nel presente manuale Downloaded f...

Страница 292: ...evitare di posizionare oggetti vicino alla presa di alimentazione in modo da poter scollegare il cavo agevolmente all occorrenza Non spegnere la macchina con l interruttore principale e non aprire gli sportelli anteriori mentre la macchina è in funzione In caso contrario si possono verificare inceppamenti Non utilizzare prodotti spray infiammabili come ad esempio le colle spray vicino alla macchin...

Страница 293: ...utilizzata per periodi di tempo ancora più lunghi ad esempio durante le vacanze AVVERTENZA Canon consiglia di duplicare e di eseguire delle copie di backup dei dati registrati nel disco fisso della macchina in modo da evitare che vengano persi dei dati in caso di guasti o problemi relativi al disco fisso Né Canon né altri fornitori di servizi potranno essere ritenuti responsabili di danni causati ...

Страница 294: ...la Guida alla copiatura e alla funzione Mailbox Oltre alle normali funzioni di copiatura sono state introdotte nuove funzioni quali Campioni che permette di eseguire una serie di stampe che possono essere controllate prima della stampa copia definitiva Opuscolo che permette di unire le copie per creare un opuscolo e Originali formati misti che permette di riprodurre con un unica operazione origina...

Страница 295: ...riducendo notevolmente i costi di trasmissione rispetto ai fax tradizionali In un ambiente mobile è anche possibile ricevere i fax in modo remoto dalla macchina all esterno dell ufficio Se sono installati la Super G3 FAX Board e il driver del fax opzionali è possibile inviare fax dal computer Stampa Vedere la Guida per la stampa PS PCL UFR II Con l attivazione di UFR II PCL Printer Kit la macchina...

Страница 296: ...e di utilizzare la iR3045 iR3045N iR3035 iR3035N iR3025 iR3025N come un normale scanner È possibile eseguire la scansione dei documenti utilizzando la macchina e leggere i dati in un applicazione in esecuzione sul computer Per utilizzare questa funzione la macchina deve essere collegata ad una rete deve essere corredata della funzione di stampa di serie per la iR3045N iR3035N iR3025N e sul compute...

Страница 297: ...stema e componenti 1 13 Prima di iniziare ad utilizzare questa apparecchiatura 1 Configurazione del sistema e componenti Accessori opzionali b c d f g e a j k i h Unità principale Downloaded from ManualsPrinter com Manuals ...

Страница 298: ...F N1 c Card Reader C1 d Copy Tray J1 e Paper Deck Q1 f Canon Cassette Feeding Unit Y3 g Inner 2way Tray D1 h Envelope Feeder Attachment C2 i Puncher Unit Q1 j Finisher S1 k Additional Finisher Tray B1 l Buffer Pass Unit E2 m Puncher Unit L1 n Staple Cartridge D2 D3 o Staple J1 p Saddle Finisher AE q Finisher AE1 Downloaded from ManualsPrinter com Manuals ...

Страница 299: ...a Canon Cassette Feeding Unit Y3 opzionali a Alimentatore DADF N1 opzionale b Pannello comandi c Pannello superiore destro dell unità principale d Bypass e Interruttore principale di accensione f Pulsante di test g Interruttore di sicurezza h Pannello destro del gruppo cassetti i Cassetto 2 j Cassetto 1 k Vassoio di consegna l Guida del vassoio di consegna Downloaded from ManualsPrinter com Manual...

Страница 300: ...Vetro di lettura n Pannello superiore del gruppo di fissaggio o Unità fronte retro p Coperchio dell alloggiamento della cartuccia del toner q Cartuccia del toner m n o p q Quando sono installati l alimentatore DADF N1 e la Canon Cassette Feeding Unit Y3 opzionali Downloaded from ManualsPrinter com Manuals ...

Страница 301: ...dicatore di elaborazione dati Lampeggia colore verde mentre la macchina sta eseguendo un operazione e rimane illuminato in modo fisso colore verde quando nella memoria vengono registrati dei dati fax h Tasto di azzeramento Premere questo tasto per cancellare i valori o i caratteri digitati in modo errato i Tasti numerici Premere questi tasti per impostare dei valori numerici j Tasto ID Log In Out ...

Страница 302: ...ne può essere variato a piacere in Impostazioni visualizzazione funzione in Impostazioni comuni f Control sistema Premere questo tasto per modificare controllare o annullare i lavori e per controllare o stampare l elenco dei lavori g Area di visualizzazione stato lavoro stampa In questa area viene indicata la progressione dei lavori e della copiatura oltre allo stato delle periferiche e dei materi...

Страница 303: ...tabella riportata di seguito indica le varie combinazioni di tasti funzione visualizzati sul pannello digitale della iR3045N iR3035N iR3025N Accessorio opzionale installato Tasti funzione visualizzati Nessuno Universal Send Kit UFR II PCL Printer Kit Universal Send Kit e UFR II PCL Printer Kit Super G3 FAX Board e UFR II PCL Printer Kit Universal Send Kit UFR II PCL Printer Kit e Web Access Softwa...

Страница 304: ...ll area di visualizzazione stato lavoro stampa nell angolo inferiore sinistro del display Icona tipo di lavoro Descrizione Copiatura Invio fax Mailbox Stampa Rapporto Scansione in rete Copiatura remota Funzioni aggiuntive Icona stato della macchina Descrizione Errore Inceppamento carta Inceppamento punti pinzatura Sostituire cartuccia toner Downloaded from ManualsPrinter com Manuals ...

Страница 305: ...gato a fondo nella presa di corrente ATTENZIONE Per evitare il rischio di scosse elettriche non collegare o scollegare il cavo di alimentazione quando si hanno le mani bagnate 2 Portare l interruttore principale alla posizione I L interruttore principale si trova sul lato posteriore destro della macchina L indicatore di accensione sul pannello comandi si illumina quando la macchina viene accesa co...

Страница 306: ...Sign On ed è stata selezionata un applicazione diversa da MEAP come funzione iniziale in Impostazioni comuni nella videata delle Funzioni aggiuntive La videata di avvio rimane visualizzata fino a quando la macchina è pronta per la scansione Se viene visualizzato un messaggio passare al punto 4 La videata riportata a lato viene visualizzata quando la macchina è pronta per eseguire la scansione La m...

Страница 307: ... Funzioni aggiuntive La videata di avvio rimane visualizzata fino a quando la macchina è pronta per la scansione La videata di avvio viene cancellata dal display e al suo posto viene visualizzata la videata di avvio di MEAP È possibile premere per passare alla videata delle funzioni principali ed utilizzare le funzioni di copiatura mailbox ecc anche se è ancora visualizzata la videata di avvio di ...

Страница 308: ...on l interruttore principale attendere almeno 10 secondi prima di riaccenderla con l interruttore principale Non spegnere la macchina con l interruttore principale se si vogliono inviare o ricevere fax o I fax Inoltre non spegnere la macchina con l interruttore principale se è installata la Super G3 FAX Board opzionale e si vogliono inviare o ricevere fax La trasmissione e la ricezione via I fax o...

Страница 309: ...e correttamente Per poter inviare i documenti acquisiti a un indirizzo e mail a un indirizzo I fax o a un file server occorre eseguire le impostazioni relative alla rete vedere la Guida per la rete Selezione del tipo di linea telefonica Impostare il tipo di linea telefonica utilizzata Se l impostazione è errata non sarà possibile comunicare con altre macchine Controllare il tipo di linea telefonic...

Страница 310: ...ecessario per il giorno ed il mese Immettere quattro cifre per l anno e quattro cifre per l ora includendo degli zeri se necessario nel formato 24 ore e senza inserire spazi Per impostare il fuso orario Visualizzare l elenco dei fusi orari selezionare il fuso orario della zona in cui è installata la macchina GMT Greenwich Mean Time GMT ora dell Osservatorio astronomico di Greenwich in Inghilterra ...

Страница 311: ...ina Il numero viene stampato sui documenti ricevuti via fax dai destinatari Il numero potrebbe anche essere visualizzato sul display del destinatario se la macchina di destinazione supporta questa funzione NOTA Per poter eseguire questa impostazione deve essere installata la Super G3 FAX Board opzionale 1 Premere selezionare Impostazioni comunicazioni Impostazioni utente sotto Impostazioni fax N t...

Страница 312: ...possibile impostare la visualizzazione e la stampa del nome del mittente anziché del nome registrato come nome dell unità Per poter eseguire questa impostazione deve essere installata la Super G3 FAX Board opzionale 1 Premere selezionare Impostazioni comunicazioni Impostazioni TX sotto Impostazioni comuni Nomi mittente TTI 2 Selezionare il numero in cui si vuole registrare il nome del mittente sel...

Страница 313: ...to nel campo Da della macchina di ricezione dell I fax e l indirizzo e mail dell utente registrato per SDL o per il sistema di autenticazione utente Local Device Authentication di SSO viene visualizzato nel campo del mittente vedere Invio di un I fax nella Guida alla funzione di trasmissione e Fax Se è impostato il sistema di autenticazione utente Domain Authentication di SSO compreso quando si es...

Страница 314: ...re la macchina 1 30 Prima di iniziare ad utilizzare questa apparecchiatura 1 1 Premere selezionare Impostazioni comunicazioni Impostazioni TX sotto Impostazioni comuni Nome unità 2 Digitare il nome selezionare OK Downloaded from ManualsPrinter com Manuals ...

Страница 315: ...zzate la descrizione della funzione e le istruzioni su come impostarla Menu principale Si tratta della prima videata visualizzata quando si preme Selezionare Uso della funzione Guida per visualizzare le istruzioni su come utilizzare la Guida NOTA Se si preme dopo avere selezionato un modo della funzione di copiatura o mailbox viene visualizzata una videata di guida contenente la spiegazione del mo...

Страница 316: ...alizza ulteriori impostazioni dettagliate per visualizzare altre informazioni dettagliate e argomenti correlati NOTA Il tasto Prova viene visualizzato nella videata di descrizione solo per determinate funzioni di copiatura Esempio Procedura di copiatura su carta di formato non standard 1 Selezionare Esecuzione di copie Copiatura su carta di formato non standard 2 Controllare le informazioni dettag...

Страница 317: ... Manutenzione periodica Questo capitolo spiega come caricare la carta e sostituire le cartucce di toner Caricamento della carta 2 2 Sostituzione della cartuccia di toner 2 6 Downloaded from ManualsPrinter com Manuals ...

Страница 318: ...icie piana Non posizionare carta o altri oggetti nell area vuota del cassetto vicino all area in cui si inserisce la carta In caso contrario si possono verificare inceppamenti NOTA Se mentre è in corso la stampa viene visualizzato un messaggio che chiede di caricare la carta la stampa si interrompe e riprende solo dopo che è stata inserita della carta del tipo corretto Se si seleziona un altro cas...

Страница 319: ...arta 2 3 Manutenzione periodica 2 1 Premere e rilasciare il pulsante del cassetto in cui si vuole caricare la carta 2 Aprire completamente il cassetto tirandolo dall impugnatura Downloaded from ManualsPrinter com Manuals ...

Страница 320: ...a rimossa da una confezione di carta appena aperta 4 Caricare la carta nel cassetto Pareggiare i bordi dei fogli Caricare la carta allineandola alla spalletta destra del cassetto Quando si carica la carta in un cassetto assicurarsi che il formato carta impostato corrisponda al formato della carta effettivamente usata Quando si carica la carta in un cassetto per la prima volta posizionare il selett...

Страница 321: ...e tra l orientamento degli originali e l orientamento dei fogli prestampati nella Guida di riferimento 5 Spingere lentamente il cassetto all interno della macchina finché si chiude con uno scatto AVVERTENZA Quando si chiude il cassetto fare attenzione a non ferirsi le dita IMPORTANTE Se si supera la capienza massima del cassetto o se il cassetto non è chiuso bene non sarà possibile copiare o stamp...

Страница 322: ...e la procedura riportata di seguito per sostituire la cartuccia del toner Se si seleziona Recupero successivo è possibile continuare ad eseguire operazioni quali l impostazione dei modi e la scansione degli originali anche se non si sostituisce subito la cartuccia di toner ATTENZIONE Non bruciare le cartucce di toner usate i residui di toner all interno della cartuccia potrebbero prendere fuoco e ...

Страница 323: ...ia di preparare una cartuccia di toner nuova prima che il toner si esaurisca completamente Per avere istruzioni complete su come sostituire le cartucce del toner selezionare Precedente o Successivo sul display del pannello digitale Se il toner finisce mentre è in corso la stampa le stampe restanti vengono effettuate dopo che la cartuccia del toner è stata sostituita 1 Aprire il coperchio dell allo...

Страница 324: ...potrebbero prendere fuoco e causare ustioni o incendi AVVERTENZA Se non si riesce ad estrarre la cartuccia del toner assicurarsi che la manopola sia stata girata completamente nella direzione corretta 4 Girare il tappo rosso di protezione della nuova cartuccia di toner nella direzione indicata dalla freccia senso antiorario e rimuoverlo AVVERTENZA Non toccare la punta della cartuccia di toner e fa...

Страница 325: ...assare la leva di bloccaggio IMPORTANTE Assicurarsi che il simbolo sulla leva sia allineato al simbolo dell icona di blocco NOTA Se si inserisce una cartuccia di toner adatta per un diverso tipo di macchina la leva di bloccaggio non potrà essere mossa 7 Chiudere il coperchio dell alloggiamento della cartuccia di toner AVVERTENZA Quando si chiude il il coperchio fare attenzione a non intrappolare l...

Страница 326: ...Sostituzione della cartuccia di toner 2 10 Manutenzione periodica 2 Downloaded from ManualsPrinter com Manuals ...

Страница 327: ...me rimuovere i fogli inceppati e riporta le operazioni da eseguire quando viene visualizzato un messaggio di errore Eliminazione degli inceppamenti carta 3 2 Elenco dei messaggi di errore 3 6 Elenco dei codici di errore senza messaggio 3 6 Downloaded from ManualsPrinter com Manuals ...

Страница 328: ...lizza acqua calda il toner si fissa sui tessuti e diventa indelebile Quando si estraggono dei fogli inceppati nella macchina tirarli delicatamente altrimenti il toner non fissato presente sui fogli può entrare a contatto di occhi o bocca In caso di contatto lavare immediatamente con abbondante acqua fredda e consultare immediatamente un medico Il gruppo di fissaggio e le aree vicine al gruppo di f...

Страница 329: ...dei fogli inceppati alla riaccensione della macchina non potranno essere rilevati gli inceppamenti nei cassetti Estrarre i fogli inceppati senza spegnere la macchina Se l inceppamento è nell unità principale Vedere le istruzioni riportate nelle pagine indicate di seguito a Gruppo di fissaggio vedere Gruppo di fissaggio nell unità principale nella Guida di riferimento b Unità fronte retro vedere Un...

Страница 330: ... Y3 opzionale nella Guida di riferimento b Paper Deck Q1 vedere Paper Deck Q1 opzionale nella Guida di riferimento c Alimentatore DADF N1 vedere Alimentatore DADF N1 nella Guida di riferimento d Finisher S1 vedere Finisher S1 opzionale nella Guida di riferimento e Inner 2way Tray D1 vedere Inner 2way Tray D1 opzionale nella Guida di riferimento f Copy Tray J1 vedere Copy Tray J1 opzionale nella Gu...

Страница 331: ...i Puncher Unit L1 vedere Puncher Unit L1 opzionale nella Guida di riferimento 2 Dopo avere rimosso tutti i fogli inceppati alle posizioni indicate sul pannello digitale riportare tutte le leve ed i pannelli alla posizione originale 3 Continuare a seguire la procedura e le istruzioni visualizzate Una volta rimossi tutti i fogli inceppati nelle varie aree ad eccezione dell alimentatore la stampa o l...

Страница 332: ...one di trasmissione e Fax Eseguire le opportune operazioni in base al codice di errore NOTA Quando un lavoro di trasmissione è stato annullato nella colonna Risultato del rapporto delle trasmissioni viene indicato STOP 001 Causa 1 Sono stati acquisiti originali di diverso formato ma non era impostato il modo Originali formati misti Rimedio Posizionare gli originali specificare il modo Originali fo...

Страница 333: ... di divisione o la password sono stati variati mentre la macchina stava elaborando un lavoro oppure è impostato Off per Permetti stampa con ID sconosciuti Rimedio Mettersi in contatto con il gestore del sistema 703 Causa Il disco fisso è pieno e non possono essere acquisite altre immagini Rimedio 1 Attendere alcuni istanti e riprovare dopo che si sono concluse altre trasmissioni Rimedio 2 Cancella...

Страница 334: ...ché è stato raggiunto il limite totale di pagine che possono essere generate Rimedio Mettersi in contatto con il gestore del sistema 817 Causa Si è verificato un errore di comunicazione tra la propria macchina ed una stampante remota Rimedio Controllare le connessioni di rete e riprovare Se l errore si ripresenta mettersi in contatto con il gestore del sistema 823 Causa Il collegamento ad una stam...

Страница 335: ...password è stata variata Rimedio Mettersi in contatto con il gestore del sistema o assicurarsi che l ID di divisione e la password impostati nella macchina host corrispondano all ID di divisione e alla password registrati nella stampante remota 849 Causa Le informazioni della periferica non sono state distribuite perché la macchina client sta elaborando un lavoro Rimedio Provare a distribuire anco...

Страница 336: ...da alla funzione di trasmissione e Fax ed il Capitolo 2 Introduzione alle funzioni mailbox nella Guida alla copiatura e alla funzione Mailbox Causa 3 Non è possibile registrare il documento perché sono presenti più di 1 500 documenti nella mailbox specificata Rimedio Se sono presenti molti documenti cancellare dalla mailbox specificata i documenti che non servono più 852 Causa Si è verificato un e...

Страница 337: ...er la rete Causa 4 È stato superato il limite massimo di dati che possono essere ricevuti vedere il Capitolo 6 Ricezione dei documenti nella Guida alla funzione di trasmissione e Fax Rimedio Provare a stampare ancora i documenti alla conclusione di tutti i lavori in corso Se ancora non si riesce a stampare controllare i dati inviati Causa 5 Il numero dei documenti protetti supera il limite massimo...

Страница 338: ...stato annullato sull host Rimedio Assicurarsi che la rete funzioni correttamente quindi provare ancora a stampare 858 Causa Si è verificato un problema relativo ai dati di stampa inviati da un applicazione esterna Rimedio Controllare le impostazioni dei dati inviati alla macchina assicurarsi che siano compatibili con la macchina e provare ad inviare ancora i dati 859 Causa 1 Si è verificato un err...

Страница 339: ...usa 2 Il controller esterno ha inviato dati di colore come dati monocromatici al dispositivo di addebito Rimedio Variare i dati di stampa o le impostazioni di stampa e provare ancora a stampare 862 Causa 1 È stata superata la capienza massima dei vassoi del Saddle Finisher vedere il Capitolo 9 Appendice nella Guida di riferimento Rimedio Variare i dati di stampa o le impostazioni di stampa e prova...

Страница 340: ...un errore durante l elaborazione dei dati PDL o dei dati di immagine Rimedio Controllare le impostazioni e provare ancora a stampare 865 Causa Sono impostate delle restrizioni relative alla funzione Mailbox Rimedio Mettersi in contatto con il gestore del sistema Downloaded from ManualsPrinter com Manuals ...

Страница 341: ...o capitolo contiene delle informazioni utili sull uso della macchina Uso di più funzioni 4 2 Carta supporti utilizzabili 4 4 Foglio di verifica periodica dell interruttore di sicurezza 4 6 Downloaded from ManualsPrinter com Manuals ...

Страница 342: ...le Disponibile ma in presenza di particolari condizioni Ricezione Invio Fax Scansione Stampa Copie Scansione e stampa Tramite rete Via fax Stampa dati Tramite rete Via fax Copie Mailbox Invio Copie Documento ricevuto Stampa dati Ricezione Tramite rete Via fax Stampa dati 3 3 3 3 3 Invio Fax Tramite rete Via fax 3 1 1 3 1 3 1 3 1 Scansione Copie Mailbox 1 1 1 Invio 3 1 3 1 3 1 3 Stampa Copie 2 2 Do...

Страница 343: ...tamente per ciascun lavoro Quando non è installato un finisher opzionale viene consegnata una pagina alternatamente per ciascun lavoro 3 La velocità di lavoro della macchina potrebbe ridursi NOTA Le prestazioni della macchina possono essere influenzate dall esecuzione contemporanea di diversi lavori di trasmissione e ricezione in rete Le operazioni di stampa di dati da una mailbox vengono incluse ...

Страница 344: ...ibile 1 Grammatura carta comune e riciclata da 64 a 90 g m2 La carta con una grammatura superiore a 90 g m2 deve essere caricata nel bypass 2 Grammatura carta spessa da 91 a 128 g m2 3 Alcuni tipi di traslucido non possono essere utilizzati 4 Utilizzare solo lucidi A4 studiati espressamente per questa macchina 5 Se è installato Envelope Feeder Attachment C2 opzionale nel cassetto 1 si possono cari...

Страница 345: ...zione della carta dal bypass nella Guida di riferimento I cassetti 3 e 4 ed il Paper Deck Q1 sono opzionali Formati carta Larghezza x lunghezza Fonte di alimentazione carta Cassetto 1 Cassetto 2 3 4 Bypass Paper deck opzionale A3 297 mm x 420 mm A4 297 mm x 210 mm A4R 210 mm x 297 mm A5R 148 mm x 210 mm Buste COM 10 No 10 104 7 mm x 241 3 mm 1 Monarch Catalog Glove No 8 98 4 mm x 190 5 mm 1 DL 110...

Страница 346: ...zza Eseguire una o due volte al mese la procedura indicata in Controllo periodico dell interruttore di sicurezza a p xxiii Come compilare questo foglio di verifica Riportare sul foglio la data del controllo e il nome della persona che ha effettuato il controllo Se non sono state riscontrate anomalie riportare un segno di spunta nella colonna OK In caso contrario contattare un rivenditore autorizza...

Страница 347: ...Downloaded from ManualsPrinter com Manuals ...

Страница 348: ...TIN AMERICA INC 703 Waterford Way Suite 400 Miami Florida 33126 U S A CANON AUSTRALIA PTY LTD 1 Thomas Holt Drive North Ryde Sydney N S W 2113 Australia CANON CHINA CO LTD 15F Jinbao Building No 89 Jinbao Street Dongcheng District Beijing 100005 China CANON SINGAPORE PTE LTD 1 HarbourFront Avenue 04 01 Keppel Bay Tower Singapore 098632 CANON HONGKONG CO LTD 19 F The Metropolis Tower 10 Metropolis ...

Отзывы: