background image

Posizione di installazione e utilizzo

1-8

Pr

ima di iniziare a 

utilizzare la macchina

1

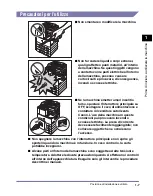
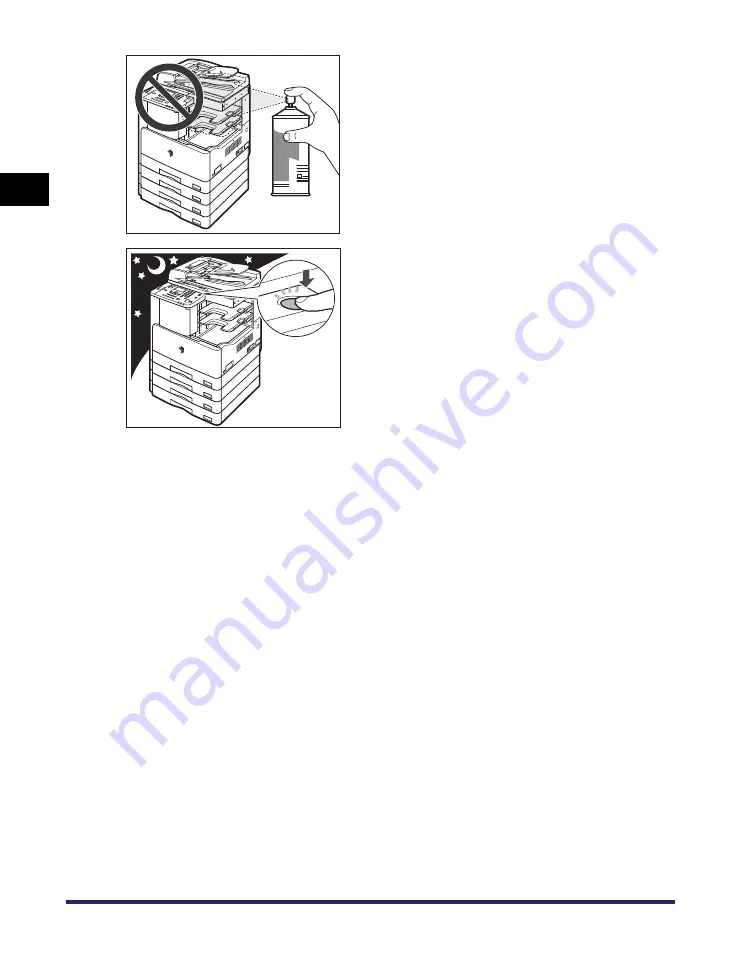
Non utilizzare spray infiammabili, quali 
colle spray, nelle vicinanze della 
macchina. Queste sostanze possono 
innescare incendi.

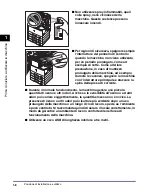
Per ragioni di sicurezza, spegnere sempre 
l’interruttore del pannello di controllo 
quando la macchina non viene utilizzata 
per un periodo prolungato, come ad 
esempio di notte. Come ulteriore 
precauzione, in caso di inutilizzo 
prolungato della macchina, ad esempio 
durante le vacanze, spegnere la macchina 
con l’interruttore principale e staccare la 
spina dalla presa di corrente.

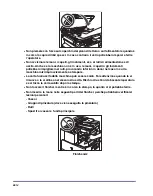
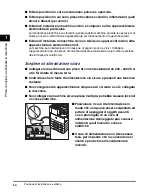
Durante il normale funzionamento, la macchina genera una piccola 
quantità di ozono e altri odori. Anche se la sensibilità all’ozono o ad altri 
odori può variare soggettivamente, la quantità emessa non è nociva. La 
presenza di ozono o altri odori può risultare più evidente dopo un uso 
prolungato della macchina o un lungo ciclo di lavoro, specie se l’ambiente 
è poco ventilato. Si raccomanda quindi di aerare il locale correttamente, in 
modo da garantire un ambiente di lavoro confortevole nell’area di 
funzionamento della macchina.

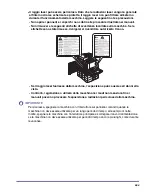
Utilizzare un cavo USB di lunghezza inferiore a tre metri.

Содержание IR 2420

Страница 1: ...dbuch Bitte lesen Sie dieses Handbuch zuerst Bitte lesen Sie dieses Handbuch bevor Sie mit dem Produkt arbeiten Nachdem Sie das Handbuch gelesen haben bewahren Sie es zum Nachschlagen an einem sichere...

Страница 2: ...imageRUNNER 2422 2420 User s Guide...

Страница 3: ...s Document Basic Operations Troubleshooting Reference Guide CD ROM Copying Instructions Copying Guide CD ROM Remote User Interface Instructions Remote UI Guide CD ROM Network Connectivity and Setup In...

Страница 4: ...NT Depending on the configuration of your computer some functions may not operate correctly If the PDF manual does not open from the CD ROM Menu open the PDF file directly from the ENGLISH folder on t...

Страница 5: ...u The Language Selection window is displayed The screen shot shown above may differ from the actual display depending on the operating system used a BROWSE MANUAL You can read any of the listed guides...

Страница 6: ...the descriptions of multi functional operations available paper stock and Index Chapter 1 Chapter 2 Chapter 3 Chapter 4 Chapter 5 Considerable effort has been made to ensure that this manual is free o...

Страница 7: ...d in the Manuals xii Legal Notices xiv Product Name xiv EMC requirements of EC Directive xiv Laser Safety xiv Additional Information xv International ENERGY STAR Program xvi IPv6 Ready Logo xvi WEEE D...

Страница 8: ...trol Panel Power 1 15 How to Turn ON the Main Power 1 15 Control Panel Power Switch 1 17 Setting Up the Connection 1 18 Settings Flowchart 1 18 Connecting to a USB Interface 1 19 Connecting to a Netwo...

Страница 9: ...3 Routine Maintenance Paper Drawers 3 2 Loading Paper 3 2 Adjusting a Paper Drawer to Hold a Different Paper Size 3 6 Replacing the Toner 3 10 Chapter 4 Troubleshooting Clearing Paper Jams 4 2 Cleari...

Страница 10: ...y lead to death or injury to persons if not performed correctly To use the machine safely always pay attention to these warnings CAUTION Indicates a caution concerning operations that may lead to inju...

Страница 11: ...strations Used in This Manual The machine illustrations used in this manual are those of the imageRUNNER 2420 with the following optional equipment attached the Feeder DADF P2 Finisher U2 Additional F...

Страница 12: ...orporation in the United States and or other countries Other product and company names herein may be the trademarks of their respective owners Microsoft Windows 2000 operating system Windows 2000 Micr...

Страница 13: ...than the Copy function In this machine these operations take place in a complex way so that not only copies but also various kinds of prints may sometimes have to wait their turn before they can be p...

Страница 14: ...xiii Printing Outputting documents such as a copy or data sent from a client computer to the machine Copying Printing data scanned from an original followed by finishing options such as stapling...

Страница 15: ...Hz although the rated input of the product is 220 to 240 V 50 60 Hz Use of shielded cable is necessary to comply with the technical EMC requirements of EC Directive Laser Safety This product is certif...

Страница 16: ...ow are attached to the laser scanner unit inside the machine and next to the toner cartridge behind the front cover This product has been classified under IEC60825 1 2007 and EN60825 1 2007 which conf...

Страница 17: ...omputers and other office equipment The program backs the development and dissemination of products with functions that effectively reduce energy consumption It is an open system in which business pro...

Страница 18: ...asis when you buy a new similar product or to an authorized collection site for recycling waste electrical and electronic equipment EEE Improper handling of this type of waste could have a possible ne...

Страница 19: ...ket distribute or transfer the SOFTWARE to any third party without prior written consent of rights holders of the SOFTWARE 5 Notwithstanding the foregoing you may transfer the SOFTWARE only when a you...

Страница 20: ...D WARRANTIES INCLUDING BUT NOT LIMITED TO THE IMPLIED WARRANTIES OF MERCHANTABILITY AND FITNESS FOR A PARTICULAR PURPOSE ARE DISCLAIMED IN NO EVENT SHALL THE PROJECT OR CONTRIBUTORS BE LIABLE FOR ANY...

Страница 21: ...rint or otherwise reproduce any particular document and or of the use of the images scanned printed or otherwise reproduced you should consult in advance with your legal advisor for guidance Paper Mon...

Страница 22: ...to overheat Never place the machine on a soft surface such as a sofa or rug Do not install the machine in the following locations A damp or dusty location A location near water faucets or water A loc...

Страница 23: ...cord in a knot as this may result in a fire or electrical shock Insert the power plug completely into the power outlet as failure to do so may result in a fire or electrical shock Do not use power cor...

Страница 24: ...nd creating a fire hazard always turn OFF the main power switch and unplug the interface cable when moving the machine Otherwise the power cord or interface cable may be damaged resulting in a fire or...

Страница 25: ...personal injury or damage if the machine suddenly starts printing Paper that has just been output from the machine may be hot Be careful when removing or aligning paper from the output tray Touching...

Страница 26: ...f the labels have been removed contact your local authorized Canon dealer If the laser beam escapes from the machine exposure may cause serious damage to your eyes Controlling adjusting or operating t...

Страница 27: ...es as this may cause the toner remaining inside the cartridges to ignite resulting in burns or a fire If you accidentally spill or scatter toner carefully gather the toner particles together or wipe t...

Страница 28: ...paper from scattering and getting into your eyes or mouth If the toner gets into your eyes or mouth wash immediately with cold water and immediately consult a physician When loading paper or removing...

Страница 29: ...small children If these items are ingested consult a physician immediately Do not dismantle the toner cartridge as doing so may cause the toner to fly out and enter your eyes or mouth If toner gets i...

Страница 30: ...Internal View 1 11 Control Panel 1 12 Optional Equipment 1 14 Main Power and Control Panel Power 1 15 How to Turn ON the Main Power 1 15 Control Panel Power Switch 1 17 Setting Up the Connection 1 18...

Страница 31: ...Machine in the Following Locations Avoid locations subject to temperature and humidity extremes whether low or high For example avoid installing the machine near water faucets hot water heaters humidi...

Страница 32: ...e appropriately ventilated sufficient to maintain a comfortable working environment in areas of machine operation Avoid locations where ammonia gas is emitted Avoid locations that are subject to vibra...

Страница 33: ...that the power supply for the machine is safe and has a steady voltage Do not connect other electrical equipment to the same power outlet to which the machine is connected Do not connect the power cor...

Страница 34: ...lation Space Provide enough space on each side of the machine for unrestricted operation The optional Finisher U2 and Document Tray J1 are attached 100 mm or more 1 198 mm 1 249 mm 1 247 mm The width...

Страница 35: ...cal authorized Canon dealer beforehand The machine is heavy and requires two or more people to lift it Therefore do not attempt to move it by yourself Doing so may result in personal injury When carry...

Страница 36: ...mmediately turn the main power switch OFF disconnect the power cord from the power outlet and then contact your local authorized Canon dealer Using the machine in this state may cause a fire or electr...

Страница 37: ...power cord when the machine will not be used for an extended period of time such as during consecutive holidays This machine generates a slight amount of ozone or other odors during normal use Althou...

Страница 38: ...al equipment attached to it are also provided For more information on the optional equipment parts and their functions see Chapter 5 Optional Equipment in the Reference Guide External View The imageRU...

Страница 39: ...over Type J The platen cover secures the originals placed on the platen glass d Feeder DADF P2 Optional Originals placed in the feeder are automatically fed sheet by sheet to the scanning area The fee...

Страница 40: ...When the drum unit is full of waste toner replace it with a new one g Paper Drawer s Left Cover Open these covers when clearing a paper jam in Paper Drawers 2 3 and 4 h Fixing Unit If a paper jam occu...

Страница 41: ...ON or OFF When the control panel is turned OFF the machine is in the Sleep mode g Additional Functions key Press to access the Additional Functions menu h Stop key Press to stop copying or scanning i...

Страница 42: ...tor Flashes or lights green when the machine is performing operations y Frame Erase key Press to set the Frame Erase mode For more information see Chapter 2 Advanced Operations in the Copying Guide z...

Страница 43: ...efore You Start Using This Machine 1 Optional Equipment a Inner 2 Way Tray E2 b Cassette Feeding Module J1 c Cassette Feeding Module K1 d Duplex Unit A1 e Finisher U2 f Feeder DADF P2 g Document Tray...

Страница 44: ...shock IMPORTANT If the main power indicator does not light up make sure that the power plug is properly inserted into the power outlet If the Cassette Heater Unit 30 is attached the machine will ente...

Страница 45: ...e Guide The default copy settings are Copy Ratio Direct 100 Paper Selection Auto Paper Selection Copy Density Auto Density Control Copy Quantity 1 Image Quality Text The default settings for the Copy...

Страница 46: ...seful Functions and Settings in the Reference Guide The machine can receive and print documents from a computer when it is in the Sleep mode To turn the control panel ON or OFF press the control panel...

Страница 47: ...twork cable is not included in this package Please obtain a suitable cable for your computer or network Settings Flowchart Cable Connection Connect the cables required for your environment See p 1 18...

Страница 48: ...ne while the main power switch is ON make sure the ground line is connected If the ground line is not connected connecting the USB cable to the machine while the main power switch is ON may result in...

Страница 49: ...3 or later is USB 2 0 Hi Speed USB Full Speed USB 1 1 equivalent For more information consult your local authorized Canon dealer Connecting to a Network The machine can connect to a TCP IP network Th...

Страница 50: ...nt For more information consult your local authorized Canon dealer After connecting the network cable perform the following operations For more information see the relevant descriptions Set the System...

Страница 51: ...relating to printing System Requirements The following system environments are necessary in order to use the printer driver NOTE Supported operating systems may differ according to the printer driver...

Страница 52: ...ed to match the output data thus realizing a significant increase in speed through optimization Installation For details about the installation procedure see the Printer Driver Installation Guide or M...

Страница 53: ...CD icon that appears on your desktop You can find the installer and Mac UFR II Printer Driver Installation Guide in the folder with the printer driver name Double click the installer icon in the inst...

Страница 54: ...printer driver The Device Settings sheet is displayed by right clicking the icon of the printer you are using in the Printers Printers and Faxes or Devices and Printers folder and selecting Properties...

Страница 55: ...Fax dialog box Mac OS X 10 5 or later of the printer driver Mac OS X 10 4 x The Installable Options sheet is displayed by the following procedure Click Print Fax on System Preferences Printing select...

Страница 56: ...ating to scanning are made using the scanner driver The scanner driver is installed from the same UFRII LT User Software CD ROM as the printer driver The contents of the CD ROM are as follows Color Ne...

Страница 57: ...orrectly A display with a resolution of at least 640 480 800 600 or more recommended and capable of displaying at least 256 colors A network host adapter capable of TCP IP and UDP IP communication on...

Страница 58: ...the installation is in progress Required Settings for Remote Scanning Once you have installed the scanner driver you need to select Color Network ScanGear as a scanner to be used in order to perform r...

Страница 59: ...Before Using the Remote Scan Function 1 30 Before You Start Using This Machine 1...

Страница 60: ...erations of the machine What This Machine Can Do 2 2 Placing Originals 2 6 Orientation 2 6 Platen Glass 2 8 Feeder DADF P2 Optional 2 10 Basic Copying 2 12 Basic Printing 2 17 Basic Remote Scanning 2...

Страница 61: ...ses UFRII LT Ultra Fast Rendering II LT Technology which utilizes a newly invented printing algorithm to minimize file processing and achieve maximum performance For instructions on setting up the mac...

Страница 62: ...2420 can be controlled and set up through the Remote UI and network For instructions on configuring the Ethernet port see the Network Guide Network Scanning If the network connection is available the...

Страница 63: ...switch or specify to have the machine enter the Sleep mode at a preset time You can set the machine to automatically shut down by enabling the Auto Shutdown Time setting The machine turns OFF the main...

Страница 64: ...rint jobs see the Reference Guide For instructions on canceling a job see Canceling a Job on p 2 21 Other Useful Functions This machine provides other useful functions as listed below Auto Paper Selec...

Страница 65: ...to copy several originals at a time and then press Start The machine automatically feeds the originals to the scanning area and scans them If you are copying in the 2 Sided mode two sided originals c...

Страница 66: ...zontally when printing with a preset copy ratio such as when enlarging an A4 or A5 original onto A3 paper See Chapter 1 Basic Operations in the Copying Guide Horizontally placed A4 and A5 originals ar...

Страница 67: ...ng ID cards using the ID Card Copy function you must use the platen glass See Chapter 2 Advanced Operations in the Copying Guide 1 Lift the feeder platen cover 2 Place your original face down The orig...

Страница 68: ...ently close the feeder platen cover CAUTION Close the feeder platen cover gently to avoid catching your hands as this may result in personal injury Do not press down hard on the feeder platen cover wh...

Страница 69: ...he following types of originals into the feeder Originals with tears or large binding holes Severely curled originals or originals with sharp folds Clipped or stapled originals Carbon backed paper or...

Страница 70: ...er if you set the Different Size Originals mode See Chapter 2 Advanced Operations in the Copying Guide 1 Adjust the slide guides to fit the size of your originals 2 Neatly place your originals with th...

Страница 71: ...r or platen cover may distort the image being copied 1 Press the appropriate keys in accordance with the messages displayed on the LCD display If there are no messages displayed proceed to step 2 If t...

Страница 72: ...se or to select Set press OK NOTE For instructions on entering characters see Chapter 2 Basic Operations in the Reference Guide Press ID NOTE For instructions on using User ID Management see Chapter 3...

Страница 73: ...tings NOTE For more information on specifying copy settings see Chapter 1 Basic Operations and Chapter 2 Advanced Operations in the Copying Guide 5 Enter the desired copy quantity from 1 to 99 using n...

Страница 74: ...r after a cover on the main unit or an optional unit is closed Copying automatically begins as soon as the machine is ready If the message Memory full appears on the LCD display divide your originals...

Страница 75: ...automatically begins as soon as the machine is ready If the message Memory full appears on the LCD display divide your originals into several sets and copy them separately 7 If you want to start copy...

Страница 76: ...ed Printing from a computer that is connected to the machine with a USB cable you must enable the optional Duplex Unit A1 from the printer driver For help see Chapter 1 Using the Machine as a Printer...

Страница 77: ...figurations and install the scanner driver in the computer For more information see Setting Up the Connection on p 1 18 and Before Using the Remote Scan Function on p 1 27 NOTE For instructions on tur...

Страница 78: ...sed 5 Open a TWAIN compliant application on your computer desktop 6 Select the command to start scanning operation such as Scan New or Acquire The Color Network ScanGear Main Window appears NOTE For h...

Страница 79: ...ning progress appears If Color Network ScanGear does not automatically close after scanning click Exit to close it Be sure to close the Color Network ScanGear Main Window before exiting the applicatio...

Страница 80: ...andling only one job Proceed to step 4 If the machine has multiple copy or print jobs Proceed to step 2 NOTE The current job is listed first on the Status screen The LCD display can display characters...

Страница 81: ...Using the System Monitor Screen You can cancel a copy or print job from the System Monitor screen during printing or while it is waiting to be processed 1 Press System Monitor The System Monitor scre...

Страница 82: ...ob Paused Current job that has been temporarily stopped by pressing Stop Waiting Reserved jobs 3 Use or to select Status press OK The Status screen appears 4 Use or to select the job you want to cance...

Страница 83: ...an display characters in ASCII code Using other character codes may cause characters garbled on the LCD display 7 Press Reset to return to the Standby display 6 Use or to select Yes press OK If you do...

Страница 84: ...describes how to load paper perform routine cleaning operations and replace consumables such as toner and staple cartridges Paper Drawers 3 2 Loading Paper 3 2 Adjusting a Paper Drawer to Hold a Diff...

Страница 85: ...ng you to load paper appears on the LCD display and the error indicator flashes red when paper runs out in any of the paper drawers a paper drawer is not fully inserted into the machine Make sure that...

Страница 86: ...er stack on a flat surface Never place paper or any other items in the empty part of the drawer next to the paper stack Doing so may cause paper jams NOTE If a message prompting you to load paper appe...

Страница 87: ...several times and align the edges to facilitate feeding 4 Load the paper stack into the paper drawer Even out the edges of the paper stack Load the paper stack against the end guide of the paper draw...

Страница 88: ...print quality or paper jams try turning the paper stack over and reload it For more information on the print direction of preprinted paper paper which has logos or patterns already printed on it see C...

Страница 89: ...per 1 Pull out the paper drawer and remove all the loaded paper 2 Push down the metal plate to lock it 3 Detach the end guide and reattach it to the slots aligned with the mark indicating the desired...

Страница 90: ...lock the front slide guide into place IMPORTANT Be sure to set the lock lever correctly If the lock lever is positioned incorrectly for the type of paper loaded in the paper drawer the wrong paper ty...

Страница 91: ...incorrectly to the size of paper loaded in the paper drawer the wrong paper size will be shown on the LCD display This may also cause paper jams dirty prints or make the inside of the machine dirty NO...

Страница 92: ...the new paper size 10 Gently push the paper drawer back into the machine until it clicks into place in the closed position CAUTION When returning the paper drawer to its original position be careful n...

Страница 93: ...apter 7 Troubleshooting in the Reference Guide WARNING Do not burn or throw used toner cartridges into open flames as this may cause the toner remaining inside the cartridges to ignite resulting in bu...

Страница 94: ...ring and dispose of them in a location away from open flames IMPORTANT Use only toner cartridges intended for use with this machine Do not replace toner cartridges until the message prompting you to d...

Страница 95: ...tine Maintenance 3 2 While pressing the unlock tab on the grip turn the toner cartridge in the direction of the arrow clockwise 3 Pressing the unlock tab pull out the toner cartridge Keep unlock tab d...

Страница 96: ...use the toner remaining inside the cartridges to ignite resulting in burns or a fire IMPORTANT If the toner is not distributed evenly inside the cartridge the outputs may be printed uneven 4 Shake the...

Страница 97: ...move the protective seal by pulling it straight out with the other hand IMPORTANT Pull out the seal slowly otherwise the toner may scatter and soil your clothes or skin Make sure that you pull out the...

Страница 98: ...rtridge fully until it locks into place 8 Close the front cover CAUTION When closing the front cover be careful not to get your fingers caught as this may result in personal injury IMPORTANT Make sure...

Страница 99: ...Replacing the Toner 3 16 Routine Maintenance 3...

Страница 100: ...jams in the machine and error messages Clearing Paper Jams 4 2 Clearing Paper Jams with On Screen Instructions 4 2 When Paper Jams Occur Frequently 4 3 List of Error Messages 4 4 Self Diagnostic Disp...

Страница 101: ...or paper take care not to cut your hands on the edges of the original or paper When removing paper which has become jammed inside the machine take care not to cut your hands or injure yourself on the...

Страница 102: ...though there is no apparent problem with the machine either one of the following two reasons may be the cause Follow the instructions described below to reduce the frequency of paper jams There are to...

Страница 103: ...sing the network Cannot staple Reduce output pages Cause The machine cannot staple the printouts because too many sheets of paper have been printed out Remedy The printouts are simply collated without...

Страница 104: ...Remedy Scan the original on the platen glass Drawer 2 cover open Close cover Cause The left cover of Paper Drawer 2 is open Remedy Close the paper drawer s left cover Drawer 3 cover open Close cover C...

Страница 105: ...Frnt Left cover open Close cover Cause One or more covers are open Remedy Close all of the covers Load correct paper Cause 1 The paper size detected automatically by the paper drawer does not match t...

Страница 106: ...e desired paper size Remedy 2 Set the copy ratio to match the desired paper size If you press Start while this message is displayed the paper with the smallest margin is selected automatically and pri...

Страница 107: ...on p 4 2 Cause 2 A cover has been opened during printing Remedy Open the cover again and check if there is any jammed paper Clear the jammed paper if any and close the cover The message disappears and...

Страница 108: ...r size is unavailable for stapling Remedy Use the suitable paper size for stapling See Chapter 2 Advanced Operations in the Copying Guide This size cannot be offset Cause The machine cannot offset the...

Страница 109: ...se Tray B is full of paper Remedy Remove the prints from Tray B See Chapter 5 Optional Equipment in the Reference Guide Waste toner full Prepare drum Cause Waste toner is full in the drum Remedy Repla...

Страница 110: ...disconnect the power cord with wet hands as this may result in electrical shock CAUTION Always grasp the power plug portion when disconnecting the power cord Pulling on the cord may expose or snap the...

Страница 111: ...ollowing information available Model name Problem and status of the machine Service call message on the LCD display 2 If the machine still does not operate normally follow the procedure below and cont...

Страница 112: ...1 CHAPTER 5 Appendix This chapter provides the specifications of the main unit and the optional equipment and other useful information Multifunctional Operations 5 2 Available Paper Stock 5 3 Index 5...

Страница 113: ...e vertical columns are already being performed Example When copying is in progress you can scan originals for a copy job NOTE The machine s performance may be affected if image processing such as comp...

Страница 114: ...m2 2 From 75 g m2 to 90 g m2 3 From 81 g m2 to 90 g m2 4 From 91 g m2 to 105 g m2 5 From 106 g m2 to 128 g m2 6 Use only A4 transparencies made especially for this machine IMPORTANT When printing on...

Страница 115: ...for the imageRUNNER 2422 2420 Chlorine free paper can be used with this machine Paper Size Width Length Paper Source Paper Drawer 1 Paper Drawers 2 3 4 Stack Bypass A4 297 mm 210 mm A4R 210 mm 297 mm...

Страница 116: ...ork 1 20 Connecting to a USB Interface 1 19 Control Panel 1 10 1 12 Control Panel Power Switch 1 12 1 17 COPY Key 1 12 Copy Ratio Key 1 13 Copying Definition of xiii Counters 1 11 D Density Key 1 13 D...

Страница 117: ...Keys 1 12 O OK Key 1 13 On Screen Instruction 4 2 Optional Equipment Cassette Feeding Module J1 1 14 Cassette Feeding Module K1 1 14 Inner 2 Way Tray E2 1 14 P Paper Drawer s Left Cover 1 11 Paper Dra...

Страница 118: ...i Service Call Message 4 11 Setting Up the Connection 1 18 Settings Flowchart 1 18 Sleep Mode 1 17 Slide guides feeder 2 11 Stack Bypass 1 10 Start Key 1 12 Stop Key 1 12 Symbols Used in This Manual i...

Страница 119: ...Index 5 8 Appendix 5...

Страница 120: ...imageRUNNER 2422 2420 Guide de l utilisateur...

Страница 121: ...f rence CD ROM Instructions relatives la fonction copie Guide de la fonction copie CD ROM Utilisation de l interface utilisateur distante Guide du logiciel d administration CD ROM Connexion et configu...

Страница 122: ...D ROM ouvrez le fichier PDF directement partir du dossier FRAN AIS sur le CD ROM Guide de l utilisateur Utilisation du menu du CD ROM Cette section pr sente le menu du CD ROM Lorsque vous ins rez le C...

Страница 123: ...pouvez lire un guide de la liste en cliquant dessus Apr s avoir cliqu sur le guide souhait l application Adobe Reader Adobe Acrobat Reader s ex cute et le manuel PDF s affiche b INSTALLER Vous pouvez...

Страница 124: ...s le papier disponible et l index Chapitre 1 Chapitre 2 Chapitre 3 Chapitre 4 Chapitre 5 Des efforts consid rables ont t mis en uvre pour s assurer que les guides relatifs la machine ne contiennent ni...

Страница 125: ...termes utilis s dans ces guides xii Mentions l gales xiv Nom du produit xiv Exigences CEM de la directive europ enne xiv Faisceau laser xiv Informations compl mentaires xv Programme international ENER...

Страница 126: ...rincipale 1 15 Interrupteur du panneau de commande 1 17 Configuration de la connexion 1 18 Sch ma de configuration 1 18 Connexion une interface USB 1 19 Connexion un r seau 1 20 Utilisation d Ethernet...

Страница 127: ...st me 2 22 Chapitre 3 Maintenance p riodique Cassettes 3 2 Chargement de papier 3 2 Modification du format papier d une cassette 3 6 Remplacement du toner 3 10 Chapitre 4 D pannage limination des bour...

Страница 128: ...tions susceptibles de repr senter un danger de mort ou de provoquer des blessures si les instructions ne sont pas respect es Ces recommandations sont respecter rigoureusement ATTENTION Point important...

Страница 129: ...uide Les illustrations utilis es dans ce guide repr sentent la machine imageRUNNER 2420 quip e des p riph riques en option suivants chargeur CRV P2 Module de Finition interne U2 R ceptacle suppl menta...

Страница 130: ...autres pays Les autres noms de produits ou de soci t s cit s dans le pr sent guide peuvent tre des marques de leurs propri taires respectifs Syst me d exploitation Microsoft Windows 2000 Windows 2000...

Страница 131: ...e fonction que la copie Sur cette machine le d roulement de ces op rations est assez complexe et par cons quent il est possible que les copies ou diff rents types d impression doivent attendre leur to...

Страница 132: ...ession Tirage de documents tels qu une copie ou des donn es envoy es la machine par un ordinateur client Copie Impression de donn es lues partir d un original suivie d options de finition notamment l...

Страница 133: ...0 V 50 Hz avec une tension nominale de 220 V 240 V 50 60 Hz L utilisation de c ble blind est n cessaire pour satisfaire aux exigences techniques CEM de la directive europ enne Faisceau laser Canon cer...

Страница 134: ...quettes ci dessous sont appos es sur l unit laser l int rieur de la machine et c t de la cartouche de toner derri re le capot avant D apr s les normes CEI60825 1 2007 et EN60825 1 2007 ce produit corr...

Страница 135: ...nts de bureau Il encourage le d veloppement et la diffusion de produits quip s de fonctions r duisant la consommation d nergie de mani re efficace Il s agit d un syst me ouvert auquel les entreprises...

Страница 136: ...EEE en vue de leur recyclage ou un point d change de produits autoris qui est accessible lorsque vous faites l acquisition d un nouveau produit du m me type que l ancien Toute d viation par rapport ce...

Страница 137: ...sans le consentement crit pr alable des d tenteurs du LOGICIEL 5 Nonobstant la disposition ci dessus vous pouvez transf rer le LOGICIEL seulement si a vous c dez l ensemble de vos droits aff rents au...

Страница 138: ...project nor the names of its contributors may be used to endorse or promote products derived from this software without specific prior written permission THIS SOFTWARE IS PROVIDED BY THE PROJECT AND...

Страница 139: ...E OU IMPLICITE RELATIVE AU PRESENT MATERIEL NOTAMMENT CELLES AYANT TRAIT A L APTITUDE A ETRE COMMERCIALISE A LA QUALITE MARCHANDE A L ADAPTATION A UN USAGE PARTICULIER ET A L ABSENCE DE CONTREFACON CA...

Страница 140: ...e soit un document particulier et ou sur la l galit de l utilisation des images ainsi lues imprim es ou reproduites nous vous recommandons de prendre pr alablement les conseils juridiques n cessaires...

Страница 141: ...telle qu un sofa ou un tapis Ne pas placer la machine un endroit pr sentant l une des caract ristiques suivantes emplacement humide ou poussi reux proximit de robinets et d eau exposition directe la...

Страница 142: ...pas la machine sur une prise multiple ou sur une rallonge avec prise multiple car cela pourrait provoquer un incendie ou une lectrocution Ne repliez et n attachez pas le cordon lectrique en position r...

Страница 143: ...as de produit a rosol au contenu inflammable proximit de la machine Si le gaz qu il contient venait au contact de l un des composants lectriques internes de la machine il y aurait danger d incendie ou...

Страница 144: ...geur M me si la machine n est pas en service vos mains vos cheveux ou vos v tements risquent d tre happ s par les rouleaux d entra nement ce qui risque de provoquer des blessures ou des d g ts si la m...

Страница 145: ...eur agr Canon local Si le laser n tait plus confin l int rieur de la machine il pourrait provoquer des l sions oculaires graves en cas d exposition Le contr le le r glage ou l utilisation de la machin...

Страница 146: ...llez ce qu aucun objet m tallique collier bracelet etc ne soit en contact avec elle pour viter les risques de br lure ou d lectrocution Ne jetez pas les cartouches de toner usag es au feu car les r si...

Страница 147: ...la machine ne vous exposez pas la chaleur mise par l ensemble de fixation et ses alentours pendant une dur e prolong e Ceci peut r sulter en des br lures faible temp rature m me si vous n avez pas to...

Страница 148: ...u un incendie En cas de renversement accidentel de toner rassembler avec pr caution les particules de toner ou les enlever l aide d un chiffon doux humide de fa on en viter l inhalation Ne jamais util...

Страница 149: ...tants AVERTISSEMENT l attention des porteurs de stimulateur cardiaque Ce produit met un flux magn tique de faible intensit En cas d anomalie votre stimulateur cardiaque loignez vous de la machine et c...

Страница 150: ...mande 1 12 quipement en option 1 14 Interrupteur principal et interrupteur du panneau de commande 1 15 Mise sous tension de l alimentation principale 1 15 Interrupteur du panneau de commande 1 17 Conf...

Страница 151: ...itions suivantes Emplacements soumis une temp rature et une humidit extr mes qu elles soient faibles ou lev es vitez par exemple la proximit imm diate avec des robinets radiateurs humidificateurs clim...

Страница 152: ...est recommand d ouvrir r guli rement portes et fen tres du local pour travailler dans des conditions plus agr ables Endroits o des vapeurs d ammoniac sont d gag es Endroits soumis des vibrations Par...

Страница 153: ...e secteur d di e et pr voyez le plus d espace possible entre la machine et les autres appareils lectroniques Branchez la machine sur une prise trifilaire standard CA mise la masse de 220 240 V Assurez...

Страница 154: ...mager ce dernier ou des fils l int rieur de la machine risquent de se d connecter Ceci pourrait provoquer un incendie Evitez les situations suivantes branchement et d branchement fr quents du cordon d...

Страница 155: ...lable votre revendeur Canon agr local La machine est lourde et deux personnes ou plus sont n cessaires pour la soulever N essayez donc pas de la d placer vous m me vous risqueriez de vous blesser Lors...

Страница 156: ...ur Arr t d branchez le cordon d alimentation de la prise secteur et contactez votre revendeur Canon agr local L utilisation de la machine dans cet tat risque de provoquer un incendie ou une lectrocuti...

Страница 157: ...s e pendant une p riode prolong e par exemple pendant les vacances mettez l interrupteur principal sur Arr t et d branchez la prise d alimentation Lors du fonctionnement la machine g n re de l ozone o...

Страница 158: ...r sent es Pour plus d informations sur l quipement en option les l ments et leurs fonctions voir le Chapitre 5 quipement en option du Guide de r f rence Vue externe Mod le imageRUNNER 2422 sur lequel...

Страница 159: ...xposition prot ge les originaux plac s sur la vitre d exposition d Chargeur CRV P2 en option Les originaux plac s dans le chargeur sont automatiquement entra n s feuille par feuille vers la zone de le...

Страница 160: ...Lorsque l unit du tambour est remplie de toner usag remplacez la par une nouvelle g Capot gauche de la cassette Ouvrez ces capots pour liminer un bourrage dans les cassettes 2 3 et 4 h Unit de fixatio...

Страница 161: ...en mode Veille g Touche Mode utilisateur Appuyez sur cette touche pour acc der au menu Fonctions supplementaire h Touche Arr t Pour arr ter la copie ou la lecture i Touche D but Appuyez sur cette touc...

Страница 162: ...ue des op rations y Touche Effacer cadre Appuyez sur cette touche pour sp cifier le mode Effacer cadre Pour plus d informations voir le Chapitre 2 Op rations avanc es du Guide de la fonction copie z T...

Страница 163: ...hine 1 quipement en option a Bac S parateur interne E2 b Module Une Cassette J1 c Module Une Cassette K1 d Unit recto verso A1 e Module de Finition interne U2 f Chargeur CRV P2 g Tablette originaux J1...

Страница 164: ...pourrait provoquer une lectrocution IMPORTANT S il ne s allume pas assurez vous que la fiche du cordon d alimentation est correctement ins r e dans la prise secteur Si le module Cassette Heater Unit...

Страница 165: ...f rence Les r glages de copie par d faut sont les suivants Taux de reproduction 1 1 100 S lection du format papier s lection automatique Densit de copie r glage automatique de la densit Nombre de copi...

Страница 166: ...tre 3 Param tres et fonctions utiles du Guide de r f rence La machine peut recevoir et imprimer des documents provenant d un ordinateur m me lorsqu elle est en mode Veille Pour mettre le panneau de co...

Страница 167: ...n est pas fourni dans l emballage Vous devez vous procurer un c ble adapt votre ordinateur ou votre r seau Sch ma de configuration Raccordement des c bles Raccordez les c bles correspondant votre envi...

Страница 168: ...d exploitatioon de votre ordinateur ATTENTION Avant de connecter le c ble USB la machine alors que l interrupteur principal est en position Marche v rifiez que la ligne de terre est raccord e Si la li...

Страница 169: ...Hi Speed USB Full Speed quivalent USB 1 1 Sous Mac OS X 10 3 2 ou version ant rieure l interface USB correspond USB Full Speed quivalent USB 1 1 et sous Mac OS X 10 3 3 ou version sup rieure elle corr...

Страница 170: ...tions consultez votre repr sentant Canon agr le plus proche Apr s avoir raccord le c ble r seau effectuez les op rations suivantes Pour plus d informations reportez vous aux descriptions correspondant...

Страница 171: ...sion Configuration syst me requise Les environnements syst me suivants sont requis pour utiliser le pilote d imprimante REMARQUE Les syst mes d exploitation pris en charge peuvent varier selon la vers...

Страница 172: ...rablement la vitesse d impression Installation Pour des d tails sur la proc dure d installation voir le Guide d installation du pilote d imprimante ou Guide d installation du pilote d imprimante UFR I...

Страница 173: ...sur votre bureau Le programme d installation et le Guide d installation du pilote d imprimante UFR II Mac figurent dans le dossier portant le nom du pilote d imprimante Double cliquez sur l ic ne du...

Страница 174: ...es de l imprimante l aide du pilote d imprimante Sous Windows Les options de l imprimante sont d finies dans l onglet Param tres du p riph rique du pilote d imprimante L cran Param tres du p riph riqu...

Страница 175: ...e dans le serveur d impression vous pouvez utiliser la fonction Lire l tat du p riph rique Pour plus d informations sur la proc dure d installation de Canon Driver Information Assist Service voir le G...

Страница 176: ...nez votre imprimante cliquez sur Options et fournitures cliquez sur Gestionnaire v rifiez si le pilote d imprimante correspondant votre imprimante est s lectionn sous Imprimer via Pour plus d informat...

Страница 177: ...au Les r glages li s la lecture sont effectu s via le pilote de num risation Le pilote de num risation se trouve dans le m me CD ROM que le pilote d imprimante logiciel utilisateur UFRII LT Ce CD ROM...

Страница 178: ...aire l ex cution des syst mes d exploitation mentionn s ci dessus Affichage avec une r solution minimale de 640 480 800 600 minimum recommand s capable d afficher au moins 256 couleurs Carte r seau h...

Страница 179: ...tall le pilote de num risation vous devez s lectionner Color Network ScanGear comme scanner utiliser afin de pouvoir proc der la lecture distance S lection du scanner en r seau que vous souhaitez util...

Страница 180: ...ine Fonctions de la machine 2 2 Mise en place des originaux 2 6 Orientation 2 6 Vitre d exposition 2 8 Chargeur CRV P2 en option 2 10 Copie de base 2 12 Impression de base 2 17 Lecture distance standa...

Страница 181: ...nologie UFRII LT Ultra Fast Rendering II LT qui utilise un nouvel algorithme d impression pour r duire le traitement du fichier et optimiser le r sultat Pour des instructions sur la configuration de l...

Страница 182: ...geRUNNER 2422 2420 via l interface utilisateur distante et le r seau Pour plus d informations sur la configuration du port Ethernet voir Guide de mise en r seau Lecture en r seau S il est possible d t...

Страница 183: ...ogrammer pour qu il s active un moment pr cis Vous pouvez configurer la machine pour qu elle s arr te automatiquement en activant le param tre D lai fermeture auto Ce param tre a pour effet de couper...

Страница 184: ...f rence Pour des instructions sur l annulation d une t che voir Annulation d une t che la p 2 21 Autres fonctions utiles Cette machine offre galement les fonctions utiles suivantes S lection automati...

Страница 185: ...tan ment plusieurs originaux et appuyez sur D but La machine charge automatiquement les originaux dans la zone de lecture et les lit Si vous effectuez des copies en mode Recto verso les originaux rect...

Страница 186: ...sque vous agrandissez un original A4 ou A5 sur du papier A3 Voir Chapitre 1 Op rations de base dans le Guide de la fonction copie Les originaux A4 et A5 plac s dans le sens horizontal sont d sign s so...

Страница 187: ...la vitre d exposition pour copier des cartes d identit avec la fonction Copie carte ID Voir le Chapitre 2 Op rations avanc es du Guide de la fonction copie 1 Soulevez le chargeur cache d exposition 2...

Страница 188: ...rgeur cache d exposition ATTENTION Pour viter de vous blesser refermez d licatement le chargeur cache d exposition en prenant soin de ne pas vous coincer les mains N appuyez pas trop fort sur le charg...

Страница 189: ...A4R A5 et A5R 50 feuilles 80 g m2 A3 25 feuilles 80 g m2 IMPORTANT Ne chargez pas d originaux d chir s ou perfor s froiss s recourb s ou corn s maintenus par des agrafes ou des trombones dos carbon ou...

Страница 190: ...e mode M lange d originaux Voir le Chapitre 2 Op rations avanc es du Guide de la fonction copie 1 R glez les guides coulissants en fonction du format des originaux 2 Placez soigneusement les originaux...

Страница 191: ...he d exposition peuvent d former l image copi e 1 Appuyez sur les touches correspondant aux messages affich s sur l cran LCD Si aucun message n est affich passez l tape 2 Si le message Saisie N serv p...

Страница 192: ...lisez ou pour s lectionner R gler appuyez sur OK REMARQUE Pour plus d informations sur la saisie de caract res voir le Chapitre 2 Op rations de base du Guide de r f rence Appuyez sur ID REMARQUE Pour...

Страница 193: ...opie souhait s REMARQUE Pour plus d informations sur la d finition des r glages de copie voir le Chapitre 1 Op rations de base et le Chapitre 2 Op rations avanc es du Guide de la fonction copie 5 Entr...

Страница 194: ...d un p riph rique en option Le tirage d marre automatiquement lorsque la machine est pr te Si le message M moire pleine s affiche sur l cran LCD divisez vos originaux en plusieurs jeux et copiez ceux...

Страница 195: ...ffiche sur l cran LCD divisez vos originaux en plusieurs jeux et copiez ceux ci s par ment 7 Pour commencer la copie de l original suivant durant l impression de la t che en cours r p tez les tapes 3...

Страница 196: ...recto verso depuis un ordinateur connect la machine l aide d un c ble USB vous devez activer l Unit recto verso A1 dans le pilote d imprimante Pour obtenir de l aide voir le Chapitre 1 Utilisation de...

Страница 197: ...oir Configuration de la connexion la p 1 18 et Avant d utiliser la fonction de lecture distance la p 1 28 REMARQUE Pour plus d informations sur la mise sous tension de la machine voir Interrupteur pri...

Страница 198: ...patible TWAIN sur le bureau de votre ordinateur 6 S lectionnez la commande pour d marrer la lecture par exemple Nouvelle lecture ou Obtenir La fen tre principale de Color Network ScanGear s affiche RE...

Страница 199: ...se ferme pas automatiquement apr s la lecture cliquez sur quitter pour la fermer Veillez fermer la fen tre principale de Color Network ScanGear avant de quitter l application 9 Une fois la lecture te...

Страница 200: ...a machine ne traite qu une seule t che Passez l tape 4 Si plusieurs copies ou impressions ont t lanc es Passez l tape 2 REMARQUE La t che actuelle appara t en premier sur l cran Statut L cran LCD peut...

Страница 201: ...ce Il est impossible de s lectionner et d annuler plusieurs t ches la fois S lectionnez et annulez les t ches une une Utilisation de l cran Moniteur syst me Vous pouvez annuler une t che partir de l c...

Страница 202: ...z sur OK Si vous s lectionnez Copie l cran Statut copie Journal s affiche Si vous s lectionnez Impression l cran Statut impr Journal s affiche 3 Appuyez sur ou pour s lectionner Statut appuyez sur OK...

Страница 203: ...SCII Si vous utilisez d autres codes de caract res leur affichage sur l cran LCD risque d tre incoh rent 7 Appuyez sur Restauration pour revenir l cran d attente 6 Appuyez sur ou pour s lectionner Oui...

Страница 204: ...que comment charger du papier effectuer une maintenance p riodique et remplacer les consommables comme les cartouches de toner et d agrafes Cassettes 3 2 Chargement de papier 3 2 Modification du forma...

Страница 205: ...ier Un message vous invitant charger du papier s affiche sur l cran LCD et le t moin d erreur clignote en rouge dans les cas suivants Une des cassettes est vide Une cassette n est pas compl tement log...

Страница 206: ...ns les parties de la cassette non occup es par la pile de papier Cela pourrait provoquer un bourrage REMARQUE Si un message vous invite remettre du papier avant la fin du tirage les impressions restan...

Страница 207: ...uilles plusieurs fois et alignez les bords pour faciliter l alimentation 4 Chargez la pile de feuilles dans la cassette Taquez bien le bord des feuilles Chargez la pile de feuilles contre le guide d e...

Страница 208: ...lit d impression ou un bourrage retournez la pile de feuilles et rechargez la Pour plus d informations sur le sens d impression du papier pr imprim papier sur lequel des logos ou des motifs sont d j i...

Страница 209: ...ier d un tiroir r glez les guides papier en suivant la proc dure ci apr s REMARQUE Contactez votre repr sentant Canon pour toute question concernant les r glages pour les papiers U1 U2 et U3 1 Sortez...

Страница 210: ...ide d extr mit et r installez le en l alignant sur les marques indiquant le format papier souhait D tachez le guide d extr mit en le poussant vers le bas et vers l avant Alignez le guide d extr mit su...

Страница 211: ...r de verrouillage S il n est pas bien positionn sur le type de papier charg dans la cassette le mauvais type de papier sera affich l cran Cela pourrait provoquer un bourrage salir les impressions ou l...

Страница 212: ...hine REMARQUE Le message A4R affich l cran indique que l tiquette ou la marque de poin on du format papier des tiroirs est A4 8 Collez l tiquette de format papier appropri e sur la plaque pr vue cet e...

Страница 213: ...oc dure ci apr s REMARQUE Pour obtenir des informations d taill es sur les crans indiquant les instructions relatives au remplacement du toner ou des agrafes ainsi qu l limination des bourrages papier...

Страница 214: ...v tements lavez les imm diatement l eau froide Un lavage l eau chaude aurait pour effet de fixer d finitivement le toner et de cr er une tache ind l bile Lorsque vous remplacez des cartouches de tone...

Страница 215: ...des instructions l cran Pour plus d informations voir le Chapitre 7 D pannage du Guide de r f rence 2 Tout en appuyant sur le loquet de d verrouillage de la poign e tournez la cartouche de toner dans...

Страница 216: ...lures ou un incendie IMPORTANT Si le toner n est pas bien r parti l int rieur de la cartouche la qualit de l impression risque d tre irr guli re 3 Pendant que vous appuyez sur le loquet de d verrouil...

Страница 217: ...autre main IMPORTANT Tirez la languette d licatement pour viter toute projection de toner sur vos v tements ou votre peau Veillez tirer la languette compl tement pour viter toute erreur d impression...

Страница 218: ...ournez la cartouche jusqu ce qu un d clic se fasse entendre 8 Refermez le capot avant ATTENTION En refermant le capot avant veillez ne pas vous blesser en vous pin ant les doigts IMPORTANT Veillez net...

Страница 219: ...Remplacement du toner 3 16 Maintenance p riodique 3...

Страница 220: ...chine et les messages d erreur limination des bourrages papier 4 2 limination des bourrages papier l aide des instructions l cran 4 2 Bourrages papier fr quents 4 3 Liste des messages d erreur 4 4 cra...

Страница 221: ...lors de toute autre inspection interne veillez ce qu aucun objet m tallique collier bracelet etc n entre en contact avec elle pour viter les risques de br lure ou d lectrocution ATTENTION Lors de l li...

Страница 222: ...si la machine se met subitement imprimer Bourrages papier fr quents Si des bourrages papier se produisent fr quemment m me si la machine n a pas de probl me apparent l une des deux raisons suivantes p...

Страница 223: ...l impression Une d cision doit tre prise ou une action doit tre effectu e pendant l examen du r seau Agraf impossible R duire pages impr Cause La machine ne parvient pas agrafer les feuilles imprim e...

Страница 224: ...Cause Le capot gauche de la cassette 2 est ouvert Solution Fermez le capot gauche de la cassette Capot cass 3 ouvert Fermer capot Cause Le capot gauche de la cassette 3 est ouvert Solution Fermez le...

Страница 225: ...ution Mettez l appareil hors tension attendez plus de 10 secondes puis remettez le sous tension Si cela ne r sout pas le probl me d branchez la machine et contactez votre revendeur Canon agr local Voi...

Страница 226: ...ns rez la cassette le plus loin possible Mettre pap correct Cause 1 Le format de papier d tect automatiquement par la cassette ne correspond pas au format r el du papier Solution 1 V rifiez que le for...

Страница 227: ...ier souhait Solution 2 R glez le taux de reproduction pour qu il corresponde au format souhait Si vous appuyez sur D but pendant que ce message est affich le papier comportant la marge la plus faible...

Страница 228: ...afin de r aliser des copies recto verso Ordinaire Couleur Recycl ou Epais 1 R cept sortie plein Retirer papier Cause Le r ceptacle est rempli de papier Solution Retirez les feuilles des r ceptacles d...

Страница 229: ...tambour Cause Le tambour est rempli de toner usag Solution Remplacez l unit du tambour Voir le Chapitre 6 Maintenance p riodique du Guide de r f rence V rifier document Cause Il y a peut tre un bourra...

Страница 230: ...nchez d branchez pas le cordon d alimentation avec les mains humides car cela pourrait provoquer une lectrocution ATTENTION Toujours tenir la fiche du cordon pour d brancher la machine Le fait de tire...

Страница 231: ...t tat de la machine Message d entretien affich l cran 1 Mettez l appareil hors tension Attendez au moins 10 secondes avant de la remettre sous tension 2 Si la machine ne fonctionne toujours pas correc...

Страница 232: ...nexe Ce chapitre d crit les caract ristiques de la machine et des p riph riques en option Il contient galement d autres informations utiles Op rations multifonctionnelles 5 2 Types de papier disponibl...

Страница 233: ...mple En cours de copie vous pouvez lire des originaux pour une t che de copie REMARQUE Les performances de la machine peuvent tre r duites si le traitement de l image compression agrandissement r duct...

Страница 234: ...m2 90 g m2 3 De 81 g m2 90 g m2 4 De 91 g m2 105 g m2 5 De 106 g m2 128 g m2 6 Utilisez uniquement des transparents au format A4 sp cialement con us pour cette machine IMPORTANT Lorsque vous imprimez...

Страница 235: ...sont propos es en option pour l imageRUNNER 2422 2420 Il est possible d utiliser du papier sans chlore avec cette machine Format papier Largeur Longueur Alimentation papier Cassette 1 Cassettes 2 3 4...

Страница 236: ...Chargement de papier 3 2 Cassettes 3 2 Chargeur 2 6 Chargeur CRV P2 1 10 1 14 Clavier num rique 1 12 Compteur 1 11 Configuration de la connexion 1 18 Connexion un r seau 1 20 Connexion une interface U...

Страница 237: ...2 O Op rations multifonctionnelles 5 2 P Panneau de commande propos du panneau de commande 1 10 Interrupteur du panneau de commande 1 12 Panneau de commande principal 1 12 Papier de couleur 5 3 Papier...

Страница 238: ...on 2 pages 1 13 Touche Taux de reproduction 1 13 Touche Tonalit 1 12 Touches et boutons utilis s dans ce guide x Transparent 5 3 TWAIN 2 18 Type de papier Format papier 5 4 Type de papier 5 3 Types de...

Страница 239: ...Index 5 8 Annexe 5...

Страница 240: ...imageRUNNER 2422 2420 Anwenderhandbuch...

Страница 241: ...dlegende Bedienung St rungsbeseitigung Referenzhandbuch CD ROM Kopierfunktionen Kopiererhandbuch CD ROM Anleitungen zum Arbeiten mit dem Remote User Interface Anwenderschnittstelle Handbuch Remote UI...

Страница 242: ...ekt aus dem Ordner DEUTSCH auf der Anwenderhandbuch CD ROM Verwendung des CD ROM Men s In diesem Abschnitt finden Sie Informationen zur Verwendung des CD ROM Men s Wenn Sie die mitgelieferte Anwenderh...

Страница 243: ...hrten Handb cher durch Anklicken des jeweiligen Handbuchs ansehen Nachdem Sie das gew nschte Handbuch angeklickt haben startet Adobe Reader Adobe Acrobat Reader und das PDF Handbuch wird angezeigt b...

Страница 244: ...igneten Papiersorten und den Index Kapitel 1 Kapitel 2 Kapitel 3 Kapitel 4 Kapitel 5 Bei der Erstellung dieser Handb cher und Anleitungen wurden gr te Anstrengungen unternommen um Ungenauigkeiten und...

Страница 245: ...eise xiv Produktbezeichnung xiv EMC Anforderungen der EU Richtlinie xiv Hinweise zur Sicherheit des Lasers xiv Zus tzliche Informationen xv Internationales ENERGY STAR Programm xvi IPv6 Ready Logo xvi...

Страница 246: ...alter 1 15 Bedienfeldschalter 1 17 Einrichten der Verbindung 1 18 Flussdiagramm f r die Einstellungen 1 18 Die Verbindung mit einer USB Schnittstelle 1 19 Anschlie en an ein Netzwerk 1 20 Verwenden vo...

Страница 247: ...stemmonitors 2 22 Kapitel 3 Regelm ige Wartung Kassetten 3 2 Einlegen von Papier 3 2 Einrichten der Kassetten auf andere Papierformate 3 6 Austauschen des Toners 3 11 Kapitel 4 St rungsbeseitigung Bes...

Страница 248: ...r Tod die Folge sein Bitte beachten Sie diese Warnungen unbedingt um den sicheren Betrieb zu gew hrleisten VORSICHT So wird eine Vorsichtsma nahme bez glich Vorg ngen gekennzeichnet die zu Personensch...

Страница 249: ...chen am Computerbildschirm Abbildungen in diesem Handbuch Die Ger teabbildungen in diesem Handbuch zeigen das Modell imageRUNNER 2420 mit den folgenden angebrachten Zusatzausstattungen einzug D ADF P...

Страница 250: ...ion in den USA und oder anderen L ndern Andere Firmen oder Produktnamen die in diesem Handbuch verwendet werden und nicht in dieser Liste erw hnt sind k nnen Warenzeichen der entsprechenden Firmen sei...

Страница 251: ...von Kopier und Druckauftr gen weist das System den einzelnen Auftr gen einen Platz in der Druckreihenfolge zu so dass in einigen F llen kurze Wartezeiten entstehen Um in den Anleitungen Begriffsklarhe...

Страница 252: ...Dokumentenausgabe wie Kopien oder Daten die von einem Client Computer an das System gesendeten wurden Kopieren Ausdrucken von Daten eines gescannten Originals mit anschlie enden Finishing Optionen wi...

Страница 253: ...von 230V 50 Hz gen gt obwohl die Nennlast des Produktes bei 220 bis 240V 50 60 Hz liegt Die Verwendung von abgeschirmten Kabeln ist notwendig um die technischen EMC Anforderungen der EU Richtlinie zu...

Страница 254: ...arnhinweise befinden sich auf der Laserscannereinheit im System und neben der Tonerpatrone hinter der vorderen Abdeckung Dieses System entspricht der Europanorm IEC60825 1 2007 und EN60825 1 2007 und...

Страница 255: ...tern und anderen B roger ten Im Rahmen dieses Programms wird die Entwicklung und Verbreitung von Produkten gef rdert die ber Energiesparfunktionen verf gen Es handelt sich um ein offenes System an dem...

Страница 256: ...Kauf eines hnlichen Produkts oder durch Abgabe bei einer autorisierten Sammelstelle f r die Wiederaufbereitung von Elektro und Elektronik Altger ten geschehen Der unsachgem e Umgang mit Altger ten kan...

Страница 257: ...btreten in Unterlizenz vergeben vermarkten verteilen oder an Dritte bertragen 5 Ungeachtet des Vorangegangenen darf die SOFTWARE nur dann an Dritte bertragen werden wenn a Sie alle Rechte am PRODUKT u...

Страница 258: ...of the project nor the names of its contributors may be used to endorse or promote products derived from this software without specific prior written permission THIS SOFTWARE IS PROVIDED BY THE PROJEC...

Страница 259: ...ng dieser Reproduktionen k nnen rechtlich unzul ssig sein und strafrechtliche und oder zivilrechtliche Verfolgung nach sich ziehen Unten auf dieser Seite finden Sie eine Liste mit Beispielen f r solch...

Страница 260: ...s System so auf dass die Bel ftungsschlitze nicht durch eine Wand oder andere Objekte verdeckt sind Lassen Sie immer Abstand zur Wand Wenn die Bel ftungsschlitze blockiert werden baut sich im Systemin...

Страница 261: ...tzkabel nicht besch digt oder ver ndert wird Keinesfalls schwere Gegenst nde auf das Kabel stellen das Kabel starkem Zug aussetzen oder berm ig biegen da es dadurch zu Sch den an den Leitern im Kabel...

Страница 262: ...ren des Systems vornehmen oder gestautes Papier entfernen wollen um Verbrennungen oder elektrischen Schlag zu vermeiden Bei Auftreten von ungewohnten Ger uschen Rauch Hitze oder ungew hnlichen Ger che...

Страница 263: ...nicht arbeitet k nnen Ihre H nde Haare oder Bekleidung von den Walzen ergriffen werden und Sie k nnen sich dabei verletzen oder das System besch digen wenn pl tzlich ein Druckvorgang startet Papier da...

Страница 264: ...sind Wenn die Plaketten entfernt wurden wenden Sie sich an Ihren Canon Servicepartner Wenn Laserlicht aus dem System austritt und in Kontakt mit Ihren Augen kommt k nnen ernste Verletzungen und Sch d...

Страница 265: ...llgegenst nde nicht in Ber hrung mit dem Systeminneren kommen da es sonst zu Verbrennungen oder elektrischem Schlag kommen kann Bitte werfen Sie verbrauchte Tonerpatronen nie in offenes Feuer weil sic...

Страница 266: ...ereinheit und ihrer Umgebung abgestrahlt wird Andernfalls kann es zu Niedertemperatur Verbrennungen kommen auch wenn Sie die Fixiereinheit und ihre Umgebung nicht direkt ber hrt haben Bitte achten Sie...

Страница 267: ...ersch ttet oder verstreut wird kehren Sie die Tonerpartikel vorsichtig zusammen oder nehmen Sie die Tonerpartikel mit einem weichen angefeuchteten Tuch auf und achten Sie darauf dass Sie den Tonerstau...

Страница 268: ...NG Hinweis f r Tr ger von Herzschrittmachern Dieses Produkt erzeugt ein schwaches magnetisches Feld Wenn Sie einen Herzschrittmacher tragen und sich beim Arbeiten an diesem System unwohl f hlen ziehen...

Страница 269: ...xxx...

Страница 270: ...nansicht 1 11 Bedienfeld 1 12 Zusatzausstattungen 1 14 Hauptschalter und Bedienfeldschalter 1 15 Einschalten des Systems ber Hauptschalter 1 15 Bedienfeldschalter 1 17 Einrichten der Verbindung 1 18 F...

Страница 271: ...lungsorts Orte vermeiden an denen das System extremen Temperaturen und extremer Feuchtigkeit oder Trockenheit ausgesetzt ist Orte in der N he von Wasseranschl ssen Hei wasserbereitern Luftbefeuchtern...

Страница 272: ...usreichende Bel ftung zu sorgen um ein angenehmes Arbeitsklima im Bereich des Systems zu schaffen Orte meiden an denen sich Ammoniakgas entwickelt Orte vermeiden an denen das System starken Ersch tter...

Страница 273: ...ersorgung des Systems sicher ist und unter einer konstanten Spannung steht Schlie en Sie keine weiteren elektrischen Systeme an die gleiche Netzsteckdose an Das System nicht ber eine Mehrfachsteckdose...

Страница 274: ...atz an allen Seiten des Systems vorsehen um eine angemessene Bel ftung zu gew hrleisten Mit Finisher U2 und Dokumentenablage J1 beide optional Ohne Zusatzausstattung betr gt die Breite 1 018 mm bzw mi...

Страница 275: ...igen Sie Ihren Canon Servicepartner Das System ist schwer und zum Anheben sind zwei oder mehr Personen erforderlich Versuchen Sie nicht es alleine zu bewegen Andernfalls besteht Verletzungsgefahr Das...

Страница 276: ...System sofort ber den Hauptschalter ausschalten den Netzstecker ziehen und den Canon Servicepartner kontaktieren Eine Weiterbenutzung des Systems in einem solchen Zustand kann zu Feuer oder elektrisch...

Страница 277: ...den am Hauptschalter aus und ziehen Sie zus tzlich den Netzstecker Das System erzeugt w hrend des Betriebs in geringen Mengen Ozon oder andere Ger che Obwohl die Empfindlichkeit gegen Ozon oder andere...

Страница 278: ...erden Abbildungen von Systemen mit Zusatzausstattung gezeigt Einzelheiten zur Zusatzausstattung Teilen und Funktionen siehe Kapitel 5 Zusatzausstattung im Referenzhandbuch Au enansicht Modell imageRUN...

Страница 279: ...em Vorlagenglas angelegt werden d Einzug D ADF P2 Zusatzausstattung Die im Einzug eingelegten Originale werden automatisch nacheinander auf den Scanbereich gezogen Der Einzug dreht auch automatisch di...

Страница 280: ...gef llt ist durch eine neue Patrone ersetzen g Linke Papierkassettenabdeckung ffnen Sie beim Beseitigen eines Papierstaus in Kassetten 2 3 und 4 diese Abdeckungen h Fixiereinheit Bei Auftreten eines...

Страница 281: ...System im Energiesparmodus g Zusatzfunktionen Taste Mit dieser Taste ffnen Sie das Zusatzfunktionsmen h Stopp Taste Mit dieser Taste stoppen Sie einen Kopier bzw Scanvorgang i Start Taste Dr cken um...

Страница 282: ...Anzeige gr n y Rahmen L schen Taste Mit dieser Taste geben Sie die L schungsfunktion ein Weitere Informationen finden Sie in Kapitel 2 Erweiterte Bedienung im Kopiererhandbuch z Seitentrennung Taste...

Страница 283: ...tionen 1 14 Vor dem Start 1 Zusatzausstattungen a Internes Zusatzausgabefach E2 b Kassetteneinheit J1 c Kassetteneinheit K1 d Duplex Einheit A1 e Finisher U2 f Einzug D ADF P2 g Dokumentenablage J1 h...

Страница 284: ...iden WICHTIG Falls die Bereitschaftsanzeige nicht leuchtet vergewissern Sie sich dass der Netzstecker fest in der Netzsteckdose sitzt Wenn die Kassettenheizung Typ 30 angebracht ist wird nach Schalten...

Страница 285: ...kopiereinstellungen sind Abbildungsma stab Direkt 100 Papierwahl Automatische Papierwahl Kopienbilddichte Automatischer Dichteabgleich Kopienanzahl 1 Bildqualit t Text Die Voreinstellungen f r die Kop...

Страница 286: ...Einstellungen im Referenzhandbuch Das System kann w hrend es sich im Schlafmodus befindet auch Dokumente von einem Computer empfangen und ausdrucken Das Bedienfeld wird mit dem Bedienfeldschalter auf...

Страница 287: ...Lieferumfang enthalten Besorgen Sie sich bitte ein geeignetes Kabel f r Ihren Computer oder Ihr Netzwerk Flussdiagramm f r die Einstellungen Kabelanschluss Schlie en Sie die f r Ihre Umgebung notwendi...

Страница 288: ...ationen des Betriebssystems Ihres Computers ab VORSICHT Bevor Sie das USB Kabel am System anschlie en w hrend der Hauptnetzschalter auf ON steht stellen Sie zuerst sicher dass die Erdungsleitung anges...

Страница 289: ...entspricht USB 1 1 F r Mac OS X 10 3 2 oder niedriger ist es USB Full Speed entspricht USB 1 1 und f r Mac OS X 10 3 3 oder h her ist es USB 2 0 Hi Speed USB Full Speed entspricht USB 1 1 N here Infor...

Страница 290: ...sich bitte an Ihren Canon Servicepartner Nach dem Anschluss des Netzwerkkabels f hren Sie die folgenden Schritte aus Weitere Informationen finden Sie unter den zugeh rigen Beschreibungen Konfigurieren...

Страница 291: ...rderungen Folgende Systemumgebungen sind notwendig um den Druckertreiber verwenden zu k nnen HINWEIS Die unterst tzten Betriebssysteme sind abh ngig von der Version des Druckertreibers Software Betrie...

Страница 292: ...ion Einzelheiten zur Installation des Druckertreibers finden Sie in der Installationshandbuch zum Druckertreiber oder Mac UFR II Druckertreiber Installationshandbuch CD ROM Men Windows HINWEIS Lesen S...

Страница 293: ...zeigt wird Sie finden das Installationsprogramm und das Mac UFR II Druckertreiber Installationshandbuch in dem Ordner mit dem Druckertreibernamen Doppelklicken Sie auf das Symbol des Installationsprog...

Страница 294: ...m Druckertreiber einrichten F r Windows Druckeroptionen werden von der Registerkarte Ger teeinstellungen des Druckertreibers aus eingerichtet Sie k nnen die Registerkarte Ger teeinstellungen ffnen ind...

Страница 295: ...tosh Druckeroptionen werden ber die Registerkarte Installationsoptionen im Dialogfeld Druckerinformationen Mac OS X 10 4 bzw ber die Registerkarte Treiber im Dialogfeld Drucken Faxen Mac OS X 10 5 ode...

Страница 296: ...Vor Verwendung des Systems als Drucker 1 27 Vor dem Start 1 HINWEIS Die oben dargestellte Bildschirmabbildung stammt von Mac OS X 10 4...

Страница 297: ...cannertreiber vorgenommen Der Scannertreiber wird von der gleichen CD ROM mit der UFRII LT Anwendersoftware wie der Druckertreiber installiert Auf dieser CD ROM sind die folgenden Komponenten gespeich...

Страница 298: ...Pixel oder mehr empfohlen das mindestens 256 Farben anzeigen kann Ein Netzwerk Hostadapter f r die TCP IP und UDP IP Kommunikation in einem Ethernet Netzwerk WICHTIG Wenn Sie das System als Netzwerksc...

Страница 299: ...Scannertreiber installiert haben m ssen Sie Color Network ScanGear als Scanner f r das Remote Scannen ausw hlen Ausw hlen des zu verwendenden Netzwerkscanners Zum Scannen mit Color Network ScanGear w...

Страница 300: ...nge Funktionen dieses Systems 2 2 Ein Auflegen von Originalen 2 6 Ausrichtung 2 6 Vorlagenglas 2 8 Einzug D ADF P2 Zusatzausstattung 2 10 Grundlegende Kopierfunktionen 2 12 Grundlegende Druckfunktion...

Страница 301: ...ering II LT Technologie die den Dateiverarbeitungsaufwand mit Hilfe des neu entwickelten Druckalgorithmus minimiert und f r eine maximale Leistungsf higkeit sorgt N here Informationen f r die Einstell...

Страница 302: ...tzwerk gesteuert und eingerichtet werden Anleitungen zum Konfigurieren des Ethernet Anschlusses finden Sie im Netzwerkhandbuch Netzwerkscan Wenn eine Netzwerkverbindung verf gbar ist k nnen Sie mit de...

Страница 303: ...gen Das Netzwerkhandbuch Energie sparen Sie k nnen den Stromverbrauch effektiv senken indem Sie den Ruhemodus und die Einstellung Zeit Auto Abschalten festlegen Sie k nnen das System so einstellen das...

Страница 304: ...en Zugriff auf das Ger t verhindern indem Sie eine Benutzer ID und ein Passwort ber die Remote UI speichern Siehe Handbuch Remote UI Systemmonitor ber Systemmonitor k nnen Sie den Systemstatus pr fen...

Страница 305: ...mehrere Originale in einem Durchgang kopieren wollen und bet tigen Sie Start Das System zieht die Originale automatisch auf den Scanbereich und scannt sie ein Mit der Kopierfunktion Doppelseitig k nn...

Страница 306: ...len legen Sie die Originale quer ein Siehe Kapitel 1 Grundlegende Bedienung im Kopiererhandbuch Quer zugef hrte Originale der Formate A4 und A5 tragen die Formatbezeichnungen A4R und A5R Originale im...

Страница 307: ...ie ID Karte kopieren m ssen Sie das Vorlagenglas verwenden Siehe Kapitel 2 Erweiterte Bedienung im Kopiererhandbuch 1 Klappen Sie den Einzug die Originalabdeckung auf 2 Legen Sie das Original mit der...

Страница 308: ...inzug die Originalabdeckung vorsichtig VORSICHT Schlie en Sie den Einzug die Originalabdeckung vorsichtig damit Sie sich nicht die Finger einklemmen es besteht Verletzungsgefahr Bei Verwendung des Vor...

Страница 309: ...en sollten nicht ber den Einzug zugef hrt werden Originale mit Rissen oder gro en Heftl chern Stark gewellte oder zerknitterte Originale Geheftete Originale Originale mit beschichteter R ckseite oder...

Страница 310: ...Modus Unterschiedliche Originalformate aktivieren Siehe Kapitel 2 Erweiterte Bedienung im Kopiererhandbuch 1 Stellen Sie die F hrungsschienen auf die Gr e des Originals ein 2 Platzieren Sie die Origin...

Страница 311: ...g ber hren Durch Bewegen des Einzugs bzw der Originalabdeckung kann das Bild auf der Kopie verwackeln 1 Bet tigen Sie die betreffenden Tasten entsprechend der auf dem LCD Display angezeigten Meldungen...

Страница 312: ...che Tasten ein bet tigen Sie oder um Einstellen zu w hlen bet tigen Sie OK HINWEIS Anweisungen zum Eingeben von Zeichen siehe Grundlegende Bedienung im Referenzhandbuch Bet tigen Sie ID HINWEIS Anweis...

Страница 313: ...gew nschten Kopiereinstellungen fest HINWEIS Weitere Informationen zum Festlegen der Kopiereinstellungen siehe Kapitel 1 Grundlegende Bedienung und Kapitel 2 Erweiterte Bedienung im Kopiererhandbuch 5...

Страница 314: ...ng des Systems bzw eine Zusatzausstattung geschlossen wurde Das Kopieren beginnt automatisch sobald das System betriebsbereit ist Bei Anzeige der Meldung Speicher voll auf dem LCD Display teilen Sie I...

Страница 315: ...utomatisch sobald das System betriebsbereit ist Bei Anzeige der Meldung Speicher voll auf dem LCD Display teilen Sie Ihre Originale in verschiedene S tze auf und kopieren Sie sie getrennt 7 Falls Sie...

Страница 316: ...pelseitigen Druck von einem Computer aus durchzuf hren der ber ein USB Kabel mit dem System verbunden ist m ssen Sie die optionale Duplex Einheit A1 ber den Druckertreiber aktivieren Zwecks Hilfe sieh...

Страница 317: ...installieren Weitere Informationen finden Sie Einrichten der Verbindung auf Seite 1 18 und Vor dem Verwenden der Remote Scan Funktion auf Seite 1 28 HINWEIS Anweisungen zum Einschalten des Systems fin...

Страница 318: ...n auf Seite 2 6 4 Wen Sie nach der Installation des Treibers zum ersten Mal scannen w hlen Sie den Color Network ScanGear als Scanner aus 5 ffnen Sie eine TWAIN kompatible Anwendung auf Ihrem Computer...

Страница 319: ...bis das Dialogfeld angezeigt wird das den Fortschritt des Scanvorgangs anzeigt Wenn der Color Network ScanGear nach dem Scannen nicht automatisch schlie t klicken Sie auf Beenden um ihn zu schlie en S...

Страница 320: ...Auftrag ausf hrt Fahren Sie mit Schritt 4 fort Wenn sich im System mehrere Kopier oder Druckauftr ge befinden Fahren Sie mit Schritt 2 fort HINWEIS Der aktuelle Job wird zuerst auf der Statusanzeige...

Страница 321: ...uch Sie k nnen nicht mehrere Jobs auf einmal w hlen und gemeinsam abbrechen W hlen bzw brechen Sie jeweils nur einen Job ab Verwenden des Systemmonitors Sie k nnen Jobs die gedruckt werden oder auf Ve...

Страница 322: ...Sie dann OK Bei der Wahl von Kopie wird die Anzeige Kopieren Status Log eingeblendet Bei der Wahl von Druck wird die Anzeige Drucken Status Log eingeblendet 3 W hlen Sie mit oder Status bet tigen Sie...

Страница 323: ...Wenn Sie andere Zeichencodes verwenden k nnen die Zeichen auf dem LCD Display verst mmelt sein 7 Bet tigen Sie die Taste R ckstellung um zum Standbydisplay zur ckzukehren 6 W hlen Sie mit oder Ja bet...

Страница 324: ...en zum Einlegen von Papier zum Durchf hren von regelm igen Reinigungsarbeiten und zum Ersetzen von Verbrauchsmaterial wie Toner und Heftklammermagazinen Kassetten 3 2 Einlegen von Papier 3 2 Einrichte...

Страница 325: ...rt zum Einlegen von Papier auf und die Fehler Anzeige blinkt rot wenn der Vorrat der ausgew hlten Papierkassette ersch pft ist eine Kassette nicht vollst ndig in das System eingesetzt ist Stellen Sie...

Страница 326: ...e im freien Bereich der Kassette neben den Papierstapel Anderenfalls k nnen Papierstaus resultieren HINWEIS Wenn w hrend des Druckvorgangs eine Meldung zum Einlegen von Papier erscheint werden die res...

Страница 327: ...rkanten schneiden WICHTIG Restliches Papier in seine Originalverpackung zur ckgeben und an einem trocknen vor direktem Sonnenlicht gesch tzten Ort lagern HINWEIS Bitte verwenden Sie f r Drucke und Kop...

Страница 328: ...die Kassette eingelegt ist wird die nach oben weisende Seite bedruckt Falls St rungen wie z B schlechte Druckqualit t oder Papierstaus auftreten den Papierstapel versuchsweise umdrehen und erneut ein...

Страница 329: ...nd erstellt die verbleibenden Kopien oder Drucke Einrichten der Kassetten auf andere Papierformate Wenn Sie Papier mit anderem Format in eine Kassette legen wollen richten Sie die F hrungsschienen in...

Страница 330: ...etzen Sie sie in die Schlitze an der Markierung f r das neue Papierformat ein Kippen Sie Breitenf hrung nach vorne um sie zu l sen Richten Sie die Breitenf hrung mit der Markierung des neuen Papierfor...

Страница 331: ...die Verriegelung unbedingt richtig ein Falls die Verriegelung f r den eingelegten Papiertyp in der Kassette falsch positioniert ist wird der falsche Papiertyp am LCD Display angezeigt Dies kann auch z...

Страница 332: ...s eingelegte Papierformat an der Kassette falsch positioniert ist wird das falsche Papierformat am LCD Display angezeigt Dies kann auch zu Papierstaus verschmutzten Drucken und zu Verschmutzungen im S...

Страница 333: ...n Papierformat 10 Schieben Sie die Kassette sanft in das System zur ck bis sie mit einem Klicken einrastet VORSICHT Schieben Sie die Kassette vorsichtig in Ihre Originalposition zur ck und achten Sie...

Страница 334: ...HINWEIS Weitere Informationen zu Anzeigen mit Anweisungen zum Austausch von Toner und Heftklammermagazinen Beheben von Papier oder Heftklammerstaus siehe Kapitel 7 St rungsbeseitigung im Referenzhand...

Страница 335: ...Kleidung kommt Toner auf H nden und Kleidung sofort mit kaltem Wasser abwaschen Durch Waschen mit warmem Wasser verfestigt sich der Toner so dass sich solche Flecken nur sehr schwer entfernen lassen...

Страница 336: ...dete Anzeige ist ein Auszug der Bildschirmanweisungen Weitere Informationen siehe Kapitel 7 St rungsbeseitigung im Referenzhandbuch 2 Dr cken Sie die Entriegelungstaste am Griff und drehen Sie dabei d...

Страница 337: ...Verbrennungen oder einen Brand verursachen kann WICHTIG Wenn der Toner nicht gleichm ig in der Patrone verteilt ist erfolgt m glicherweise ein ungleichm iger Ausdruck 3 Halten Sie die Entriegelungstas...

Страница 338: ...ab WICHTIG Ziehen Sie den Schutzstreifen langsam ab da sonst Tonerstaub austreten und Sie beschmutzen k nnte Stellen Sie sicher dass der Schutzstreifen vollst ndig abgezogen ist da andernfalls Druckf...

Страница 339: ...one bis sie einrastet 8 Schlie en Sie die vordere Abdeckung VORSICHT Bitte gehen Sie beim Schlie en der vorderen Abdeckung vorsichtig vor damit Sie sich nicht die Finger einklemmen oder verletzen WICH...

Страница 340: ...ystem und Fehlermeldungen beschrieben Beseitigen von Papierstaus 4 2 Beseitigen von Papierstaus anhand von Bildschirmanweisungen 4 2 Bei h ufig auftretendem Papierstau 4 3 Liste der Fehlermeldungen 4...

Страница 341: ...t es sehr hei e Bereiche und Teile die unter Hochspannung stehen Wenn Sie gestautes Papier aus dem System entfernen oder das Systemeinnere untersuchen achten Sie bitte darauf dass Halsketten Armb nder...

Страница 342: ...ofort die Finger aus dem System Auch wenn das System nicht betriebsbereit ist k nnen sich Finger Haare und Kleidung in den Einzugswalzen verfangen Dies stellt bei pl tzlichem Druckbeginn eine Verletzu...

Страница 343: ...nes Bedienungsfehlers nicht m glich Sie m ssen w hrend des Scannens Kopierens oder Druckens Entscheidungen treffen oder Schritte durchf hren Sie m ssen beim Dursuchen des Netzwerks Entscheidungen tref...

Страница 344: ...aus den F chern Comput neu starten Bei weiteren Probl Service kontakt Grund Ein Fehler ist aufgetreten L sung Wenden Sie sich an Ihren Canon Fachh ndler vor Ort Siehe Benachrichtigen Ihres Canon Serv...

Страница 345: ...M glicherweise ist ein Originalstau im Einzug aufgetreten L sung Entfernen Sie das gestaute Dokument Dokument zu lang Grund Das zu kopierende Original ist zu lang f r den Einzug L sung Scannen Sie das...

Страница 346: ...ach B voll Papier entfernen Grund Fach B ist voll L sung Entfernen Sie alle Drucke aus Fach B Siehe Kapitel 5 Zusatzausstattung im Referenzhandbuch Finisherabd offen Abdeckung schlie en Grund Die vord...

Страница 347: ...he Kapitel 6 Regelm ige Wartung im Referenzhandbuch Keine Heftklammern Heftpatr wechseln Grund Es sind nur noch wenige Heftklammern im Heftklammernmagazin L sung Setzen Sie ein neues Heftklammernmagaz...

Страница 348: ...ie Meldung erscheint und der Druckvorgang wird fortgesetzt Richt Pap einlegen Ursache 1 Das in der Kassette automatisch erfasste Papierformat stimmt m glicherweise nicht mit dem tats chlichen berein L...

Страница 349: ...eicher des Systems ist voll mit gescannten Dokumenten L sung Teilen Sie das Original in mehrere Abschnitte und scannen Sie diese einzeln nacheinander Trommel n eingesetzt Trommel einsetzen Grund Die T...

Страница 350: ...roblems den folgenden Anweisungen WARNUNG Niemals den Netzstecker mit nassen H nden ziehen oder anschlie en um elektrische Schl ge zu vermeiden VORSICHT Bitte fassen Sie beim Herausziehen des Kabels i...

Страница 351: ...s Servicerufmeldungen am LCD Display 1 Schalten Sie das System ber den Hauptschalter aus Warten Sie mindestens zehn Sekunden bevor Sie das System erneut einschalten 2 Falls Ihr System danach immer noc...

Страница 352: ...nhang In diesem Kapitel sind die technischen Daten der Haupteinheit und der Zusatzausstattung sowie andere n tzliche Informationen zusammengefasst Multifunktionale Bedienung 5 2 Verf gbare Papiersorte...

Страница 353: ...chgef hrt werden Beispiel W hrend des Kopiervorgangs k nnen Sie Originale f r einen Kopierjob scannen HINWEIS Die Leistungskapazit t kann beeintr chtigt werden falls Bildverarbeitung wie Komprimierung...

Страница 354: ...4 Von 91 g m2 bis 105 g m2 5 Von 106 g m2 bis 128 g m2 6 Nur A4 Folien verwenden die speziell auf dieses System ausgelegt sind WICHTIG F r das Drucken auf die R ckseite von bereits bedrucktem Papier...

Страница 355: ...r Modell imageRUNNER 2422 2420 optional Chlorfrei gebleichtes Papier kann in diesem System verwendet werden Papierformat Breite L nge Papierquelle Kassette 1 Kassetten 2 3 4 Stapelanlage A4 297 mm 210...

Страница 356: ...diesem Handbuch x Datenkontrolle 1 13 Dichte Taste 1 13 Die Verbindung mit einer USB Schnittstelle 1 19 Dokumentenablage J1 1 14 Doppelseitiger Druck 2 17 Doppelseitig Taste 1 13 Drucken 2 17 Drucken...

Страница 357: ...Au enansicht 1 9 Innenansicht 1 11 Kopieren Definition xiii KOPIE Taste 1 12 Korrektur Taste 1 12 L LCD Display 1 12 Linke Abdeckung Haupteinheit 1 11 Linke Papierkassettenabdeckung 1 11 M Mehrfrequen...

Страница 358: ...St rungsbeseitigung Beseitigen von Papierstaus 4 2 Fehlermeldungen 4 4 Servicerufmeldung 4 11 Symbole in diesem Handbuch ix Systemmonitor 2 22 Systemmonitor Taste 1 12 T Tonerpatrone 1 11 3 11 Transpo...

Страница 359: ...Index 5 8 Anhang 5...

Страница 360: ...imageRUNNER 2422 2420 Guida per l utente...

Страница 361: ...o Operazioni di base Risoluzione dei problemi Guida di riferimento CD ROM Istruzioni per la copiatura Guida alla copiatura CD ROM Istruzioni relative all interfaccia utente remota Guida Interfaccia Ut...

Страница 362: ...nel CD ROM del manuale utente Uso del menu del CD ROM Questa sezione descrive come utilizzare il menu del CD ROM Quando si inserisce il CD ROM del manuale dell utente in dotazione all interno dell uni...

Страница 363: ...er visualizzare uno dei manuali elencati fare clic sul manuale desiderato Una volta selezionato il manuale Adobe Reader Adobe Acrobat Reader si avvia e viene visualizzato il manuale in formato PDF b I...

Страница 364: ...operazioni multifunzione i tipi di carta accettati e l indice Capitolo 1 Capitolo 2 Capitolo 3 Capitolo 4 Capitolo 5 Canon ha impiegato notevoli risorse per assicurare che questo manuale sia privo di...

Страница 365: ...ali xii Note legali xiv Nome del prodotto xiv Requisiti di compatibilit elettromagnetica EMC della Direttiva CE xiv Sicurezza del raggio laser xiv Informazioni supplementari xv Programma International...

Страница 366: ...lo 1 15 Accensione con l interruttore principale 1 15 Interruttore di alimentazione del pannello di controllo 1 17 Impostazione della connessione 1 18 Diagramma impostazioni 1 18 Connessione a un inte...

Страница 367: ...ssetti carta 3 2 Caricamento della carta 3 2 Regolazione di un cassetto per un diverso formato carta 3 6 Sostituzione del toner 3 10 Capitolo 4 Risoluzione dei problemi Eliminazione degli inceppamenti...

Страница 368: ...se non eseguite correttamente Per utilizzare la macchina in condizioni di sicurezza prestare pertanto attenzione a queste avvertenze ATTENZIONE Indica operazioni che potrebbero provocare lesioni a pe...

Страница 369: ...ustrazioni della macchina utilizzate nel manuale sono quelle visualizzate quando sulla imageRUNNER 2420 sono installati i seguenti accessori opzionali Alimentatore DADF P2 Finisher U2 Additional Finis...

Страница 370: ...i Stati Uniti e o in altri paesi Gli altri nomi di prodotto e di azienda indicati nel manuale possono essere marchi di fabbrica dei rispettivi proprietari Sistema operativo Microsoft Windows 2000 Wind...

Страница 371: ...complessit delle operazioni eseguite da questo sistema tale per cui pu succedere che i lavori di riproduzione sia copie che stampe debbano attendere il loro turno prima di essere stampati Per evitare...

Страница 372: ...Stampa Elaborazione e consegna di documenti quali copie o dati inviati da un computer client alla macchina Copia Stampa di dati acquisiti da un originale seguita da opzioni di finitura quali la pinza...

Страница 373: ...i 230V 50 Hz sebbene la tensione nominale di questo prodotto sia 220 240V 50 60 Hz L uso di un cavo schermato necessario per conformit ai requisiti tecnici di compatibilit elettromagnetica EMC della D...

Страница 374: ...ate sull unit di scansione laser interna alla macchina e accanto alla cartuccia toner dietro lo sportello anteriore Questo prodotto stato classificato in base alle normative IEC60825 1 2007 e EN60825...

Страница 375: ...l ufficio Questo progetto sostiene lo sviluppo e la diffusione di prodotti corredati di funzioni che riducono in modo considerevole il consumo di energia Si tratta di un progetto aperto alle aziende...

Страница 376: ...elettriche al momento dell acquisto delle nuove o un deposito autorizzato allo smaltimento dei rifiuti derivanti dal disuso delle apparecchiature elettriche ed elettroniche La gestione impropria di qu...

Страница 377: ...ibuire o trasferire il SOFTWARE a terze parti senza il preventivo consenso scritto dei possessori dei diritti del SOFTWARE 5 Ferme restando le disposizioni precedenti l utente pu trasferire il SOFTWAR...

Страница 378: ...he name of the project nor the names of its contributors may be used to endorse or promote products derived from this software without specific prior written permission THIS SOFTWARE IS PROVIDED BY TH...

Страница 379: ...le riproduzioni cos ottenute possono essere vietati dalla legge ed essere perseguibili penalmente e o civilmente Di seguito viene riportato un elenco non esaustivo dei documenti che vietato riprodurre...

Страница 380: ...ppoggiare mai la macchina su superfici morbide per esempio divani o tappeti Non installare la macchina nei seguenti luoghi Luoghi umidi o polverosi Vicino a rubinetti d acqua o in prossimit di acqua L...

Страница 381: ...avvolgere o legare il cavo per evitare il rischio di incendi o folgorazioni Inserire la spina del cavo a fondo nella presa di rete per evitare il rischio di incendi o folgorazioni Non utilizzare cavi...

Страница 382: ...egnere sempre la macchina con l interruttore principale e scollegare il cavo di interfaccia quando si deve spostare la macchina In caso contrario il cavo di alimentazione o il cavo di interfaccia potr...

Страница 383: ...infortuni o danni nel caso in cui la macchina inizi improvvisamente a stampare La carta fuoriuscita dalla macchina pu essere calda Fare attenzione quando la si rimuove o la si allinea nel vassoio di u...

Страница 384: ...rivenditore autorizzato Canon Se il raggio laser fuoriesce dalla macchina l esposizione pu causare seri danni alla vista Controllo regolazione o utilizzo della macchina nei modi non menzionati nei ma...

Страница 385: ...e ed evitare che collane bracciali o altri oggetti metallici vengano a contatto con le parti interne della macchina in quanto si potrebbero causare incendi o scosse elettriche Non bruciare o gettare t...

Страница 386: ...e emesso dall unit di fissaggio e dall area circostante per prolungati periodi di tempo In caso contrario sono possibili ustioni da bassa temperatura anche se non stata toccata direttamente l unit di...

Страница 387: ...l toner involontariamente raccogliere con attenzione le particelle di toner insieme oppure asportarle con un panno morbido operando in modo da evitarne l inalazione Per pulire il toner versato non usa...

Страница 388: ...TENZA Per i portatori di pacemaker cardiaco Questo prodotto emette onde elettromagnetiche di basso livello Se si portatori di pacemaker cardiaco e si riscontrano delle anomalie allontanarsi dalla macc...

Страница 389: ...xxx...

Страница 390: ...lo 1 12 Accessori opzionali 1 14 Interruttore principale e interruttore del pannello di controllo 1 15 Accensione con l interruttore principale 1 15 Interruttore di alimentazione del pannello di contr...

Страница 391: ...one Non installare l apparecchiatura nelle seguenti posizioni Evitare posizioni soggette a temperature o umidit estreme troppo alte o basse Ad esempio non installare la macchina vicino a rubinetti d a...

Страница 392: ...mbiente poco ventilato Si raccomanda quindi di aerare il locale correttamente in modo da garantire un ambiente di lavoro confortevole nell area di funzionamento della macchina Evitare posizioni in cui...

Страница 393: ...re con la ricezione di segnali sonori e visivi Collegare l apparecchiatura ad una presa di corrente dedicata ed installarla il pi lontano possibile da altri dispositivi elettronici Collegare la macchi...

Страница 394: ...e possibile danneggiare il cavo stesso o i fili all interno potrebbero scollegarsi Pericolo di incendio Evitare le situazioni seguenti Frequenti connessioni e disconnessioni del cavo di alimentazione...

Страница 395: ...rima il rivenditore autorizzato Canon La macchina pesante e deve essere sollevata da almeno due persone Non tentare di spostare la macchina da soli Diversamente si potrebbero subire infortuni Durante...

Страница 396: ...incipale su OFF scollegare il cavo di alimentazione e contattare il rivenditore autorizzato Canon L uso della macchina in queste condizioni pu provocare incendi o scosse elettriche La presa di corrent...

Страница 397: ...le vacanze spegnere la macchina con l interruttore principale e staccare la spina dalla presa di corrente Durante il normale funzionamento la macchina genera una piccola quantit di ozono e altri odori...

Страница 398: ...a con alcuni accessori opzionali collegati Per maggiori informazioni sugli accessori e le parte opzionali e il loro funzionamento vedere il Capitolo 5 Accessori opzionali nella Guida di riferimento Vi...

Страница 399: ...en Cover tiene fermi gli originali posizionati sul piano di copiatura d Alimentatore DADF P2 opzionale Gli originali posti nell alimentatore vengono alimentati automaticamente foglio per foglio nell a...

Страница 400: ...tamburo piena di toner di scarico sostituirla con un unit nuova g Sportello di sinistra del cassetto carta Aprire questi coperchi durante la rimozione di un inceppamento carta nei cassetti carta 2 3 e...

Страница 401: ...nnello di controllo la macchina passa nel modo Sleep g Tasto Funzioni aggiuntive Premere questo tasto per accedere al menu Funzioni aggiuntive h Tasto Stop Premere per interrompere la copiatura o la s...

Страница 402: ...ono in corso operazioni sulla macchina y Tasto Cancellazione bordi Premere questo tasto per impostare il modo Cancellazione bordi Per ulteriori informazioni vedere il Capitolo 2 Operazioni avanzate ne...

Страница 403: ...e a utilizzare la macchina 1 Accessori opzionali a Inner 2way Tray E2 b Modulo Cassetto Aggiuntivo J1 c Modulo Cassetto Aggiuntivo K1 d Duplex Unit A1 e Finisher U2 f Alimentatore DADF P2 g Vassoio Po...

Страница 404: ...di alimentazione quando si hanno le mani bagnate IMPORTANTE Se l indicatore di accensione non si illumina assicurarsi che la spina sia saldamente inserita nella presa di corrente Se collegato Cassette...

Страница 405: ...Guida di riferimento Le impostazioni di copia predefinite sono Rapporto di riproduzione Diretto 100 Selezione carta Selezione carta automatica Densit di copia Controllo automatico della densit Numero...

Страница 406: ...postazioni e funzioni utili nella Guida di riferimento La macchina pu ricevere e stampare documenti inviati da un computer se si trova nel modo Sleep Per spegnere riaccendere il pannello di controllo...

Страница 407: ...nella confezione Richiedere un cavo idoneo per il computer o la rete Diagramma impostazioni Connessione cavo Collegare i cavi richiesti in base alla propria configurazione Vedere da p 1 18 a 1 21 Cavo...

Страница 408: ...dipende dalle specifiche del sistema operativo presente sul computer ATTENZIONE Prima di collegare il cavo USB alla macchina mentre l interruttore principale sulla posizione ON assicurarsi che la lin...

Страница 409: ...1 Per Mac OS X 10 3 2 o versioni precedenti l interfaccia corretta USB Full Speed equivalente a USB 1 1 e per Mac OS X 10 3 3 o versioni successive l interfaccia corretta USB 2 0 Hi Speed USB Full Spe...

Страница 410: ...ivolgersi al rivenditore autorizzato Canon Dopo aver collegato il cavo di rete eseguire le operazioni indicate di seguito Per ulteriori informazioni vedere le descrizioni relative Configurare le impos...

Страница 411: ...equisiti di sistema Per potere usare il driver di stampa sono necessari i seguenti requisiti di sistema NOTA I sistemi operativi supportati possono variare in funzione della versione del driver utiliz...

Страница 412: ...elativi alla procedura di installazione vedere la Guida di Installazione del Driver Stampante o Guida di installazione del driver della stampante UFR II per Mac Menu del CD ROM Windows NOTA Visualizza...

Страница 413: ...llazione e la Guida di installazione del driver della stampante UFR II per Mac sono nella cartella denominata con il nome del driver di stampa Fare doppio clic sull icona del programma di installazion...

Страница 414: ...prodotto occorre impostare le opzioni della stampante mediante il driver di stampa Per Windows Le opzioni della stampante sono impostante dalla scheda Impostazioni periferica del driver La scheda Impo...

Страница 415: ...zioni driver Canon nel server di stampa possibile utilizzare la funzione Stato periferica Per informazioni sulla procedura di installazione del Servizio assistenza informazioni driver Canon vedere la...

Страница 416: ...selezionare la stampante fare clic su Opzioni e forniture fare clic su Driver Verificare che sia selezionato il driver di stampa corrispondente alla stampante in uso per Stampa con Per ulteriori infor...

Страница 417: ...tramite il driver dello scanner Il driver dello scanner viene installato dallo stesso CD ROM contenente il software utente UFRII LT del driver della stampante Il contenuto del CD ROM elencato di segu...

Страница 418: ...sistemi operativi Schermo con risoluzione di almeno 640 480 consigliato almeno 800 600 e in grado di visualizzare almeno 256 colori Scheda di rete host compatibile con la comunicazione TCP IP e UDP I...

Страница 419: ...po aver installato il driver dello scanner occorre selezionare Color Network ScanGear come scanner da utilizzare per poter eseguire l acquisizione remota Selezione dello scanner di rete da utilizzare...

Страница 420: ...na Funzioni del modello 2 2 Posizionamento degli originali 2 6 Orientamento 2 6 Piano di lettura 2 8 Alimentatore DADF P2 opzionale 2 10 Copiatura di base 2 12 Stampa di base 2 17 Scansione remota di...

Страница 421: ...a UFRII LT Ultra Fast Rendering II LT che adotta un nuovo algoritmo di stampa per ridurre al minimo l elaborazione dei file e ottenere le massime prestazioni Per le istruzioni sull impostazione della...

Страница 422: ...a imageRUNNER 2422 2420 tramite la IU remota e la rete Per istruzioni sulla configurazione della porta Ethernet vedere la Guida per la rete Scansione di rete Se disponibile la connessione di rete la f...

Страница 423: ...Impostazioni rete la Guida per la rete Risparmio energetico L utilizzo del modo Sleep e dell impostazione Intervallo arresto automatico consente un efficiente risparmio energetico possibile attivare i...

Страница 424: ...dalla IU remota Vedere la Guida Interfaccia Utente Remota Controllo sistema La schermata Controllo sistema consente di verificare lo stato della macchina e di annullare lavori di copia e stampa Per i...

Страница 425: ...oraneamente quindi premere Avvio Gli originali verranno automaticamente trasferiti nell area di scansione e sottoposti a scansione Durante la copiatura nel modo 2 lati gli originali fronte retro posso...

Страница 426: ...un rapporto di riproduzione preimpostato ad esempio l ingrandimento di un originale A4 o A5 in formato A3 Vedere il Capitolo 1 Operazioni di base nella Guida alla copiatura Gli originali in formato A4...

Страница 427: ...funzione Copia documenti identit necessario utilizzare il piano di lettura Vedere il Capitolo 2 Operazioni avanzate nella Guida alla copiatura 1 Sollevare l alimentatore o il coperchio del piano di l...

Страница 428: ...catamente l alimentatore o il coperchio del piano di lettura ATTENZIONE Chiudere delicatamente l alimentatore o il coperchio del piano di lettura per evitare di ferirsi le mani Non premere con forza s...

Страница 429: ...posizionare sull alimentatore i seguenti tipi di originali Originali strappati o con fori grandi di rilegatura Originali molto arricciati o spiegazzati Originali pinzati o con punti metallici Fogli au...

Страница 430: ...limentatore se si imposta il modo Originali di formato diverso Vedere il Capitolo 2 Operazioni avanzate nella Guida alla copiatura 1 Regolare le guide scorrevoli adattandole al formato degli originali...

Страница 431: ...amento dell alimentatore o del coperchio del piano di lettura pu distorcere l immagine che si sta copiando 1 Premere i tasti appropriati in base ai messaggi visualizzati sul display LCD Se non vi sono...

Страница 432: ...er selezionare Impostare premere OK NOTA Per istruzioni sull immissione dei caratteri vedere il Capitolo 2 Operazioni di base nella Guida di riferimento Premere ID NOTA Per informazioni sull uso della...

Страница 433: ...opiatura desiderate NOTA Per ulteriori informazioni sulle impostazioni del modo di copia vedere il Capitolo 1 Operazioni di base e il Capitolo 2 Operazioni avanzate nella Guida alla copiatura 5 Immett...

Страница 434: ...hiuso un coperchio sull unit principale o su un unit opzionale La copiatura ha inizio automaticamente non appena la macchina pronta Se sul display LCD viene visualizzato il messaggio Memoria esaurita...

Страница 435: ...ura ha inizio automaticamente non appena la macchina pronta Se sul display LCD viene visualizzato il messaggio Memoria esaurita dividere gli originali in diversi gruppi e copiarli separatamente 7 Per...

Страница 436: ...ato alla macchina tramite cavo USB necessario abilitare l unit opzionale Duplex Unit A1 dal driver della stampante Per istruzioni vedere il Capitolo 1 Utilizzo della macchina come Stampante nella Guid...

Страница 437: ...e la configurazione della macchina e installare il driver dello scanner nel computer Per ulteriori informazioni vedere Impostazione della connessione a p 1 18 e Prima di utilizzare la funzione di scan...

Страница 438: ...ta dopo l installazione del driver selezionare Color Network ScanGear come lo scanner da utilizzare 5 Avviare un applicazione TWAIN compatibile sul desktop del computer 6 Selezionare il comando per av...

Страница 439: ...ar finch non viene visualizzata la casella di avanzamento della scansione Se Color Network ScanGear non si chiude automaticamente al termine della scansione fare clic su Esci per chiuderlo Verificare...

Страница 440: ...solo lavoro Procedere al punto 4 Se nella macchina sono presenti pi lavori di copia o stampa Procedere al punto 2 NOTA Viene elencato per primo il processo corrente nella schermata Stato Il display L...

Страница 441: ...riferimento Non possibile selezionare pi lavori e annullarli in una sola volta Selezionare e annullare un lavoro alla volta Utilizzo della schermata Controllo sistema possibile annullare un lavoro da...

Страница 442: ...OK Se si seleziona Copie viene visualizzata la schermata Stato registro copie Se si seleziona Stampe viene visualizzata la schermata Stato registro stampe 3 Utilizzare o per selezionare Stato premere...

Страница 443: ...tteri in codice ASCII L uso di altri codici di carattere pu provocare la comparsa di caratteri errati sul display LCD 7 Premere Reset per ritornare al display del modo Standby 6 Utilizzare o per selez...

Страница 444: ...e caricare la carta eseguire le operazioni di pulizia ordinaria e sostituire i consumabili ad esempio il toner e le cartucce punti Cassetti carta 3 2 Caricamento della carta 3 2 Regolazione di un cass...

Страница 445: ...LCD viene visualizzato un messaggio che segnala all operatore di caricare della carta mentre l indicatore di errore lampeggia in rosso nei seguenti casi carta esaurita in uno dei cassetti carta casset...

Страница 446: ...a carta o altri oggetti nella parte vuota del cassetto accanto alla risma di fogli Diversamente si potrebbero causare inceppamenti carta NOTA Se un messaggio richiede di caricare carta durante una sta...

Страница 447: ...bordi dei fogli durante il caricamento nella macchina IMPORTANTE Riporre i fogli in eccedenza nella confezione originale e conservarli in un luogo asciutto lontano dalla luce diretta del sole NOTA Per...

Страница 448: ...arta il lato rivolto verso l alto quello su cui avviene la stampa Se si verificano problemi quali una qualit di stampa scadente o inceppamenti carta provare a capovolgere la risma di carta e a ricaric...

Страница 449: ...ina viene riavviata automaticamente e produce le copie o le stampe rimanenti Regolazione di un cassetto per un diverso formato carta Se si desidera cambiare il formato della carta in un cassetto atten...

Страница 450: ...muovere la guida del bordo dei fogli ed inserirla nelle fessure allineandola al contrassegno che indica il formato carta desiderato Sbloccare la guida del bordo dei fogli spingendola verso il basso e...

Страница 451: ...ttamente Se la leva di blocco in una posizione non corretta per il tipo di carta caricato nel cassetto carta sul display LCD viene visualizzato un tipo di carta errato Questo pu inoltre causare incepp...

Страница 452: ...l interno della macchina NOTA A4R visualizzato sul display LCD indica l etichetta del formato carta o il contrassegno A4 sui cassetti carta 8 Applicare l etichetta del formato carta corretto sulla pia...

Страница 453: ...r sostituire la cartuccia di toner NOTA Per informazioni dettagliate sui display che mostrano le istruzioni per la sostituzione del toner o dei punti rimuovere gli inceppamenti carta o punti quindi ve...

Страница 454: ...viene a contatto con le mani o con gli abiti lavarlo immediatamente con acqua fredda Se si utilizza acqua calda il toner si fissa in modo permanente e diventa indelebile Quando si gettano le cartucce...

Страница 455: ...sponde alle istruzioni a video Per i dettagli vedere il Capitolo7 Risoluzione dei problemi nella Guida di riferimento 2 Premendo verso il basso la linguetta di sblocco sull impugnatura ruotare la cart...

Страница 456: ...e provocare incendi IMPORTANTE Se il toner non uniformemente distribuito all interno della cartuccia le stampe potrebbero risultare di qualit scadente 3 Tenendo premuta la linguetta di sblocco estrarr...

Страница 457: ...o vero l esterno IMPORTANTE Rimuovere il sigillo lentamente per evitare che il toner possa fuoriuscire e sporcare gli abiti o la pelle Sfilare completamente il sigillo diversamente si possono verifica...

Страница 458: ...posizione 8 Chiudere lo sportello anteriore ATTENZIONE Quando si chiude lo sportello anteriore fare attenzione a non rimanere intrappolati con le dita poich si potrebbero riportare delle lesioni IMPO...

Страница 459: ...Sostituzione del toner 3 16 Manutenzione ordinaria 3...

Страница 460: ...ssaggi di errore Eliminazione degli inceppamenti carta 4 2 Eliminazione degli inceppamenti carta con istruzioni a video 4 2 Quando si verificano spesso inceppamenti della carta 4 3 Elenco dei messaggi...

Страница 461: ...nceppati o si effettua un controllo della parte interna della macchina prestare attenzione ed evitare che collane bracciali o altri oggetti metallici vengano a contatto con le parti interne della macc...

Страница 462: ...improvvisamente a stampare Quando si verificano spesso inceppamenti della carta Se si verificano spesso inceppamenti carta anche se la macchina non presenta problemi evidenti la causa potrebbe essere...

Страница 463: ...deve prendere una decisione o compiere un azione durante la scansione la copiatura o la stampa Quando si deve prendere una decisione o compiere un azione durante l esplorazione della rete 2 lati non p...

Страница 464: ...e il formato carta corretto nel bypass Soluzione 2 Impostare il formato carta per il bypass in base alla carta da caricare nel bypass Caricare carta Causa Manca carta nel cassetto oppure il cassetto n...

Страница 465: ...uzione corrispondente al formato carta desiderato Se si preme Avvio mentre visualizzato questo messaggio viene selezionata automaticamente la carta con meno margine e inizia la stampa Inceppamento car...

Страница 466: ...a Memoria esaurita Causa La memoria della macchina piena di documenti sottoposti a scansione Soluzione Dividere l originale in parti pi piccole e sottoporle a scansione una ad una Non collegato Verifi...

Страница 467: ...el Finisher Pinzatura impossib Ridurre pagine Causa L unit non in grado di pinzare le stampe il numero di fogli stampato eccessivo Soluzione Le stampe vengono fascicolate senza pinzatura Se necessario...

Страница 468: ...e macchina Ancora problemi Chiamare rapp serv Causa Si verificato un errore Soluzione Rivolgersi al rivenditore autorizzato Canon di zona Vedere Quando contattare il rivenditore autorizzato Canon a p...

Страница 469: ...segna Vassoio A pieno Togliere fogli Causa Il vassoio A pieno di carta Soluzione Rimuovere le stampe dal vassoio A Vedere il Capitolo 5 Accessori opzionali nella Guida di riferimento Vassoio B pieno T...

Страница 470: ...alla procedura descritta di seguito per risolvere il problema AVVERTENZA Per evitare folgorazioni non collegare o scollegare il cavo di alimentazione quando si hanno le mani bagnate ATTENZIONE Per sco...

Страница 471: ...a Messaggio di richiesta di assistenza sul display LCD 1 Portare l interruttore di alimentazione principale in posizione OFF Attendere almeno 10 secondi prima di riaccendere la macchina 2 Se la macchi...

Страница 472: ...OLO 5 1 5 Appendice Questo capitolo contiene le specifiche dell unit principale e degli accessori opzionali nonch altre informazioni utili Operazioni multifunzione 5 2 Tipi di carta accettati 5 3 Indi...

Страница 473: ...tre in corso la copia possibile acquisire gli originali per un lavoro di copia NOTA Le prestazioni della macchina possono risentirne se l elaborazione dell immagine compressione ingrandimento riduzion...

Страница 474: ...le 1 Da 64 g m2 a 80 g m2 2 Da 75 g m2 a 90 g m2 3 Da 81 g m2 a 90 g m2 4 Da 91 g m2 a 105 g m2 5 Da 106 g m2 a 128 g m2 6 Utilizzare esclusivamente lucidi A4 adatti per la macchina IMPORTANTE Per sta...

Страница 475: ...imageRUNNER 2422 2420 Con questa macchina possibile utilizzare carta lavorata senza uso di cloro Formato carta Larghezza x lunghezza Origine carta Cassetto carta 1 Cassetti carta 2 3 e 4 Bypass A4 29...

Страница 476: ...mune 5 3 Carta di alta qualit 5 3 Carta riciclata 5 3 Carta spessa 5 3 Cartuccia di toner 1 11 3 10 Cassetti carta Caricamento della carta 3 2 Informazioni sui cassetti carta 1 10 Regolazione di un ca...

Страница 477: ...saggi di errore 4 4 Messaggio di richiesta di assistenza 4 11 Modo Sleep 1 17 Modulo Cassetto Aggiuntivo J1 1 10 Modulo Cassetto Aggiuntivo K1 1 10 O Operazioni multifunzione 5 2 P Pannello di control...

Страница 478: ...ve 1 12 Tasto ID 1 12 Tasto Indietro 1 12 Tasto OK 1 13 Tasto Originali di formato diverso 1 13 Tasto Qualit immagine 1 13 Tasto Rapporto di riproduzione 1 13 Tasto Reset 1 12 Tasto SCAN 1 12 Tasto Se...

Страница 479: ...Indice 5 8 Appendice 5...

Страница 480: ...imageRUNNER 2422 2420 Gu a de usuario...

Страница 481: ...es b sicas Soluci n de problemas Gu a de referencia CD ROM Instrucciones de copiado Gu a de copia CD ROM lnstrucciones sobre la interfaz de usuario remoto Gu a de IU remoto CD ROM Instrucciones sobre...

Страница 482: ...e el Men CD ROM abra el archivo PDF directamente desde la carpeta ESPA OL del CD ROM del Manual de usuario Utilizaci n del Men CD ROM Esta secci n describe c mo utilizar el Men CD ROM Cuando inserta e...

Страница 483: ...ede leer cualquiera de las gu as indicadas haciendo clic en ella Despu s de hacer clic en la gu a que desee se ejecutar Adobe Reader Adobe Acrobat Reader y se mostrar el manual del PDF b INSTALAR Uste...

Страница 484: ...ultifunci n los tipos de papel disponibles y el ndice Cap tulo 1 Cap tulo 2 Cap tulo 3 Cap tulo 4 Cap tulo 5 Hemos puesto todo nuestro empe o en evitar que los manuales del equipo contengan imprecisio...

Страница 485: ...manuales xii Avisos legales xiv Nombre del producto xiv Directiva de la CE sobre compatibilidad electromagn tica xiv Seguridad l ser xiv Informaci n adicional xv Programa internacional ENERGY STAR xvi...

Страница 486: ...ntrol 1 15 C mo encender la alimentaci n principal 1 15 Interruptor de alimentaci n del panel de control 1 17 Configuraci n de la conexi n 1 18 Organigrama de las opciones 1 18 Conexi n a una interfaz...

Страница 487: ...co Cassettes 3 2 Cargar papel 3 2 Ajustar un cassette para alojar papel de distinto tama o 3 6 Sustituir el t ner 3 10 Cap tulo 4 Soluci n de problemas Eliminar atascos de papel 4 2 Eliminaci n de ata...

Страница 488: ...esiones personales si no se ejecutan correctamente Para utilizar el equipo de forma segura preste atenci n siempre a estas advertencias ATENCI N Indica una precauci n relativa a operaciones que pueden...

Страница 489: ...este manual Las ilustraciones que aparecen en este manual corresponden al modelo imageRUNNER 2420 con los siguientes equipos opcionales instalados el alimentador DADF P2 la Unidad de Acabado U2 la Ba...

Страница 490: ...Microsoft Corporation en Estados Unidos y otros pa ses El resto de nombres de productos y compa as citados son marcas comerciales propiedad de sus respectivas compa as Sistema operativo Microsoft Wind...

Страница 491: ...intas a las de copia Como estas operaciones se realizan de forma compleja en el equipo no s lo las copias sino tambi n los distintos tipos de impresiones deben esperar a veces su turno para ser realiz...

Страница 492: ...xiii Impresi n Impresi n de documentos como copias o datos enviados desde un ordenador cliente al equipo Copia Imprimir los datos le dos de un original y realizar las funciones de acabado como grapar...

Страница 493: ...l es de 230 V y 50 Hz aunque la tensi n de entrada prevista para el producto va de 220 V a 240 V y de 50 a 60 Hz El empleo de cables apantallados es necesario para cumplir con los requisitos t cnicos...

Страница 494: ...unidad exploradora del l ser del interior de la m quina y junto al cartucho de t ner tras la tapa frontal Este producto se ha clasificado seg n las normas IEC60825 1 2007 y EN60825 1 2007 que corresp...

Страница 495: ...oficina El programa se basa en el desarrollo y difusi n de productos con funciones que reducen eficazmente el consumo de energ a Se trata de un sistema abierto en el que los fabricantes pueden partic...

Страница 496: ...otro al comprar un producto similar o entreg ndolo en un lugar de recogida autorizado para el reciclado de equipos electr nicos EEE La manipulaci n inapropiada de este tipo de desechos podr a tener un...

Страница 497: ...RE 3 Solo podr utilizar el SOFTWARE con el producto Canon que adquiri el PRODUCTO 4 No podr asignar sublicenciar comercializar distribuir ni transferir el SOFTWARE a ning n tercero sin el previo conse...

Страница 498: ...in the documentation and or other materials provided with the distribution 3 Neither the name of the project nor the names of its contributors may be used to endorse or promote products derived from...

Страница 499: ...n modo por el equipo puede estar prohibido por la ley y por tanto incurrir en responsabilidades civiles o penales por ello A continuaci n se ofrece una lista de algunos de estos documentos Se trata n...

Страница 500: ...mo un sof o una alfombra No instale el equipo en las siguientes ubicaciones Lugares sucios o polvorientos Lugares pr ximos a grifos o agua Lugares expuestos a la luz directa del sol Lugares sometidos...

Страница 501: ...ios enchufes ya que esto puede provocar un incendio o descarga el ctrica No enrolle o ate el cable de alimentaci n ya que esto puede provocar un incendio o descarga el ctrica Introduzca totalmente la...

Страница 502: ...a del equipo Si el gas contenido en estos productos entra en contacto con los componentes el ctricos internos del equipo se puede producir un incendio o descarga el ctrica Para evitar que se deteriore...

Страница 503: ...e el equipo no est en funcionamiento sus manos el pelo o la ropa pueden quedar atrapados en los rodillos lo que puede ocasionar lesiones personales si el equipo comienza a imprimir repentinamente El p...

Страница 504: ...despegan las etiquetas p ngase en contacto con su distribuidor local Canon autorizado Si el rayo l ser sale del interior del equipo y sus ojos quedan expuestos pueden producirse lesiones Controlar aju...

Страница 505: ...ni arroje al fuego los cartuchos de t ner usados ya que pueden arder los restos de t ner del interior del cartucho y provocar un incendio o quemaduras Si accidentalmente se derrama o dispersa t ner r...

Страница 506: ...o o sustituir el cartucho del t ner tenga cuidado de no mancharse las manos o la ropa con el t ner Si se mancha lave inmediatamente la zona con agua fr a El lavado con agua caliente puede hacer que la...

Страница 507: ...dora que no disponga de medidas de protecci n contra explosiones de polvo Al hacerlo podr a provocar un mal funcionamiento en la aspiradora o tener como resultado una explosi n de polvo debido a las d...

Страница 508: ...1 11 Panel de control 1 12 Equipos opcionales 1 14 Alimentaci n principal y alimentaci n del panel de control 1 15 C mo encender la alimentaci n principal 1 15 Interruptor de alimentaci n del panel de...

Страница 509: ...ntes lugares Evite los lugares sometidos a niveles extremos muy altos o muy bajos de temperatura y humedad Por ejemplo evite instalar el equipo cerca de grifos calderas humidificadores acondicionadore...

Страница 510: ...amiento del equipo se recomienda ventilar adecuadamente la habitaci n lo suficiente para mantener un ambiente de trabajo agradable Evite los lugares sometidos a vapores de amon aco Evite los lugares s...

Страница 511: ...ja de alimentaci n en una toma el ctrica exclusiva y mantenga la m xima separaci n entre el equipo y cualquier otro equipo electr nico Conecte el equipo a una toma est ndar con toma de tierra de tres...

Страница 512: ...cables situados en el interior del equipo De este modo se podr a originar un incendio Evite las siguientes situaciones Conectar y desconectar el cable de alimentaci n con frecuencia Tropezarse con el...

Страница 513: ...Canon autorizado El equipo es pesado por lo que se requieren dos o m s personas para levantarlo Por lo tanto no intente moverlo sin ayuda Si lo hace podr a sufrir lesiones Cuando transporte el equipo...

Страница 514: ...alimentaci n principal desenchufe el cable de alimentaci n de la toma el ctrica y llame a su distribuidor local Canon autorizado El empleo del equipo en este estado puede provocar un incendio o descar...

Страница 515: ...cipal y desenchufe el cable de alimentaci n cuando no vaya a utilizar el equipo durante varios d as Este equipo genera una peque a cantidad de ozono u otros olores durante su uso normal Aunque la sens...

Страница 516: ...ner m s informaci n acerca del equipo opcional sus partes y funciones consulte el Cap tulo 5 Equipos opcionales en la Gu a de referencia Vista exterior Modelo imageRUNNER 2422 con la Bandeja Interior...

Страница 517: ...los originales colocados en el cristal de copia d Alimentador DADF P2 opcional Los originales que se colocan en el alimentador se env an autom ticamente hoja a hoja al rea de lectura El alimentador t...

Страница 518: ...uos de t ner sustit yala por una nueva g Tapa izquierda del cassette Abra estas tapas para retirar papel atascado de los cassettes 2 3 y 4 h Unidad de fijaci n Si se produce un atasco de papel en la u...

Страница 519: ...panel de control se apaga el equipo permanece en modo de ahorro de energ a g Tecla Funciones adicionales Se pulsa para acceder al men Funciones adicionales h Tecla Detener Se pulsa para detener la co...

Страница 520: ...cuando el equipo est realizando operaciones y Tecla Borrado marco P lsela para especificar el modo Borrado marco Para obtener m s informaci n consulte el cap tulo 2 Operaciones avanzadas en la Gu a de...

Страница 521: ...o 1 Equipos opcionales a Bandeja Interior de 2 V as E2 b M dulo de Alimentaci n por Cassette J1 c M dulo de Alimentaci n por Cassette K1 d Unidad D plex A1 e Unidad de Acabado U2 f Alimentador DADF P2...

Страница 522: ...rica IMPORTANTE Si no se ilumina el indicador de alimentaci n compruebe si la clavija de alimentaci n est firmemente insertada en la toma de corriente Si se ha instalado la unidad Calentador para Cass...

Страница 523: ...Las opciones de copia predeterminadas son Escala copia directa 100 Selecci n de papel Selecci n autom tica de papel Densidad de copia Control autom tico de densidad N mero de copias 1 Calidad de image...

Страница 524: ...n la Gu a de referencia El equipo puede recibir e imprimir documentos de un ordenador cuando se encuentra en modo de ahorro de energ a Para encender o apagar el panel de control pulse el interruptor d...

Страница 525: ...ed Adquiera un cable adecuado para su ordenador o red Organigrama de las opciones Conexi n de cables Conecte los cables necesarios para su entorno Consulte la p g 1 18 hasta 1 21 Mediante cable USB Co...

Страница 526: ...de las especificaciones del sistema operativo del ordenador ATENCI N Antes de conectar el cable USB al equipo mientras la alimentaci n principal est encendida aseg rese de establecer la conexi n a un...

Страница 527: ...B Full Speed equivalente a USB 1 1 Para Mac OS X 10 3 2 o versiones anteriores es USB Full Speed equivalente a USB 1 1 y para Mac OS X 10 3 3 o versiones posteriores es USB 2 0 Hi Speed USB Full Speed...

Страница 528: ...r local Canon autorizado Despu s de conectar el cable de red realice las siguientes operaciones Para obtener m s informaci n consulte las descripciones pertinentes Configure las opciones del administr...

Страница 529: ...os siguientes entornos de sistema son necesarios para utilizar el controlador de impresora NOTA Los sistemas operativos compatibles pueden variar en funci n de la versi n del controlador de impresora...

Страница 530: ...obtener m s informaci n acerca del procedimiento de instalaci n consulte la Gu a de instalaci n del controlador de impresora o Gu a de instalaci n del controlador de impresora UFR II para Mac Men del...

Страница 531: ...ritorio Encontrar el instalador y la Gu a de instalaci n del controlador de impresora UFR II para Mac en la carpeta con el nombre de la impresora Haga doble clic en el icono del instalador en la carpe...

Страница 532: ...presora Para Windows Las opciones de la impresora se configuran desde la pesta a Configuraciones del dispositivo del controlador de la impresora La pesta a Configuraciones del dispositivo se muestra a...

Страница 533: ...en el servidor de impresi n puede utilizar la funci n Recibir estado del dispositivo Para obtener m s detalles sobre el procedimiento de instalaci n del Canon Driver Information Assist Service consul...

Страница 534: ...l Sistema seleccione la impresora haga clic en Opciones y recambios haga clic en Driver Confirme que el controlador de impresora correspondiente a su impresora est seleccionado en Imprimir con Para ob...

Страница 535: ...ran mediante el controlador de esc ner El controlador de esc ner se instala desde el propio CD ROM del software de usuario de UFRII LT al igual que el controlador de impresora A continuaci n se muestr...

Страница 536: ...de al menos 640 480 800 600 o m s recomendado y capaz de mostrar un m nimo de 256 colores Un adaptador host de red capaz de comunicarse a trav s de redes TCP IP y UDP IP en una red Ethernet IMPORTANTE...

Страница 537: ...alado el controlador de esc ner debe seleccionar Color Network ScanGear para que se utilice este esc ner al realizar una lectura remota Selecci n del esc ner de red que desea utilizar Para escanear me...

Страница 538: ...b sicas del equipo Funciones de este equipo 2 2 Colocar originales 2 6 Orientaci n 2 6 Cristal de copia 2 8 Alimentador DADF P2 opcional 2 10 Copia b sica 2 12 Impresi n b sica 2 17 Lectura remota b...

Страница 539: ...vo algoritmo de impresi n inventado para minimizar el proceso de archivo y conseguir un rendimiento m ximo Para obtener instrucciones acerca de la configuraci n del equipo como una impresora consulte...

Страница 540: ...ER 2422 2420 a trav s del IU remoto y de la red Si desea obtener instrucciones sobre c mo configurar el puerto Ethernet consulte la Gu a de red Lectura en red Si la conexi n de red est disponible la f...

Страница 541: ...nerg a Puede ahorrar alimentaci n de una forma eficiente activando el modo Suspendido y el ajuste Tiempo apagado autom tica Para configurar el equipo para que acceda al modo de ahorro de energ a manua...

Страница 542: ...remoto Consulte la Gu a de IU remoto Monitor del sistema La pantalla Monitor del sistema permite comprobar el estado del equipo y cancelar trabajos de copia e impresi n Para obtener instrucciones acer...

Страница 543: ...y a continuaci n pulse Inicio El equipo alimenta autom ticamente los originales hasta el rea de lectura y los lee Si realiza la copia con el modo de doble cara los originales de doble cara se giran y...

Страница 544: ...una escala de zoom prefijada por ejemplo para ampliar un original A4 o A5 en papel A3 Consulte el Cap tulo 1 Funciones b sicas en la Gu a de copia Los originales de tama o A4 y A5 colocados horizontal...

Страница 545: ...a de carn debe utilizar el cristal de copia Consulte el Cap tulo 2 Operaciones avanzadas en la Gu a de copia 1 Levante el alimentador o la tapa del cristal de copia 2 Coloque el original con el anvers...

Страница 546: ...istal de copia ATENCI N Cierre con cuidado el alimentador o la placa de cristal de copia para evitar lesionarse la mano No presione con fuerza sobre el alimentador o la tapa del cristal de copia cuand...

Страница 547: ...ipos de originales Originales rotos o con grandes perforaciones de encuadernaci n Originales muy curvados o con pliegues marcados Originales con clips o grapas Originales con el anverso de papel carb...

Страница 548: ...inales de distinto tama o Consulte el Cap tulo 2 Operaciones avanzadas en la Gu a de copia 1 Ajuste las gu as deslizantes al tama o de los originales 2 Ponga cuidadosamente los originales con la cara...

Страница 549: ...ador o la tapa del cristal de copia puede provocar la distorsi n de la imagen en proceso de copia 1 Pulse las teclas adecuadas en funci n de los mensajes que aparecen en la pantalla Si no aparece ning...

Страница 550: ...a seleccionar Fijar pulse OK NOTA Si desea obtener instrucciones sobre c mo introducir caracteres consulte el Cap tulo 2 Funciones b sicas en la Gu a de referencia Pulse ID NOTA Si desea obtener instr...

Страница 551: ...ara obtener m s informaci n acerca de la especificaci n de las opciones de copia consulte el Cap tulo 1 Funciones b sicas y el Cap tulo 2 Operaciones avanzadas de la Gu a de copia 5 Introduzca el n me...

Страница 552: ...una tapa de la unidad principal o una unidad opcional La copia se iniciar autom ticamente cuando el equipo est preparado Si aparece el mensaje Memoria llena en la pantalla divida los originales en va...

Страница 553: ...na en la pantalla divida los originales en varios grupos y c pielos por separado 7 Si desea iniciar la copia del siguiente original mientras se est imprimiendo el trabajo actual repita los pasos compr...

Страница 554: ...impresi n a dos caras desde un ordenador conectado al equipo mediante un cable USB debe habilitar la Unidad D plex A1 opcional desde el controlador de impresora Para obtener ayuda consulte el cap tul...

Страница 555: ...el ordenador Para obtener m s informaci n consulte Configuraci n de la conexi n en la p g 1 18 y Antes de usar la funci n de escaneado remoto en la p g 1 28 NOTA Si desea obtener instrucciones sobre...

Страница 556: ...ectura tras la instalaci n del controlador seleccione Color Network ScanGear para utilizar este esc ner 5 Abra una aplicaci n compatible con TWAIN en su ordenador 6 Seleccione el comando para iniciar...

Страница 557: ...e muestra el progreso de la lectura Si no se cierra autom ticamente la pantalla de Color Network ScanGear cuando finalice la lectura haga clic en Salir para cerrarla Aseg rese de cerrar la ventana pri...

Страница 558: ...ajo Contin e en el paso 4 Si el equipo tiene que realizar varios trabajos de copia o impresi n Contin e en el paso 2 NOTA El trabajo actual se muestra primero en la pantalla Estado La pantalla puede m...

Страница 559: ...vez Desde la pantalla Monitor del sistema Puede cancelar un trabajo desde la pantalla Monitor del sistema mientras un trabajo se est imprimiendo o en espera para procesarse 1 Pulse Monitor del sistema...

Страница 560: ...do trabajo actual que se ha detenido temporalmente al pulsar Detener Esperando trabajos reservados 3 Utilice o para seleccionar Estado pulse OK Aparece la pantalla Estado 4 Utilice o para seleccionar...

Страница 561: ...go ASCII La utilizaci n de otros c digos de caracteres puede provocar que se visualicen caracteres confusos en la pantalla 7 Pulse Reiniciar para volver a la pantalla del modo preparado 6 Utilice o pa...

Страница 562: ...lo se describe c mo cargar papel realizar operaciones de limpieza peri dicas y sustituir consumibles como los cartuchos de t ner y grapas Cassettes 3 2 Cargar papel 3 2 Ajustar un cassette para alojar...

Страница 563: ...l Aparecer un mensaje que le solicitar que cargue papel y el indicador de error parpadear en rojo si se agota el papel en uno de los cassettes un cassette no est completamente insertado en el equipo A...

Страница 564: ...otros objetos en la zona libre del cassette situada junto a la pila de papel Si lo hace es posible que se produzcan atascos de papel NOTA Si aparece un mensaje que solicita que se cargue papel durante...

Страница 565: ...s varias veces y alinee los bordes para facilitar su introducci n 4 Cargue el papel en el cassette Alinee los bordes del papel Coloque el papel contra la gu a posterior del cassette Cuando cargue pape...

Страница 566: ...rriba En el caso de producirse problemas como una calidad de impresi n deficiente o atascos de papel intente girar la pila de papel y volver a cargarla Para obtener m s informaci n sobre la direcci n...

Страница 567: ...ama o de papel en un cassette siga el procedimiento que se describe m s adelante para ajustar las gu as del cassette NOTA Consulte a su representante de servicio t cnico de Canon acerca de las opcione...

Страница 568: ...evo en las ranuras de manera que quede alineada con la marca correspondiente al tama o de papel que desee Retire la gu a posterior presionando hacia abajo y hacia adelante Alinee la gu a posterior con...

Страница 569: ...palanca de bloqueo no se encuentra correctamente colocada seg n el tipo de papel cargado en el cassette aparecer un tipo de papel incorrecto en la pantalla LCD Este error puede provocar atascos de pap...

Страница 570: ...que se ensucie el interior del equipo NOTA La indicaci n A4R que aparece en la pantalla LCD muestra la etiqueta de tama o de papel o la marca de perforaci n del papel A4 en los cassettes 8 Pegue la co...

Страница 571: ...A Para obtener informaci n detallada acerca de las pantallas en las que se muestran las instrucciones acerca de c mo sustituir el t ner o las grapas y c mo eliminar atascos de papel o de grapas consul...

Страница 572: ...o con agua fr a El lavado con agua caliente puede hacer que las manchas de t ner se fijen de forma permanente haciendo imposible su eliminaci n Para tirar los cartuchos de t ner usados p ngalos en una...

Страница 573: ...una captura de la instrucci n en pantalla Para obtener m s informaci n consulte el cap tulo 7 Soluci n de problemas en la Gu a de referencia 2 Mientras pulsa la pesta a de apertura del mango gire el...

Страница 574: ...un incendio o quemaduras IMPORTANTE Si el t ner no se distribuye uniformemente en el interior del cartucho es posible que las impresiones no sean uniformes 3 Mientras pulsa la pesta a de apertura extr...

Страница 575: ...cinta protectora en l nea recta para extraerla con la otra mano IMPORTANTE Retire la cinta lentamente de lo contrario es posible que el t ner se disperse y le manche la ropa o la piel Aseg rese de re...

Страница 576: ...el cartucho de t ner hasta que encaje en su sitio 8 Cierre la tapa frontal ATENCI N Para evitar accidentes tenga cuidado con los dedos al cerrar la tapa frontal IMPORTANTE Aseg rese de limpiar la unid...

Страница 577: ...Sustituir el t ner 3 16 Mantenimiento peri dico 3...

Страница 578: ...ipo y mensajes de error Eliminar atascos de papel 4 2 Eliminaci n de atascos de papel mediante las instrucciones en pantalla 4 2 Si se producen atascos de papel frecuentes 4 3 Lista de mensajes de err...

Страница 579: ...llares pulseras u otros objetos met licos los componentes internos del equipo ya que puede quemarse o recibir una descarga el ctrica ATENCI N Al extraer originales o papel atascados tenga cuidado de n...

Страница 580: ...siones personales o da os en el equipo si ste comienza a imprimir Si se producen atascos de papel frecuentes Si se producen frecuentes atascos de papel a pesar de que no haya ning n problema aparente...

Страница 581: ...red Atasco de grapas Causa Se ha producido un atasco de grapas en la Unidad de Acabado U2 Soluci n Compruebe si se ha producido un atasco de grapas Consulte el Cap tulo 7 Soluci n de problemas en la...

Страница 582: ...l tama o de papel real Soluci n 1 Aseg rese de que el tama o de papel cargado en el cassette coincida con el tama o de papel ajustado para dicha ubicaci n Soluci n 2 Ajuste el tama o del cassette para...

Страница 583: ...presas a doble cara se ha seleccionado uno de los siguientes tama os de papel Sobre Etiquetas Grueso 2 Grueso 3 Papel calidad o Transparencia Soluci n Seleccione unos de los siguientes tipos de papel...

Страница 584: ...nsajes de aviso al servicio t cnico en la p g 4 11 xxx representa un n mero Imposible grapar Reduzca n p ginas Causa El equipo no puede grapar las impresiones porque hay demasiadas hojas de papel Solu...

Страница 585: ...un tama o de papel adecuado para grapar Consulte el Cap tulo 2 Operaciones avanzadas en la Gu a de copia Poco t ner Prepare t ner nuevo Causa Se est agotando el t ner Soluci n Balancee el cartucho de...

Страница 586: ...camente el papel con el margen m s peque o y se iniciar la impresi n Tambor no instalado Inserte tambor Causa No se ha instalado la unidad del tambor Soluci n Instale la unidad de tambor Consulte el C...

Страница 587: ...i n Cierre la tapa izquierda del cassette Tapa fr post abierta Cierre tapa Causa Una o m s tapas est n abiertas Soluci n Cierre todas las tapas T ner residual lleno Reemplace el tambor Causa El t ner...

Страница 588: ...ra resolver el problema ADVERTENCIA No enchufe ni desenchufe el cable de alimentaci n con las manos h medas ya que puede recibir una descarga el ctrica ATENCI N Para desenchufar el cable de alimentaci...

Страница 589: ...rvicio t cnico de la pantalla 1 Apague el interruptor de alimentaci n principal Espere diez segundos como m nimo antes de volver a encender el interruptor de alimentaci n principal 2 Si el equipo sigu...

Страница 590: ...O 5 1 5 Ap ndice Este cap tulo contiene las especificaciones de la unidad principal y los equipos opcionales as como otra informaci n til Operaciones multifunci n 5 2 Papel admitido 5 3 ndice alfab ti...

Страница 591: ...se pueden leer originales para un trabajo de copia NOTA El rendimiento del equipo puede verse afectado si el procesamiento de im genes como las operaciones de compresi n ampliaci n reducci n o rotaci...

Страница 592: ...3 De 81 g m2 a 90 g m2 4 De 91 g m2 a 105 g m2 5 De 106 g m2 a 128 g m2 6 Utilice nicamente transparencias A4 fabricadas especialmente para este equipo IMPORTANTE Si imprime en el reverso de papel imp...

Страница 593: ...on opcionales para el modelo imageRUNNER 2422 2420 Con este equipo se puede utilizar papel sin cloro Tama o de papel Ancho largo Origen de papel Cassette 1 Cassettes 2 3 4 Bandeja alim A4 297 mm 210 m...

Страница 594: ...papel de distinto tama o 3 6 Cargar papel 3 2 Componentes y funciones de la unidad principal Vista exterior 1 9 Vista interior 1 11 Conexi n a una interfaz USB 1 19 Conexi n a una red 1 20 Configuraci...

Страница 595: ...opciones 1 18 P Panel de control Acerca del panel de control 1 10 Interruptor de alimentaci n del panel de control 1 12 Panel de control principal 1 12 Pantalla 1 12 Papel Papel admitido 5 3 Tama o de...

Страница 596: ...ginales distinto tama o 1 13 Tecla Reiniciar 1 12 Tecla Selecci n de papel 1 13 Tecla Separaci n 2 p ginas 1 13 Tecla Tono 1 12 Tecla Ver opciones 1 12 Teclas num ricas 1 12 Teclas y botones utilizado...

Страница 597: ...ndice alfab tico 5 8 Ap ndice 5...

Страница 598: ...r regional dealer CANON LATIN AMERICA INC 703 Waterford Way Suite 400 Miami Florida 33126 U S A CANON AUSTRALIA PTY LTD 1 Thomas Holt Drive North Ryde Sydney N S W 2113 Australia CANON CHINA CO LTD 15...

Отзывы: