Canon imageRUNNER ADVANCE 8105 Скачать руководство пользователя страница 108

Protocol Settings

4-22

4

Using a TCP/IP Network

12

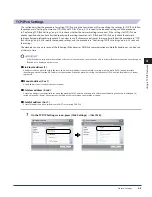
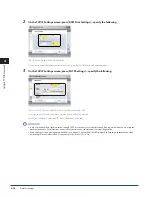
  On the TCP/IP Settings screen, press [Confirm Dept . ID PIN] 

 specify the following .


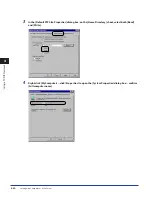
[On]: You can confirm the Department ID and password when printing using a driver that supports Windows Vista. [Use HTTP] is 

automatically set to 'On' if you select [On].

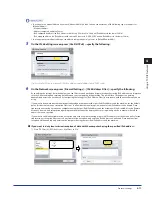
A key pair to use for encrypted SSL communication is required to confirm Department IDs and passwords. Even if you set <Confirm 

Dept. ID PIN> to 'On', Department IDs and passwords cannot be confirmed if the key pair is corrupted or invalid. In this case, erase the 

key pair and see e-Manual > Security to register a new key pair.
If there is no key pair, you cannot set <Confirm Dept. ID PIN> to 'On'. You can use the preinstalled key pair, or generate an original key 

pair with the machine, to set as the default key. For information on the default key, and instructions on how to generate an original key, 

see e-Manual > Security.

13

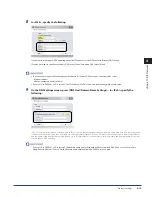
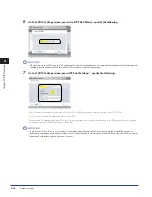
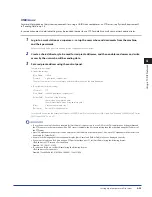
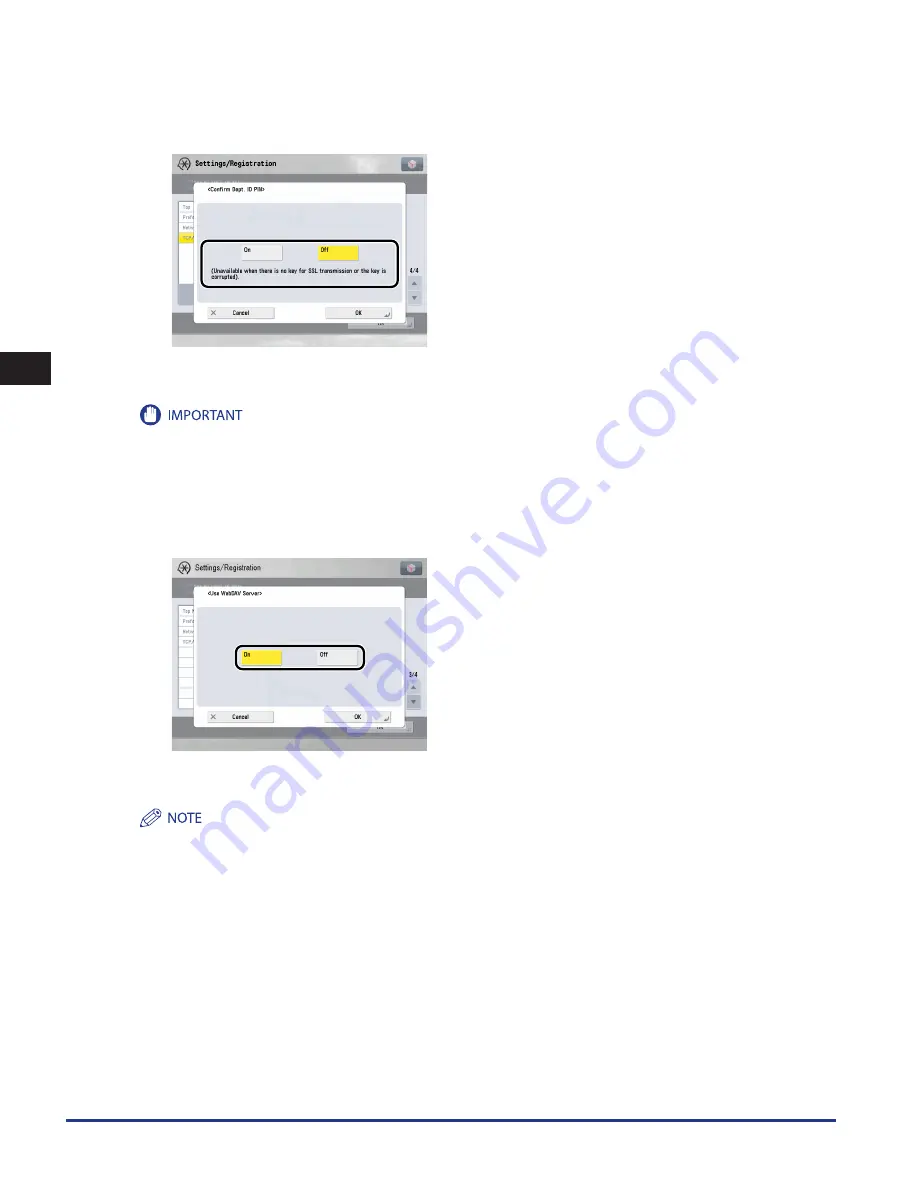
  On the TCP/IP Settings screen, press [Use WebDAV Server] 

 specify the following .


[On]: You can access the Advanced Box of the machine from a computer using a WebDAV server. [Use HTTP] is automatically set to 'On' if 

you select [On].

Authentication of a computer accessing the Advanced Box, and SSL encrypted communication between the computer and the 

machine, are possible using a WebDAV server.

Содержание imageRUNNER ADVANCE 8105

Страница 1: ...ENG 0LEASE READ THIS GUIDE BEFORE OPERATING THIS PRODUCT FTER YOU FINISH READING THIS GUIDE STORE IT IN A SAFE PLACE FOR FUTURE REFERENCE Getting Started Read this guide first...

Страница 2: ......

Страница 3: ...imageRUNNER ADVANCE 8105 8095 8085 Getting Started...

Страница 4: ...ment Setup p 3 9 SMB CIFS SMB CIFS Network Setup Procedures p 6 2 Protocol Settings p 6 3 Network Settings Apple Talk AppleTalk Network Setup Procedures p 7 2 Protocol Settings p 7 3 TCP IP TCP IP Net...

Страница 5: ...EAP Service Management Service SMS Settings System Requirements for Using SMS p 8 6 Before Starting SMS Preparations p 8 7 Remote Scan Settings Chapter 14 Before Using the Remote Scan Function E Mail...

Страница 6: ...ion Getting Started This Document 30 Quick Reference for Basic and Useful Operations Quick Reference 30 Maintenance and Troubleshooting Maintenance Guide 30 Frequently Asked Questions and Answers Freq...

Страница 7: ...and Store Access Stored Files Fax I Fax Inbox Secured Print Web Access Scanner Quick Menu Status Monitor Cancel Print Network Remote UI MEAP Security e Manual 30 To view the manual in PDF format Adob...

Страница 8: ...achine from a Computer Chapter 9 Installing the System Options MEAP Applications Chapter 10 Updating the Firmware Chapter 11 Managing the Register Update Software Function Chapter 12 Before Using the...

Страница 9: ...Maintenance and Inspections xxix Consumables xxxi Other Warnings xxxi Periodic Inspection of the Breaker xxxii Checking the Breaker xxxii Check Sheet for the Periodic Inspection of the Breaker xxxv Ch...

Страница 10: ...etwork Setup Procedures 4 2 Protocol Settings 4 3 TCP IPv4 Settings 4 3 TCP IPv6 Settings 4 9 Settings Common to TCP IPv4 and TCP IPv6 4 15 Confirming TCP IPv4 Settings 4 23 Confirming TCP IPv6 Settin...

Страница 11: ...nstall Delivery 9 9 Installing by Not Connecting this Machine to an Outside Network 9 12 Obtaining the License Key License File 9 12 Installing the System Options Using the Touch Panel Display 9 13 In...

Страница 12: ...POD Deck Lite A1 15 16 Paper Deck Unit C1 15 16 Document Insertion Unit K1 15 17 Professional Puncher Integration Unit B1 15 17 Paper Folding Unit H1 15 18 Staple Finisher D1 15 18 Booklet Finisher D1...

Страница 13: ...ations that may lead to death or injury to persons if not performed correctly To use the machine safely always pay attention to these warnings Indicates a caution concerning operations that may lead t...

Страница 14: ...ual are those taken when the optional Duplex Color Image Reader Unit is attached to the imageRUNNER ADVANCE 8105 Note that functions that cannot be used depending on the model or options are not displ...

Страница 15: ...ystem Windows 2000 Server Microsoft Windows Server 2003 operating system Windows Server 2003 Microsoft Windows Server 2003 R2 operating system Windows Server 2003 R2 Microsoft Windows XP Professional...

Страница 16: ...name PostScript in the text are references to the PostScript language as defined by Adobe Systems Incorporated unless otherwise stated The name PostScript also is used as a product trademark for Adob...

Страница 17: ...demark for Adobe Systems implementation of the PostScript language interpreter Except as otherwise stated any reference to a PostScript printing device PostScript display device or similar item refers...

Страница 18: ...not only copies but also various kinds of prints may sometimes have to wait their turn before they can be printed To avoid confusion when reading this manual the terms scanning printing and copying us...

Страница 19: ...xvii Copying Printing data scanned from an original followed by finishing options such as stapling...

Страница 20: ...required to correct the interference at his own expense If this equipment does cause harmful interference to other equipment which can be determined by turning the equipment off and on the user is enc...

Страница 21: ...below are attached to the Main Unit s Upper Right Cover and Front Cover Use of controls adjustments or performance of procedures other than those specified in the manuals for this machine may result...

Страница 22: ...ithstanding the foregoing you may transfer the SOFTWARE only when a you assign to a transferee all of your rights to the PRODUCT and all rights and obligations under the conditions governing the SOFTW...

Страница 23: ...equest by email in English or Japanese at oipossg canon co jp The request must identify the open source and the applicable Open Source License Please refer to e Manual on a CD ROM bundled with this pr...

Страница 24: ...print or otherwise reproduce any particular document and or of the use of the images scanned printed or otherwise reproduced you should consult in advance with your legal advisor for guidance Paper Mo...

Страница 25: ...e covered under your Limited Warranty Installation Do not install the machine near alcohol paint thinner or other flammable substances If flammable substances come into contact with electrical parts i...

Страница 26: ...of working parts inside the machine Blocking these openings can cause the machine to overheat Never place the machine on a soft surface such as a sofa or rug Do not install the machine in the followin...

Страница 27: ...ower plug completely into the power outlet as failure to do so may result in a fire or electrical shock Do not use power cords other than the power cord provided as this may result in a fire or electr...

Страница 28: ...ine Also do not spill water liquids or flammable substances alcohol benzene paint thinner etc inside the machine If these items come into contact with a high voltage area inside the machine it may res...

Страница 29: ...re stapling is performed near the rollers when a finisher is attached as this may result in personal injury Staple Finisher Booklet Finisher The laser beam can be harmful to human bodies Since radiati...

Страница 30: ...en removed contact your local authorized Canon dealer If the laser beam escapes from the machine exposure may cause serious damage to your eyes Controlling adjusting or operating the machine in ways n...

Страница 31: ...llow necklaces bracelets or other metal objects to touch the inside of the machine as this may result in burns or electrical shock Do not burn or throw used toner cartridges into open flames as this m...

Страница 32: ...paper which has become jammed inside the machine remove the jammed paper gently to prevent the toner on the paper from scattering and getting into your eyes or mouth If the toner gets into your eyes...

Страница 33: ...of small children If these items are ingested consult a physician immediately Do not dismantle the toner cartridge as doing so may cause toner to fly out and enter your eyes or mouth If toner gets in...

Страница 34: ...power is turned OFF before inspecting the breaker If a malfunction occurs after an inspection contact your local authorized Canon dealer Checking the Breaker 1 Push the test button on the rear of the...

Страница 35: ...turn the power ON and OFF If the breaker lever does not switch to the OFF side position repeat step 1 If the breaker lever does not switch to the OFF side position despite carrying out the above proce...

Страница 36: ...xxxiv 4 Press the main power switch to the ON I side position 5 Fill in the check sheet located on the next page to document your periodic inspections of the breaker...

Страница 37: ...ly Follow the procedure described in Periodic Inspection of the Breaker on p xxxii once or twice a month How to Fill in This Check Sheet Fill in the date of inspection and the name of the inspector Wh...

Страница 38: ...xxxvi...

Страница 39: ...orting Data 1 9 Parts and Their Functions 1 10 External View 1 10 Internal View 1 12 Control Panel Parts and Functions 1 13 Main Power and Control Panel Power 1 14 How to Turn ON the Main Power 1 14 C...

Страница 40: ...ling the Machine in the Following Locations Avoid locations subject to temperature and humidity extremes whether low or high For example avoid installing the machine near water faucets hot water heate...

Страница 41: ...may be more noticeable during extended use or long production runs especially in poorly ventilated rooms It is recommended that the room be appropriately ventilated sufficient to maintain a comfortab...

Страница 42: ...on electronic equipment Electrical interference and vibrations generated by the machine during printing can adversely affect the operation of such equipment Avoid installing the machine near televisio...

Страница 43: ...ecome damaged if it is stepped on affixed with staples or if heavy objects are placed on it Continued use of a damaged power cord can lead to an accident such as a fire or electrical shock The power c...

Страница 44: ...beforehand Do not attempt to move the machine yourself Handling Precautions We recommend that you read this section prior to using this machine Do not attempt to disassemble or modify the machine Some...

Страница 45: ...or unusual noise immediately turn the main power switch OFF disconnect the power cord from the power outlet and then call your local authorized Canon dealer Using the machine in this state may cause...

Страница 46: ...hine operation For safety reasons turn OFF the control panel power switch of the machine when it will not be used for a long period of time such as overnight As an added safety measure turn OFF the ma...

Страница 47: ...se Image mode For information on backing up this data see e Manual Remote UI Address book device settings Settings Registration settings favorite settings for Web Access Printer settings paper informa...

Страница 48: ...ired for operating the machine See Control Panel Parts and Functions on p 1 13 2 Multi Purpose Tray Use the multi purpose tray to feed paper manually and for loading nonstandard paper stock See e Manu...

Страница 49: ...Before You Start Using This Machine 1 1 Printer Cover Instead of the feeder you can attach the Printer Cover For more information on the optional products that can be attached to the machine see e Ma...

Страница 50: ...tridge See e Manual Maintenance 2 Front Cover Open this cover to clear a paper jam in the fixing transport unit See e Manual Problem Solving 3 Fixing Transport Unit Pull out the fixing unit to clear a...

Страница 51: ...d ON 11 Edit Pen Use when operating the touch panel display such as to enter characters If you lose the edit pen contact your local authorized Canon dealer Do not use an object with a sharp end on the...

Страница 52: ...rning ON the main power 1 Make sure that the power plug is firmly inserted into the power outlet Do not connect or disconnect the power cord with wet hands as this may result in electrical shock 2 Tur...

Страница 53: ...on settings See e Manual Settings Registration If a Macintosh which has been shut down is connected to the machine via a USB cable when you turn the machine ON the Macintosh may also turn ON In this c...

Страница 54: ...receive and print documents from a personal computer when it is in the Sleep mode I fax documents can also be received while the machine is in the Sleep mode It takes approximately 1 minute for the m...

Страница 55: ...e machine is turned ON When the machine shuts down it also performs an internal cooling down process which enables the machine to be shut down safely 1 Press the main power switch to the side When ope...

Страница 56: ...ying functions convenient new functions such as Copy Sample which helps to avoid copy errors Booklet for making copies into booklets and Different Size Originals for copying originals of different siz...

Страница 57: ...are supported PDF JPEG TIFF and XPS which offer you greater flexibility in accommodating digital workplace environments Printing See e Manual Print You can use this machine as a high speed network pr...

Страница 58: ...nts into Your Computer See e Manual Scanner The Network Scan function enables you to use the imageRUNNER ADVANCE 8105 8095 8085 as a conventional scanner You can scan a document using the machine and...

Страница 59: ...olor Image Reader Unit Advanced Box Network 2 Duplex Color Image Reader Unit Memory Media 3 Duplex Color Image Reader Unit Using the Stored Documents Mail Box None Advanced Box Network 2 None Memory M...

Страница 60: ...r ID and the System Password The default setting for both the System Manager ID and System Password is 7654321 We recommend that you change both the System Manager ID and System Password See e Manual...

Страница 61: ...machine using the Remote UI and log in as an administrator For information on the log in service see e Manual MEAP If the authentication function is not set the Log In screen is not displayed For inf...

Страница 62: ...equired to Use the Machine 1 24 1 Before You Start Using This Machine 3 Enter the System Manager ID and System Password click Administrator Login When you are finished with the operation click Log Out...

Страница 63: ...is compatible and how to check the network environment you are using Optional Equipment and System Requirements for Connecting to a Network 2 2 Printing from a Computer 2 2 Using E Mail I Fax 2 5 Sen...

Страница 64: ...r more information on utilities see e Manual Optional Products Software Printing from a Computer Optional Equipment Requirements Printing If you want to use the UFR II printer driver Optional equipmen...

Страница 65: ...P Professional Windows XP Home Edition Windows Server 2003 Windows Server 2008 Windows Vista Ultimate Windows Vista Business Windows Vista Home Premium Windows Vista Home Basic Windows Vista Enterpris...

Страница 66: ...mory Any computer which runs the above operating system software properly When you are using Mac OS X 10 3 or later you can only print via an SMB CIFS network if you are using a PS printer driver prov...

Страница 67: ...ided with the imagePASS System Requirements The following system environments are confirmed for using the e mail I fax functions Compatible mail forwarding server software Sendmail 8 93 or later UNIX...

Страница 68: ...network and system environments are compatible when sending data from the machine to a file server depending on the type of network used With a TCP IPv4 Network Using FTP Compatible servers Windows 20...

Страница 69: ...iness and IIS 7 0 Windows Vista Home Premium and IIS 7 0 Windows Vista Home Basic and IIS 7 0 Windows Vista Enterprise and IIS 7 0 Windows 2000 Server and Apache 2 0 for Win 32 Windows XP Professional...

Страница 70: ...ta Home Premium and Apache 2 0 or later Windows Vista Home Basic and Apache 2 0 or later Windows Vista Enterprise and Apache 2 0 or later Solaris Version 9 or later and Apache 2 0 or later Compatible...

Страница 71: ...ol Version 6 and has a dual stack configuration that enables it to communicate with both IPv4 networks and IPv6 networks You can select whether to use the functions of IPv4 or IPv6 You can also enable...

Страница 72: ...UNIX computers the TCP IP protocol is used After configuring the settings in accordance with Chapter 3 Settings Common to the Network Protocols see the following Chapter 4 Using a TCP IP Network Using...

Страница 73: ...ronment Before specifying the settings of the desired protocol Chapters 4 to 7 be sure to set the items explained in this chapter Network Environment Setup Procedures 3 2 Connecting the Machine to a C...

Страница 74: ...ettings for communication between the machine and computers on your network To specify the settings use The machine s control panel The Remote UI via a web browser 3 Communication Environment Setup Se...

Страница 75: ...r When connecting the interface cable or network cable be sure to observe the following precautions to avoid electrical shock Turn OFF the machine s main power switch before disconnecting the power co...

Страница 76: ...le may cause your computer or machine to operate poorly When the machine is connected to a computer via the USB cable you will not be able to use some of the utilities If you connect the machine to a...

Страница 77: ...splay used in this manual Specify the network settings from the Settings Registration screen displayed by pressing Settings Registration To move up one level press Up See this diagram to specify the v...

Страница 78: ...epartment ID System Manager PIN is set by default in the machine As a result administrators are required to enter a system manager department ID and system manager PIN in the Settings Registration scr...

Страница 79: ...Network screen press Confirm Network Connection Set Changes specify the following On If errors related to network connections occur an error message is displayed on the touch panel display of the mach...

Страница 80: ...d then turn it ON Connect the cable with the machine s main power switch OFF The machine automatically determines the Ethernet type Press On unless you want to specify a particular Ethernet setting If...

Страница 81: ...d Write On Off You can set or browse each item of the machine with a utility that uses SNMP v 1 to obtain information As the write access with SNMP v 1 is enabled the security functions of SNMP v 3 ar...

Страница 82: ...ss Permission and the community name in Community Name You can also change the community name in Community Name to a name other than public If you want to specify a Community Name 2 Press Set Communit...

Страница 83: ...u select Auth Yes Encry Yes from the Security Settings drop down list select the authentication algorithm enter the passwords for authentication and encryption If you select Auth Yes Encry No from the...

Страница 84: ...ntext select the context you want to delete press Delete A context named NULL is registered by default The NULL context cannot be deleted and is not displayed on the Context Settings screen 3 Set moni...

Страница 85: ...ncerning the machine on computers other than those whose IP addresses are allowed to send or receive data even if Use SNMP v 1 Use SNMP v 3 and Dedicated Port Settings are set to On For details see TC...

Страница 86: ...Communication Environment Setup 3 14 3 Settings Common to the Network Protocols...

Страница 87: ...twork Setup Procedures 4 2 Protocol Settings 4 3 TCP IPv4 Settings 4 3 TCP IPv6 Settings 4 9 Settings Common to TCP IPv4 and TCP IPv6 4 15 Confirming TCP IPv4 Settings 4 23 Confirming TCP IPv6 Setting...

Страница 88: ...a Computer as a File Server on p 4 28 Specify the settings of the computer receiving data sent from the machine It is recommended that steps 1 and 3 above be performed by the network administrator The...

Страница 89: ...functions are not available with this machine For details see the manual provided with the imagePASS TCP IPv4 Settings This section describes the procedure for setting TCP IPv4 using the control panel...

Страница 90: ...n Protocol table is also disabled If you set Use IPv4 to Off you cannot use an SMB CIFS network 3 On the TCP IPv4 Settings screen press IP Address Settings specify the following Using a fixed IP addre...

Страница 91: ...previously set these will be overwritten by the setting values obtained from DHCP RARP or BOOTP If you use DHCP without the DNS dynamic update function it is recommended that an identical IP address...

Страница 92: ...pdating it is necessary to set a host name and domain name If you set BOOTP or DHCP to On in step 3 the host name and domain name you set manually will be overwritten 7 On the DNS Settings screen pres...

Страница 93: ...select Properties In the Advanced sheet of the displayed dialog box click Credentials In the DNS dynamic update credentials dialog box enter the user name domain and password for the Active Directory...

Страница 94: ...v4 address or range of addresses for which data transmission reception is to be allowed or specify the prefix and prefix length of the IPv4 address es If you do not want to restrict data transmission...

Страница 95: ...ollowing IPv6 addresses With IPv6 communication multiple IPv6 addresses can be used at the same time If the IPv6 address assigned to the machine is the same as another node you may not be able to perf...

Страница 96: ...en the machine is started The stateless address is discarded when the machine is restarted with the machine s main power switch ON 4 On the IPv6 Settings screen press Manual Address Settings specify t...

Страница 97: ...e possibility of a third person gaining unauthorized access can be reduced by configuring the settings for IPv6 Address Filter in accordance with the environment you are using If you want to deny data...

Страница 98: ...set the IPv6 address or range of addresses for which data transmission reception is to be allowed or specify the prefix and prefix length of the IPv6 address es If you do not want to restrict data tra...

Страница 99: ...be overwritten 9 On the DNS Settings screen press DNS Host Domain Name Settings in IPv6 specify the following On for Use Same Host Name Domain Name as IPv4 You can set the same host name or domain nam...

Страница 100: ...omatically register a manual address in the DNS server using dynamic DNS updating On for Register Stateful Address You can automatically register a stateful address in the DNS server using dynamic DNS...

Страница 101: ...both protocols After performing this procedure follow the procedure in Confirming TCP IPv4 Settings on p 4 23 and Confirming TCP IPv6 Settings on p 4 24 to check whether the network settings are corr...

Страница 102: ...ization using SNTP Select the interval for performing time synchronization in Polling Interval In NTP Server Address enter the NTP server IP address or host name In order to perform time synchronizati...

Страница 103: ...er name for access to an FTP server without specifying User and Password or if you enter anonymous in User To display the job list press Status Monitor Cancel Print Log on the touch panel display 5 On...

Страница 104: ...the print application Pressing On for IPP Print Settings automatically sets Use HTTP to On To use SSL to encrypt the IPP data press On for Use SSL If you are using IPP authentication press On for Use...

Страница 105: ...iscovery from utilities Optionally press Scope Name and enter the scope name for a multicast discovery For instructions on how to deliver and share device information such as the Address Book and Depa...

Страница 106: ...en using a WebDAV server In Server Address enter a proxy server IP address or FQDN for example starfish company com In Port Number enter the port number of a proxy server using numeric keys If you wan...

Страница 107: ...or reception filter so as to deny transmission reception and enter the MAC address to be allowed Data transmission reception will be enabled only between the device having the specified MAC address a...

Страница 108: ...ase the key pair and see e Manual Security to register a new key pair If there is no key pair you cannot set Confirm Dept ID PIN to On You can use the preinstalled key pair or generate an original key...

Страница 109: ...rtup Time Settings on p 4 27 execute the PING command only after the time set as the startup time passes If you connect the machine to a switching hub the machine may not be able to connect to a netwo...

Страница 110: ...tup time of the machine s network functions by following the procedure in Startup Time Settings on p 4 27 execute the PING command only after the time set as the startup time passes If you connect the...

Страница 111: ...encryption In order to select Always SSL or On for Allow SSL SMTP Receive to allow SSL transmission it is necessary to generate a key pair in advance For instructions on how to generate a key pair see...

Страница 112: ...display Press On for SMTP Authentication SMTP AUTH press Off for POP Authentication Before Send In User enter the user name used for logging in to the SMTP server If you are using a Microsoft SMTP se...

Страница 113: ...urs because the spanning tree process performed between switching hubs prevents them from communicating with each other immediately after the machine connects to a switching hub In this case use the f...

Страница 114: ...03 Server 2008 Samba shared folder UNIX Linux Mac OS X This section describes how to set up a computer as an FTP WebDAV server For instructions on how to configure a Windows and Samba shared folder se...

Страница 115: ...a on p 2 6 For installation procedures see the manuals provided with your operating system User authentication for access to FTP servers is performed using the local account database of Windows 2000 X...

Страница 116: ...30 4 Using a TCP IP Network 3 In the Default FTP Site Properties dialog box on the Home Directory sheet select both Read and Write 4 Right click My Computer click Properties to open the System Propert...

Страница 117: ...name enter the password in Password re enter the password in Confirm password click Create Enter a user name and a password not longer than 24 alphanumeric characters If User must change password at...

Страница 118: ...the above example it is necessary to use a DNS server This applies even if the machine and the FTP server are in the same subnet If no DNS server is available the host name setting should be specifie...

Страница 119: ...Folder Path Enter one of the following share when using relative path home hsato share when using absolute path User User name entered in step 1 Password Password for the above user For a sample scre...

Страница 120: ...o send data from the machine through Mac OS X enter the password Enter a user name and a password not longer than 24 alphanumeric characters 4 Create a shared folder to which files are to be sent Samp...

Страница 121: ...TP_Folder If you enter a relative path Users yoko Public FTP_Folder If you enter an absolute path User User name entered in step 3 Password Password for the above user Up to 255 alphanumeric character...

Страница 122: ...n if either of the other two authentication methods are enabled The priority level is Anonymous authentication Digest authentication Basic authentication If a high level of security is required disabl...

Страница 123: ...directory named C Inetpub export share home users and then create a virtual directory that links to the physical directory as the folder to which files are sent The machine s address settings Protoco...

Страница 124: ...ting file to give permission to the user who will set the WebDAV server return the permissions for the Apache setting file to their original values after setting the WebDAV server Server authenticatio...

Страница 125: ...canon co jp Folder Path user_name WebDAV User User name for the Basic and Digest authentication methods of the WebDAV server Password Password for the Basic and Digest authentication method of the Web...

Страница 126: ...Setting Up a Computer as a File Server 4 40 4 Using a TCP IP Network...

Страница 127: ...5 1 15 3 5 Using a NetWare Network Windows This chapter describes settings and procedures for using the machine with a NetWare network NetWare Network Setup Procedures 5 2 Protocol Settings 5 3...

Страница 128: ...the settings use The machine s control panel The Remote UI via a web browser Canon utilities 3 Computer Settings for Printing See e Manual Network Specify the settings of each computer you use for pr...

Страница 129: ...rame type for your environment from the Frame Type drop down list If you select Auto Detect the frame type is automatically determined Select the print service specified in NetWare Print Service Setti...

Страница 130: ...the specific user you can specify the print service without having to log in to NetWare Select the tree to which the desired print server belongs select the context to which the desired print server b...

Страница 131: ...belongs in Context Name enter the name of the context to which the desired print server belongs in Print Server Name enter the name of the desired print server Sample settings CANON 1 o CANON_SALES o...

Страница 132: ...Protocol Settings 5 6 5 Using a NetWare Network Windows...

Страница 133: ...g the machine with an SMB CIFS network SMB CIFS Network Setup Procedures 6 2 Protocol Settings 6 3 TCP IP Settings 6 3 SMB and WINS Settings 6 3 Setting Up a Computer as a File Server 6 6 Connecting t...

Страница 134: ...the equipment needed see Optional Equipment and System Requirements for Connecting to a Network on p 2 2 3 Computer Settings for a File Server See Setting Up a Computer as a File Server on p 6 6 Speci...

Страница 135: ...ngs yet enter them now For more information see TCP IPv4 Settings on p 4 3 TCP IPv6 Settings on p 4 9 and Settings Common to TCP IPv4 and TCP IPv6 on p 4 15 SMB and WINS Settings To use the machine on...

Страница 136: ...tion is displayed the comment entered here is also displayed On for LM Announce The LAN Manager can be informed of the existence of the machine Off for LM Announce If the LAN Manager is not required t...

Страница 137: ...s screen press WINS Settings specify the following On for WINS Resolution You can resolve the name with WINS Enter the IP address of a WINS server in WINS Server Address Enter the Scope ID settings if...

Страница 138: ...from the machine to a server on the network you must enter an address setting from the control panel For instructions on how to specify recipient address settings see e Manual Scan and Send The follo...

Страница 139: ...played on the screens for Windows 2000 are used The items displayed may differ according to your operating system If you are using Windows Vista or later a dialog box may be displayed while you are pe...

Страница 140: ...d NetBIOS Computer Name dialog box confirm NetBIOS computer name If you are using Windows Server 2008 select Computer Property click Computer name domain and workgroup settings Change settings In the...

Страница 141: ...the control panel In an Active Directory environment the procedures for setting up users differ from the above For details see the Windows manual When a computer that one or more users log on to is re...

Страница 142: ...ccess to the shared folder under Permissions select both Write and Read Execute or a higher access authority For data in the folder check both Write and Read or a higher access authority To display th...

Страница 143: ...ost Name on the control panel Also up to 255 alphanumeric characters can be entered for Folder Path If you change the language of the touch panel display Host Name and Folder Path may not be displayed...

Страница 144: ...ocol Windows SMB Host Name swan share Shared folder path Folder Path Images User User name entered in the above step Password Password for the above user For a sample screen see the example of Windows...

Страница 145: ...7 1 15 3 7 Using an AppleTalk Network Macintosh This chapter describes settings and procedures for printing via an AppleTalk network AppleTalk Network Setup Procedures 7 2 Protocol Settings 7 3...

Страница 146: ...machine s control panel The Remote UI via a web browser Canon utilities 3 Macintosh Print Settings See e Manual Network Specify the settings for each computer you use for printing Depending on the mac...

Страница 147: ...ou want to use the PS printer driver with the PS Printer Kit set whether to apply spooling to the print job Spool The machine specified in Service Name prints only after spooling the print job to the...

Страница 148: ...Protocol Settings 7 4 7 Using an AppleTalk Network Macintosh...

Страница 149: ...tarting the Remote UI and SMS which are used to manage the machine from a computer System Requirements for Using the Remote UI 8 2 Before You Start the Remote UI 8 3 Enabling the Remote UI 8 4 System...

Страница 150: ...Mac OS 10 3 or later Safari 1 3 2 or later Available browsers may be limited depending on the login services for the MEAP function you are using For instructions on how to use the login services see e...

Страница 151: ...ronment has a proxy server perform the following setting Settings vary according to the system environment consult your network administrator Enter the IP address of the machine into Exceptions in the...

Страница 152: ...Settings License Other Remote UI If the System Manager ID and System Password have already been set enter the System Manager ID and System Password using numeric keys press Log In Out 2 Select On sel...

Страница 153: ...n OFF the main power of the machine and then turn ON the main power again The Remote UI setting is made effective only after turning the machine s main power OFF and then ON For information on how to...

Страница 154: ...ndows XP Professional Microsoft Internet Explorer 6 SP1 Microsoft Internet Explorer 6 SP2 Microsoft Internet Explorer 7 Windows Vista Microsoft Internet Explorer 7 Mac OS X 10 3 Safari 1 3 2 Mac OS X...

Страница 155: ...etwork environment consult the network administrator In the proxy server settings of your web browser add the IP address of the machine to the Exceptions addresses that do not use a proxy list You can...

Страница 156: ...y to set the key pair and server certificate necessary for performing Encrypted SSL communications in Certificate Settings in Management Settings of the machine For information on generating the key f...

Страница 157: ...stalling the System Options MEAP Applications 9 5 Installing by Connecting this Machine to an Outside Network 9 6 Using the Touch Panel Display to Install Delivery 9 6 Using the Remote UI to Install D...

Страница 158: ...Register Update Software function from the Remote UI for a specified time when Remote Login Service of the SMS is set and the Web browser was closed without pressing To Portal or Log Out when Remote L...

Страница 159: ...ications by using the license file license key that you obtained from the License Management System Register the License Key Using the Touch Panel Display System Options Install the License File Using...

Страница 160: ...ed Feature Set Universal Send Security Feature Set Universal Send Digital User Signature Kit Encrypted Secure Print Software Secure Watermark Document Scan Lock Kit Data Erase Kit Web Access Software...

Страница 161: ...Install Delivery p 9 9 To Install by Not Connecting this Machine to an Outside Network Installing System Options Install using one of the following procedures If you want to install multiple system o...

Страница 162: ...AP applications to the machine using the touch panel display To perform the procedures described in this section you must log in to the machine as an administrator See Logging In from the Touch Panel...

Страница 163: ...9 Installing the System Options MEAP Applications 4 Enter the license access number four digits at a time Enter four digits of the license access number press OK Repeat this step four times to enter a...

Страница 164: ...ptions and MEAP applications but you cannot select the same product with different version at the same time If the agreement screen is displayed read the agreement If you abide with the agreement clic...

Страница 165: ...the system options or MEAP applications to the machine using the Remote UI To perform the procedures described in this section you must log in to the machine as an administrator See Logging In from t...

Страница 166: ...If the license access number is incorrect an error page is displayed 4 Select the system options and MEAP applications click Start Installation Status after Installation Start Starts the installed ME...

Страница 167: ...is completed the message Restart the device appears Restart the machine to enable the function To return to the delivery install page click To Delivered Installation You can download the manual for th...

Страница 168: ...nse file is issued by the distributor of the MEAP application You do not need to obtain the license key license file explained in this section For more information see the manual for each MEAP applica...

Страница 169: ...ss Settings Registration Management Settings License Other Register License 2 Enter the license key using numeric keys press Start Press to move the cursor Backspace Press when you entered a wrong num...

Страница 170: ...te UI Manual You can install the system options to the machine using the Remote UI To perform the procedures described in this section you must log in to the machine as an administrator See Logging In...

Страница 171: ...cations 3 Click Browse select the license file to install click Next File extensions License file File with lic extension You do not have to use Application File Path You can also specify the file pat...

Страница 172: ...machine as an administrator See Logging In from the Remote UI on p 1 23 The maximum number of MEAP applications that can be installed is 19 The maximum amount of hard disk space allocated to install M...

Страница 173: ...le to install click Next File extensions Application File A file with the jar extension License File A file with the lic extension You cannot install license files only When installing the MEAP applic...

Страница 174: ...new MEAP application the following information is displayed on the screen Application Information License Information The following information is displayed when you overwrite a MEAP application Curr...

Страница 175: ...MEAP Applications Starting the MEAP Applications This section describes how to start the installed MEAP application from the SMS screen For more information on SMS see e Manual MEAP 1 From the top pag...

Страница 176: ...s available If you cannot find a manual to download see the function descriptions in the e Manual included with this machine If you installed from the Remote UI you can jump to the above URL from the...

Страница 177: ...10 1 15 3 10 Updating the Firmware This chapter describes how to update the firmware of the machine Updating the Firmware 10 2 Using the Remote UI to Update Manual 10 3...

Страница 178: ...lowing procedure is performed you cannot use the Register Update Software function from the Remote UI for a specified time when Remote Login Service of the SMS is set and the Web browser was closed wi...

Страница 179: ...procedures described in this section you must log in to the machine as an administrator See Logging In from the Remote UI on p 1 23 To perform the procedures described in this section the data of the...

Страница 180: ...3 Click Browse select the firmware to update click Next 4 Check the contents that will be updated on the confirmation screen click Yes The new firmware is applied to the machine When the message The...

Страница 181: ...s used with an outside network connected Managing by Using the Touch Panel Display 11 2 Displaying the Installation Log Using the Touch Panel Display 11 2 Testing Communication Using the Touch Panel D...

Страница 182: ...the procedures described in this section you must log in to the machine as an administrator See Logging In from the Touch Panel Display on p 1 22 Displaying the Installation Log Using the Touch Panel...

Страница 183: ...naging by Using the Touch Panel Display 11 3 11 Managing the Register Update Software Function 4 Press Display Update Logs The installation logs of the system options and MEAP applications are display...

Страница 184: ...ion Testing Communication Using the Touch Panel Display You can check whether the machine can properly communicate with the delivery server 1 Press Settings Registration Management Settings License Ot...

Страница 185: ...aded from the delivery server When the communication test is completed the communication test result screen is displayed If Failed is displayed on the communication test result screen check that the n...

Страница 186: ...UI To perform the procedures described in this section you must log in to the machine as an administrator See Logging In from the Touch Panel Display on p 1 22 Displaying the Installation Log Using th...

Страница 187: ...11 Managing the Register Update Software Function 2 Click Display Logs Communication Test 3 From the Log View drop down list select Update Logs click Switch The installation logs of the system options...

Страница 188: ...er Update Software Function Testing Communication Using the Remote UI You can check whether the machine can properly communicate with the delivery server 1 From the top page of the Remote UI click Set...

Страница 189: ...d click Yes Contents for the test are downloaded from the delivery server When the communication test is completed the communication test result screen is displayed If Failed is displayed on the commu...

Страница 190: ...Managing by Using the Remote UI 11 10 11 Managing the Register Update Software Function...

Страница 191: ...settings are required to manage the Advanced Box users and open the Advanced Box to the public by SMB or WebDAV User Access Control for Advanced Box 12 2 Advanced Box Open to Public Settings 12 6 Usi...

Страница 192: ...nal Space to restrict access and output of data for each user To specify each setting for User Setting Information Management Service it is necessary to access and then log in to the machine from the...

Страница 193: ...l for Advanced Box 12 3 12 Before Using the Advanced Box 4 Click User Access Control for Advanced Box from the applications on the portal screen The Log In page for the user management of the Advanced...

Страница 194: ...he Advanced Box 5 Enter the user name and password click Log In The default setting for user name is Administrator and the password is password We recommend that you change both the user name and pass...

Страница 195: ...User Access Control for Advanced Box 12 5 12 Before Using the Advanced Box 7 Enter each item click Add The new user information is registered...

Страница 196: ...t be opened to the public as a WebDAV server and SMB server at the same time Using a WebDAV SMB Server 1 Press Settings Registration Function Settings Store Access Files Advanced Box Settings Open to...

Страница 197: ...st be set See SMB and WINS Settings on p 6 3 If you set the Advanced Box to be open to the public as a WebDAV server and use authentication management Press On Press Advanced Box Settings WebDAV Serve...

Страница 198: ...Advanced Box Open to Public Settings 12 8 12 Before Using the Advanced Box...

Страница 199: ...r driver and set up the printer configuration using the printer driver Installing the Printer Driver 13 2 System Requirements 13 2 Selecting the Appropriate Printer Driver 13 3 Installation 13 5 Setti...

Страница 200: ...se the printer driver Supported operating systems may differ according to the printer driver version you are using For Windows Operating Systems Windows 2000 Windows XP Windows Server 2003 Windows Vis...

Страница 201: ...iver The available CD ROM may differ depending on the machine and the system environment you are using Content of Each CD ROM UFR II Printer Driver For Windows Printer Driver Installtion Guide For Mac...

Страница 202: ...ters and the PCL6 printer driver is for both color and black and white printers PCL6 is an advanced version of PCL5c and PCL5e and offers superior printing quality and speed The PCL5e printer driver i...

Страница 203: ...ac OS CD ROM Menu Windows From the menu screen of the CD ROM you can begin installing the printer driver or display the Printer Driver Installation Guide Click this button to install the printer drive...

Страница 204: ...double click the CD icon that appears on your desktop You can find the installer and Driver Guide in the folder s with the printer driver name s Double click the installation icon in the installer set...

Страница 205: ...Driver Installation Guide or the online help for details about the installation procedure Click Get Device Status to obtain information about options installed and set in the device If you cannot obta...

Страница 206: ...ormation dialog box is displayed by clicking Printer Info in any of the preferences panes of the printer driver See the Mac Printer Driver Guide or the online help for details about the installation p...

Страница 207: ...l the software For more information see the Readme txt file located in Canonfm program files Canon Font Manager English Only the PCL User Software CD ROM includes this software PPD file Use the PPD Po...

Страница 208: ...Other Software Programs 13 10 13 Before Printing from Computers...

Страница 209: ...emote Scan Function In order to use this product as a network scanner you must install the scanner driver Installing the Scanner Driver 14 2 System Requirements 14 3 Installation 14 4 Settings Require...

Страница 210: ...driver The contents of the CD ROM are as follows Network ScanGear Color Network ScanGear Network ScanGear Installtion Guide The scanner driver is included in the CD ROM labeled UFR II User Software UF...

Страница 211: ...hard disk that can run the supported systems Main memory The capacity of the main memory that can run the supported systems A display with a resolution of at least 640 x 480 800 x 600 or more recommen...

Страница 212: ...ou can begin installing the scanner driver or display the Network ScanGear Installation Guide Click this button to install the scanner driver Click this button first Click this button to view the Netw...

Страница 213: ...or Color Network ScanGear select the device on the network that you want to use as a scanner using the ScanGear Tool Because a scanner is not selected immediately after installation this operation mu...

Страница 214: ...Settings Required Prior to Remote Scanning 14 6 14 Before Using the Remote Scan Function...

Страница 215: ...Lite A1 15 16 Paper Deck Unit C1 15 16 Document Insertion Unit K1 15 17 Professional Puncher Integration Unit B1 15 17 Paper Folding Unit H1 15 18 Staple Finisher D1 15 18 Booklet Finisher D1 15 20 In...

Страница 216: ...ond 64 to 90 g m2 However if Consider Paper Type for Copy is set to On in Paper Drawer Auto Selection On Off in Paper Feed Settings in Common in Function Settings Settings Registration paper is not fe...

Страница 217: ...which is automatically assigned to a print job that is accepted TIME Prints the date and time in 24 hour notation when a print job was completed JOB NAME Prints the name of the printed document or th...

Страница 218: ...are printed DEST RECEIVABLE DATA The data receivable at the registered destinations is printed AUTO DELIVERY On is printed if Auto Delivery Settings in Transmitting Settings in Device Information Deli...

Страница 219: ...ART TIME Prints the date and time in 24 hour notation when device information communication started An asterisk indicates that a report has already been printed END TIME Prints the date and time in 24...

Страница 220: ...e user name is not printed ST TIME Start Time The time in 24 hour notation at which the document started to be transmitted is printed The start time is printed only for send jobs that have been set wi...

Страница 221: ...See e Manual Settings Registration JOB NO The four digit number that is automatically assigned when the document is accepted for sending is printed DEPT ID If Department ID Management is set the Depa...

Страница 222: ...partment ID Management is set the Department ID is printed Transmission logs are listed according to Department ID ST TIME Start Time The date and time in 24 hour notation at which the document starte...

Страница 223: ...See e Manual Settings Registration Address Book List You can print the contents of the Address Book subaddress books 1 to 10 or one touch buttons Manually print the list of the selected Address Book...

Страница 224: ...emory from Scan and Store Local If a file is stored in the Advanced Box of this machine from Scan and Store Network If a file is stored in the Advanced Box of another machine from Scan and Store Resul...

Страница 225: ...e Prints the name of the application Application ID System Application Name Prints the system application s file name or the Application ID of a standard application Application Version Prints the app...

Страница 226: ...current value for each register Maximum Memory Usage Prints the maximum amount of memory that can be used by each application The Maximum Memory Usage number is printed in kilobytes KB Registered Serv...

Страница 227: ...n Plain Heavy Color Recycled Pre Punched Transparency Tracing Labels Bond and Letterhead The printing conditions may vary depending on the paper type For more information on paper types see e Manual B...

Страница 228: ...m Power Consumption 1 92 kW or less When in the Sleep mode 1 W or less When in the Energy Saver mode 240 Wh or less 10 is selected Memory Capacity Standard 1 5 GB Maximum 2 GB Hard Disk Capacity Stand...

Страница 229: ...o 400 in 1 increments Original Feeding Mechanism Automatic Document Feeder Original Tray Capacity 300 sheets 20 lb bond 80 g m2 Original Scanning Speed Copying 1 sided scanning 120 sheets minute LTR i...

Страница 230: ...n Unit W x D 93 3 4 x 31 1 8 2 382 mm x 789 mm when the Booklet Finisher D1 is attached and the auxiliary tray is extended Paper Deck Unit C1 Item Specification Paper Size Weight Type Size LTR Weight...

Страница 231: ...roximately 134 lb 61 kg Installation Space Including the Main Unit W x D 107 1 4 1 x 31 1 8 2 723 mm 1 x 789 mm when the Booklet Finisher D1 is attached and the multi purpose tray and the auxiliary tr...

Страница 232: ...1 4 x 31 1 4 1 190 mm x 336 mm x 793 mm Weight Approximately 157 lb 71 kg Installation Space Including the Main Unit W x D 107 1 4 1 x 32 1 8 2 723 mm 1 x 817 mm when the Booklet Finisher D1 is attac...

Страница 233: ...allel LTR EXEC 1 500 sheets 100 sets 7 3 4 or 195 mm in height 1 11 x 17 LGL LTRR 750 sheets 50 sets 3 7 8 97 mm in height No Collating mode with different paper sizes Tray A 750 sheets or 3 7 8 97 mm...

Страница 234: ...ght Control Panel in the rightmost position Booklet Finisher D1 Item Specification Paper Size Weight Type Size 13 x 19 12 5 8 x 17 11 16 12 x 18 11 x 17 LGL LTR LTRR EXEC STMTR and Custom Size Free Si...

Страница 235: ...hed Tray A 11 x 17 30 sheets LTRR LGL 10 sheets Tray B 11 x 17 LGL LTRR 10 sheets Tray C 11 x 17 30 sheets LTRR LGL 10 sheets Half Fold mode when the Paper Folding Unit H1 is attached Tray A LTRR 10 s...

Страница 236: ...edge of the Upright Control Panel in the rightmost position Inner Booklet Trimmer A1 Item Specifications Paper Size Weight Type Size 13 x 19 12 5 8 x 17 11 16 12 x 18 11 x 17 LGL LTRR and Custom Size...

Страница 237: ...en Punch Holes Two holes 70 mm 2 3 4 Three holes 108 mm 4 1 4 Punch Waste Tray Capacity Approximately 5 000 sheets 20 lb bond 80 g m2 Power Source Maximum Power Consumption From the finisher Approxima...

Страница 238: ...Reader Extensions 1 Policy Applied 1 1 PDF only E mail and I Fax Features Item Specifications Communication Protocol SMTP POP3 I Fax Communication Mode Simple Full Resolution For Sending E mail 100 x...

Страница 239: ...PServer NDS PServer RPrinter NPrinter NetBIOS 1 Frame type Print application Ethernet II SMB AppleTalk Frame type Print application Ethernet SNAP PAP Printer Access Protocol 1 IPv6 is not supported P...

Страница 240: ...he optional Duplex Color Image Reader Unit is attached 93 3 4 2 382 mm 54 1 372 mm 4 100 mm or more The optional Booklet Finisher Paper Folding Unit Professional Puncher Integration Unit Professional...

Страница 241: ...Specifications 15 27 15 Appendix...

Страница 242: ...Specifications 15 28 15 Appendix...

Страница 243: ...Send Common Settings Register Edit Favorite Settings Register Name 10 characters maximum x2 E mail I Fax Settings Register Unit Name 24 characters maximum Default Subject 40 characters maximum Receiv...

Страница 244: ...24 characters maximum One touch Button Name 12 characters maximum E mail Address 128 characters maximum I Fax Name 24 characters maximum One touch Button Name 12 characters maximum I Fax Address 128...

Страница 245: ...ns Settings Registration Preferences Timer Energy Settings Date Time Settings Year Month day hour Function Settings Receive Forward Common Settings Set Fax I Fax Inbox Set Register Confidential Fax In...

Страница 246: ...ite Settings Number of Keys 9 Access Stored Files Access Stored Files Favorite Settings Number of Keys 9 Sending Documents Number of Documents 32 documents maximum Number of Pages 999 pages maximum Re...

Страница 247: ...paper orientation in the multi purpose tray POD Deck Lite A1 is vertical Either On or Off Auto Orientation Setting Corner Top Right Double Right Corner Top Right Corner Top Right Double Right Corner T...

Страница 248: ...vertical Either On or Off Auto Orientation Setting Corner Top Left Double Left Corner Top Left Corner Top Right Double Right Corner Top Left Corner Top Left Double Left Corner Top Right Double Right...

Страница 249: ...multi purpose tray POD Deck Lite A1 is vertical Either On or Off Auto Orientation Setting Orientation on the platen glass Original side Face down Orientation in the feeder Original side Face up Origi...

Страница 250: ...d Folder Samba UNIX Linux Mac OS X 6 12 Windows 2000 XP Vista 7 Server2003 Server 2008 6 7 Consumables Safety instructions xxxi Context 5 5 Context name 5 5 Control panel 3 7 3 9 4 3 4 9 5 3 6 3 7 3 A...

Страница 251: ...ric keys 1 13 O Operations required to use the machine 1 21 Confirm the following settings 1 21 Optional equipment and system requirements Printing from a computer 2 2 Sending data 2 6 Using E Mail I...

Страница 252: ...2 Network environment 3 2 SMB CIFS network 6 2 TCP IP network 4 2 SMB CIFS 2 4 SMB CIFS network 6 3 SMB CIFS network setup procedures 6 2 SMB Server Settings 6 3 SMS Service Management System 8 7 SMT...

Страница 253: ...ystem requirements 2 5 Using network with various types of computers 2 10 Using the remote scan function Installation 14 4 Settings required prior to remote scanning 14 5 System requirements 14 3 V Vo...

Страница 254: ...Index 15 40 15 Appendix...

Страница 255: ......

Страница 256: ...erlands See http www canon europe com for details on your regional dealer CANON LATIN AMERICA INC 703 Waterford Way Suite 400 Miami Florida 33126 U S A CANON AUSTRALIA PTY LTD 1 Thomas Holt Drive Nort...

Отзывы: