background image

Copy Guide – iR ADV

Page

19

of

43

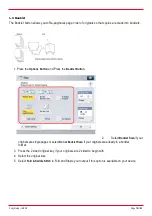
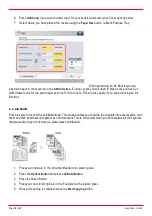
1. Press the

Options Button

and select

Front Covers

2. Specify the settings foryour Front and Back Covers

3. Select Paper and specify which trays the covers are coming from and load the drawer(s) or multi-

purpose tray with Cover Paper/Card

4. Press the Green Start Button

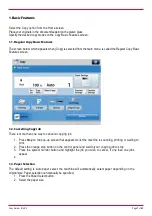
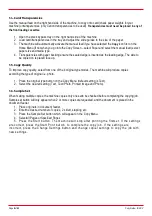
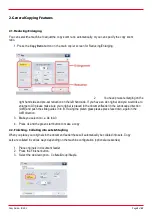
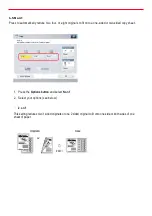
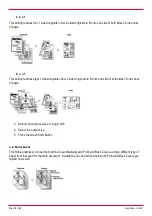
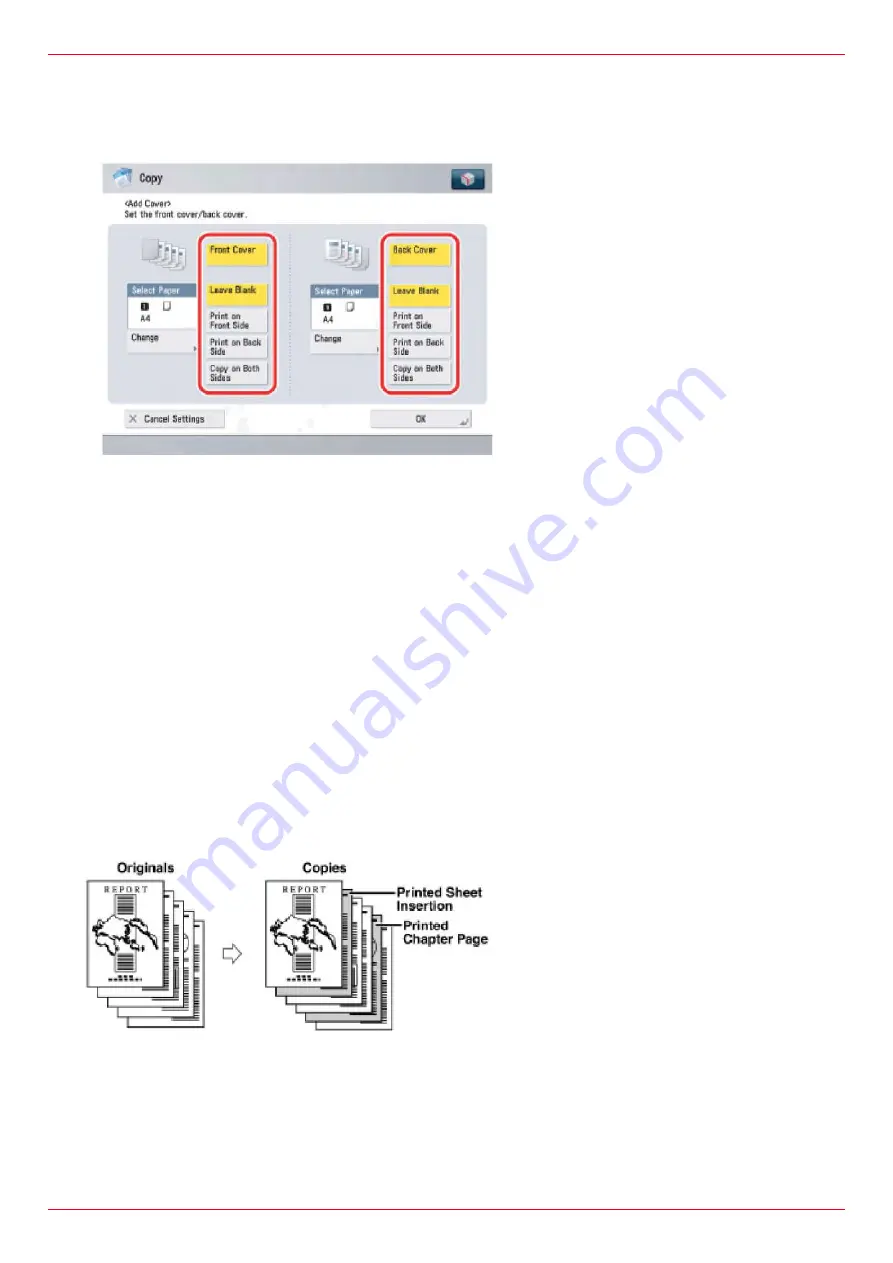
4.7. Insert Sheets

This mode enables you to set the machine to automatically add insert insertions, chapter pages or tab papers using
a different type of paper from that used for the main document

Sheets/Chapter Papers

This allows you to insert a sheet of paper between copies. You may also copy on the sheet insertions.

Содержание ImageRUNNER ADV

Страница 1: ...Black White Copy Guide Prepared for ImageRUNNER ADV 14 01 2015 Version 1 ...

Страница 2: ...shing Collating into sets Stapling 9 3 Double Sided Copying 12 4 Options Screen 1 of 4 14 4 1 Book to 2 Pages 14 4 2 2 Sided 14 4 3 Booklet 15 4 4 Job Build 16 4 5 Non1 17 4 6 Front Cover 18 4 7 Insert Sheets 19 4 8 Different Size Originals 21 4 9 Density 21 4 10 Text Photo Map 22 4 11 Transparency Cover Sheets 23 5 Options Screen 2 of 3 25 5 1 Secure Watermark 25 5 2 Page Numbering 26 5 3 CopySet...

Страница 3: ... Gutter 34 6 Options Screen 3 of 3 36 6 1 Print Check 36 6 2 Negative Positive 37 6 3 Image Repeat 37 6 4 Merge Job Blocks 39 6 5 Job Done Notice 40 6 6 Mirror Image 40 6 7 Printon Tab 41 6 8 Store in Mailbox 42 6 9 Superimpose Image 42 ...

Страница 4: ... thatyou will only disclose this information to such ofyour employees as is necessary You further agree not to disclose this information or any part of it to any other party without our express written consent This shall not apply to information which is published or becomes known legitimately from another source other than Canon UK Limited or any of its subsidiaries Copyright Canon UK Limited 201...

Страница 5: ... ADVANCE device s with all of the information needed to gain the most out ofyour investment The following sections will take you through in detail the steps you need to take to produce high quality copies from your imageRUNNER ADVANCE Multi Functional Device Forfurther support please contact the Software Support Centre ...

Страница 6: ...py Job There is more than one way to cancel a copying job 1 Press Stop on the pop up screen that appears whilst the machine is scanning printing or waiting to print 2 Press the orange stop button on the control panel and wait foryour copying job to stop 3 Press the system monitor button and highlight the job you wish to cancel if one than one jobs appear 4 1 3 Paper Selection The default setting i...

Страница 7: ... 5 Copy Quality To improve copy quality select from one of the 4 original type modes The machine will produce copies according the type of original i e photo 1 Press the original type button on the Copy Menu default setting is Text 2 Select the desired setting Text Text Photo Printed Image and Photo 1 6 Sample Set When making multiple copies the machine copies only one setto be checked before comp...

Страница 8: ...e sure your original is placed in the documentfeeder in the Landscape direction A4R and push the slide guides in to fit If using the platen glass please place face down again in the A4R direction 3 Make you selection i e A4 to A3 4 Press ok and the green start button to make a copy 2 2 Finishing Collating into sets Stapling When you place your originals in the document feeder these will automatica...

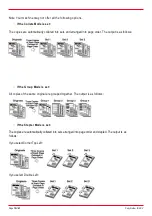
Страница 9: ...nto sets and arranged into page order The output is as follows If the Group Mode is set All copies of the same original are grouped together The output is as follows If the Stapler Mode is set The copies are automatically collated into sets arranged into page order and stapled The output is as follows If you select Corner Top Left If you select Double Left ...

Страница 10: ...Copy Guide iRADV Page 11 of 43 4 Press the OK button 5 Enter the desired number copies and press the Start button ...

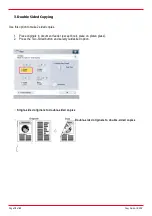
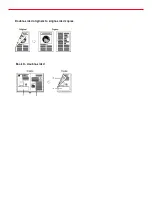
Страница 11: ...se this option to make 2 sided copies 1 Place originals in document feeder except book place on platen glass 2 Press the Two Sided button and selectyourdesired option Single sided originals to double sided copies Double sided originals to double sided copies ...

Страница 12: ... Double sided originals to single sided copies Book to double sided ...

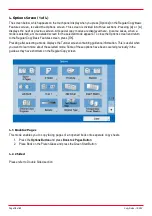
Страница 13: ... close the Options screen and return to the Regular Copy Basic Features screen press OK Pressing after selecting a mode displays the Tutorial screen containing guidance information This is useful when you want to learn more about the selected mode Some of these options have been covered previously in the guide as they have shortcuts on the Regular Copy screen 4 1 Bookto2 Pages This mode enables yo...

Страница 14: ...tton and Press the Booklet Button 2 Select Booklet Scan if your originals are single pages or select Do not Booklet Scan if your originals are already in a booklet format 3 Press the 2 sided original key if your originals are 2 sided to begin with 4 Select the original size 5 Select Fold Saddle Stitch to Fold and Staple your output if this option is available on your device ...

Страница 15: ...This will also apply if you are producing an A4 Booklet 4 4 Job Build Press to select or cancel the Job Build mode This mode enables you to divide the originals into several parts scan them and then print them all together as one document This is convenient when you cannot place all the originals thatyou wantto copy at one time i e platen glass and feeder 1 Placeyouroriginals in the documentfeeder...

Страница 16: ...ginals to fit onto a one sided or two sided copy sheet 1 Press the Options button and select N on 1 2 Select your options see below 2 o n 1 This setting reduces two 1 sided originals or one 2 sided original to fit onto one side or both sides of one sheet of paper ...

Страница 17: ...r 2 sided originals to fit onto one side of both sides of one sheet of paper 3 Selectyouroriginal sizes to begin with 4 Select the output size 5 Press the Green Start Button 4 6 Front Cover This mode enables you to set the machine to automatically add Front and Back Covers using a different type of paper from that used for the main document In addition you can decide whether the Front and Back Cov...

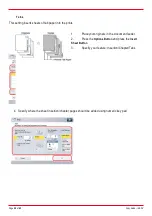
Страница 18: ...oad the drawer s or multi purpose tray with Cover Paper Card 4 Press the Green Start Button 4 7 Insert Sheets This mode enables you to set the machine to automatically add insert insertions chapter pages or tab papers using a different type of paper from that used for the main document Sheets Chapter Papers This allows you to insert a sheet of paper between copies You may also copy on the sheet in...

Страница 19: ...s of tab paper into the prints 1 Placeyouroriginals in the documentfeeder 2 Press the Options Button and press the Insert Sheet Button 3 Specify your feature Insertion Chapter Tabs 4 Specify where the sheet insertion chapter pages should be added using numeric key pad ...

Страница 20: ...e width such as A3 and A4 together as one group by setting them in the feeder 1 Placeyouroriginals in the documentfeeder 2 PresstheOptions Button and press DifferentSize Originals 3 Press the Green Start Button 4 9 Density You can manually adjust the exposure to the most appropriate level for the original 1 Placeyouroriginal s in document feeder or on platen glass 2 Press the Options Button and pr...

Страница 21: ...nd on the main copier screen or by pressing the options button The following options are available Text Photo Map Mode This mode is best suitable for originals containing text images photos as well as fine graphics such as those found on maps Printed Image Mode This mode is best suited for images printed with halftone dots Photo Print Out Mode This mode is best suited for photos printed on photogr...

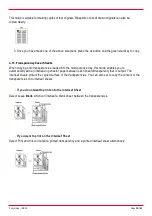
Страница 22: ...ray this mode enables you to automatically add an interleaving sheetof paper between each sheetoftransparencythat is output The interleaf sheets protect the copied surface of the transparencies You can also set to copy the content of the transparencies onto interleaf sheets If you do notwantto print onto the Interleaf Sheet Select Leave Blank which will interleaf a blank sheet between the transpar...

Страница 23: ...DV 1 Placeyouroriginals in the documentfeeder 2 Press the Options Button and press Transparency Cover Sheet 3 Makeyourselection and selectwhereyourtransparencies are coming from and size 4 Press ok and press the green start button ...

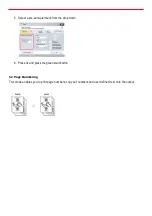
Страница 24: ...u can embed text such as CONFIDENTIAL the date and time The embedded text appears when copies are copied 1 Placeyouroriginal s in document feeder or on platen glass 2 Press the Options Button and arrow down to page 2 of options and press Secure Watermark 3 Select the type of watermark Watermark Date Copy Set Numbering Serial Number ID User Name and follow instructions 4 Select Size Colour and Patt...

Страница 25: ...lect a pre set watermark from the drop down 6 Press ok and press the green start button 5 2 Page Numbering This mode enables you to print page numbers copy set numbers and user defined text onto the output ...

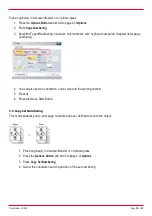
Страница 26: ...rs total page numbering 4 You can also set the orientation colour size and the starting number 5 Pressok 6 Press the Green Start Button 5 3 Copy Set Numbering This mode enables you to print page numbers and user defined text onto the output 1 Place original s in documentfeeder or on platen glass 2 Press the Options Button and scroll to page 2 of Options 3 Press Copy Set Numbering 4 Select the orie...

Страница 27: ...es or scan an original containing halftones such as a printed photograph using the Photo Printout Mode the effect a shimmering wavy pattern may occur However you can lessen this effect by using low as the setting to produce a clearer copy image High This setting enhances the edges of the original images so that faint or fine text is reproduced with a sharper contrast This setting is particularly s...

Страница 28: ...reen start button 5 5 Erase Frame This mode enables you to erase shadows and lines that appear when copying various types of originals There are three types of Erase Frame Original Frame Erase This mode erases the dark borders and frame lines that appear around the copy if the original is smaller than the selected paper size This is also useful if you have fax header markings on your original and ...

Страница 29: ...e frame width or you can Adjust each side independently by pressing the Adjust Independently button 5 Press ok and press the green start button Book Frame Erase This mode erases the dark border as well as the centre and contour lines that appear ifyou are copying facing pages in a book or bound originals onto a single sheet of paper 1 Placeyouroriginal s in the document feeder or on the platen gla...

Страница 30: ...ust each side independently by pressing the Adjust Independently button 6 Press ok and press the green start button Binding Erase This mode erases the shadows that appear on copies from binding holes on originals 1 Placeyouroriginal s in the document feeder or on the platen glass 2 Press the Option Button and scroll down to page 2 of the Option Button 3 Press the Erase Frame Button and press Erase...

Страница 31: ...ode enables you to print a watermark date and user defined text onto the output Prints Watermarks or User Defined text onto the output 1 Place originals in the document feeder or on the platen glass 2 Press the Options Button and scroll down to page 2 of the Options Button 3 Press the Watermark Button 4 Select the Orientation Size Colour and Watermark type 5 Press okand press the green start key t...

Страница 32: ...croll down to page 2 of the Options Button 3 Press the Print Date Button 4 Setthe Orientation Size Colour DateType and Specify date ifyou wish a date in the pastorfuture 5 Press the ok button and press the green start key 5 8 Shift You can make copies with the entire original image shifted to the centre or the corner This is useful if you have for example an A5 original and only A4 output paper yo...

Страница 33: ...the ok button and press the green start key By Numeric Keys allows you to measure where you want to shift the image you will require a ruler for this option 5 9 Gutter This mode enables you to make copies or prints with the entire original image shifted by a designated width to the left right top or bottom in order to create a gutter on the copies 1 Place originals in the document feeder or on the...

Страница 34: ...Copy Guide iR ADV Page 35 of 43 4 Selectthe desired GutterType 5 Select which side you want to move and by how much 6 Press the ok button and press the green start key ...

Страница 35: ...ile copying them when you scan originals in succession on the platen glass can only be used from the platen glass 1 Place original on the platen glass 2 Press the Options Button and scroll down to page 3 of the Options Button 3 Press the Print Check Button 4 Press the Green Start Button 5 Confirm contents of the printout and scan the next original 6 After all originals are scanned press Stop ...

Страница 36: ...aten glass 2 Press the Options Button and scroll down to page 3 of the Options Button 3 Press the Nege Posi Button 6 3 Image Repeat This mode enables you to repeatedly copy the entire original image in either the vertical or horizontal direction Automatic Setting The original image is copied so thatthe maximum number of possible repeats fit onto the selected paper ManualSetting The original image ...

Страница 37: ...lass 2 Press the Options Button and scroll down to page 3 of the Options Button 3 Press the Repeat Images 4 Leave on Auto to do Image Repeat Automatically 5 If you wish to set the number of repeats manually use the and on Vertical and Horizontal 6 Press the ok key and press the green start key ...

Страница 38: ... them as one document You can set copy settings for example the Job Separator and Page Numbering modes for the combined document 1 Place original s in the document feeder or on the platen glass 2 Press the Options Button and scroll down to page 3 of the Options Button 3 Press the Merge Job Block NB Please refer to a separate guide for setting up and using this option ...

Страница 39: ...under Scan and Send 1 Place original s in the document feeder or on the platen glass 2 Press the Options Button and scroll down to page 3 of the Options Button 3 Press the Job Done Notice Button 4 Selectyour email address 5 Press ok and press the green start button 6 6 Mirror Image This mode enables you to copy the original image reversed as if it were a reflection in the mirror 1 Place original s...

Страница 40: ...the originals must be shifted so that the image is copied onto the tabs 1 Place original s in the document feeder or on the platen glass 2 Load your tab paper into the multi purpose tray 3 Press the Options Button and scroll down to page 3 of the Options Button 4 Press the Print on Tab Button 5 Set the copy shift width using the and buttons 6 Press ok and press the green start button ...

Страница 41: ...e original s in the document feeder or on the platen glass 2 Press the Options Button and scroll down to page 3 of the Options Button 3 Press the Store in Mailbox button 4 Press the Mailbox Number 5 If you want to name the document press File Name 6 Press the ok button 6 9 Superimpose Image The Superimpose Image Mode enables you to Super Impose a previously scanned image which has been stored in t...

Страница 42: ...utton and scroll down to page 3 of the Options Button 2 Press the Superimpose Button 3 Press Set for the side of the paper you want to Superimpose 4 Set the image form to be superimposed over the original press next 5 Select the composition type 6 Selectcolourmodeforthe image 7 Press ok and press the green start key ...

Отзывы: