6
(8) Start Button
This starts scanning the document loaded in the document feed tray
(9) Feed Selection Indicator
This indicates the way documents are currently being fed in
accordance with the position of the feed selection lever.
(10) Feed Selection Lever
This changes the way documents are fed.
(11) Connectors
Connectors for connecting an AC adapter and USB cable are
available.
(12) Eject Selection Lever
Use this lever to change the way documents are ejected.
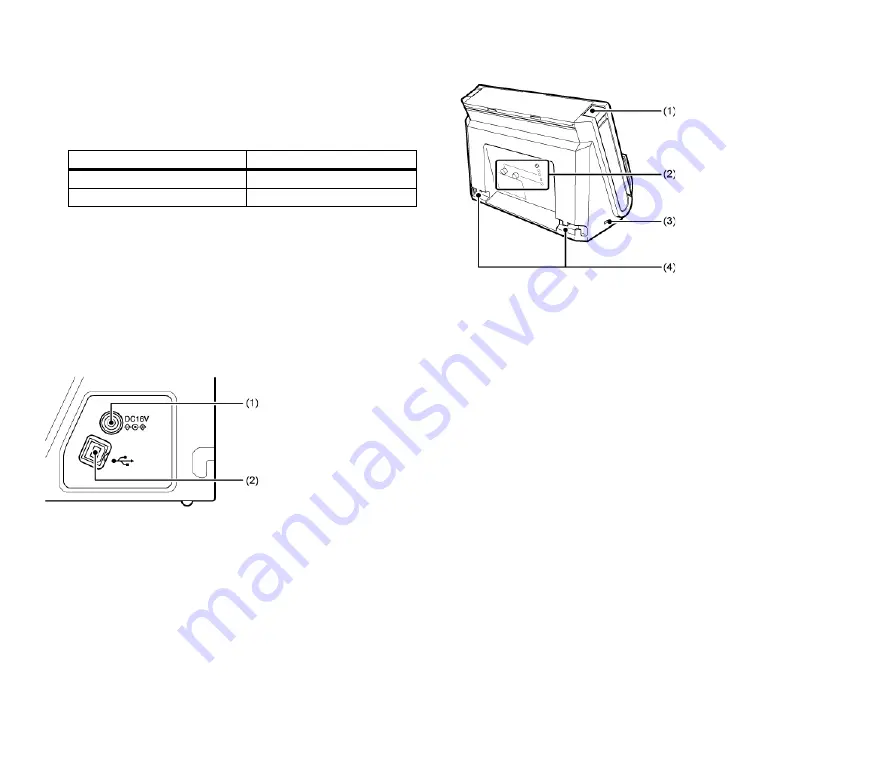
Connectors
(1) Power Connector
Connect the supplied AC adapter to this connector.
(2) USB Connector
Connect the supplied USB cable to this connector.
Back View
(1) OPEN Button
Press this button to open the front unit.
(2) Wi-Fi function setting location (DR-C225W II only)
Set and confirm wireless connection using the Wi-Fi function.
(3) Kensington Slot
Connect an anti-theft key chain or the like.
(4) Cable Grooves
Secure the USB cable and power cord that are connected to the
scanner along the rear of the scanner. Use these when you want to
run the cables on the side opposite the connectors.
Lever position
Indicator color
Upper (non separation feeding)
White
Lower (standard feeding)
Black
Содержание imageFORMULA DR-C225 II
Страница 112: ...112 External Dimensions Front View Side View ...
Страница 113: ...113 ...
Страница 114: ...114 ...
Страница 115: ...115 ...


