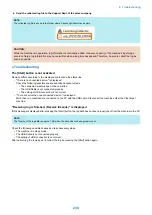
6. Send the collected log file to the Support Dept. of the sales company.
NOTE:
The collected log file is saved in the folder where CanonLogCollector.exe exists.
CAUTION:
While the machine is in operation, log information is continually added. However, capacity of the machine's log storage
area is not large, log information may be overwritten when a long time has passed. Therefore, be sure to collect the log as
soon as possible.
● Troubleshooting
The [Start] button is not activated
Remedy differs according to the displayed contents on the status line.
• "There is no connected device." is displayed.
Check the following possible causes and take necessary steps.
• The connected machine has not been started
• The USB Cable is not connected properly
• The setting of USB connection is not correct
• "There are more than one connected device." is displayed.
More than one machines are connected to the PC with the USB cable. Disconnect the machines other than the target
machine.
"Receiving log is finished. (Receive timeout.)" is displayed
If this message is displayed after pressing the [Start] button, the log data has not been properly sent from the machine to the PC.
NOTE:
The file size of the log data is approx. 1 KB when the data has not been properly sent.
Check the following possible causes and take necessary steps.
• The machine is in sleep mode.
• The USB Cable is not connected properly
• The setting of USB connection is not correct
After performing the remedy work, collect the log by pressing the [Start] button again.
6. Troubleshooting
230
Содержание imageCLASS MF264dw
Страница 13: ...Product Overview 1 Product Lineup 6 Features 8 Specifications 9 Parts Name 14 ...
Страница 14: ...Product Lineup Host machine MF269dw MF267dw MF266dn MF264dw MF263dn MF261d 1 Product Overview 6 ...
Страница 67: ...Consumable Parts Consumable parts are not required in this machine 3 Periodical Service 59 ...
Страница 68: ...Periodical Service No periodic services are required to this machine 3 Periodical Service 60 ...
Страница 77: ... SADF Unit Reader Unit 1 2 No Name 1 SADF Unit 2 Reader Unit 4 Parts Replacement and Cleaning 69 ...
Страница 78: ... Copyboard Cover Reader Unit 1 2 No Name 1 Copyboard Cover 2 Reader Unit 4 Parts Replacement and Cleaning 70 ...
Страница 89: ...3 80 mm 80 mm 4 Parts Replacement and Cleaning 81 ...
Страница 92: ... If the Fax is not installed 3x 2x 1x 2 60 mm 3 4 Parts Replacement and Cleaning 84 ...
Страница 96: ...3 4 Parts Replacement and Cleaning 88 ...
Страница 97: ...4 5 4 Parts Replacement and Cleaning 89 ...
Страница 105: ...2 3 1x 4 Parts Replacement and Cleaning 97 ...
Страница 106: ...4 CAUTION When placing the units do NOT damage the Flat Cable and the Harness 4 Parts Replacement and Cleaning 98 ...
Страница 108: ... Procedure CAUTION Do not damage the White Guide Plate 1 2 4 Parts Replacement and Cleaning 100 ...
Страница 110: ...5 6 4x 1x 1x 7 4 Parts Replacement and Cleaning 102 ...
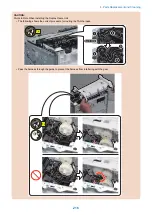
Страница 115: ...3 4 5 4 Parts Replacement and Cleaning 107 ...
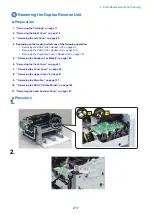
Страница 116: ...6 4 Parts Replacement and Cleaning 108 ...
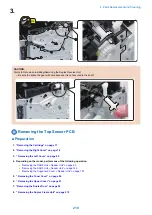
Страница 122: ...2 3 4 4 Parts Replacement and Cleaning 114 ...
Страница 124: ...1 2 2x 3 4 4 Parts Replacement and Cleaning 116 ...
Страница 127: ...2 3 4 2x 1x 5 4 Parts Replacement and Cleaning 119 ...
Страница 129: ...3 4 2x 1x 5 6 4 Parts Replacement and Cleaning 121 ...
Страница 132: ...5 2x 4 Parts Replacement and Cleaning 124 ...
Страница 138: ...2 1x 3 1x 4 4 Parts Replacement and Cleaning 130 ...
Страница 140: ... Procedure 1 2 4 Parts Replacement and Cleaning 132 ...
Страница 144: ... Procedure 1 2 3 2x 4 Parts Replacement and Cleaning 136 ...
Страница 146: ...3 4 4 Parts Replacement and Cleaning 138 ...
Страница 147: ...5 4 Parts Replacement and Cleaning 139 ...
Страница 153: ...1 2 3 4 4 Parts Replacement and Cleaning 145 ...
Страница 155: ...1 2 2x 3 4 4 Parts Replacement and Cleaning 147 ...
Страница 158: ...2 3 4 2x 1x 5 4 Parts Replacement and Cleaning 150 ...
Страница 160: ...3 4 2x 1x 5 6 4 Parts Replacement and Cleaning 152 ...
Страница 163: ...5 2x 4 Parts Replacement and Cleaning 155 ...
Страница 166: ...2 2x 1x 1x 3 1x 1x 4 Parts Replacement and Cleaning 158 ...
Страница 170: ...2 2x 3 4 2x 4 Parts Replacement and Cleaning 162 ...
Страница 173: ...2 3 4 2x 1x 5 4 Parts Replacement and Cleaning 165 ...
Страница 175: ...3 4 2x 1x 5 6 4 Parts Replacement and Cleaning 167 ...
Страница 178: ...5 2x 4 Parts Replacement and Cleaning 170 ...
Страница 180: ...Controller System Removing the Control Panel Unit Procedure 1 2 4x 3 4 Parts Replacement and Cleaning 172 ...
Страница 183: ...2 4x 4 Parts Replacement and Cleaning 175 ...
Страница 186: ...2 3 If the Fax is installed 4x If the Fax is not installed 4x 4 Parts Replacement and Cleaning 178 ...
Страница 188: ... If the Fax is not installed 6 2x 1x 7 3x 8 2x 1x 4 Parts Replacement and Cleaning 180 ...
Страница 191: ...4 1x 5 1x 6 3x 4 Parts Replacement and Cleaning 183 ...
Страница 199: ... Procedure 1 3x 2x 4 Parts Replacement and Cleaning 191 ...
Страница 201: ... If the Fax is not installed 2 4x 3 4 Parts Replacement and Cleaning 193 ...
Страница 208: ...4 4 Parts Replacement and Cleaning 200 ...
Страница 211: ...3 2x 4 1x 4 Parts Replacement and Cleaning 203 ...
Страница 213: ...2 3 4x 4 4 Parts Replacement and Cleaning 205 ...
Страница 217: ...3 1x 1x 4 5 2x 6 4 Parts Replacement and Cleaning 209 ...
Страница 218: ...7 8 9 4 Parts Replacement and Cleaning 210 ...
Страница 223: ...4 4 Parts Replacement and Cleaning 215 ...
Страница 228: ...Adjustment 5 Adjustment at Parts Replacement 221 ...
Страница 230: ...Troubleshooting 6 Test Print 223 Troubleshooting Items 226 Debug Log 228 Version Upgrade 231 ...
Страница 242: ...Error Jam Alarm 7 Overview 235 Error Code 238 Jam Code 241 Alarm Code 243 ...
Страница 251: ...Alarm Code This machine does not have any Alarm Code 7 Error Jam Alarm 243 ...
Страница 287: ...APPENDICES Service Tools 280 General Circuit Diagram 281 Backup Data 283 ...

