background image

Papierkassetten

5-4

Rege

lmäß

ige W

a

rt

u

n

g

5

WICHTIG

Vor der Verwendung muss gerolltes oder welliges Papier geglättet werden.

Achten Sie darauf, dass der Papierstapel nicht über die Höhenbegrenzung (

auf der linken Seite und Rückseite der Führungsschienen hinausragt.

Achten Sie darauf, dass das für die Papierkassette eingestellte Papierformat/der 
Papiertyp mit dem Format/Typ des eingelegten Papiers übereinstimmt.

HINWEIS

Mit Ausnahme von Kassette 1 beim imageRUNNER 2520i/2520, in die nur 250 Blatt 
Normalpapier (80 g/m

2

) eingelegt werden kann, fasst jede Papierkassette bis zu 550 

Blatt Normalpapier (80 g/m

2

).

Befolgen Sie die Anweisungen auf dem Papierpaket, mit welcher Seite das Papier 
nach oben einzulegen ist.

3

Öffnen Sie ein neues Paket 
Papier, und nehmen Sie das 
Papier heraus.

VORSICHT

Achten Sie beim Einlegen von 
Papier darauf, dass Sie sich nicht 
die Finger an den Papierkanten 
schneiden.

WICHTIG

Packen Sie das restliche Papier wieder 
ordentlich in der Originalverpackung 
ein, und bewahren Sie es an einem 
trocknen, vor direktem Sonnenlicht 
geschützten Ort auf.

HINWEIS

Für qualitativ hochwertige Ausdrucke 
sollten Sie das von Canon 
empfohlene Papier verwenden. 

Vor dem Einlegen sollten Sie das 
Papier mehrmals auffächern und 
bündig ausrichten, damit es sich 
leichter zuführen lässt.

4

Legen Sie den Papierstapel in die 
Kassette ein.

Glätten Sie die Kanten des Papierstapels, 
und legen Sie den Papierstapel an der 
rechten Seite der Kassette an.

VORSICHT

Achten Sie beim Einlegen von 
Papier darauf, dass Sie sich nicht 
die Finger an den Papierkanten 
schneiden.

Downloaded from ManualsPrinter.com Manuals

Содержание image runner 2520

Страница 1: ... dieses Handbuch zuerst Bitte lesen Sie dieses Handbuch bevor Sie mit dem Produkt arbeiten Nachdem Sie das Handbuch gelesen haben bewahren Sie es zum Nachschlagen an einem sicheren Ort auf Guida per l utente Leggere questa guida Leggere questa guida prima di iniziare ad utilizzare il prodotto Terminata la lettura conservare la guida in un luogo sicuro per eventuali consultazioni Guía de usuario Le...

Страница 2: ...imageRUNNER 2545i 2545 2535i 2535 2530i 2530 2525i 2525 2520i 2520 User s Guide Downloaded from ManualsPrinter com Manuals ...

Страница 3: ...tions Sending and Facsimile Guide CD ROM Remote User Interface Instructions Remote UI Guide CD ROM Network Connectivity Security Management System Settings Guide CD ROM Color Network ScanGear Instructions Network ScanGear Guide CD ROM USB Memory Media Printing Instructions PS PCL UFRII LT Printer Instructions Printer Guide CD ROM Windows Printer Driver Instructions Windows Printer Driver Guide CD ...

Страница 4: ...ncludes the descriptions of available paper stock and Index Chapter 1 Chapter 2 Chapter 3 Chapter 4 Chapter 5 Chapter 6 Chapter 7 Considerable effort has been made to ensure that this manual is free of inaccuracies and omissions However as we are constantly improving our products if you need an exact specification please contact Canon Downloaded from ManualsPrinter com Manuals ...

Страница 5: ...uct Name xiv EMC requirements of EC Directive xiv R TTE Directive xiv Laser Safety xiv Additional Information xv International ENERGY STAR Program xvi IPv6 Ready Logo xvi WEEE Directive xvii Copyright xviii Third Party Software xviii Disclaimers xix Legal Limitations on the Usage of Your Product and the Use of Images xix Super G3 xx Important Safety Instructions xxi Installation xxi Power Supply x...

Страница 6: ...2 Before You Start Using the Machine Turning ON OFF the Machine 2 2 Turning ON the Main Power 2 2 Using the Control Panel Power Switch Sleep Mode 2 4 Turning OFF the Main Power 2 4 Setup Flow 2 5 Chapter 3 Accompanying CD ROMs User Manual CD ROM 3 2 System Requirements 3 2 Using the CD ROM Menu 3 3 UFRII LT User Software 3 4 Contents of CD ROM 3 4 System Requirements 3 5 UFRII LT Printer Driver 3 ...

Страница 7: ...oading Paper 5 3 Adjusting a Paper Drawer to Hold a Different Paper Size 5 5 Replacing the Toner 5 8 Routine Cleaning 5 13 Platen Glass and Cover 5 13 Feeder Scanning Area and Rollers 5 14 Consumables 5 18 Paper Stock 5 18 Toner 5 19 Be careful of counterfeit toners 5 19 Stamp Ink Cartridge 5 20 Staple Cartridge 5 20 Genuine Supplies 5 20 Chapter 6 Troubleshooting Clearing Paper Jams 6 2 Fixing Un...

Страница 8: ...vii Chapter 7 Appendix Available Paper Stock 7 2 Index 7 4 Downloaded from ManualsPrinter com Manuals ...

Страница 9: ... may lead to death or injury to persons if not performed correctly To use the machine safely always pay attention to these warnings CAUTION Indicates a caution concerning operations that may lead to injury to persons if not performed correctly To use the machine safely always pay attention to these cautions IMPORTANT Indicates operational requirements and restrictions Be sure to read these items c...

Страница 10: ...ation screens Illustrations Used in This Manual The machine illustrations used in this manual are those of the imageRUNNER 2545i with the following optional equipment attached the Inner Finisher B1 Inner Finisher Additional Tray B1 and CST Feeding Unit AE1 Keys Example Control Panel Key icon Key Name Additional Functions Touch Panel Display Key Name OK Cancel etc Key Icon etc Buttons Icons and Oth...

Страница 11: ...ited to your needs Abbreviations Used in This Manual In this manual product names are abbreviated as follows Microsoft Windows 2000 operating system Windows 2000 Microsoft Windows XP operating system Windows XP Microsoft Windows Vista operating system Windows Vista Microsoft Windows 7 operating system Windows 7 Microsoft Windows Server 2003 operating system Windows Server 2003 Microsoft Windows Se...

Страница 12: ... has scanned the original that you want to copy it can immediately scan the next person s original You can also print from this machine using a function other than the Copy function In this machine these operations take place in a complex way so that not only copies but also various kinds of prints may sometimes have to wait their turn before they can be printed To avoid confusion when reading the...

Страница 13: ...ting documents such as a copy fax or data sent from a client computer to the machine Copying Printing data scanned from an original followed by finishing options such as stapling Downloaded from ManualsPrinter com Manuals ...

Страница 14: ...ment in the Reference Guide Model Copy Remote Scan Remote UI Send Fax Print Feeder Drawer Searchable PDF USB UFRII LT PCL PS Barcode 2 3 4 imageRUNNER 2545i opt opt opt opt opt imageRUNNER 2545 opt opt opt opt opt opt opt opt imageRUNNER 2535i opt opt opt opt opt imageRUNNER 2535 opt opt opt opt opt opt opt opt imageRUNNER 2530i opt opt opt opt opt imageRUNNER 2530 opt opt opt opt opt opt opt opt ...

Страница 15: ...s necessary to comply with the technical EMC requirements of EC Directive R TTE Directive Laser Safety This product is certified as a Class 1 laser product under IEC60825 1 2007 and EN60825 1 2007 This means that the product does not produce hazardous laser radiation Since radiation emitted inside the product is completely confined within protective housings and external covers the laser beam cann...

Страница 16: ...o the machine s internal part and next to the waste toner container behind the front cover This product has been classified under IEC60825 1 2007 and EN60825 1 2007 which conform to the following classes CLASS 1 LASER PRODUCT LASER KLASSE 1 APPAREIL Á LASER DE CLASSE 1 APPARECCHIO LASER DI CLASSE 1 PRODUCTO LÁSER DE CLASE 1 APARELHO A LASER DE CLASSE 1 LUOKAN 1 LASER TUOTE LASERPRODUKT KLASS 1 CAU...

Страница 17: ...fice equipment The program backs the development and dissemination of products with functions that effectively reduce energy consumption It is an open system in which business proprietors can participate voluntarily The targeted products are office equipment such as computers displays printers facsimiles and copiers The standards and logos are uniform among participating nations The protocol stack...

Страница 18: ...ated collection point e g on an authorized one for one basis when you buy a new similar product or to an authorized collection site for recycling waste electrical and electronic equipment EEE and batteries and accumulators Improper handling of this type of waste could have a possible impact on the environment and human health due to potentially hazardous substances that are generally associated wi...

Страница 19: ...nse or right expressed or implied is hereby conveyed or granted by rights holders of the SOFTWARE to you for any intellectual property of rights holders of the SOFTWARE 3 You may use the SOFTWARE solely for use with the Canon product you purchased the PRODUCT 4 You may not assign sublicense market distribute or transfer the SOFTWARE to any third party without prior written consent of rights holder...

Страница 20: ...ed by law and may result in criminal and or civil liability A non exhaustive list of these documents is set forth below This list is intended to be a guide only If you are uncertain about the legality of using your product to scan print or otherwise reproduce any particular document and or of the use of the images scanned printed or otherwise reproduced you should consult in advance with your lega...

Страница 21: ...of approximately 3 seconds per page which results in reduced telephone line charges Approximately 3 seconds per page fax transmission time based on CCITT ITU T No 1 Chart JBIG Standard Mode at 33 6 Kbps modem speed The PSTN Public Switched Telephone Network currently supports 28 8 Kbps modem speeds or slower depending on telephone line conditions Downloaded from ManualsPrinter com Manuals ...

Страница 22: ...ty Installation WARNING Never block the ventilation slots and louvers on the machine These openings are provided for proper ventilation of working parts inside the machine Blocking these openings can cause the machine to overheat Never place the machine on a soft surface such as a sofa or rug Do not install the machine in the following locations A damp or dusty location A location near water fauce...

Страница 23: ...n locations subject to excessive vibrations as this may cause the machine to fall or tip over resulting in personal injury Do not remove the machine s leveling feet after the machine has been installed as this may cause the machine to fall or tip over resulting in personal injury Power Supply WARNING Do not damage or modify the power cord Also do not place heavy objects on the power cord or pull o...

Страница 24: ... electrical shock IMPORTANT Leave sufficient space around the power plug so that it can be unplugged easily If objects are placed around the power plug you will be unable to unplug it in an emergency Handling WARNING Do not attempt to disassemble or modify the machine There are high temperature and high voltage components inside the machine which may result in a fire or electrical shock If the mac...

Страница 25: ...ver gently to avoid catching your hands as this may result in personal injury Do not press down hard on the feeder platen cover when using the platen glass to make copies of thick books Doing so may damage the platen glass and result in personal injury Do not place your hands hair clothing etc near the exit and feed rollers Even if the machine is not in operation your hands hair or clothing may ge...

Страница 26: ...uring any phase of user operation Read the following remarks and instructions for safety Never open covers other than those instructed in the manuals Do not remove the following caution labels which are attached to the machine If the labels have been removed contact your local authorized Canon dealer If the laser beam escapes from the machine exposure may cause serious damage to your eyes Controll...

Страница 27: ...ectrical shock There are some areas inside the machine which are subject to high voltages When removing jammed paper or when inspecting the inside of the machine do not allow necklaces bracelets or other metal objects to touch the inside of the machine as this may result in burns or electrical shock Do not burn or throw used toner cartridges into open flames as this may cause the toner remaining i...

Страница 28: ...idge take care not to allow the toner to come into contact with your hands or clothing as this will dirty your hands or clothing If they become dirty wash immediately with cold water Washing with warm water will set the toner and make it impossible to remove the toner stains When removing paper which has become jammed inside the machine remove the jammed paper gently to prevent the toner on the pa...

Страница 29: ...feguards against dust explosions to clean up spilled toner Doing so may cause a malfunction in the vacuum cleaner or result in a dust explosion due to static discharge CAUTION Keep toner and other consumables out of the reach of small children If these items are ingested consult a physician immediately Do not dismantle the toner cartridge as doing so may cause the toner to fly out and enter your e...

Страница 30: ...o connect the cables Installation Location and Handling 1 2 Installation Precautions 1 2 Handling Precautions 1 7 Cable Connection 1 9 Using the Machine as a Local Printer USB Connection 1 9 Sharing the Machine with Other Network Users 1 10 Using the Machine as a Fax Device 1 12 Downloaded from ManualsPrinter com Manuals ...

Страница 31: ...ocations Avoid locations subject to temperature and humidity extremes whether low or high For example avoid installing the machine near water faucets hot water heaters humidifiers air conditioners heaters or stoves Avoid installing the machine in direct sunlight If this is unavoidable use curtains to shade the machine Be sure that curtains do not block the machine s ventilation slots or louvers or...

Страница 32: ...ufficient to maintain a comfortable working environment in areas of machine operation Avoid locations where ammonia gas is emitted Avoid locations that are subject to vibration For example avoid installing the machine on unstable floors or stands Avoid exposing the machine to rapid changes in temperature If the room in which the machine is installed is cold but rapidly heated water droplets conden...

Страница 33: ...move the machine s leveling feet Do not remove the machine s leveling feet after the machine has been installed If you put weight on the front of the machine while the drawers or units within the machine are pulled out the machine may fall forward To prevent this from happening make sure that the machine s leveling feet are in place Contact an authorized Canon dealer if communication is unavailabl...

Страница 34: ... overheating which could result in a fire If excessive stress is applied to the connection part of the power cord it may damage the power cord or the wires inside the machine may disconnect This could result in a fire Avoid the following situations Connecting and disconnecting the power cord frequently Tripping over the power cord Bending the power cord near the connection part and applying contin...

Страница 35: ...ration View from Above When the optional Inner Finisher B1 is attached Moving the Machine If you intend to move the machine even to a location on the same floor of your building contact your local authorized Canon dealer beforehand Do not attempt to move the machine yourself The width is 1 079 mm when no options are attached Downloaded from ManualsPrinter com Manuals ...

Страница 36: ...switch OFF disconnect the power cord from the power outlet and then contact your local authorized Canon dealer Using the machine in this state may cause a fire or electrical shock Also avoid placing objects around the power plug so that the machine can be disconnected whenever necessary Do not turn the main power switch OFF or open the front covers while the machine is in operation This may result...

Страница 37: ...n extended period of time such as during consecutive holidays This machine generates a slight amount of ozone or other odors during normal use Although sensitivity to ozone or other odors may vary this amount is not harmful Ozone or other odors may be more noticeable during extended use or long production runs especially in poorly ventilated rooms It is recommended that the room be appropriately v...

Страница 38: ... machine as a local printer you can connect the machine and a computer using a USB cable The machine is USB 2 0 high speed compatible After establishing the connection between the machine and the computer you must install the drivers and utilities that match the operating system on your computer For more information on installing the driver through USB connection see the Printer Driver Installatio...

Страница 39: ...tting is enabled See Chapter 7 Other System Settings in the System Settings Guide With the USB connection you cannot use the Remote UI or the Remote Scan function Some utilities are also not functional if the machine is connected to a computer via the USB cable NOTE The appropriate USB interface for Windows 2000 XP Vista 7 Server 2003 Server 2008 is USB 2 0 Hi Speed USB Full Speed USB 1 1 equivale...

Страница 40: ... the power cord from the power outlet IMPORTANT You cannot use the machine as a repeater bridge or gateway NOTE The machine can automatically detect the Ethernet speed 10BASE T or 100BASE TX In a mixed 10BASE T 100BASE TX environment devices on the network hubs routers etc must support the mixed environment For more information contact your local authorized Canon dealer Computer with a 100BASE TX ...

Страница 41: ... shown below For more information on the telephone line contact your local telephone company IMPORTANT Before using the fax function you must set the machine configuration Fore more information see Chapter 1 Introduction to Send and Fax Functions in the Sending and Facsimile Guide Modular cable Telephone wall jack The telephone line jack is located on the left side of the machine Downloaded from M...

Страница 42: ...cribes the setup procedures and guides you to the appropriate manuals for the required setup instructions Turning ON OFF the Machine 2 2 Turning ON the Main Power 2 2 Using the Control Panel Power Switch Sleep Mode 2 4 Turning OFF the Main Power 2 4 Setup Flow 2 5 Downloaded from ManualsPrinter com Manuals ...

Страница 43: ...he Main Power on p 2 4 1 Make sure that the power plug is firmly inserted into the power outlet WARNING Do not connect or disconnect the power cord with wet hands as this may result in electrical shock IMPORTANT If the main power indicator does not light up make sure that the power cord is properly inserted into the machine s socket If the optional Cassette Heater Unit 37 is attached it will enter...

Страница 44: ...ic Operations in the Reference Guide You can select the top screen of the desired function that appears when the machine is turned ON See Chapter 3 Configuring the Machine s Basic Settings in the Reference Guide 3 Wait until the machine is ready to scan The screen on the left is displayed until the machine is ready to scan The screen on the left is displayed when the machine is ready to scan Downl...

Страница 45: ...ntrol panel ON or OFF press the control panel power switch When the control panel is turned OFF the machine is in the Sleep mode NOTE The machine will not enter the Sleep mode when it is in operation The machine can receive forward or print documents when it is in the Sleep mode Control Panel Power Switch Machine Status ON Ready OFF Sleep mode To safely turn OFF the machine s main power press the ...

Страница 46: ...er Manual CD ROM See User Manual CD ROM on p 3 2 NOTE For available functions on a product basis see Available Features on p xiii Required Other functions include Send to USB memory media Searchable PDF and Barcode Printing No Setup Items Function Send E Mail I Fax Send to File Server Fax Fax from a client Computer Print Remote Scan Remote UI Others 1 Cable Connection USB Ethernet Telephone 2 Lice...

Страница 47: ... be received through a POP3 server After activating the Send function optional for the imageRUNNER 2545 2535 2530 2525 2520 specify the following The machine s e mail address The SMTP server The POP3 server 5 Fax Settings See the Sending and Facsimile Guide Before sending receiving faxes you must specify the following Unit telephone number the machine s fax number Telephone line type Unit name 6 S...

Страница 48: ...4 Contents of CD ROM 3 4 System Requirements 3 5 Installation 3 7 PCL User Software 3 10 Contents of CD ROM 3 10 System Requirements 3 11 Installation 3 11 PS User Software Optional 3 12 Contents of CD ROM 3 12 System Requirements 3 13 Installation 3 13 Fax Driver Software Optional 3 15 Contents of CD ROM 3 15 System Requirements 3 16 Installation 3 16 Downloaded from ManualsPrinter com Manuals ...

Страница 49: ...the configuration of your computer some functions may not operate correctly If the PDF manuals do not open from the CD ROM Menu open the PDF files directly from the ENGLISH folder on the User Manual CD ROM Windows Macintosh OS Windows 2000 Service Pack 4 or later Windows XP Service Pack 1a or later Windows Vista Service Pack 2 or later Windows 7 Windows Server 2003 Windows Server 2008 Mac OS X 10 ...

Страница 50: ...stem used For Macintosh users double click the START icon to start the CD ROM Menu a BROWSE MANUAL You can read any of the listed guides by clicking on the desired guide After clicking on the desired guide Adobe Reader Adobe Acrobat Reader starts and the PDF manual is displayed b INSTALL You can install the listed PDF manuals on your computer After clicking INSTALL select the location where you wa...

Страница 51: ...iately divided between the host PC and the printer to greatly reduce the overall printing time The workload can be delegated to match the output data thus realizing a significant increase in speed through optimization Color Network ScanGear With the Color Network ScanGear originals placed in the feeder platen glass can be scanned and imported to a computer on the network The Color Network ScanGear...

Страница 52: ... Before installing the software make sure that your system meets the system requirements outlined below UFRII LT Printer Driver Software Operating Systems Windows 2000 Windows XP Windows Vista Windows 7 Windows Server 2003 Windows Server 2008 Mac OS X 10 4 9 or later NOTE Supported operating systems may vary depending on the version of the printer driver used Hardware Computer Any computer that ru...

Страница 53: ...apable of displaying at least 256 colors A network host adapter capable of TCP IP and UDP IP communication on an Ethernet network IMPORTANT If you want to use the machine as a network scanner it must be connected to a computer over an IPv4 network NOTE When scanning a large number of images or images containing large amounts of image data an insufficient memory error or significant loss of scannin...

Страница 54: ...e For details about the installation procedure see the Printer Driver Installation Guide or Mac Printer Driver Installation Guide CD ROM Menu Windows NOTE View the HTML manuals before you start the installation You cannot view the HTML manuals while the installation is in progress Click to install the printer driver Click to view the Printer Driver Installation Guide Downloaded from ManualsPrinter...

Страница 55: ... desktop You can find the installer and Mac Printer Driver Installation Guide in the folder with the printer driver name Double click the installer icon in the installer set folder to start the installation Displaying the Mac Printer Driver Installation Guide In the installation folder double click Documents Guide the index html icon Downloaded from ManualsPrinter com Manuals ...

Страница 56: ...are 3 9 Accompanying CD ROMs 3 NOTE Depending on the printer model you are using the installation guide may be a PDF file If so double click the PDF icon in the Documents folder Downloaded from ManualsPrinter com Manuals ...

Страница 57: ...host PC s processing power for performing high speed processing PCL6 is an advanced version of PCL5 and offers superior printing quality and speed Printer Driver Installation Guide Read this HTML manual before installing the printer driver Font Manager Use this software to manage fonts and view them accurately in Windows Double click Canonfm the Setup exe icon to install the software For more info...

Страница 58: ... used Hardware Computer Any computer that runs the above systems Memory The amount of memory required to run the above systems correctly Installation From the menu screen of the CD ROM you can begin installing the software or display the HTML manual to view details about the installation procedure CD ROM Menu NOTE View the HTML manuals before you start the installation You cannot view the HTML man...

Страница 59: ...s it to the printer As well as converting print data it can also enable you to configure settings relating to finishing and detailed settings such as halftones and provides an appropriate print environment for desktop publishing and publishing on demand Printer Driver Installation Guide Mac PS Printer Driver Installation Guide Read these HTML manuals before installing the printer driver IMPORTANT ...

Страница 60: ...uter that runs the above systems Memory The amount of memory required to run the above systems correctly Installation From the menu screen of the CD ROM you can begin installing the software or display the HTML manual to view details about the installation procedure For details about the installation procedure see the Printer Driver Installation Guide or Mac Printer Driver Installation Guide CD RO...

Страница 61: ...ore you start the installation You cannot view the HTML manuals while the installation is in progress For details about installing the printer driver and displaying the Mac Printer Driver Installation Guide see UFRII LT User Software on p 3 4 Downloaded from ManualsPrinter com Manuals ...

Страница 62: ...he optional Super G3 Fax Board AG1 Contents of CD ROM Fax Driver With the fax driver installed on your computer you can fax documents directly from applications on your computer desktop instead of scanning originals on the machine Fax Driver Installation Guide Read this HTML manual before installing the fax driver IMPORTANT The drivers included on the CD ROMs support 32 bit operating systems The d...

Страница 63: ...that runs the above systems Memory The amount of memory required to run the above systems correctly Installation From the menu screen of the CD ROM you can begin installing the software or display the HTML manual to view details about the installation procedure CD ROM Menu NOTE View the HTML manuals before you start the installation You cannot view the HTML manuals while the installation is in pro...

Страница 64: ...py 4 2 Printing from a Computer 4 4 Printing from a USB Memory Media Device Media Print 4 6 Sending a Document E Mail I Fax File Server and USB Memory Media Device 4 8 Sending a Fax 4 10 Scanning from a Computer Remote Scan 4 12 Operating the Machine from a Computer Remote UI 4 14 Downloaded from ManualsPrinter com Manuals ...

Страница 65: ...aten cover after placing your originals on the platen glass Enter your department ID and password if the screen prompts you to do so press Log In Out Enter your user ID and password if the screen prompts you to do so press Log In Out Insert the control card if the screen prompts you to do so When you have finished the operations press Log In Out or remove the control card to log out For more infor...

Страница 66: ...y is displayed on the upper right side of the touch panel display When the screen below appears select the original size press OK Start To cancel copying press Stop You can also cancel the current copy job by pressing Cancel on the screen indicating the copy processing status The canceling procedure differs depending on the job status For more information see Chapter 1 Introduction to Copy Functio...

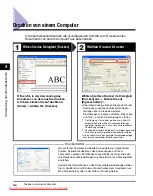
Страница 67: ...inter setting sheet shown on step 3 may vary depending on the application you are using 2 The name of the button to start printing may vary depending on the application you are using The dialog boxes for print settings shown in steps 2 and 4 may vary depending on the application you are using The printer driver installed on your computer enables the machine to print the documents from the applicat...

Страница 68: ... driver To cancel printing on your computer click Cancel in the dialog box that appears when the print data is being processed To cancel printing on the machine s control panel use the System Monitor screen displayed by pressing Stop or System Monitor 2 1 The name of the button to start printing may vary depending on the application you are using 2 The canceling procedure differs depending on the ...

Страница 69: ...ia device has been inserted appears press Done and proceed to the next step If the machine is in the Sleep mode press Power Enter your ID and password or insert the control card if the screen prompts you to do so See How to Log in to the Machine on p 4 2 The USB ports on the right side of the machine are optional USB Application 3 Port Interface Kit A1 The left side USB port is not available when ...

Страница 70: ...elect the folder press Down to display the files select the file To cancel printing press Stop You can also cancel the current print job by pressing Cancel on the screen indicating the print processing status The canceling procedure differs depending on the job status For more information Chapter 3 Managing Print Jobs in the Printer Guide When printing is complete remove the USB memory media devic...

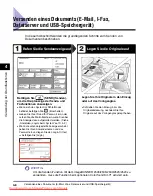
Страница 71: ...it Y1 Display the Send Screen Place Your Originals Press SEND to display the top screen of the Send and Fax functions Place your originals in the feeder or on the platen glass If the machine is in the Sleep mode press Power Enter your ID and password or insert the control card if the screen prompts you to do so See How to Log in to the Machine on p 4 2 If the screen shown below appears enter your ...

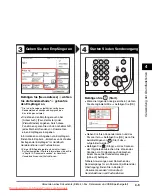
Страница 72: ... Specifying Destinations Easily and Quickly in the Sending and Facsimile Guide Some USB memory media devices are not compatible with the machine For more information see Chapter 2 Sending Documents in the Sending and Facsimile Guide Press Start When the screen below appears select the original size press OK Enter your user name and password press OK if the machine prompts you to do so when you pre...

Страница 73: ...emote UI Guide Display the Send Screen Place Your Originals Press SEND to display the top screen of the Send and Fax functions Place your originals in the feeder or on the platen glass If the machine is in the Sleep mode press Power Enter your ID and password or insert the control card if the screen prompts you to do so See How to Log in to the Machine on p 4 2 If the screen shown below appears en...

Страница 74: ...nformation on specifying destinations see Chapter 4 Specifying Destinations Easily and Quickly in the Sending and Facsimile Guide When the screen below appears select the original size press OK To cancel scanning originals press Stop You can also cancel scanning originals by pressing Cancel on the screen indicating the fax processing status For instructions on how to cancel sending a document duri...

Страница 75: ...iffer from the ones displayed on your computer depending on the application or operating system you are using Switch the Machine Online Place Your Originals Press SCAN PRINT to display the Scan Print screen Remote Scan Online Place your originals in the feeder or on the platen glass Close the feeder platen cover after placing your originals on the platen glass If the machine is in the Sleep mode p...

Страница 76: ...Gear is selected as the scanner to be used For more information see the documentation that comes with your TWAIN compliant application On the Color Network ScanGear dialog box specify the settings such as the color mode and resolution To cancel scanning click Cancel in the dialog box that appears when the scan data is being processed When scanning is complete switch the machine offline For instruc...

Страница 77: ...ENTER key on your computer keyboard On the Remote UI top page displayed in step 1 enter your department ID or user ID and password click OK After successfully logging in the Device Status page is displayed Go to other pages as necessary by using the menu on the left side of the page The ID and password you have to enter when logging in depend on the Remote UI setting Ask your system administrator ...

Страница 78: ... staple cartridges Paper Drawers 5 2 Loading Paper 5 3 Adjusting a Paper Drawer to Hold a Different Paper Size 5 5 Replacing the Toner 5 8 Routine Cleaning 5 13 Platen Glass and Cover 5 13 Feeder Scanning Area and Rollers 5 14 Consumables 5 18 Paper Stock 5 18 Toner 5 19 Stamp Ink Cartridge 5 20 Staple Cartridge 5 20 Genuine Supplies 5 20 Downloaded from ManualsPrinter com Manuals ...

Страница 79: ...ze A4 A4R A3 and A5R Type Plain Recycled Color and 3 hole punch See Available Paper Stock on p 7 2 With the optional Envelope Feeder Attachment D1 the following envelopes can be loaded in the Paper Drawer 2 No 10 COM10 ISO B5 Monarch ISO C5 and DL See Chapter 4 Optional Equipment in the Reference Guide The number of available paper drawers may vary depending on the machine configuration See Availa...

Страница 80: ...ich color images have been copied Do not print on the reverse side of such paper Paper which has been printed on using a thermal transfer printer Do not print on the reverse side of such paper Fan the stack of paper well before loading it and align the edges of the paper stack on a flat surface Never place paper or anything in the empty part of the drawer next to the paper stack Doing so may cause...

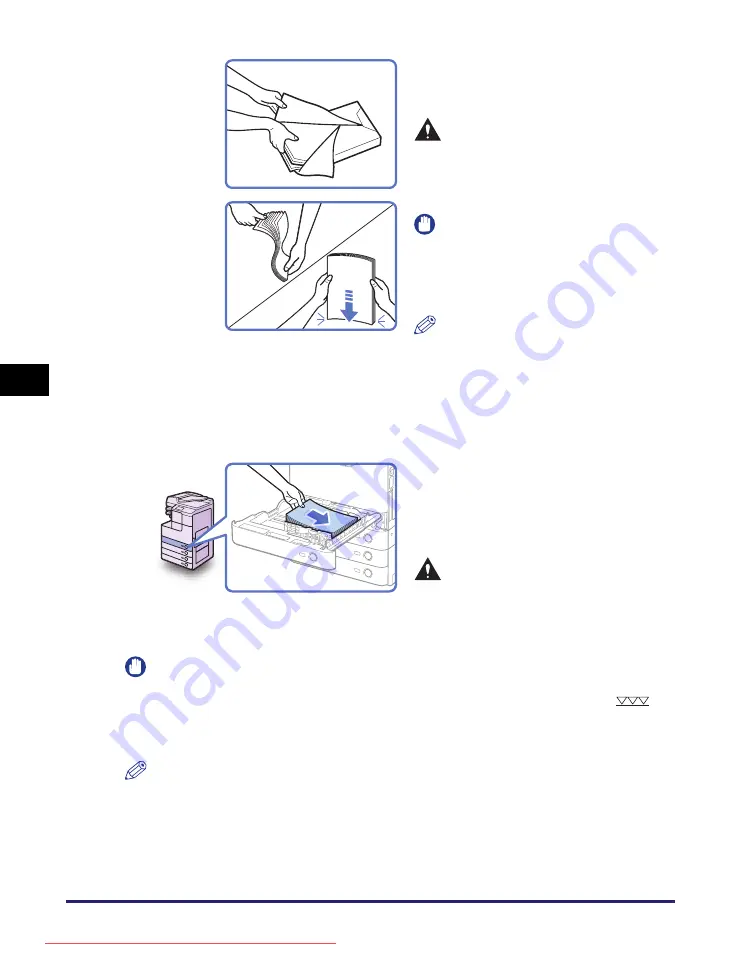
Страница 81: ...printing one sided documents on paper loaded in the paper drawer the side facing up is the one printed on 3 Open a package of paper and take out the paper stack from the package CAUTION Take care not to cut your hands on the edges of the paper when loading it into the machine IMPORTANT Rewrap any remaining paper in its original package and store it in a dry place away from direct sunlight NOTE For...

Страница 82: ...er type as required For help see Chapter 3 Configuring the Machine s Basic Settings in the Reference Guide IMPORTANT Make sure that the paper type setting of the paper drawer matches the type of the paper that is being loaded Adjusting a Paper Drawer to Hold a Different Paper Size If you want to change the size of paper in the paper drawer adjust the slide guides for the new paper size as describe...

Страница 83: ...cause paper jams or dirty prints or make the inside of the machine dirty IMPORTANT Rolled or curled paper must be straightened out prior to use Make sure that the height of the paper stack does not exceed the loading limit marks both on the left and back sides of the slide guides Make sure that the paper size setting of the paper drawer matches the size of the paper that is being loaded 4 Load the...

Страница 84: ...ttings in the Reference Guide IMPORTANT Make sure that the paper type setting of the paper drawer matches the type of the paper that is being loaded 6 Gently push the paper drawer back into the machine until it clicks into place CAUTION When returning the paper drawer to its original position be careful not to get your fingers caught as this may result in personal injury Paper Size Plate Paper Dra...

Страница 85: ... can no longer be made the message Replace the toner appears on the touch panel display Pressing Recover Later enables you to continue operations However you have to replace the toner cartridge to make further prints WARNING Do not burn or throw used toner cartridges into open flames as this may cause the toner remaining inside the cartridges to ignite resulting in burns or a fire Do not store ton...

Страница 86: ...If toner gets onto your hands or clothing wash it off immediately with cold water Washing with warm water may set the toner permanently making the stains impossible to remove When discarding used toner cartridges put the cartridges in a bag to prevent the toner remaining inside the cartridges from scattering and dispose of them in a location away from open flames IMPORTANT Use only toner cartridge...

Страница 87: ...the cartridge and result in burns or a fire 2 Turn the locking lever counterclockwise until it becomes vertical IMPORTANT Make sure that the down arrow on the locking lever is aligned with the up arrow of the Unlock icon position before proceeding IMPORTANT If the toner cartridge cannot be pulled out check that the knob is turned all the way to the appropriate position Do not touch the opening of ...

Страница 88: ...les on p 5 18 Do not touch the opening of the toner cartridge or subject it to shock by hitting it Doing so may cause the toner to leak out of the cartridge 5 Insert the new toner cartridge in the toner supply port as far as it will go Support the new toner cartridge with one hand from underneath while pushing it into the machine with the other hand Downloaded from ManualsPrinter com Manuals ...

Страница 89: ...ht arrow of the Lock icon position 7 Close the toner replacement cover CAUTION When closing the cover be careful not to get your fingers caught as this may result in personal injury IMPORTANT Make sure that you clean the fixing unit every time you replace the toner cartridge See Chapter 5 Routine Maintenance in the Reference Guide Lock icon Downloaded from ManualsPrinter com Manuals ...

Страница 90: ...larly and clean the area around the base of the power plug s metal pins and the power outlet with a dry cloth to ensure that all dust and grime is removed If the power cord is connected for a long period of time in a damp dusty or smoky location dust can build up around the power plug and become damp This may cause a short circuit and result in a fire IMPORTANT Do not dampen the cloth too much as ...

Страница 91: ...lers Clean the feeder scanning area and rollers regularly as described below IMPORTANT Do not dampen the cloth too much as excess water may damage the machine NOTE The Feeder DADF AA1 AB1 is optional for the imageRUNNER 2545 2535 2530 2525 2520 1 Open the feeder cover 2 Clean the rollers a total of three places inside the feeder cover with a water moistened cloth Then wipe the area with a soft dry...

Страница 92: ... wipe the area with a soft dry cloth Spin the rollers with your hand while cleaning them 5 Clean the transparent plastic part of the inner cover with a water moistened cloth Then wipe the area with a soft dry cloth 6 Close the inner cover CAUTION When closing the cover be careful not to get your fingers caught as this may result in personal injury Tab Downloaded from ManualsPrinter com Manuals ...

Страница 93: ...sin roller wipe the resin roller and its surroundings with a water moistened cloth Then wipe the area with a soft dry cloth NOTE If the feed dial cannot be reached while the feeder is opened close the feeder turn the feed dial slightly open the feeder clean the roller Repeat these steps until the roller surface is completely clean Feed Dial Feed Dial Downloaded from ManualsPrinter com Manuals ...

Страница 94: ...TION When closing the feeder be careful not to get your fingers caught as this may result in personal injury Be aware that the light emitted from the platen glass may be very bright when closing the feeder 11 Close the feeder cover CAUTION When closing the cover be careful not to get your fingers caught as this may result in personal injury Feeder Scanning Area Downloaded from ManualsPrinter com M...

Страница 95: ...d A5 recycled paper color paper transparencies recommended for the machine labels and other types of paper stock are available For more information contact your local authorized Canon dealer CAUTION Do not store paper in places exposed to open flames as this may cause the paper to ignite resulting in burns or a fire IMPORTANT To prevent moisture build up tightly wrap any remaining paper in its ori...

Страница 96: ...o clean up spilled toner Doing so may cause a malfunction in the vacuum cleaner or result in a dust explosion due to static discharge CAUTION Keep toner and other consumables out of the reach of small children If these items are ingested consult a physician immediately IMPORTANT Store toner cartridges in a cool location away from direct sunlight The recommended storage conditions are temperatures ...

Страница 97: ...n the touch panel display replace the staple cartridge with a new one Use only staple cartridges intended for use with the machine Staple J1 IMPORTANT The Staple mode is available only when the optional Inner Finisher B1 is attached to the machine Genuine Supplies Canon has developed and manufactured Toner Parts and Supplies specifically for use in this machine For optimal print quality and for op...

Страница 98: ...Clearing Paper Jams 6 2 Fixing Unit 6 3 Paper Drawers 1 and 2 6 5 Feeder 6 9 Service Call Message 6 12 Restarting the Machine 6 12 Using the Machine with Limited Functions 6 13 Requesting Repairs from the Control Panel 6 14 Contacting Your Local Authorized Canon Dealer 6 16 Downloaded from ManualsPrinter com Manuals ...

Страница 99: ...d inside the machine take care not to cut your hands or injure yourself on the parts on the inside of the machine If you cannot remove the paper please contact your local authorized Canon dealer When removing paper which has become jammed inside the machine take care not to allow the toner on the jammed paper to come into contact with your hands or clothing as this will dirty your hands or clothin...

Страница 100: ...ne suddenly starts printing IMPORTANT After you have cleared all the paper jams make sure to return all the levers and covers to their original positions Once you have removed all of the jammed paper printing resumes NOTE When all the paper jams are cleared the machine automatically recalculates the number of copies or prints to make You do not need to re enter the number of copies or prints even ...

Страница 101: ...ding from the lower part of the fixing unit 3 Pull down the upper cover of the fixing unit by the tab and remove any jammed paper CAUTION The fixing unit and its surroundings are subject to high temperatures When removing jammed paper do not touch anything in this area except the jammed paper or the upper cover Downloaded from ManualsPrinter com Manuals ...

Страница 102: ...mmed paper as described below IMPORTANT The procedure described in this section assumes that the machine is equipped with four paper drawers The number of available paper drawers may vary depending on the machine configuration 4 Place your hand where the hand symbol is located on the right cover of the main unit and then gently close the right cover until it clicks into place CAUTION When closing ...

Страница 103: ...he right cover of the main unit and open the right cover 3 Open the paper drawer s right cover and remove any jammed paper 4 Press the button on Paper Drawer 1 and pull out the drawer until it stops 2 Remove any jammed paper Downloaded from ManualsPrinter com Manuals ...

Страница 104: ...til it stops 5 Remove any jammed paper 6 Gently push the drawer back into the machine until it clicks into place CAUTION When returning the paper drawer to its original position be careful not to get your fingers caught as this may result in personal injury 8 Remove any jammed paper Downloaded from ManualsPrinter com Manuals ...

Страница 105: ...riginal position be careful not to get your fingers caught as this may result in personal injury 10 Close the paper drawer s right cover CAUTION When closing the cover be careful not to get your fingers caught as this may result in personal injury 11 Place your hand where the hand symbol is located on the right cover of the main unit and then gently close the right cover until it clicks into place...

Страница 106: ... jammed in the feeder remove the jammed paper as described below IMPORTANT The Feeder DADF AA1 AB1 is optional for the imageRUNNER 2545 2535 2530 2525 2520 2 Open the inner cover holding it by the front tab 1 Open the feeder cover Tab Downloaded from ManualsPrinter com Manuals ...

Страница 107: ...er cover CAUTION When closing the covers be careful not to get your fingers caught as this may result in personal injury 5 Lift the feeder and check for any jammed originals left inside If you find any jammed originals left in the feeder repeat the procedure from step 1 Do not pull the original forcibly because it may tear Feed Dial Jammed original Downloaded from ManualsPrinter com Manuals ...

Страница 108: ...o their original positions Once you have removed all of the jammed paper printing resumes 6 Close the feeder CAUTION When closing the feeder be careful not to get your fingers caught as this may result in personal injury Be aware that the light emitted from the platen glass may be very bright when closing the feeder Downloaded from ManualsPrinter com Manuals ...

Страница 109: ...milar to the one shown below is displayed follow the procedures described below Restarting the Machine If a service call message is displayed restart the machine IMPORTANT If the main power is turned OFF all the jobs in the machine s memory will be erased 1 Turn OFF the machine s main power 2 Wait at least 10 seconds and turn the main power back ON Downloaded from ManualsPrinter com Manuals ...

Страница 110: ... s memory will be erased NOTE Setting the machine to the Limited Functions Mode from the Service Call Message screen enables the Limited Functions Mode in Common Settings See Chapter 3 Configuring the Machine s Basic Settings in the Reference Guide The Service Call Message screen may re appear if the Limited Functions Mode is deactivated without isolating the cause of the malfunction 3 Restart the...

Страница 111: ...erwise damage the power cord If the power cord is damaged this could cause current to leak resulting in a fire or electrical shock IMPORTANT To make repair requests from the touch panel display the machine must be configured beforehand For more information contact your local authorized Canon dealer The machine starts up in the Limited Functions Mode NOTE After the problem with the finisher is solv...

Страница 112: ...l the request by pressing Cancel Yes 4 Press Corrupt Image Paper Jams or Other Problem to select the type of the problem you want to fix press Request The screen on the left appears when your request has successfully been sent NOTE You can cancel the request by pressing Cancel Yes Downloaded from ManualsPrinter com Manuals ...

Страница 113: ...re or otherwise damage the power cord If the power cord is damaged this could cause current to leak resulting in a fire or electrical shock IMPORTANT Even if a blackout occurs or the machine is turned OFF a built in battery retains the documents received in memory for about an hour However if the battery is not fully charged the documents may not be retained To fully charge the built in battery it...

Страница 114: ...CHAPTER 7 1 7 Appendix This chapter describes the types of paper that can be used with the machine and includes the index Available Paper Stock 7 2 Index 7 4 Downloaded from ManualsPrinter com Manuals ...

Страница 115: ...types for the paper drawers see Chapter 3 Configuring the Machine s Basic Settings in the Reference Guide For instructions on how to register paper types for the stack bypass see Chapter 2 Basic Operations and Chapter 3 Configuring the Machine s Basic Settings in the Reference Guide Chlorine free paper can be used with this machine Paper Type Paper Source Paper Drawer 64 to 90 g m2 Stack Bypass 64...

Страница 116: ... 4 Paper Drawer 2 Stack Bypass A4 297 mm 210 mm A4R 210 mm 297 mm A3 297 mm 420 mm A5R 148 mm 210 mm Irregular Size 99 mm to 297 mm 148 mm to 432 mm N A N A Envelope No 10 COM10 104 7 mm 241 3 mm N A Optional ISO B5 176 mm 250 mm N A Optional Monarch 98 4 mm 190 5 mm N A Optional ISO C5 162 mm 229 mm N A Optional DL 110 mm 220 mm N A Optional Paper Drawers 1 2 3 4 Paper See Loading Paper on p 5 3 ...

Страница 117: ...ea and rollers 5 14 Platen glass and cover 5 13 Routine cleaning 5 13 Color Network ScanGear 3 4 Color paper 7 2 Consumables Paper stock 5 18 Stamp ink cartridge 5 20 Staple cartridge 5 20 Toner 5 19 Control panel power switch 2 4 Copying 4 2 Copying Definition of xii D Displays used in this manual x E Ethernet 100BASE TX 1 10 10BASE T 1 10 F Fax Driver 3 15 Fax Driver Installation Guide 3 15 Fax ...

Страница 118: ...10 Network ScanGear Installation Guide 3 5 Network scanning 4 12 P Paper jams 6 2 Feeder 6 9 Fixing unit 6 3 Paper Drawers 1 and 2 6 5 Paper stock 5 18 Paper size 7 3 Paper type 7 2 PCL Printer Driver PCL5 PCL6 3 10 PCL User Software 3 10 Plain paper 7 2 Printer Driver Installation Guide 3 4 3 10 3 12 Printing from a computer 4 4 from USB memory media 4 6 Printing Definition of xii PS Printer Driv...

Страница 119: ...20 Staple cartridge 5 20 Symbols used in this manual viii T Telephone connection 1 12 Toner cartridge 5 8 5 19 Transparency 7 2 Troubleshooting Limited functions 6 13 Service call message 6 12 TWAIN 3 4 U UFRII LT Printer Driver 3 4 UFRII LT User Software 3 4 USB connection 1 9 USB memory media printing 4 6 User Manual CD ROM 3 2 Downloaded from ManualsPrinter com Manuals ...

Страница 120: ...imageRUNNER 2545i 2545 2535i 2535 2530i 2530 2525i 2525 2520i 2520 Guide de l utilisateur Downloaded from ManualsPrinter com Manuals ...

Страница 121: ... des fonctions envoi et télécopie CD ROM Instructions d utilisation du logiciel d administration interface utilisateur distante Guide du logiciel d administration CD ROM Connectivité réseau Gestion de la sécurité Guide des réglages système CD ROM Instructions de Color Network ScanGear Guide de Network ScanGear CD ROM Instructions d impression du support mémoire USB Instructions d utilisation des p...

Страница 122: ...ier disponibles et l index Chapitre 1 Chapitre 2 Chapitre 3 Chapitre 4 Chapitre 5 Chapitre 6 Chapitre 7 Un soin particulier a été apporté à la rédaction de ce guide afin d éviter les inexactitudes ou omissions Toutefois du fait de notre souci constant d amélioration de nos produits il est possible d obtenir des spécifications techniques précises auprès de la société Canon Downloaded from ManualsPr...

Страница 123: ...om du produit xiv Exigences CEM de la directive européenne xiv Directive R TTE xiv Faisceau laser xv Informations complémentaires xv Programme international ENERGY STAR xvi Logo IPv6 Ready xvi Directive DEEE xvii Copyright xvii Logiciel de tierce partie xviii Limites de responsabilité xix Restrictions légales relatives à l utilisation de votre produit et des images xix Super G3 xx Consignes de séc...

Страница 124: ...ise sous tension hors tension de la machine 2 2 Mise sous tension de la machine 2 2 Utilisation de l interrupteur du panneau de commande mode Veille 2 4 Mettez la machine hors tension 2 4 Marche à suivre de l installation 2 6 Chapitre 3 CD ROM livrés avec la machine CD ROM de documentation utilisateur 3 2 Configuration système 3 2 Utilisation du menu du CD ROM 3 3 Logiciel utilisateur UFRII LT 3 4...

Страница 125: ... un ordinateur Lecture à distance 4 12 Opération de la machine à partir d un ordinateur Interface utilisateur distante 4 14 Chapitre 5 Entretien périodique Cassettes 5 2 Chargement de papier 5 3 Modification du format de papier d une cassette 5 5 Remplacement de la cartouche de toner 5 9 Entretien courant 5 14 Vitre d exposition et cache d exposition 5 14 Zone de lecture du chargeur et rouleaux d ...

Страница 126: ...sage d entretien 6 12 Redémarrage de la machine 6 12 Utilisation de la machine avec des fonctions limitées 6 13 Demande de maintenance à partir du panneau de commande 6 14 Contacter votre revendeur Canon agréé local 6 16 Chapitre 7 Annexe Types de papier disponibles 7 2 Index 7 4 Downloaded from ManualsPrinter com Manuals ...

Страница 127: ...rations susceptibles de représenter un danger de mort ou de provoquer des blessures si les instructions ne sont pas respectées Ces recommandations sont à respecter rigoureusement ATTENTION Point important concernant les opérations susceptibles de provoquer des blessures si les instructions ne sont pas respectées Ces recommandations sont à respecter rigoureusement IMPORTANT Point important concerna...

Страница 128: ...strations utilisées dans ce guide Les illustrations utilisées dans ce guide représentent l imprimante imageRUNNER 2545i dotée de l équipement en option suivant le module de finition interne B1 le bac séparateur pour module de finition interne B1 et du socle double cassette AE1 Touches Exemple Panneau de commande Icône de la touche Nom de la touche Mode Utilisateur Afficheur tactile Nom de la touch...

Страница 129: ...ons qui conviennent le mieux à vos besoins Abréviations utilisées dans ce guide Dans ce guide les noms de produits sont abrégés comme suit Système d exploitation Microsoft Windows 2000 Windows 2000 Système d exploitation Microsoft Windows XP Windows XP Système d exploitation Microsoft Windows Vista Windows Vista Système d exploitation Microsoft Windows 7 Windows 7 Système d exploitation Microsoft ...

Страница 130: ...t en mesure de lire l original d un autre utilisateur pour en faire une copie sans qu il soit nécessaire de patienter Il est possible également d effectuer des impressions à l aide d une fonction autre que la copie Au niveau de la machine le déroulement de ces opérations est assez complexe et par conséquent il est probable que les copies ou différents types d impression doivent attendre leur tour ...

Страница 131: ...s qu une copie une télécopie ou des données envoyées à la machine par un ordinateur client Copie Impression de données lues à partir d un original suivie d options de finition notamment l agrafage Downloaded from ManualsPrinter com Manuals ...

Страница 132: ...quipement optionnel du Guide de référence Modèle Copie Lecture à distance Interface utilisateur distante Envoi Télé copieur Impression Chargeur Cassette Fonction OCR PDF USB UFRII LT PCL PS Codes à barres 2 3 4 imageRUNNER 2545i opt opt opt opt opt imageRUNNER 2545 opt opt opt opt opt opt opt opt imageRUNNER 2535i opt opt opt opt opt imageRUNNER 2535 opt opt opt opt opt opt opt opt imageRUNNER 253...

Страница 133: ... exigences CEM de la directive européenne Ce produit est conforme aux spécifications CEM de la directive européenne pour une alimentation secteur nominale de 230 V 50 Hz avec une tension nominale de 220 V 240 V 50 60 Hz L utilisation de câble blindé est nécessaire pour satisfaire aux exigences techniques CEM de la directive européenne Directive R TTE Cet équipement F190300 F190700 F190800 est conf...

Страница 134: ...ion et les portes externes sauf indication expresse du Guide de référence de la machine Informations complémentaires Lors de l entretien ou du réglage du système optique du produit veillez à ne placer aucun objet brillant tournevis etc sur le trajet du faisceau laser En outre les objets personnels tels que montres bagues doivent être enlevés avant d intervenir sur la machine Le faisceau réfléchi v...

Страница 135: ...mme international ENERGY STAR en matière de rendement énergétique Le programme international ENERGY STAR pour l équipement bureautique est destiné à promouvoir les économies d énergie pour les ordinateurs et autres équipements de bureau Il encourage le développement et la diffusion de produits équipés de fonctions réduisant la consommation d énergie de manière efficace Il s agit d un système ouver...

Страница 136: ...électroniques EEE et des piles et accumulateurs Le traitement inapproprié de ce type de déchet risque d avoir des répercussions sur l environnement et la santé humaine du fait de la présence de substances potentiellement dangereuses généralement associées aux équipements électriques ou électroniques Votre coopération envers la mise au rebut correcte de ce produit contribuera à l utilisation effica...

Страница 137: ...z exclusivement le LOGICIEL avec le produit Canon que vous avez acheté le PRODUIT 4 Vous ne devez pas transférer accorder en sous licence vendre diffuser ou céder le LOGICIEL à un tiers sans le consentement écrit préalable des détenteurs du LOGICIEL 5 Nonobstant la disposition ci dessus vous pouvez transférer le LOGICIEL seulement si a vous cédez l ensemble de vos droits afférents au PRODUIT ainsi...

Страница 138: ...nale Vous trouverez ci dessous une liste non exhaustive des documents dont la reproduction peut être interdite Cette liste est uniquement destinée à vous servir de guide Si vous avez un doute sur la légalité de l utilisation de votre produit pour numériser imprimer ou reproduire de quelque manière que ce soit un document particulier et ou sur la légalité de l utilisation des images ainsi numérisée...

Страница 139: ...rées de transmission d environ 3 secondes par page ce qui réduit la facture de téléphone Temps de transmission d environ 3 secondes par page avec un modem 33 6 Kbps basé sur la mire n 1 du CCITT UIT T JBIG mode standard Le réseau téléphonique public commuté RTPC autorise actuellement des vitesses de transmission de 28 8 Kbps ou moins selon l état des lignes téléphoniques Downloaded from ManualsPri...

Страница 140: ... ouvertures d aération de la machine Elles permettent de ventiler correctement ses composants internes Si elles sont obstruées cela risquerait d entraîner une surchauffe de la machine Ne jamais placer la machine sur une surface non rigide telle qu un sofa ou un tapis Ne pas placer la machine à un endroit présentant l une des caractéristiques suivantes emplacement humide ou poussiéreux proximité de...

Страница 141: ...e estrade par exemple sur une surface inclinée ou à un endroit soumis à de fortes vibrations car elle pourrait tomber ou se renverser avec un risque de blessure pour l utilisateur Ne retirez pas les pieds de mise au niveau de la machine une fois que celle ci est installée car elle pourrait tomber ou se renverser avec un risque de blessure pour l utilisateur Alimentation électrique AVERTISSEMENT Ne...

Страница 142: ...une rallonge risque en effet de provoquer un incendie ou une électrocution Si toutefois cela est inévitable utiliser une rallonge prévue pour des tensions supérieures ou égales à 220 240 V CA Enlever le lien du cordon et insérer complètement la fiche dans la rallonge pour assurer une bonne connexion Ne pas utiliser d alimentation autre que celle spécifiée sous peine d incendie ou d électrocution T...

Страница 143: ...rovoquer un incendie toujours mettre l interrupteur principal sur Arrêt et débrancher le câble d interface avant de déplacer la machine On risquerait sinon d endommager le cordon ou le câble et de provoquer un incendie ou une électrocution Assurez vous que la fiche du cordon d alimentation est convenablement insérée dans la prise secteur si la machine a été déplacée N utilisez pas la machine si la...

Страница 144: ...ins les cheveux les vêtements etc de la sortie et des rouleaux du chargeur Même si la machine n est pas en service vos mains vos cheveux ou vos vêtements risquent d être happés par les rouleaux d entraînement ce qui risque de provoquer des blessures ou des dégâts si la machine se met subitement à imprimer Le papier qui sort juste de la machine peut être chaud Faites attention quand vous retirez ou...

Страница 145: ...machine Lire les remarques et instructions qui suivent concernant la sécurité Ne jamais ouvrir un capot si cette ouverture n est pas demandée dans les guides Ne retirez pas les étiquettes d avertissements apposées sur la machine Si les étiquettes ont été retirées contactez votre revendeur agréé Canon local Si le laser n était plus confiné l intérieur de la machine il pourrait provoquer des lésions...

Страница 146: ...ou une électrocution De hautes tensions sont présentes dans certaines zones à l intérieur de la machine Lors de l élimination d un bourrage à l intérieur de la machine ou de toute autre inspection interne veillez à ce qu aucun objet métallique collier bracelet etc ne touche l intérieur de la machine pour éviter les risques de brûlure ou d électrocution Ne pas jeter les cartouches de toner usagées ...

Страница 147: ... électrocution Lorsque vous retirez le papier coincé ou lorsque vous inspectez l intérieur de la machine ne vous exposez pas à la chaleur émise par l ensemble de fixation et ses alentours pendant une durée prolongée Ceci peut provoquer des brûlures à faible température même si vous n avez pas touché directement l unité de fixation et la zone adjacente Lors de l élimination d un bourrage ou du remp...

Страница 148: ...des emplacements exposés à des flammes car ils pourraient alors s enflammer et occasionner des brûlures ou provoquer un incendie En cas de renversement accidentel de toner rassembler avec précaution les particules de toner ou les enlever à l aide d un chiffon doux humide de façon à en éviter l inhalation Ne jamais utiliser un aspirateur non équipé d un dispositif de protection contre les explosion...

Страница 149: ...ENT A l attention des porteurs de stimulateur cardiaque Ce produit émet un flux magnétique de faible intensité En cas de constatation d anomalie il convient de s éloigner et de consulter son médecin Downloaded from ManualsPrinter com Manuals ...

Страница 150: ...des câbles Emplacement d installation et manipulation 1 2 Précautions d installation 1 2 Précautions d emploi 1 7 Branchement des câbles 1 9 Utilisation de la machine comme imprimante locale connexion USB 1 9 Partage de la machine avec d autres utilisateurs réseau 1 11 Utilisation de la machine comme télécopieur 1 13 Downloaded from ManualsPrinter com Manuals ...

Страница 151: ...ons suivantes Les emplacements soumis à une température et une humidité extrêmes qu elles soient faibles ou élevées Evitez par exemple la proximité immédiate de robinets radiateurs humidificateurs climatiseurs sources de chaleur etc Une exposition directe au soleil Si cela n est pas possible protégez la machine des rayons du soleil au moyen de rideaux Assurez vous que les rideaux n obturent pas le...

Страница 152: ...ent portes et fenêtres du local pour travailler dans des conditions plus agréables Les endroits où des vapeurs d ammoniac se dégagent Les endroits soumis à des vibrations Par exemple évitez d installer la machine sur un sol ou support instable Les endroits soumis à de brusques variations de température Des gouttelettes d eau condensation peuvent se former à l intérieur de la machine si celle ci se...

Страница 153: ... au niveau de la machine Ne retirez pas les pieds de mise au niveau de la machine une fois que celle ci est installée Si vous placez un poids sur l avant de la machine alors que les tiroirs ou les unités de la machine sont sortis celle ci risque de tomber vers l avant Pour éviter cela assurez vous que les pieds de mise au niveau de la machine sont en place Contacter un revendeur Canon agréé si la ...

Страница 154: ...n incendie Si une contrainte excessive est appliquée sur la partie de connexion du cordon d alimentation elle risque d endommager ce dernier ou des fils à l intérieur de la machine risquent de se déconnecter Ceci pourrait provoquer un incendie Evitez les situations suivantes branchement et débranchement fréquents du cordon d alimentation trébucher sur le cordon d alimentation plier le cordon d ali...

Страница 155: ...que le module de finition interne B1 en option est installé Avant de déplacer la machine Si vous envisagez de déplacer la machine même sans changer d étage contactez au préalable votre revendeur Canon agréé local N essayez pas de déplacer vous même la machine La largeur d encombrement est de 1 079 mm sans équipement installé 100 mm ou plus 1 341 mm 565 mm 1 367 mm Downloaded from ManualsPrinter co...

Страница 156: ...l débranchez le cordon d alimentation de la prise secteur et contactez votre revendeur Canon agréé local L utilisation de la machine dans cet état risque de provoquer un incendie ou l électrocution Laissez un espace suffisant autour de la prise secteur pour pouvoir la débrancher en cas de nécessité Quand la machine est en cours de fonctionnement ne mettez jamais l interrupteur principal sur Arrêt ...

Страница 157: ...es vacances mettez l interrupteur principal sur Arrêt et débranchez la prise d alimentation Lors du fonctionnement la machine génère de l ozone ou d autres odeurs en faible quantité Bien que la sensibilité à l ozone ou au autre odeurs varie la quantité dégagée n est pas nocive L ozone ou les autres odeurs peuvent devenir gênantes en cas d utilisation prolongée ou de réalisation d un grand nombre d...

Страница 158: ...ne comme imprimante locale connexion USB Pour utiliser la machine comme imprimante locale reliez la à un ordinateur au moyen d un câble USB La machine est compatible avec la norme USB 2 0 High speed Après avoir raccordé la machine à l ordinateur vous devez installer les pilotes et l utilitaire correspondant au système d exploitation installé sur votre ordinateur Pour plus d informations sur l inst...

Страница 159: ... d installation L ordinateur démarre La machine est en cours d impression Si vous débranchez le câble USB de la machine ou de l ordinateur alors qu elle ou qu il est allumé attendez au moins 10 secondes avant de reconnecter le câble Si vous ne respectez pas ce délai la machine ou l ordinateur risque de ne pas fonctionner correctement Assurez vous que le réglage Utiliser périphérique USB est activé...

Страница 160: ...cepte les connexions 10BASE T et 100BASE TX utilisées par la plupart des réseaux locaux Utilisation d Ethernet Reliez le port LAN de la machine à un concentrateur à l aide de l un des types de câble suivants En cas de connexion au port 10BASE T de l ordinateur utilisez un câble LAN à paire torsadée de Catégorie 3 ou supérieure En cas de connexion au port 100BASE TX de l ordinateur utilisez un câbl...

Страница 161: ...0BASE TX Dans un environnement 10BASE T et 100BASE TX les périphériques du réseau concentrateurs routeurs etc doivent supporter un environnement mixte Pour plus d informations contactez le revendeur agréé Canon local Ordinateur équipé d un port 100BASE TX Ordinateur équipé d un port 10BASE T Câble LAN Concentrateur Le port LAN RJ 45 est situé sur le côté gauche de la machine Downloaded from Manual...

Страница 162: ...ué ci dessous Pour plus d informations sur la ligne téléphonique contactez votre compagnie de téléphone locale IMPORTANT Avant d utiliser la fonction de télécopie vous devez configurer la machine Pour plus d informations voir le Chapitre 1 Introduction aux fonctions d envoi et de fax dans le Guide des fonctions envoi et télécopie Câble modulaire Prise téléphonique murale La prise téléphonique se s...

Страница 163: ...Branchement des câbles 1 14 Installation de la machine 1 Downloaded from ManualsPrinter com Manuals ...

Страница 164: ...ie aux guides contenant des instructions d installation spécifiques dont vous aurez éventuellement besoin Mise sous tension hors tension de la machine 2 2 Mise sous tension de la machine 2 2 Utilisation de l interrupteur du panneau de commande mode Veille 2 4 Mettez la machine hors tension 2 4 Marche à suivre de l installation 2 6 Downloaded from ManualsPrinter com Manuals ...

Страница 165: ...sion de la machine Cette section explique comment mettre la machine sous tension REMARQUE Pour plus d informations sur la mise hors tension voir Mettez la machine hors tension p 2 4 1 Assurez vous que la fiche du cordon d alimentation est convenablement insérée dans la prise secteur AVERTISSEMENT Ne pas brancher ou débrancher le cordon d alimentation avec des mains humides car cela pourrait provoq...

Страница 166: ... écran de connexion s affiche Dans ce cas tapez votre numéro de service ou votre code utilisateur et le mot de passe correspondant Voir le Chapitre 2 Opérations de base du Guide de référence Vous pouvez sélectionner l écran supérieur de la fonction désirée qui s affiche lorsque la machine est sous tension Voir le Chapitre 3 Configuration des réglages de base de la machine du Guide de référence 3 P...

Страница 167: ... la machine est en mode Veille REMARQUE La machine ne passe pas en mode Veille lorsque elle est en cours de fonctionnement La machine peut recevoir transmettre ou imprimer des documents en mode Veille Interrupteur du panneau de commande Etat de la machine Marche Prêt Arrêt Mode Veille Pour mettre la machine hors tension en toute sécurité placez l interrupteur principal situé sur le panneau gauche ...

Страница 168: ...iser la machine 2 REMARQUE Vous pouvez utiliser le réglage Délai de fermeture automatique pour mettre automatiquement l imprimante hors tension Voir le Chapitre 3 Configuration des réglages de base de la machine du Guide de référence Downloaded from ManualsPrinter com Manuals ...

Страница 169: ...CD ROM de documentation utilisateur Reportez vous à la section CD ROM de documentation utilisateur p 3 2 REMARQUE Pour accéder aux fonctions disponibles à partir d un produit donné voir Fonctions disponibles p xiii Obligatoire N Option d installation Fonction Envoi d e mail d I fax Envoi au serveur de fichiers Télé copieur Télécopie d un ordinateur client Impres sion Lecture à distance Interface u...

Страница 170: ...e la machine et établissez une connexion entre la machine et un ordinateur du réseau Après avoir relié la machine au réseau configurez la pour l environnement réseau 4 Réglages E mail I Fax Voir le Guide des réglages système Envoi réception d e mails I Fax par le biais du serveur SMTP La réception d e mails I Fax est également possible par le biais d un serveur POP3 Après avoir activé la fonction ...

Страница 171: ...primante Mac Télécopie pilote de télécopie Voir le Guide du pilote de télécopie Windows Lecture à distance Color Network ScanGear Voir le Guide de Network ScanGear 7 Configuration du serveur de fichiers Voir le Guide des réglages système Avant d envoyer vos données à un ordinateur ou au réseau il convient de configurer l ordinateur pour qu il joue le rôle de serveur de fichiers Vous pouvez envoyer...

Страница 172: ...3 4 Contenu du CD ROM 3 4 Configuration système 3 5 Installation 3 7 Logiciel utilisateur PCL 3 10 Contenu du CD ROM 3 10 Configuration système 3 11 Installation 3 11 Logiciel utilisateur PS en option 3 12 Contenu du CD ROM 3 12 Configuration système 3 13 Installation 3 13 Logiciel du pilote de télécopie en option 3 15 Contenu du CD ROM 3 15 Configuration système 3 16 Installation 3 16 Downloaded ...

Страница 173: ...n la configuration de la machine certaines fonctions risquent de ne pas s exécuter correctement Si le guide au format PDF ne s ouvre pas à partir du menu du CD ROM ouvrez les fichiers PDF directement depuis le dossier FRANCAIS sur le CD ROM Windows Macintosh Système d exploitation Windows 2000 Service Pack 4 ou ultérieur Windows XP Service Pack 1a ou ultérieur Windows Vista Service Pack 2 ou ultér...

Страница 174: ...ème d exploitation utilisé Pour les utilisateurs Macintosh double cliquez sur l icône START pour lancer le menu du CD ROM a PARCOURIR GUIDE Pour lire un des guides répertoriés dans la liste cliquez sur son nom Après avoir cliqué sur le nom du guide désiré l application Adobe Reader Adobe Acrobat Reader démarre et le PDF apparaît b Installer Vous pouvez installer les guides de la liste sur votre or...

Страница 175: ...ment exécutées sur l imprimante sont réparties de manière optimale entre l ordinateur hôte et l imprimante réduisant considérablement la durée totale de l impression La charge de travail peut être déléguée afin de s adapter aux données en sortie ce qui contribue à un accroissement notable de la vitesse Color Network ScanGear Avec le logiciel Color Network ScanGear les originaux placés dans le char...

Страница 176: ...bits sur le site Web de Canon Configuration système Avant d installer le logiciel assurez vous que votre système est conforme à la configuration système décrite par la suite Pilote d imprimante UFRII LT Logiciel Systèmes d exploitation Windows 2000 Windows XP Windows Vista Windows 7 Windows Server 2003 Windows Server 2008 Mac OS X 10 4 9 ou ultérieur REMARQUE Les systèmes d exploitation pris en ch...

Страница 177: ... d afficher au moins 256 couleurs Carte réseau hôte supportant les communications TCP IP et UDP IP sur un réseau Ethernet IMPORTANT Si vous voulez utiliser la machine comme scanner réseau elle doit être reliée à un ordinateur par une connexion réseau IPv4 REMARQUE En cas de lecture d un grand nombre d images ou d images contenant un grand nombre de données d image il est possible qu une erreur sig...

Страница 178: ...dure d installation consultez le Guide d installation du pilote d imprimante ou le Guide d installation du pilote d imprimante Mac Menu du CD ROM Windows REMARQUE Prenez connaissance des guides HTML avant de lancer l installation Vous ne pourrez pas les consulter lorsque l installation sera en cours Cliquez pour installer le pilote d imprimante Cliquez pour voir le Guide d installation du pilote d...

Страница 179: ...t le Guide d installation du pilote d imprimante Mac sont disponibles dans le dossier du pilote d imprimante Double cliquez sur l icône du programme d installation qui se trouve dans le dossier du kit d installation pour commencer l installation Affichage du Guide d installation du pilote d imprimante Mac Dans le dossier du programme d installation double cliquez sur Documents Guide icône index ht...

Страница 180: ...hine 3 REMARQUE Selon le modèle de l imprimante utilisé il est possible que le guide d installation se présente sous la forme d un fichier PDF Si tel est le cas double cliquez sur l icône PDF dans le dossier Documents Downloaded from ManualsPrinter com Manuals ...

Страница 181: ...te afin d accélérer le traitement Version avancée de PCL5 PCL6 offre une qualité et une vitesse d impression plus élevées Guide d installation du pilote d imprimante Veuillez lire ce guide HTML avant d installer le pilote d imprimante Font Manager Ce logiciel permet de gérer les polices et de les voir telles qu elles s affichent dans Windows Double cliquez sur Canonfm puis sur l icône Setup exe po...

Страница 182: ...able d exécuter les systèmes d exploitation ci dessus Mémoire Quantité de mémoire nécessaire à l exécution des systèmes d exploitation mentionnés ci dessus Installation A partir de l écran du menu du CD ROM vous pouvez lancer l installation du logiciel ou afficher le manuel HTML pour examiner la procédure d installation détaillée Menu du CD ROM REMARQUE Prenez connaissance des guides HTML avant de...

Страница 183: ... la conversion des données d impression le pilote permet également de configurer les réglages liés à la finition ainsi que les réglages détaillés tels que les demi teintes il fournit un environnement d impression approprié pour la publication assistée par ordinateur et la publication à la demande Guide d installation du pilote d imprimante Guide d installation du pilote d imprimante PS Mac Lisez c...

Страница 184: ...essus Mémoire Quantité de mémoire nécessaire à l exécution des systèmes d exploitation mentionnés ci dessus Installation A partir de l écran du menu du CD ROM vous pouvez lancer l installation du logiciel ou afficher le manuel HTML pour examiner la procédure d installation détaillée Pour connaître en détail la procédure d installation consultez le Guide d installation du pilote d imprimante ou le ...

Страница 185: ... lancer l installation Vous ne pourrez pas les consulter lorsque l installation sera en cours Pour plus d informations sur l installation du pilote d imprimante et l affichage du Guide d installation du pilote d imprimante Mac consultez la section Logiciel utilisateur UFRII LT p 3 4 Downloaded from ManualsPrinter com Manuals ...

Страница 186: ...er G3 AG1 en option Contenu du CD ROM Pilote de télécopie Si le pilote de télécopie est installé sur votre ordinateur vous pouvez télécopier les documents directement à partir des applications de votre bureau au lieu de lire les originaux sur la machine Guide d installation du pilote de télécopie Veuillez lire ce guide HTML avant d installer le pilote de télécopie IMPORTANT Les pilotes inclus dans...

Страница 187: ... dessus Mémoire Quantité de mémoire nécessaire à l exécution des systèmes d exploitation mentionnés ci dessus Installation A partir de l écran du menu du CD ROM vous pouvez lancer l installation du logiciel ou afficher le manuel HTML pour examiner la procédure d installation détaillée Menu du CD ROM REMARQUE Prenez connaissance des guides HTML avant de lancer l installation Vous ne pourrez pas les...

Страница 188: ...ateur 4 4 Impression à partir d un périphérique mémoire USB Impression support 4 6 Envoi d un document E mail I fax serveur de fichiers et périphérique mémoire USB 4 8 Envoi d une télécopie 4 10 Lecture à partir d un ordinateur Lecture à distance 4 12 Opération de la machine à partir d un ordinateur Interface utilisateur distante 4 14 Downloaded from ManualsPrinter com Manuals ...

Страница 189: ...geur la vitre d exposition après avoir placé vos originaux sur la vitre d exposition Saisissez votre n de service et votre mot de passe si l écran vous demande de le faire appuyez sur Log In Out Saisissez votre code utilisateur et votre mot de passe si l écran vous demande de le faire appuyez sur Log In Out Insérez la carte compteur si l écran vous demande de le faire Une fois vos opérations termi...

Страница 190: ...fiche dans le coin supérieur droit de l afficheur tactile Lorsque l écran ci dessous apparaît sélectionnez le format de l original appuyez sur OK Début Pour annuler la copie appuyez sur Arrêt Vous pouvez aussi annuler la tâche en cours en appuyant sur Annuler dans l écran indiquant le statut de traitement de la copie La procédure d annulation diffère en fonction du statut des tâches Pour plus d in...

Страница 191: ...a feuille des réglages d impression indiqué à l étape 3 peut varier en fonction de l application que vous utilisez 2 Le nom du bouton qui lance l impression peut varier en fonction de l application que vous utilisez Les écrans du pilote d imprimante indiqués aux étapes 2 à 4 peuvent varier en fonction de l application que vous utilisez Le pilote d imprimante installé sur votre ordinateur permet à ...

Страница 192: ...au de commande de la machine utilisez l écran Moniteur système qui s affiche en appuyant sur Arrêt ou Moniteur système 2 1 Le nom du bouton qui lance l impression peut varier en fonction de l application que vous utilisez 2 La procédure d annulation diffère en fonction du statut des tâches Pour plus d informations voir le Chapitre 3 Gestion des tâches d impression dans le Guide de l imprimante Pou...

Страница 193: ...r Fin et passez à l étape suivante Si la machine est en mode Veille appuyez sur Interrupteur Saisissez votre code utilisateur et votre mot de passe ou insérez la carte compteur si l écran vous demande de le faire Reportez vous à la section Comment se connecter à la machine p 4 2 Les ports USB sur le côté droit de la machine sont en option Kit Interface 3 ports USB A1 Le port USB du côté gauche n e...

Страница 194: ... sur Bas pour afficher les fichiers sélectionnez le fichier Pour annuler l impression appuyez sur Arrêt Vous pouvez aussi annuler la tâche d impression en cours en appuyant sur Annuler dans l écran indiquant le statut de traitement de l impression La procédure d annulation diffère en fonction du statut des tâches Pour plus d informations voir le Chapitre 3 Gestion des tâches d impression dans le G...

Страница 195: ...inaux Appuyez sur SEND Envoi pour afficher l écran supérieur des fonctions envoi et télécopie Si la machine est en mode Veille appuyez sur Interrupteur Saisissez votre code utilisateur et votre mot de passe ou insérez la carte compteur si l écran vous demande de le faire Reportez vous à la section Comment se connecter à la machine p 4 2 Si l écran ci dessous s affiche saisissez votre nom d utilisa...

Страница 196: ...rmations sur l annulation de l envoi d un document pendant la transmission reportez vous au Chapitre 2 Envoi de documents dans le Guide des fonctions envoi et télécopie Les méthodes d envoi disponibles proposées à l écran varient en fonction des réglages définis Vous pouvez également spécifier le destinataire à l aide de Carnet d adresses Boutons favoris ou Btns comp 1 touche Ces fonctions vous pe...

Страница 197: ...onction Envoi Placer à originaux Appuyez sur SEND Envoi pour afficher l écran supérieur des fonctions envoi et télécopie Si la machine est en mode Veille appuyez sur Interrupteur Saisissez votre code utilisateur et votre mot de passe ou insérez la carte compteur si l écran vous demande de le faire Reportez vous à la section Comment se connecter à la machine p 4 2 Si l écran ci dessous s affiche sa...

Страница 198: ...tinataires voir le Chapitre 4 Spécification facile et rapide des destinataires dans le Guide des fonctions envoi et télécopie Appuyez sur Début Lorsque l écran ci dessous apparaît sélectionnez le format de l original appuyez sur OK Pour annuler la lecture des originaux appuyez sur Arrêt Vous pouvez aussi annuler la lecture des originaux en appuyant sur Annuler dans l écran indiquant le statut de t...

Страница 199: ... ordinateur en fonction de l application ou du système d exploitation utilisé Mettez la machine en ligne Placez vos originaux Appuyez sur SCAN PRINT Lecture Impression pour afficher l écran Lecture Impression Lecture à distance En ligne Placez vos originaux dans le chargeur ou sur la vitre d exposition Fermez le chargeur la vitre d exposition après avoir placé vos originaux sur la vitre d expositi...

Страница 200: ... soit sélectionné comme le scanner à utiliser Pour plus d informations voir la documentation fournie avec votre application compatible TWAIN Dans la boîte de dialogue du Color Network ScanGear spécifiez les réglages tels que le mode et la résolution des couleurs Pour annuler la lecture cliquez sur Annuler dans la boîte de dialogue qui s affiche lorsque les données de lecture sont traitées Lorsque ...

Страница 201: ...avier de votre ordinateur Dans la page supérieure de l interface utilisateur distante affichée à l étape 1 saisissez votre n de service ou votre code utilisateur et votre mot de passe cliquez sur OK Unefoisconnectéavecsuccès la pageStatut dupériphérique s affiche Allez dans les autres pages si nécessaire en utilisant le menu dans le côté gauche de la page Le n de service code utilisateur et le mot...

Страница 202: ... 2 Chargement de papier 5 3 Modification du format de papier d une cassette 5 5 Remplacement de la cartouche de toner 5 9 Entretien courant 5 14 Vitre d exposition et cache d exposition 5 14 Zone de lecture du chargeur et rouleaux d entraînement 5 15 Consommables 5 19 Consommables papier 5 19 Toner 5 20 Cartouche d encre de marquage 5 21 Cartouche d agrafes 5 21 Fournitures Canon 5 21 Downloaded f...

Страница 203: ... A5R Type Ordinaire Recyclé Couleur et 3 perforations Voir Types de papier disponibles p 7 2 Si vous avez installé le module enveloppes D1 en option vous pouvez charger les enveloppes suivantes dans la cassette 2 No 10 COM10 ISO B5 Monarch ISO C5 et DL Voir le Chapitre 4 Equipement optionnel dans le Guide de référence Le nombre de cassettes disponibles peut varier en fonction de la configuration d...

Страница 204: ...té reproduites n imprimez pas de l autre côté de cette feuille recto ou verso d une feuille de papier imprimée avec une imprimante à transfert thermique n imprimez pas de l autre côté de cette feuille Avant de charger le papier déramez correctement les feuilles et veillez à bien aligner les bords de la pile de papier sur une surface plane N introduisez jamais de feuilles ou d autres objets dans le...

Страница 205: ... côté imprimé est le côté orienté vers le haut dans la cassette 3 Ouvrez une ramette de papier et ôtez la pile de papier de l emballage ATTENTION Lors de l approvisionnement en papier veillez à ne pas vous couper avec le bord des feuilles IMPORTANT Remettez le papier non utilisé dans son emballage et conservez le dans un endroit sec à l abri du soleil REMARQUE Pour des impressions de qualité utili...

Страница 206: ...ent l impression dès que vous remettez le papier qui convient 6 Spécifiez le type de papier qui convient Pour plus d informations voir le Chapitre 3 Configuration des réglages de base de la machine du Guide de référence IMPORTANT Veillez à ce que le type de papier chargé dans la cassette corresponde au type de papier configuré Modification du format de papier d une cassette Pour modifier le format...

Страница 207: ...l avant afin de l aligner par rapport au repère correspondant au format de papier voulu IMPORTANT Réglez correctement la position des guides Un mauvais réglage peut entraîner des bourrages papier nuire à la qualité d impression ou provoquer un encrassement à l intérieur de la machine 1 Sortez la cassette et retirez le papier qui se trouve à l intérieur Pour savoir comment sortir la cassette report...

Страница 208: ...Indiquez le format de papier utilisé au moyen du disque prévu à cet effet dans la cassette IMPORTANT Il est possible que certains des formats de papier inscrits sur le disque ne soient pas compatibles avec la machine utilisée 4 Chargez le papier de format approprié dans la cassette ATTENTION Lors de l approvisionnement en papier veillez à ne pas vous couper avec le bord des feuilles Disque des for...

Страница 209: ...e référence IMPORTANT Veillez à ce que le type de papier défini pour la cassette corresponde à celui du papier en cours de chargement 6 Repoussez doucement la cassette dans son logement jusqu à ce qu elle soit bien en place ATTENTION En remettant la cassette dans sa position initiale veillez à ne pas vous blesser en vous pinçant les doigts Downloaded from ManualsPrinter com Manuals ...

Страница 210: ...fisante pour imprimer le message Remplacer le toner apparaît sur l afficheur tactile Appuyez sur Plus tard pour poursuivre vos opérations Vous devrez cependant remplacer la cartouche de toner pour effectuer d autres impressions AVERTISSEMENT Ne pas jeter les cartouches de toner usagées au feu car les résidus de toner pourraient s enflammer et occasionner des brûlures ou provoquer un incendie Ne st...

Страница 211: ...les vêtements Si du toner entre en contact avec les mains ou les vêtements lavez les immédiatement à l eau froide Un lavage à l eau chaude aurait pour effet de fixer l encre et de rendre les taches indélébiles Lorsque vous remplacez des cartouches de toner déposez les cartouches usagées dans un sac afin d éviter que les résidus de toner se détachent et mettez les au rebut dans un endroit à l abri ...

Страница 212: ...ent s enflammer et occasionner des brûlures ou provoquer un incendie 2 Tournez le levier de verrouillage dans le sens inverse des aiguilles d une montre pour le mettre en position verticale IMPORTANT Avant de continuer assurez vous que la flèche vers le bas sur le levier de verrouillage est alignée sur la flèche vers le haut de l icône Déverrouillage IMPORTANT Si vous ne parvenez pas à extraire la...

Страница 213: ...e toner prévues pour la machine Voir Consommables p 5 19 Ne touchez pas l ouverture de la cartouche de toner et évitez le moindre choc Vous risqueriez en effet de provoquer une fuite 5 Insérez à fond la nouvelle cartouche de toner dans l orifice du système d approvisionnement Introduisez la cartouche d une main en la prenant par dessous de l autre main Downloaded from ManualsPrinter com Manuals ...

Страница 214: ...verrouillage est alignée sur la flèche vers la droite de l icône Verrouillage 7 Fermez le cache de remplacement du toner ATTENTION Prenez garde à ne pas vous coincer les doigts lors de la fermeture IMPORTANT Veillez à nettoyer l unité de fixation à chaque remplacement de la cartouche d encre Voir le Chapitre 5 Entretien périodique du Guide de référence Icône Verrouillage Downloaded from ManualsPri...

Страница 215: ...eur et nettoyer la zone située autour des broches métalliques de la fiche ainsi que la prise secteur avec un chiffon sec pour enlever toute la poussière et la saleté Si la machine demeure branchée trop longtemps dans un local humide poussiéreux ou enfumé la poussière risque de s accumuler autour de la prise et de prendre l humidité Cela peut entraîner un court circuit et déclencher un incendie IMP...

Страница 216: ...ur et les rouleaux d entraînement de façon régulière comme indiqué ci après IMPORTANT N utilisez pas de chiffon trop humide car l excès d eau pourrait détériorer la machine REMARQUE Le chargeur CRV AA1 AB1 est disponible en option sur l imageRUNNER 2545 2535 2530 2525 2520 1 Ouvrez le capot du chargeur 2 Nettoyez les rouleaux à trois endroits différents à l intérieur du capot du chargeur au moyen ...

Страница 217: ...nsuite la surface à l aide d un chiffon doux et sec Faites tourner les rouleaux avec vos doigts pendant que vous les nettoyez 5 Nettoyez la partie en plastique transparent du capot interne au moyen d un chiffon humecté d eau Essuyez ensuite la surface à l aide d un chiffon doux et sec 6 Refermez le capot interne ATTENTION Prenez garde à ne pas vous coincer les doigts lors de la fermeture Loquet Do...

Страница 218: ...s parties environnantes à l aide d un chiffon humecté d eau Essuyez ensuite la surface à l aide d un chiffon doux et sec REMARQUE Si la molette d alimentation ne peut être atteinte lorsque le chargeur est ouvert fermez le chargeur tournez légèrement la molette d alimentation ouvrez le chargeur nettoyez le rouleau Répétez ces étapes jusqu à ce que la surface du rouleau soit entièrement nettoyée Mol...

Страница 219: ...fon doux et sec 10 Fermez le chargeur ATTENTION En refermant le chargeur veillez à ne pas vous blesser en vous pinçant les doigts Rappelez vous que la lumière émise par la vitre d exposition peut être particulièrement aveuglante 11 Fermer le capot du chargeur ATTENTION Prenez garde à ne pas vous coincer les doigts lors de la fermeture Zone de lecture du chargeur Downloaded from ManualsPrinter com ...

Страница 220: ...yclé du papier en couleur des transparents spécifiques à la machine des étiquettes et d autres types de consommables papier Pour plus d informations contactez le revendeur agréé Canon local ATTENTION Ne stockez pas le papier dans des endroits exposés aux flammes car il pourrait s enflammer et provoquer des brûlures ou un incendie IMPORTANT Pour éviter que le papier non utilisé se dégrade à cause d...

Страница 221: ...e poussières pour nettoyer le toner renversé Cela peut entraîner un dysfonctionnement de l aspirateur ou une explosion de poussières due à une décharge électrostatique ATTENTION Conserver le toner et les autres consommables hors de portée des enfants En cas d ingestion consulter immédiatement un médecin IMPORTANT Stockez les cartouches de toner dans un endroit frais à l abri des rayons du soleil L...

Страница 222: ...tile pour vous demander de mettre des agrafes remplacez la cartouche d agrafes par une cartouche neuve Utilisez exclusivement des cartouches d agrafes prévues pour la machine Agrafes J1 IMPORTANT La fonction d agrafage est disponible à condition d avoir installé le module de finition interne B1 en option Fournitures Canon Canon a développé et fabriqué des produits toner pièces et consommables spéc...

Страница 223: ...Consommables 5 22 Entretien périodique 5 Downloaded from ManualsPrinter com Manuals ...

Страница 224: ...ges papier 6 2 Unité de fixation 6 3 Cassettes 1 et 2 6 5 Chargeur 6 9 Message d entretien 6 12 Redémarrage de la machine 6 12 Utilisation de la machine avec des fonctions limitées 6 13 Demande de maintenance à partir du panneau de commande 6 14 Contacter votre revendeur Canon agréé local 6 16 Downloaded from ManualsPrinter com Manuals ...

Страница 225: ...r avec le bord de l original ou d une feuille de papier Lors de l élimination d un bourrage à l intérieur de la machine procédez avec précaution car vous risquez de vous couper les mains ou de vous blesser avec les pièces Si le papier reste bloqué contactez votre revendeur Canon local agréé Lors de l élimination d un bourrage à l intérieur de la machine évitez de toucher l encre des feuilles coinc...

Страница 226: ... se met subitement à imprimer IMPORTANT Après avoir éliminé tous les bourrages papier n oubliez pas de remettre tous les leviers capots et portes dans leur position initiale L impression peut alors reprendre REMARQUE Une fois tous les bourrages papier résolus la machine recalcule automatiquement le nombre de copies ou d impressions à effectuer Il n est pas nécessaire de saisir à nouveau le nombre ...

Страница 227: ...nité de fixation 3 Abaissez le capot supérieur de l unité de fixation en agissant sur son loquet puis dégagez le papier coincé ATTENTION L unité de fixation et la zone adjacente sont soumises à des températures très élevées Lors de l élimination d un bourrage papier veillez à ne rien toucher dans cette zone à l exception du papier coincé ou du capot supérieur Downloaded from ManualsPrinter com Man...

Страница 228: ...er bloqué comme indiqué ci après IMPORTANT La procédure décrite dans cette section suppose que la machine est équipée de quatre cassettes Le nombre de cassettes disponibles peut varier en fonction de la configuration de la machine 4 Placez votre main sur l emplacement du symbole en forme de main situé sur la porte droite de la machine puis refermez la délicatement jusqu à ce qu elle s enclenche AT...

Страница 229: ...te droite de la machine et ouvrez la porte droite 3 Ouvrez la porte droite de la cassette et dégagez le papier coincé 4 Appuyez sur le bouton de la cassette 1 puis sortez la cassette jusqu à ce qu elle s immobilise 2 Retirez le papier coincé Downloaded from ManualsPrinter com Manuals ...

Страница 230: ... qu elle s immobilise 5 Retirez le papier coincé 6 Repoussez doucement la cassette dans son logement jusqu à ce qu elle soit bien en place ATTENTION En remettant la cassette dans sa position initiale veillez à ne pas vous blesser en vous pinçant les doigts 8 Retirez le papier coincé Downloaded from ManualsPrinter com Manuals ...

Страница 231: ...ENTION En remettant la cassette dans sa position initiale veillez à ne pas vous blesser en vous pinçant les doigts 10 Refermez la porte droite de la cassette ATTENTION Prenez garde à ne pas vous coincer les doigts lors de la fermeture 11 Placez votre main sur l emplacement du symbole en forme de main situé sur la porte droite de la machine puis refermez la délicatement jusqu à ce qu elle s enclenc...

Страница 232: ...argeur retirez le papier bloqué comme indiqué ci après IMPORTANT Le chargeur CRV AA1 AB1 est disponible en option sur l imageRUNNER 2545 2535 2530 2525 2520 2 Ouvrez le capot interne en le saisissant par son loquet avant 1 Ouvrez le capot du chargeur Loquet Downloaded from ManualsPrinter com Manuals ...

Страница 233: ...uis le capot du chargeur ATTENTION Prenez garde à ne pas vous coincer les doigts lors de la fermeture des capots 5 Soulevez le chargeur et assurez vous qu aucun original n est resté coincé Si vous constatez un bourrage recommencez la procédure à partir de l étape 1 Ne tirez pas trop fort sur l original car il pourrait se déchirer Molette d alimentation Original coincé Downloaded from ManualsPrinte...

Страница 234: ... leviers capots et portes dans leur position initiale L impression peut alors reprendre 6 Fermez le chargeur ATTENTION En refermant le chargeur veillez à ne pas vous blesser en vous pinçant les doigts Rappelez vous que la lumière émise par la vitre d exposition peut être particulièrement aveuglante Downloaded from ManualsPrinter com Manuals ...

Страница 235: ...s affiche suivez les procédures décrites ci après Redémarrage de la machine Si un Message d entretien s affiche redémarrez la machine IMPORTANT La mise hors tension de la machine a pour effet d effacer toutes les tâches enregistrées dans la mémoire de la machine 1 Mettez la machine hors tension 2 Patientez 10 secondes au moins puis mettez à nouveau la machine sous tension Downloaded from ManualsPr...

Страница 236: ... vous sélectionnez le mode Fonctions limitées à partir de l écran Message d entretien vous accédez aux réglages communs pour ce mode Voir le Chapitre 3 Configuration des réglages de base de la machine du Guide de référence L écran Message d entretien risque de réapparaître si le mode Fonctions limitées est désactivé sans isoler l origine du dysfonctionnement 3 Redémarrez la machine Mettez la machi...

Страница 237: ...r celui ci notamment en exposant les fils internes ou en les arrachant Un cordon endommagé peut provoquer une fuite de courant avec risque d incendie ou d électrocution IMPORTANT Pour émettre ce type de requête vous devez configurer la machine au préalable Pour plus d informations contactez le revendeur agréé Canon local La machine démarre en mode Fonctions limitées REMARQUE Une fois que le problè...

Страница 238: ...uyer sur Annuler Oui 4 Appuyez sur Image altérée Bourrages papier ou Autre problème pour sélectionner le type de problème à résoudre appuyez sur Requête L écran ci contre s affiche une fois la requête de maintenance envoyée REMARQUE Pour annuler votre requête il suffit alors d appuyer sur Annuler Oui Downloaded from ManualsPrinter com Manuals ...

Страница 239: ...ou en les arrachant Un cordon endommagé peut provoquer une fuite de courant avec risque d incendie ou d électrocution IMPORTANT En cas de coupure de courant ou de mise hors tension de la machine la batterie intégrée conserve les documents en mémoire pendant environ une heure Cependant si la batterie n est pas complètement chargée les documents risquent d être perdus la charge complète de la batter...

Страница 240: ...CHAPITRE 7 1 7 Annexe Ce chapitre décrit les types de papier compatibles avec la machine et comprend un index Types de papier disponibles 7 2 Index 7 4 Downloaded from ManualsPrinter com Manuals ...

Страница 241: ...s voir le Chapitre 3 Configuration des réglages de base de la machine du Guide de référence Pour plus d informations sur la manière d enregistrer les types de papier pour le plateau d alimentation voir le Chapitre 2 Opérations de base et le Chapitre 3 Configuration des réglages de base de la machine du Guide de référence Il est possible d utiliser du papier sans chlore avec cette machine Type de p...

Страница 242: ...ssettes 1 3 4 Cassette 2 Plateau d alimentation A4 297 mm 210 mm A4R 210 mm 297 mm A3 297 mm 420 mm A5R 148 mm 210 mm Format irrégulier 99 mm à 297 mm 148 mm à 432 mm N D N D Enveloppe No 10 COM10 104 7 mm 241 3 mm N D En option ISO B5 176 mm 250 mm N D En option Monarch 98 4 mm 190 5 mm N D En option ISO C5 162 mm 229 mm N D En option DL 110 mm 220 mm N D En option Cassettes 1 2 3 4 Papier Voir l...

Страница 243: ...nexion réseau 1 11 Connexion téléphonique 1 13 Connexion USB 1 9 Consignes de sécurité Alimentation électrique xxii Autres points importants xxx Consommables xxix Entretien et inspection xxvii Installation xxi Manipulation xxiv Consommables Cartouche d agrafes 5 21 Cartouche d encre de marquage 5 21 Consommables papier 5 19 Toner 5 20 Consommables papier 5 19 Format de papier 7 3 Type de papier 7 ...

Страница 244: ...rtir d un ordinateur 4 4 à partir d un périphérique mémoire USB 4 6 Impression du périphérique mémoire USB 4 6 Impression support 4 6 Impression définition xii Installation Alimentation électrique 1 4 Consignes de sécurité xxi Déplacement de la machine 1 6 Emplacement et manipulation 1 2 Précautions 1 2 Interface utilisateur distante 4 14 Interrupteur du panneau de commande 2 4 L Lecture à distanc...

Страница 245: ...mante PS 3 12 Pilote d imprimante PS Mac 3 12 Pilote d imprimante UFRII LT 3 4 Pilote d imprimante UFRII LT Mac 3 4 Pilote de télécopie 3 15 Précautions d emploi 1 7 R Redémarrage 6 12 Revendeur Canon 6 16 S Surface suffisante 1 6 T Télécopie 4 10 Touches et boutons utilisées dans ce guide ix Transparent 7 2 TWAIN 3 4 Z Zone de lecture du chargeur 5 18 Downloaded from ManualsPrinter com Manuals ...

Страница 246: ...imageRUNNER 2545i 2545 2535i 2535 2530i 2530 2525i 2525 2520i 2520 Anwenderhandbuch Downloaded from ManualsPrinter com Manuals ...

Страница 247: ...ktionen CD ROM Anleitungen zum Arbeiten mit dem Remote User Interface Anwenderschnittstelle Handbuch Remote UI CD ROM Netzwerverbindung Sicherheitsverwaltung Handbuch zu den Systemeinstellungen CD ROM Anleitungen für Color Network ScanGear Handbuch zum Network ScanGear CD ROM Anleitungen für USB Speicher Mediendruck Anleitungen zum Arbeiten mit dem PS PCL UFRII LT Drucker Druckerhandbuch CD ROM An...

Страница 248: ...rtypen und den Index Kapitel 1 Kapitel 2 Kapitel 3 Kapitel 4 Kapitel 5 Kapitel 6 Kapitel 7 Bei der Erstellung dieser Handbücher und Anleitungen wurden größte Anstrengungen unternommen um Ungenauigkeiten und Auslassungen zu vermeiden Außerdem kann es aufgrund von Produktverbesserungen zu Abweichungen kommen Bitte kontaktieren Sie Canon falls Sie genaue Spezifikationen benötigen Downloaded from Manu...

Страница 249: ...linie xiv R TTE Richtlinie xiv Hinweise zur Sicherheit des Lasers xv Zusätzliche Informationen xv Internationales ENERGY STAR Programm xvi IPv6 Ready Logo xvi Richtlinie über Elektro und Elektronik Altgeräte WEEE xvii Copyright xviii Software von Drittanbietern xviii Hinweise zum Haftungsausschluss xix Rechtliche Beschränkungen zur Verwendung des Systems und der damit produzierten Bilder xx Super ...

Страница 250: ...r Inbetriebnahme des Systems Das System ein ausschalten 2 2 Einschalten des Hauptschalters 2 2 Verwenden des Bedienfeldschalters Schlafmodus 2 4 Ausschalten des Hauptschalters 2 4 Arbeitsablauf beim Einrichten 2 6 Kapitel 3 Mitgelieferte CD ROMs CD ROM Anwenderhandbuch 3 2 Systemanforderungen 3 2 Verwenden des CD ROM Menüs 3 3 UFRII LT Anwendersoftware 3 4 Inhalt der CD ROM 3 4 Systemanforderungen...

Страница 251: ...5 3 Einrichten einer Kassette für ein anderes Papierformat 5 5 Austauschen der Tonerpatrone 5 9 Regelmäßige Reinigung 5 14 Vorlagenglas und Abdeckung 5 14 Scanbereich und Walzen des Einzugs 5 15 Verbrauchsmaterial 5 19 Druck Kopiermaterial 5 19 Toner 5 20 Vorsicht vor gefälschten Toner 5 21 Patrone für Stempel 5 21 Heftklammermagazin 5 21 Originalverbrauchsmaterial 5 22 Kapitel 6 Störungsbeseitigu...

Страница 252: ...vii Kapitel 7 Anhang Geeignetes Druck Kopiermaterial 7 2 Index 7 4 Downloaded from ManualsPrinter com Manuals ...

Страница 253: ...ngen oder Tod die Folge sein Bitte beachten Sie diese Warnungen unbedingt um den sicheren Betrieb zu gewährleisten VORSICHT VORSICHT So wird eine Vorsichtsmaßnahme bezüglich Vorgängen gekennzeichnet die zu Personenschäden führen können wenn sie nicht korrekt ausgeführt werden Bitte beachten Sie diese Maßnahmen unbedingt um den sicheren Betrieb zu gewährleisten WICHTIG So werden Warnungen zur Bedie...

Страница 254: ...enutzerschnittstellen auf den Computer Bildschirmen Abbildungen in diesem Handbuch Die in dieser Anleitung verwendeten Abbildungen des Systems beziehen sich auf den imageRUNNER 2545i mit dem folgenden Sonderzubehör Finisher intern B1 Zusätzliches Finisherfach B1 und Kassetteneinheit AE1 Tasten Beispiel Bedienfeld Tastensymbol Tastenname Zusatzfunktionen Touchscreen Display Tastenname OK Abbruch us...

Страница 255: ...rt Wählen Sie die Taste oder Schaltfläche die am besten für Ihre Anforderungen geeignet ist Abkürzungen in diesem Handbuch In diesem Handbuch werden die Produktnamen wie folgt abgekürzt Betriebssystem Microsoft Windows 2000 Windows 2000 Betriebssystem Microsoft Windows XP Windows XP Betriebssystem Microsoft Windows Vista Windows Vista Betriebssystem Microsoft Windows 7 Windows 7 Betriebssystem Mic...

Страница 256: ...obald das System z B das Original zum Kopieren gescannt hat können Sie ohne Verzögerung das nächste scannen Auch Drucken mit einer anderen Funktion als der Kopierfunktion ist möglich Zur Verwaltung von Kopier und Druckaufträgen weist das System den einzelnen Aufträgen einen Platz in der Druckreihenfolge zu so dass in einigen Fällen kurze Wartezeiten entstehen Um in diesen Anleitungen Begriffsklarh...

Страница 257: ...e Kopie ein Fax oder die von einem Client Computer an das System gesendeten Druckdaten Kopieren Ausdrucken von Daten eines gescannten Originals mit anschließenden Finishing Optionen wie z B Heften Downloaded from ManualsPrinter com Manuals ...

Страница 258: ...atzausstattung finden Sie in Kapitel 4 Zusatzausstattung im Referenzhandbuch Modell Kopie Remote Scan Remote UI Sen den Fax Druck Einzug Kassette Durch such bare PDF USB UFRII LT PCL PS Bar code 2 3 4 imageRUNNER 2545i opt opt opt opt opt imageRUNNER 2545 opt opt opt opt opt opt opt opt imageRUNNER 2535i opt opt opt opt opt imageRUNNER 2535 opt opt opt opt opt opt opt opt imageRUNNER 2530i opt opt...

Страница 259: ...lt die wesentlichen EMC Anforderungen der EU Richtlinie Wir erklären hiermit dass dieses Produkt mit den EMC Anforderungen der EU Richtlinie zu Stromversorgungsnetzen von 230V 50 Hz genügt obwohl die Nennlast des Produktes bei 220 bis 240V 50 60 Hz liegt Die Verwendung von abgeschirmten Kabeln ist notwendig um die technischen EMC Anforderungen der EU Richtlinie zu erfüllen R TTE Richtlinie Dieses ...

Страница 260: ...ht dazu aufgefordert werden dürfen Sie Schutzgehäuse oder äußere Abdeckungen nicht entfernen Zusätzliche Informationen Wenn das System gewartet oder justiert werden muss legen Sie bitte auf keinen Fall Schraubenzieher oder andere spiegelnde Objekte in den Pfad des Laserstrahls Auch Ringe und Uhren sollten Sie ablegen bevor Sie mit Arbeiten im Inneren des Systems beginnen Der reflektierte Strahl ob...

Страница 261: ... dieses Produkt das ENERGY STAR Programm für die Ernergieeinsparung erfüllt Das internationale ENERGY STAR Programm für Bürogeräte ist ein internationales Programm zur Förderung eines energiebewussten Einsatzes von Computern und anderen Bürogeräten Im Rahmen dieses Programms wird die Entwicklung und Verbreitung von Produkten gefördert die über Energiesparfunktionen verfügen Es handelt sich um ein ...

Страница 262: ...Dies kann z B durch Rückgabe beim Kauf eines neuen ähnlichen Produkts oder durch Abgabe bei einer autorisierten Sammelstelle für die Wiederaufbereitung von Elektround Elektronik Altgeräten sowie Batterien und Akkumulatoren geschehen Der unsachgemäße Umgang mit Altgeräten kann aufgrund potenziell gefährlicher Stoffe die häufig in Elektro und Elektronik Altgeraten enthalten sind negative Auswirkunge...

Страница 263: ...IZENZGEBER Der Lizenzgeber von Canon überträgt Ihnen keinerlei Lizenzen oder Rechte an dem geistigen Eigentum der LIZENZGEBER weder ausdrücklich noch stillschweigend sofern dies nicht ausdrücklich durch diesen Vertrag gestattet wird 3 Die SOFTWARE darf ausschließlich mit dem gekauften Canon Produkt das PRODUKT verwendet werden 4 Die SOFTWARE darf nicht ohne vorherige schriftliche Genehmigung durch...

Страница 264: ...GARANTIE IN BEZUG AUF DIESES MATERIAL WEDER EINGESCHLOSSEN NOCH AUSGESPROCHEN AUSSER DEN HIER GEGEBENEN ES GIBT AUCH KEINE UNBEGRENZTEN GARANTIEN FÜR DIE MARKTFÄHIGKEIT DES MATERIALS DIE EIGNUNG FÜR EINEN BESTIMMTEN ZWECK ODER VERWENDUNG ODER DEN AUSSCHLUSS VON VERLETZUNGEN ANDERER PATENTE CANON INC IST NICHT FÜR DEN ERSATZ DES UNMITTELBAREN SCHADENS DES MITTELBAREN SCHADENS UND VON NEBEN UND FOLG...

Страница 265: ...sbelege Personalausweise und Reisepässe Briefmarken mit oder ohne Poststempel Einwanderungspapiere Dienstmarken oder ausweise Steuermarken mit oder ohne Stempel Wertpapiere und Schuldverschreibungen Schuldverschreibungen oder andere Bürgschaftsurkunden Schecks oder Urkunden Aktien Führerscheine und Fahrzeugbriefe Arbeiten mit Copyright Kunstwerke ohne vorherige schriftliche Genehmigung des Copyrig...

Страница 266: ...s die Belüftungsschlitze nicht durch eine Wand oder andere Objekte verdeckt sind Lassen Sie immer Abstand zur Wand Wenn die Belüftungsschlitze blockiert werden baut sich im Systeminneren Hitze auf und ein Brand kann entstehen Stellen Sie das System nie auf eine weiche Oberflache wie ein Sofa oder einen Teppich Bitte vermeiden Sie die Installation unter folgenden Bedingungen Feuchte oder staubige O...

Страница 267: ... Boden oder eine instabile Stellfläche auf der das System Erschütterungen ausgesetzt ist kann ein Umkippen mit daraus resultierender Verletzung zur Folge haben Entfernen Sie nicht die Ausgleichsfüße nachdem das System aufgestellt wurde da das System andernfalls umkippen oder fallen kann was zu Personenschäden führen kann Stromversorgung WARNUNG Bitte achten Sie darauf dass das Netzkabel nicht besc...

Страница 268: ...Stromverbindung die den hier genannten Spezifikationen entspricht es kann sonst zu Feuer oder elektrischem Schlag kommen Bitte fassen Sie beim Herausziehen des Kabels immer den Stecker und ziehen Sie nicht am Kabel selbst Wenn Sie am Kabel ziehen können Sie es beschädigen Ein beschädigtes Kabel kann zu Energieverlusten Feuer oder elektrischem Schlag führen WICHTIG Lassen Sie bitte unbedingt genug ...

Страница 269: ... Ihrem Canon Servicepartner auf VORSICHT Bitte legen Sie keine schweren Gegenstände auf das System da sie umfallen oder herunterkippen und Sie verletzen können Schließen Sie den Einzug die Originalabdeckung vorsichtig damit Sie sich nicht die Finger einklemmen es besteht Verletzungsgefahr Beim Kopieren von Büchern auf dem Vorlagenglas die Originalabdeckung den Einzug nicht zu stark hinunterdrücken...

Страница 270: ...u Ihrer Sicherheit folgende Informationen und Hinweise Öffnen Sie nie andere Abdeckungen als die in diesen Handbüchern angegebenen Entfernen Sie nicht die folgenden Warnplaketten die am System angebracht sind Wenn die Plaketten entfernt wurden wenden Sie sich an Ihren Canon Servicepartner Wenn Laserlicht aus dem System austritt und in Kontakt mit Ihren Augen kommt können ernste Verletzungen und Sc...

Страница 271: ...System stehen unter Hochspannung Wenn Sie einen Papierstau entfernen oder den Innenraum des Systems prüfen müssen achten Sie bitte darauf dass Halsketten Armbänder oder andere Metallgegenstände nicht mit dem Systeminneren in Berührung kommen da andernfalls Verbrennungs oder Stromschlaggefahr besteht Bitte werfen Sie verbrauchte Tonerpatronen nie in offenes Feuer weil sich dadurch der noch in den F...

Страница 272: ...ems prüfen müssen setzen Sie sich nicht über längere Zeit der Hitze aus die von der Fixiereinheit und ihrer Umgebung abgestrahlt wird Andernfalls kann es zu Niedertemperatur Verbrennungen kommen auch wenn Sie die Fixiereinheit und ihre Umgebung nicht direkt berühren Bitte achten Sie beim Entfernen von gestautem Papier und beim Austauschen des Tonerbehälters darauf dass der noch nicht fixierte Tone...

Страница 273: ...onerpatronen und Papier nie in der Nähe von offenem Feuer Der Toner in der Flasche oder das Papier kann sich entzünden und so Verbrennungen oder Brände verursachen Wenn Toner versehentlich verschüttet oder verstreut wird kehren Sie die Tonerpartikel vorsichtig zusammen oder nehmen Sie die Tonerpartikel mit einem weichen angefeuchteten Tuch auf und achten Sie darauf dass Sie den Tonerstaub nicht ei...

Страница 274: ...ei der Entsorgung die Patronen nicht in die Nähe offener Flammen Andere Warnhinweise WARNUNG Hinweis für Träger von Herzschrittmachern Dieses System erzeugt ein leichtes Magnetfeld Wenn Sie einen Herzschrittmacher haben und beim Arbeiten an diesem System unwohl fühlen sollten Sie Ihren Arzt zu Rate ziehen Downloaded from ManualsPrinter com Manuals ...

Страница 275: ...xxx Downloaded from ManualsPrinter com Manuals ...

Страница 276: ...llungsort und Handhabung 1 2 Vorsichtsmaßnahmen für die Installation 1 2 Vorsichtsmaßnahmen für die Handhabung 1 6 Kabelanschluss 1 8 Verwenden des Systems als lokalen Drucker USB Anschluss 1 8 Gemeinsames Verwenden des Systems mit anderen Netzwerkbenutzern 1 10 Verwenden des Systems als Faxgerät 1 12 Downloaded from ManualsPrinter com Manuals ...

Страница 277: ...eiden an denen das System extremen Temperaturen und extremer Feuchtigkeit oder Trockenheit ausgesetzt ist Orte in der Nähe von Wasseranschlüssen Heißwasserbereitern Luftbefeuchtern Heizkörpern Öfen Klimaanlagen usw meiden Aufstellorte mit direkter Sonneneinstrahlung vermeiden Das System falls erforderlich mit einem Vorhang schützen Sicherstellen dass die Vorhänge nicht die Lüftungsschlitze und lam...

Страница 278: ...lüftung zu sorgen um ein angenehmes Arbeitsklima im Bereich des Systems zu schaffen Orte meiden an denen sich Ammoniakgas entwickelt Orte vermeiden an denen das System starken Erschütterungen ausgesetzt ist Stellen Sie Ihr System auf eine stabile ebene Fläche Das System vor starken Temperaturschwankungen schützen Wenn das System von einer kalten in eine warme Umgebung gebracht wird oder auch beim ...

Страница 279: ...nn das System nach vorne kippen Um dies zu verhindern sollten Sie sicherstellen dass die Ausgleichsfüße des Systems angebracht sind Wenden Sie sich an einen autorisierten Canon Vertriebspartner wenn keine Datenkommunikation verfügbar ist Abhängig von Ihren Landeseinstellungen oder Ihrer Telefonverbindung kann möglicherweise keine Datenkommunikation durchgeführt werden Wenden Sie sich in diesem Fal...

Страница 280: ...lten das System unter keinen Umständen selbst umsetzen Wenn auf den Verbindungsteil des Netzkabels übermäßige Belastung ausgeübt wird kann das Netzkabel beschädigt werden oder die Adern im Inneren des Systems können sich lösen Dies kann zu einem Brand führen Vermeiden Sie folgende Situationen Häufiges Anschließen und Trennen des Netzkabels Stolpern über das Netzkabel Biegen des Netzkabels in der N...

Страница 281: ...Hauptschalter ausschalten den Netzstecker ziehen und den Canon Servicepartner kontaktieren Eine Weiterbenutzung des Systems in einem solchen Zustand kann zu Feuer oder elektrischen Schlägen führen Lassen Sie vor der Steckdose ausreichend Platz damit der Netzstecker leicht zugänglich ist Das System keinesfalls ausschalten oder dessen vordere Abdeckung öffnen während es arbeitet Anderenfalls können ...

Страница 282: ...Netzstecker Das System erzeugt während des Betriebs in geringen Mengen Ozon oder andere Gerüche Obwohl die Empfindlichkeit gegen Ozon oder andere Gerüche unterschiedlich sein kann stellt diese Menge für den Menschen keine Gefahr dar Ozon oder andere Gerüche können bei längerem Einsatz des Systems bzw langen Produktionszyklen besonders in unzureichend belüfteten Räumen stärker auftreten Es ist rats...

Страница 283: ...len Drucker USB Anschluss Wenn Sie das System als lokalen Drucker verwenden möchten können Sie das System mit einem USB Kabel an einen Computer anschließen Das System ist mit USB 2 0 Hochgeschwindigkeit kompatibel Nach dem Herstellen der Verbindung zwischen dem System und dem Computer müssen Sie die Treiber und das für das Betriebssystem auf Ihrem Computer geeignete Dienstprogramm installieren Aus...

Страница 284: ...ade installiert Der Computer fährt gerade hoch Das System druckt gerade Wenn Sie das USB Kabel vom System oder Computer trennen der eingeschaltet ist sollten Sie vor dem Neuanschluss des Kabels immer mindestens 10 Sekunden lang warten Durch den sofortigen Neuanschluss des Kabels funktioniert das System oder der Computer u U nicht einwandfrei Vergewissern Sie sich ob die Einstellung USB System verw...

Страница 285: ...Verwenden des Systems mit anderen Netzwerkbenutzern Da das System TCP IP unterstützt kann es von mehreren Netzwerknutzern verwendet werden Das System unterstützt sowohl 10BASE T als auch 100BASE TX Verbindungen die in den meisten LANs verwendet werden können Verwenden von Ethernet Verbinden Sie den LAN Anschluss des Systems mit den folgenden Kabeltypen mit einem Hubport Beim Anschluss an einen Com...

Страница 286: ...ose WICHTIG Sie können das System nicht als Repeater Brücke oder Gateway verwenden HINWEIS Das System kann die Ethernet Geschwindigkeit 10BASE T oder 100BASE TX automatisch erkennen In einer gemischten 10BASE T 100BASE TX Umgebung müssen die im Netzwerk installierten Geräte Hubs Router usw die gemischte Umgebung unterstützen Für weitere Informationen setzen Sie sich bitte mit Ihrem Canon Servicepa...

Страница 287: ...r weitere Informationen zur Telefonleitung wenden Sie sich bitte an Ihre örtliche Telefongesellschaft WICHTIG Bevor Sie die Faxfunktion nutzen können müssen Sie die Systemkonfiguration einstellen Weitere Informationen finden Sie in Kapitel 1 Einführung in die Sende und Faxfunktionen im Handbuch Sendefunktionen und Faxfunktionen Modulares Kabel Telefon anschlussdose Die Telefonbuchse befindet sich ...

Страница 288: ...erdem enthält es Hinweise zu den entsprechenden Handbüchern für die notwendigen Anweisungen für die Einrichtung Das System ein ausschalten 2 2 Einschalten des Hauptschalters 2 2 Verwenden des Bedienfeldschalters Schlafmodus 2 4 Ausschalten des Hauptschalters 2 4 Arbeitsablauf beim Einrichten 2 6 Downloaded from ManualsPrinter com Manuals ...

Страница 289: ...lten HINWEIS Nähere Anweisungen zum Ausschalten über den Hauptschalter finden Sie unter Ausschalten des Hauptschalters auf S 2 4 1 Vergewissern Sie sich ob der Netzstecker richtig in der Steckdose sitzt WARNUNG Bitte stecken Sie den Netzstecker nicht mit nassen oder feuchten Händen in die Steckdose oder ziehen ihn heraus da dadurch Stromschlaggefahr besteht WICHTIG Wenn die Bereitschaftsanzeige ni...

Страница 290: ...n Anzeige für die Anmeldung Geben Sie in diesem Fall Ihre Abteilungs ID oder Anwender ID und Ihr Passwort ein Siehe Kapitel 2 Grundlegende Operationen im Referenzhandbuch Sie können die Hauptanzeige der gewünschten Funktion auswählen die beim Einschalten des Systems erscheint Siehe Kapitel 3 Konfigurieren der Grundeinstellungen des Systems im Referenzhandbuch 3 Warten Sie bis das System scanbereit...

Страница 291: ...im Schlafmodus HINWEIS Das System wird nicht in den Schlafmodus geschaltet wenn es gerade in Betrieb ist Im Schlafmodus kann das System Dokumente empfangen weiterleiten oder drucken Bedienfeldschalter Systemstatus EIN Bereit AUS Schlafmodus Betätigen Sie den Hauptschalter der sich auf der linken Seite des Systems befindet und bringen Sie in ihn die Position um das System sicher auszuschalten Die B...

Страница 292: ...ms 2 HINWEIS Sie können mit der Einstellung Zeit automatisches Abschalten das System so einstellen dass es automatisch herunterfährt Siehe Kapitel 3 Konfigurieren der Grundeinstellungen des Systems im Referenzhandbuch Downloaded from ManualsPrinter com Manuals ...

Страница 293: ...enderhandbuch enthalten Siehe CD ROM Anwenderhandbuch auf S 3 2 HINWEIS Nähere Informationen zu den verfügbaren Funktionen auf Produktbasis finden Sie unter Verfügbare Funktionen auf S xiii Erforderlich Zu den anderen Funktionen zählen An USB Speichermedien senden durchsuchbare PDF und Barcode Druck Nr Einzurichten Funktion E Mail I Fax senden An Dateiserver senden Fax Fax von einem Client Compute...

Страница 294: ...ils I Faxe können auch über einen POP3 Server empfangen werden Geben Sie Folgendes an nachdem Sie die Senden Funktion optional für imageRUNNER 2545 2535 2530 2525 2520 aktiviert haben die E Mail Adresse des Systems den SMTP Server den POP3 Server 5 Faxeinstellungen Siehe Handbuch Sendefunktionen und Faxfunktionen Vor dem Versenden Empfangen von Faxen müssen Sie Folgendes angeben Eigene Rufnummer F...

Страница 295: ...Arbeitsablauf beim Einrichten 2 8 Vor Inbetriebnahme des Systems 2 Downloaded from ManualsPrinter com Manuals ...

Страница 296: ... Anwendersoftware 3 4 Inhalt der CD ROM 3 4 Systemanforderungen 3 5 Installation 3 7 Anwendersoftware PCL 3 10 Inhalt der CD ROM 3 10 Systemanforderungen 3 11 Installation 3 12 Anwendersoftware PS optional 3 13 Inhalt der CD ROM 3 13 Systemanforderungen 3 14 Installation 3 14 Faxtreiber Software optional 3 16 Inhalt der CD ROM 3 16 Systemanforderungen 3 17 Installation 3 17 Downloaded from Manuals...

Страница 297: ... Computers arbeiten einige Funktionen u U nicht einwandfrei Wenn sich die PDF Handbücher nicht aus dem CD ROM Menü öffnen lassen öffnen Sie die PDF Dateien direkt aus dem Ordner Deutsch auf der CD ROM Anwenderhandbuch Windows Macintosh Betriebssystem Windows 2000 Service Pack 4 oder neuere Version Windows XP Service Pack 1a oder neuere Version Windows Vista Service Pack 2 oder neuere Version Windo...

Страница 298: ... START um das CD ROM Menü zu starten a HANDBUCH DURCHSUCHEN Sie können sich jedes hier aufgeführte Handbuch durchlesen indem Sie auf den Namen des gewünschten Handbuchs klicken Nach dem Klicken auf das gewünschte Handbuch wird Adobe Reader Adobe Acrobat Reader gestartet und das PDF Handbuch angezeigt b installieren Sie können die hier aufgeführten PDF Handbücher auf Ihrem Computer installieren Wäh...

Страница 299: ...ilt um den Zeitaufwand für das Drucken erheblich zu verringern Da sich die Arbeitsbelastung entsprechend der Ausgabedaten delegieren lässt wird die Geschwindigkeit durch die Optimierung enorm erhöht Color Network ScanGear Mit Color Network ScanGear lassen sich die in den Einzug auf das Vorlagenglas gelegten Originale scannen und in einen Computer im Netzwerk importieren Color Network ScanGear wird...

Страница 300: ...chriebenen Systemanforderungen erfüllt UFRII LT Druckertreiber Software Betriebssysteme Windows 2000 Windows XP Windows Vista Windows 7 Windows Server 2003 Windows Server 2008 Mac OS X 10 4 9 oder neuere Version HINWEIS Die unterstützten Betriebssysteme hängen u U von der Version des verwendeten Druckertreibers ab Hardware Computer Jeder beliebige Computer auf dem die o g Systeme ausgeführt werden...

Страница 301: ...ion in einem Ethernet Netzwerk WICHTIG Wenn Sie das System als Netzwerkscanner benutzen möchten muss es über ein IPv4 Netzwerk mit einem Computer verbunden sein HINWEIS Beim Scannen einer Vielzahl von Bildern oder von Bildern die große Bilddatenmengen enthalten kann die Fehlermeldung wonach der Arbeitsspeicher nicht ausreicht oder ein Verlust der Scangeschwindigkeit auftreten In diesem Fall können...

Страница 302: ... Sie im Installationshandbuch zum Druckertreiber oder im Mac Druckertreiber Installationshandbuch CD ROM Menü Windows HINWEIS Zeigen Sie die Handbücher im HTML Format zuerst an bevor Sie mit der Installation beginnen Während der Installation können Sie die HTML Handbücher nicht anzeigen Klicken Sie hier um den Druckertreiber zu installieren Klicken Sie hier um das Installationshandbuch zum Drucker...

Страница 303: ...licken Sie auf das CD Symbol das auf dem Desktop erscheint Das Installationsprogramm und das Mac Druckertreiber Installationshandbuch finden Sie in dem Ordner mit dem Druckertreibernamen Doppelklicken Sie auf das Symbol des Installationsprogramms im Ordner des Installationsprogramms um die Installation zu starten Downloaded from ManualsPrinter com Manuals ...

Страница 304: ... Doppelklicken Sie im Installationsordner auf Documents Guide das index html Symbol HINWEIS Abhängig vom verwendeten Druckermodell liegt das Installationshandbuch möglicherweise als PDF Datei vor Doppelklicken Sie in diesem Fall auf das PDF Symbol im Ordner Documents Downloaded from ManualsPrinter com Manuals ...

Страница 305: ... Rechenleistung des Host PCs voll aus um die Verarbeitungsgeschwindigkeit zu erhöhen PCL6 ist eine erweiterte Version von PCL5 und bietet eine hervorragende Druckqualität und geschwindigkeit Installationshandbuch zum Druckertreiber Lesen Sie sich dieses Handbuch im HTML Format durch bevor Sie den Druckertreiber installieren Font Manager Verwenden Sie diese Software um Fonts Schriften zu verwalten ...

Страница 306: ...b Ihr System die unten beschriebenen Systemanforderungen erfüllt Software Betriebssysteme Windows 2000 Windows XP Windows Vista Windows 7 Windows Server 2003 Windows Server 2008 HINWEIS Die unterstützten Betriebssysteme hängen u U von der Version des verwendeten Druckertreibers ab Hardware Computer Jeder beliebige Computer auf dem die o g Systeme ausgeführt werden Speicher Der für die einwandfreie...

Страница 307: ...ionsvorgang anzeigen CD ROM Menü HINWEIS Zeigen Sie die Handbücher im HTML Format zuerst an bevor Sie mit der Installation beginnen Während der Installation können Sie die HTML Handbücher nicht anzeigen Klicken Sie hier um den Druckertreiber zu installieren Klicken Sie hier um das Installationshandbuch zum Druckertreiber anzuzeigen Klicken Sie zuerst auf diese Schaltfläche Downloaded from ManualsP...

Страница 308: ...eiter Neben der Konvertierung von Druckdaten können Sie auch Einstellungen in Bezug auf die Endverarbeitung sowie Detaileinstellungen wie z B Halbtöne konfigurieren Ferner bietet er eine geeignete Druckumgebung für DTP Desktop Publishing und Publishing on Demand Installationshandbuch zum Druckertreiber Mac PS Druckertreiber Installationshandbuch Lesen Sie sich diese HTML Handbücher durch bevor Sie...

Страница 309: ...ie einwandfreie Ausführung der o g Systeme erforderliche Arbeits Speicher Installation Im Menü Bildschirm der CD ROM können Sie mit der Installation der Software beginnen oder das HTML Handbuch zur Anzeige näherer Informationen zum Installationsvorgang anzeigen Ausführliche Informationen zum Installationsvorgang finden Sie im Installationshandbuch zum Druckertreiber oder im Mac Druckertreiber Inst...

Страница 310: ...vor Sie mit der Installation beginnen Während der Installation können Sie die HTML Handbücher nicht anzeigen Ausführliche Informationen zur Installation des Druckertreibers und zum Anzeigen des Mac Druckertreiber Installationshandbuchs siehe UFRII LT Anwendersoftware auf S 3 4 Downloaded from ManualsPrinter com Manuals ...

Страница 311: ...Faxkarte AG1 Inhalt der CD ROM Faxtreiber Wenn der Faxtreiber auf Ihrem Computer installiert wurde können Sie Dokumente direkt aus Anwendungen auf Ihrem Computer Desktop faxen ohne die Originale mit dem System einscannen zu müssen Installationshandbuch zum Faxtreiber Lesen Sie sich dieses Handbuch im HTML Format durch bevor Sie den Faxtreiber installieren WICHTIG Die auf den CD ROMs enthaltenen Tr...

Страница 312: ...usführung der o g Systeme erforderliche Arbeits Speicher Installation Im Menü Bildschirm der CD ROM können Sie mit der Installation der Software beginnen oder das HTML Handbuch zur Anzeige näherer Informationen zum Installationsvorgang anzeigen CD ROM Menü HINWEIS Zeigen Sie die Handbücher im HTML Format zuerst an bevor Sie mit der Installation beginnen Während der Installation können Sie die HTML...

Страница 313: ...Faxtreiber Software optional 3 18 Mitgelieferte CD ROMs 3 Downloaded from ManualsPrinter com Manuals ...

Страница 314: ...ie 4 2 Drucken von einem Computer 4 4 Drucken von einem USB Speichergerät Mediendruck 4 6 Versenden eines Dokuments E Mail I Fax Dateiserver und USB Speichergerät 4 8 Versenden eines Faxes 4 10 Scannen von einem Computer Remote Scan 4 12 Betrieb des Systems über einen Computer Remote UI 4 14 Downloaded from ManualsPrinter com Manuals ...

Страница 315: ... Originalabdeckung nachdem Sie Ihre Originale auf das Vorlagenglas gelegt haben Geben Sie Ihre Abteilungs ID und Ihr Passwort ein wenn Sie über die Anzeige dazu aufgefordert werden betätigen Sie Log In Out Geben Sie Ihre Anwender ID und Ihr Passwort ein wenn Sie über die Anzeige dazu aufgefordert werden betätigen Sie Log In Out Setzen Sie die Kontrollkarte ein wenn Sie über die Anzeige dazu aufgef...

Страница 316: ... angegebenen Kopien wird oben rechts auf dem Touchscreen Display angezeigt Wenn die folgende Anzeige erscheint wählen Sie das Originalformat betätigen Sie OK Start Betätigen Sie Stopp um den Kopiervorgang abzubrechen Sie können den aktuellen Auftrag auch abbrechen indem Sie auf der Kopierstatusanzeige Abbruch betätigen Der Abbruchvorgang verläuft je nach Auftragsstatus verschieden Weitere Informat...

Страница 317: ... Name der Taste über welche die in Schritt 3 dargestellte Seite mit den Druckereinstellungen angezeigt werden kann kann je nach verwendeter Anwendung variieren 2 Der Name der Taste über die der Druckvorgang gestartet wird kann je nach verwendeter Anwendung variieren Die in den Schritten 2 bis 4 gezeigte Druckertreiberanzeige kann je nach verwendeter Anwendung variieren Der auf Ihrem Computer insta...

Страница 318: ...gang auf dem Bedienfeld des Systems abzubrechen verwenden Sie den Systemmonitor der durch Betätigen von Stopp oder Systemmonitor angezeigt wird 2 1 Der Name der Taste über die der Druckvorgang gestartet wird kann je nach verwendeter Anwendung variieren 2 Der Abbruchvorgang verläuft je nach Auftragsstatus verschieden Weitere Informationen finden Sie in Kapitel 3 Verwalten von Druckaufträgen im Druc...

Страница 319: ...ie Fertig und fahren Sie mit dem nächsten Schritt fort Wenn sich das System im Schlafmodus befindet betätigen Sie Einschalten Geben Sie Ihre ID und Ihr Passwort ein oder setzen Sie die Kontrollkarte ein wenn Sie über die Anzeige dazu aufgefordert werden Siehe Anmelden Login beim System auf S 4 2 Die USB Anschlüsse an der rechten Seite des Systems sind optional USB Schnittstellen Kit 3 Der USB Ansc...

Страница 320: ...ner betätigen Sie Abw um die Dateien anzuzeigen wählen Sie die Datei Betätigen Sie Stopp um den Druckvorgang abzubrechen Sie können den aktuellen Druckauftrag auch abbrechen indem Sie auf der Druckstatusanzeige Abbruch betätigen Der Abbruchvorgang verläuft je nach Auftragsstatus verschieden Weitere Informationen finden Sie in Kapitel 3 Verwalten von Druckaufträgen im Druckerhandbuch Entfernen Sie ...

Страница 321: ...tigen Sie SEND Senden um die Hauptanzeige der Sende und Faxfunktionen anzuzeigen Wenn sich das System im Schlafmodus befindet betätigen Sie Einschalten Geben Sie Ihre ID und Ihr Passwort ein oder setzen Sie die Kontrollkarte ein wenn Sie über die Anzeige dazu aufgefordert werden Siehe Anmelden Login beim System auf S 4 2 Wenn die unten dargestellte Anzeige erscheint geben Sie Ihren Anwendernamen u...

Страница 322: ...egen der Empfänger im Handbuch Sendefunktionen und Faxfunktionen Einige USB Speichergeräte sind nicht mit dem System kompatibel Weitere Informationen finden Sie in Kapitel 2 Dokumente senden im Handbuch Sendefunktionen und Faxfunktionen Betätigen Sie Start Wenn die folgende Anzeige erscheint wählen Sie die originale Größe betätigen Sie OK Geben Sie Ihren Anwendernamen und das Passwort ein betätige...

Страница 323: ...egen Sie die Originale auf Betätigen Sie SEND Senden um die Hauptanzeige der Sende und Faxfunktionen anzuzeigen Wenn sich das System im Schlafmodus befindet betätigen Sie Einschalten Geben Sie Ihre ID und Ihr Passwort ein oder setzen Sie die Kontrollkarte ein wenn Sie über die Anzeige dazu aufgefordert werden Siehe Anmelden Login beim System auf S 4 2 Wenn die unten dargestellte Anzeige erscheint ...

Страница 324: ...eben von Empfängern finden Sie in Kapitel 4 Einfaches und schnelles Festlegen der Empfänger im Handbuch Sendefunktionen und Faxfunktionen Wenn die folgende Anzeige erscheint wählen Sie die originale Größe betätigen Sie OK Betätigen Sie Stopp um das Scannen der Originale abzubrechen Sie können das Scannen von Originalen auch abbrechen indem Sie auf der Sendestatusanzeige Abbruch betätigen Nähere An...

Страница 325: ...erwendeten Betriebssystem von denen abweichen die auf Ihrem Computer angezeigt werden Schalten Sie das System online Legen Sie die Originale auf Betätigen Sie SCAN PRINT Scan Druck um den Bildschirm Scan Druck anzuzeigen Remote Scan Online Legen Sie Ihre Originale in den Einzug oder auf das Vorlagenglas Schließen Sie den Einzug bzw die Originalabdeckung nachdem Sie Ihre Originale auf das Vorlageng...

Страница 326: ...nner ausgewählt ist Weitere Informationen finden Sie in der Dokumentation die Sie zusammen mit der TWAIN kompatiblen Anwendung erhalten haben Geben Sie im Dialogfeld Color Network ScanGear Einstellungen wie Farbmodus und Auflösung an Klicken Sie im Dialogfeld das bei der Verarbeitung der gescannten Daten angezeigt wird auf Abbrechen um den Scanvorgang abzubrechen Schalten Sie das System nach Absch...

Страница 327: ... EINGABETASTE auf Ihrer Tastatur Geben Sie auf der in Schritt 1 angezeigten oberen Seite Remote UI Ihre Abteilungs ID oder Ihre Anwender ID und Ihr Passwort ein klicken Sie auf OK Nach der erfolgreichen Anmeldung wird die Seite Gerätestatus angezeigt Rufen Sie über das Menü im linken Bereich der Seite ggf weitere Seiten auf Die bei der Anmeldung einzugebende ID und das Passwort hängen von der Remo...

Страница 328: ...magazinen Papierkassetten 5 2 Einlegen von Papier 5 3 Einrichten einer Kassette für ein anderes Papierformat 5 5 Austauschen der Tonerpatrone 5 9 Regelmäßige Reinigung 5 14 Vorlagenglas und Abdeckung 5 14 Scanbereich und Walzen des Einzugs 5 15 Verbrauchsmaterial 5 19 Druck Kopiermaterial 5 19 Toner 5 20 Patrone für Stempel 5 21 Heftklammermagazin 5 21 Originalverbrauchsmaterial 5 22 Downloaded fr...

Страница 329: ... Typ Normalpapier Recyclingpapier farbiges Papier und Papier mit 3er Lochung Siehe Geeignetes Druck Kopiermaterial auf S 7 2 Mit der optionalen Briefumschlagzuführung D1 können die folgenden Briefumschläge in die Kassette 2 eingelegt werden Nr 10 COM10 ISO B5 Monarch ISO C5 und DL Siehe Kapitel 4 Zusatzausstattung im Referenzhandbuch Die Anzahl der verfügbaren Kassetten hängt von der Systemkonfigu...

Страница 330: ...arbige Bilder kopiert wurden Bedrucken Sie nicht die Rückseite von solchem Papier Papier das mit einem Thermotransferdrucker bedruckt wurde Bedrucken Sie nicht die Rückseite von solchem Papier Fächern Sie den Papierstapel vor dem Einlegen gut auf und richten Sie die Kanten des Papierstapels auf einer ebenen Fläche aus Legen Sie weder Papier noch etwas anderes in den leeren Teil der Kassette neben ...

Страница 331: ...egen ist 3 Öffnen Sie ein neues Paket Papier und nehmen Sie das Papier heraus VORSICHT Achten Sie beim Einlegen von Papier darauf dass Sie sich nicht die Finger an den Papierkanten schneiden WICHTIG Packen Sie das restliche Papier wieder ordentlich in der Originalverpackung ein und bewahren Sie es an einem trocknen vor direktem Sonnenlicht geschützten Ort auf HINWEIS Für qualitativ hochwertige Aus...

Страница 332: ... setzt das System den Druckvorgang automatisch fort sobald Sie das richtige Papier eingelegt haben 6 Legen Sie bei Bedarf den Papiertyp fest Hilfe finden Sie unter Kapitel 3 Konfigurieren der Grundeinstellungen des Systems im Referenzhandbuch WICHTIG Achten Sie darauf dass der für die Papierkassette eingestellte Papiertyp mit dem Typ des eingelegten Papiers übereinstimmt Einrichten einer Kassette ...

Страница 333: ...hrungsschiene nach hinten oder vorne zur Markierung für das gewünschte Papierformat WICHTIG Achten Sie darauf dass Sie die Führungsschienen richtig justieren Andernfalls können Papierstaus oder verschmutzte Ausdrucke entstehen oder die Innenflächen des Systems verschmutzen 1 Öffnen Sie die Kassette und nehmen Sie das darin liegende Papier heraus Nähere Anweisungen zum Öffnen der Papierkassette fin...

Страница 334: ...ngelegten Papiers übereinstimmt 5 Ändern Sie das Papierformatschild zur Angabe des richtigen Papierformats an der Kassette WICHTIG Die auf den Schildern angegebenen Papierformate können Formate enthalten die das System nicht verwenden kann 4 Legen Sie das entsprechende Papierformat in die Kassette VORSICHT Achten Sie beim Einlegen von Papier darauf dass Sie sich nicht die Finger an den Papierkante...

Страница 335: ...s die Papiertypeinstellung der Papierkassette mit der Papierart übereinstimmt die eingelegt wird 6 Schieben Sie die Papierkassette vorsichtig wieder in das System bis sie hörbar einrastet VORSICHT Schieben Sie die Papierkassette vorsichtig in ihre ursprüngliche Position zurück und achten Sie dabei darauf dass Sie sich nicht die Finger einklemmen Sie könnten sich verletzen Downloaded from ManualsPr...

Страница 336: ...erden können wird die Meldung Wechseln Sie den Toner auf dem Touchscreen Display angezeigt Durch Betätigen der Taste Später beheben können Sie den Betrieb fortsetzen Für weitere Ausdrucke müssen Sie die Tonerpatrone jedoch austauschen WARNUNG Werfen Sie gebrauchte Tonerpatronen nie in offenes Feuer oder verbrennen diese da sich der restliche Toner in den Patronen entzünden und Feuer oder Verbrennu...

Страница 337: ...n noch mit Ihrer Kleidung in Berührung kommt Waschen Sie Toner auf Händen oder Kleidung sofort mit kaltem Wasser ab Durch warmes Wasser kann der Toner dauerhaft fixieren wodurch sich Tonerflecken nicht mehr entfernen lassen Legen Sie verbrauchte Tonerpatronen zur Entsorgung in einen Beutel damit der restliche Toner nicht aus den Patronen gelangen kann und entsorgen Sie die Tonerpatronen nicht in d...

Страница 338: ...brennungen verursachen kann 2 Drehen Sie die Verriegelung gegen den Uhrzeigersinn bis der Hebel senkrecht steht WICHTIG Achten Sie vor dem Fortfahren darauf dass der Pfeil nach unten auf dem Verriegelungshebel auf den Pfeil nach oben der Entriegelungssymbol Position ausgerichtet ist WICHTIG Wenn sich die Tonerpatrone nicht herausziehen lässt vergewissern Sie sich ob der Knopf in die richtige Posit...

Страница 339: ...nen Siehe Verbrauchsmaterial auf S 5 19 Berühren Sie nicht die Öffnung der Tonerpatrone oder stoßen Sie nicht dagegen Dadurch kann der Toner aus der Patrone entweichen 5 Setzen Sie die neue Tonerpatrone so weit wie möglich in die Zufuhreinheit ein Halten Sie die neue Tonerpatrone mit einer Hand von unten fest während Sie sie mit der anderen Hand in das System hineinschieben Downloaded from Manuals...

Страница 340: ...rriegelungssymbol Position ausgerichtet ist 7 Schließen Sie die Abdeckung für den Austausch der Tonerpatrone VORSICHT Achten Sie beim Schließen der Abdeckung darauf dass Sie sich nicht die Finger einklemmen und dadurch verletzen WICHTIG Reinigen Sie die Fixiereinheit unbedingt jedes Mal wenn Sie die Tonerpatrone austauschen Siehe Kapitel 5 Regelmäßige Wartung im Referenzhandbuch Verriegelungssymbo...

Страница 341: ... Netzsteckdose und entfernen Sie den Staub aus dem Bereich um die Metallstifte und in der Netzsteckdose mit einem trockenen Tuch Wenn das System lange Zeit in einer feuchten staubigen oder rauchigen Umgebung installiert ist kann sich in diesem Bereich Staub sammeln und feucht werden Dies kann zu Kurzschlüssen führen und Brände verursachen WICHTIG Feuchten Sie das Tuch nicht zu stark an da das Syst...

Страница 342: ...n Scanbereich und die Walzen des Einzugs regelmäßig wie nachstehend beschrieben WICHTIG Feuchten Sie das Tuch nicht zu stark an da das System durch zu viel Wasser beschädigt werden kann HINWEIS Der Einzug D ADF AA1 AB1 ist für den imageRUNNER 2545 2535 2530 2525 2520 optional 1 Öffnen Sie die Abdeckung des Einzugs 2 Reinigen Sie die Walzen insgesamt drei Positionen an der Innenseite des Einzugs mi...

Страница 343: ...en Sie den Bereich dann mit einem weichen trockenen Tuch ab Drehen Sie die Walzen beim Reinigen mit der Hand 5 Reinigen Sie die Plastikteile an der inneren Abdeckung mit einem mit Wasser angefeuchteten Tuch Wischen Sie den Bereich dann mit einem weichen trockenen Tuch ab 6 Schließen Sie die innere Abdeckung VORSICHT Achten Sie beim Schließen der Abdeckung darauf dass Sie sich nicht die Finger eink...

Страница 344: ...eten Tuch und drehen Sie die Walze dabei mit dem Einzugsrad Wischen Sie den Bereich dann mit einem weichen trockenen Tuch ab HINWEIS Wenn Sie das Einzugsrad bei geöffnetem Einzug nicht erreichen können schließen Sie den Einzug drehen Sie das Einzugsrad leicht öffnen Sie den Einzug reinigen Sie die Walze Wiederholen Sie diese Schritte bis die Walzenoberfläche vollständig sauber ist Einzugsrad Einzu...

Страница 345: ...CHT Achten Sie beim Schließen des Einzugs darauf dass Sie sich nicht die Finger einklemmen und dadurch verletzen Seien Sie sich beim Schließen des Einzugs darüber im Klaren dass das vom Vorlagenglas abgestrahlte Licht sehr hell sein kann 11 Schließen Sie die Abdeckung des Einzugs VORSICHT Achten Sie beim Schließen der Abdeckung darauf dass Sie sich nicht die Finger einklemmen und dadurch verletzen...

Страница 346: ...3 und A5 stehen Recyclingpapier farbiges Papier Folien für das System empfohlen Etiketten und andere Papiertypen zur Verfügung Für weitere Informationen setzen Sie sich bitte mit Ihrem Canon Servicepartner in Verbindung VORSICHT Bewahren Sie Papier nie an einem Ort auf an dem es offenen Flammen ausgesetzt ist da es sich dadurch entzünden und so Verbrennungen oder Feuer verursachen kann WICHTIG Bew...

Страница 347: ...artikel mit einem weichen angefeuchteten Tuch auf und achten Sie darauf dass Sie den Tonerstaub nicht einatmen Verwenden Sie zum Aufnehmen von verschüttetem Toner niemals Staubsauger ohne Schutzvorrichtungen gegen Staubexplosionen Andernfalls kann es zu einer Fehlfunktion des Staubsaugers kommen oder aufgrund von statischer Aufladung eine Staubexplosion verursacht werden VORSICHT Bitte bewahren Si...

Страница 348: ...len Verwenden Sie zum Herausnehmen und Austauschen der Patrone für Stempel die zum Lieferumfang gehörige Pinzette Patrone für Stempel C1 WICHTIG Der Stempelmodus steht nur zur Verfügung wenn die optionale Stempeleinheit B1 am Einzug optional für den imageRUNNER 2545 2535 2530 2525 2520 installiert ist Heftklammermagazin Wenn auf dem Touchscreen Display eine Meldung angezeigt wird in der Sie zum Ei...

Страница 349: ... zur Verwendung mit diesem System gedacht sind Zur Gewährleistung der optimalen Druckqualität Systemleistung und Produktivität empfehlen wir dass Sie Originaltoner teile und verbrauchsmaterial von Canon verwenden Wenden Sie sich an Ihren Canon Fachhändler oder Servicepartner für Originalverbrauchsmaterial von Canon Downloaded from ManualsPrinter com Manuals ...

Страница 350: ...e lösen Beseitigen von Papierstaus 6 2 Fixiereinheit 6 3 Papierkassetten 1 und 2 6 5 Einzug 6 9 Die Servicemeldung 6 12 Neustarten des Systems 6 12 Verwenden des Systems mit beschränkten Funktionen 6 13 Reparaturanfragen über das Bedienfeld 6 14 Kontaktieren des Canon Servicepartners 6 16 Downloaded from ManualsPrinter com Manuals ...

Страница 351: ... Bauteilen im Systeminneren verletzen Wenn Sie das Papier nicht entfernen können wenden Sie sich bitte an Ihren Canon Servicepartner Achten Sie beim Beseitigen eines Papierstaus im System darauf dass Ihre Hände oder Kleidung nicht mit dem Toner auf dem Papier in Berührung kommen da sie dadurch schmutzig werden können Waschen Sie Toner sofort mit kaltem Wasser ab Durch warmes Wasser kann der Toner ...

Страница 352: ...ition ein Nach dem Beseitigen aller Papierstaus wird der Druckvorgang fortgesetzt HINWEIS Nach dem Beseitigen aller Papierstaus wird die Anzahl der zu erstellenden Kopien oder Ausdrucke automatisch vom System neu berechnet Selbst bei der Ausgabe mehrerer Sätze müssen Sie die Anzahl der Kopien oder Drucke nicht neu eingeben Fixiereinheit Bei einem Papierstau in der Fixiereinheit entfernen Sie das g...

Страница 353: ...ute Papier aus dem unteren Teil der Fixiereinheit 3 Ziehen Sie die obere Abdeckung der Fixiereinheit an der Lasche nach oben und entfernen Sie u U gestautes Papier VORSICHT Die Fixiereinheit und ihre Umgebung werden sehr heiß Berühren Sie beim Beseitigen eines Papierstaus aus diesem Bereich nur das gestaute Papier oder die obere Abdeckung Downloaded from ManualsPrinter com Manuals ...

Страница 354: ...r wie nachstehend beschrieben WICHTIG Bei den in diesem Abschnitt beschriebenen Schritten wird vorausgesetzt dass das System mit vier Papierkassetten ausgestattet ist Die Anzahl der verfügbaren Kassetten hängt von der Systemkonfiguration ab 4 Fassen Sie die rechte Abdeckung der Haupteinheit an der durch ein Handsymbol markierten Stelle an und schließen Sie die rechte Abdeckung vorsichtig bis sie h...

Страница 355: ...nheit und öffnen Sie die rechte Abdeckung 3 Öffnen Sie die rechte Abdeckung der Kassette und entfernen Sie gestautes Papier 4 Betätigen Sie die Taste an Papierkassette 1 und ziehen Sie die Papierkassette bis zur Arretierung heraus 2 Entfernen Sie sämtliches gestautes Papier Downloaded from ManualsPrinter com Manuals ...

Страница 356: ...liches gestautes Papier 6 Schieben Sie die Kassette vorsichtig wieder in das System bis sie hörbar einrastet VORSICHT Schieben Sie die Papierkassette vorsichtig in ihre ursprüngliche Position zurück und achten Sie dabei darauf dass Sie sich nicht die Finger einklemmen Sie könnten sich verletzen 8 Entfernen Sie sämtliches gestautes Papier Downloaded from ManualsPrinter com Manuals ...

Страница 357: ...he Position zurück und achten Sie dabei darauf dass Sie sich nicht die Finger einklemmen Sie könnten sich verletzen 10 Schließen Sie die rechte Abdeckung der Kassette VORSICHT Achten Sie beim Schließen der Abdeckung darauf dass Sie sich nicht die Finger einklemmen und dadurch verletzen 11 Fassen Sie die rechte Abdeckung der Haupteinheit an der durch ein Handsymbol markierten Stelle an und schließe...

Страница 358: ...estaute Papier wie nachstehend beschrieben WICHTIG Der Einzug D ADF AA1 AB1 ist für den imageRUNNER 2545 2535 2530 2525 2520 optional 2 Öffnen Sie die innere Abdeckung und halten Sie diese dabei an der vorderen Lasche fest 1 Öffnen Sie die Abdeckung des Einzugs Lasche Downloaded from ManualsPrinter com Manuals ...

Страница 359: ...nzugs VORSICHT Achten Sie beim Schließen der Abdeckungen darauf dass Sie sich nicht die Finger einklemmen und dadurch verletzen 5 Heben Sie den Einzug an und prüfen Sie ob noch gestaute Originale im Innern vorhanden sind Wiederholen Sie den Vorgang aus Schritt 1 wenn Sie noch gestaute Originale im Einzug finden Ziehen Sie nicht mit Gewalt am gestauten Original weil es dadurch reißen könnte Einzugs...

Страница 360: ...on ein Nach dem Beseitigen aller Papierstaus wird der Druckvorgang fortgesetzt 6 Schließen Sie den Einzug VORSICHT Achten Sie beim Schließen des Einzugs darauf dass Sie sich nicht die Finger einklemmen und dadurch verletzen Seien Sie sich beim Schließen des Einzugs darüber im Klaren dass das vom Vorlagenglas abgestrahlte Licht sehr hell sein kann Downloaded from ManualsPrinter com Manuals ...

Страница 361: ...bildete erscheint gehen Sie wie unten beschrieben vor Neustarten des Systems Wenn eine Servicerufmeldung angezeigt wird starten Sie das System neu WICHTIG Beim Ausschalten des Systems werden alle Aufträge im Speicher des Systems gelöscht 1 Schalten Sie das System über den Hauptschalter aus 2 Warten Sie mindestens 10 Sekunden und schalten Sie dann das System wieder ein Downloaded from ManualsPrinte...

Страница 362: ...stem in der Anzeige Serviceruf auf den Beschränkter Funktionsmodus einstellen wird der Beschränkter Funktionsmodus in den Allgemeinen Einstellungen aktiviert Siehe Kapitel 3 Konfigurieren der Grundeinstellungen des Systems im Referenzhandbuch Die Anzeige Serviceruf wird u U erneut eingeblendet wenn der Beschränkter Funktionsmodus ohne Isolierung der Störungsursache deaktiviert wird 3 Starten Sie d...

Страница 363: ...e am Kabel ziehen können Sie es beschädigen Ein beschädigtes Kabel kann zu Kriechstrom führen wodurch Brand oder Stromschlaggefahr besteht WICHTIG Das System muss für Reparaturanfragen vom Touchscreen Display zuvor konfiguriert sein Für weitere Informationen setzen Sie sich bitte mit Ihrem Canon Servicepartner in Verbindung Das System wird im Beschränkter Funktionsmodus gestartet HINWEIS Nach dem ...

Страница 364: ...bruch Ja stornieren 4 Betätigen Sie Beschädigtes Bild Papierstau oder Anderes Problem zur Auswahl des Problemtyps der behoben werden soll betätigen Sie Anfrage Nach dem erfolgreichen Senden Ihrer Anfrage erscheint die links abgebildete Anzeige HINWEIS Sie können die Anfrage durch Betätigen von Abbruch Ja stornieren Downloaded from ManualsPrinter com Manuals ...

Страница 365: ...es Kabel kann zu Kriechstrom führen wodurch Brand oder Stromschlaggefahr besteht WICHTIG Auch wenn es zu einem Stromausfall kommt oder das System ausgeschaltet wird sichert eine integrierte Batterie die im Speicher empfangenen Dokumente für ungefähr eine Stunde Wenn die Batterie aber nicht vollständig aufgeladen ist bleiben die Dokumente möglicherweise nicht erhalten Das vollständige Aufladen der ...

Страница 366: ...7 Anhang Dieses Kapitel enthält eine Beschreibung der Papiertypen die mit dem System verwendet werden können sowie den Index Geeignetes Druck Kopiermaterial 7 2 Index 7 4 Downloaded from ManualsPrinter com Manuals ...

Страница 367: ...n finden Sie in Kapitel 3 Konfigurieren der Grundeinstellungen des Systems im Referenzhandbuch Anleitungen zur Registrierung der Papiertypen für die Stapelablage finden Sie in Kapitel 2 Grundlegende Bedienung und in Kapitel 3 Konfigurieren der Grundeinstellungen des Systems im Referenzhandbuch Chlorfrei gebleichtes Papier kann in diesem System verwendet werden Papiertyp Papierzufuhr Papierkassette...

Страница 368: ...ierkassette 2 Stapelablage A4 297 mm 210 mm A4R 210 mm 297 mm A3 297 mm 420 mm A5R 148 mm 210 mm Wählbar Format 99 mm bis 297 mm 148 mm bis 432 mm n verf n verf Brief umschlag Nr 10 COM10 104 7 mm 241 3 mm n verf Optional ISO B5 176 mm 250 mm n verf Optional Monarch 98 4 mm 190 5 mm n verf Optional ISO C5 162 mm 229 mm n verf Optional DL 110 mm 220 mm n verf Optional Papier kassetten 1 2 3 4 Papie...

Страница 369: ... 4 D Darstellung von Schaltflächen und Tasten in diesem Handbuch ix Druck Kopiermaterial 5 19 Papierformat 7 3 Papiertyp 7 2 Drucken von einem Computer 4 4 von einem USB Speichergerät 4 6 Drucken von einem USB Speichergerät 4 6 Drucken Definition xii Druckertreiber PCL PCL5 PCL6 3 10 Druckertreiber PS 3 13 E Einlegen von Papier Papierkassetten 5 2 Einzug Reinigung 5 15 Ethernet 100BASE TX 1 10 10B...

Страница 370: ...seinheit 37 2 3 Kopieren 4 2 Kopieren Definition xii M Mac PS Druckertreiber Installationshandbuch 3 13 Mac PS Druckertreiber 3 13 Mac UFR II Druckertreiber Installationshandbuch 3 4 Mac UFRII LT Druckertreiber 3 4 Markierungen und Symbole in diesem Handbuch viii Mediendruck 4 6 N Netzwerkanschluss 1 10 Netzwerk Scannen 4 12 Neustarten 6 12 Normalpapier 7 2 P Papier mit 3er Lochung 7 2 Papierstaus...

Страница 371: ...erbrauchsmaterial xxviii Wartung und Inspektion xxvi Störungsbeseitigung Beschränkte Funktionen 6 13 Servicemeldung 6 12 T Telefonanschluss 1 12 Tonerpatrone 5 9 5 20 Transport des Systems 1 5 TWAIN 3 4 U UFRII LT Anwendersoftware 3 4 UFRII LT Druckertreiber 3 4 USB Anschluss 1 8 V Verbrauchsmaterial Druck Kopiermaterial 5 19 Heftklammermagazin 5 21 Patrone für Stempel 5 21 Toner 5 20 Verfügbare F...

Страница 372: ...imageRUNNER 2545i 2545 2535i 2535 2530i 2530 2525i 2525 2520i 2520 Guida per l utente Downloaded from ManualsPrinter com Manuals ...

Страница 373: ... per invio e fax Guida alla funzione di trasmissione e Fax CD ROM Istruzioni relative all interfaccia utente remota Guida Interfaccia Utente Remota CD ROM Connessioni di rete Gestione della sicurezza Guida alle impostazioni di sistema CD ROM Istruzioni per Color Network ScanGear Guida di Network ScanGear CD ROM Istruzioni per la stampa da memoria USB Istruzioni per la stampa PS PCL UFRII LT Guida ...

Страница 374: ...oni dei tipi di carta accettati e l indice Capitolo 1 Capitolo 2 Capitolo 3 Capitolo 4 Capitolo 5 Capitolo 6 Capitolo 7 Per la stesura del presente manuale è stato fatto uno sforzo considerevole per evitare imprecisioni o omissioni Tuttavia poiché i prodotti sono in continua evoluzione si consiglia di rivolgersi a Canon nel caso in cui fossero necessarie informazioni specifiche sul prodotto Downlo...

Страница 375: ...tto xiv Requisiti di compatibilità elettromagnetica EMC della Direttiva CE xiv Direttiva R TTE xiv Sicurezza del raggio laser xv Informazioni supplementari xv Programma International ENERGY STAR xvi Logo IPv6 Ready xvi Direttiva WEEE RAEE xvii Copyright xvii Software di terza parte xviii Declino di responsabilità xix Limiti legali per l uso del prodotto e delle immagini xix Super G3 xx Importanti ...

Страница 376: ... macchina Accensione spegnimento della macchina 2 2 Accensione dell interruttore principale 2 2 Utilizzo dell interruttore del pannello di controllo modo Riposo 2 4 Spegnimento della macchina con l interruttore principale 2 4 Schema di configurazione 2 6 Capitolo 3 CD ROM allegati CD ROM del manuale utente 3 2 Requisiti di sistema 3 2 Uso del menu del CD ROM 3 3 UFRII LT Software per l utente 3 4 ...

Страница 377: ... per un diverso formato carta 5 5 Sostituzione del toner 5 9 Pulizia periodica 5 14 Piano di copiatura e coperchio 5 14 Rulli e area di scansione dell alimentatore 5 15 Consumabili 5 19 Tipi di carta 5 19 Toner 5 20 Attenzione ai toner contraffatti 5 20 Cartuccia inchiostro per timbro 5 21 Cartuccia punti 5 21 Parti originali 5 22 Capitolo 6 Individuazione e soluzione dei problemi Eliminazione deg...

Страница 378: ...vii Capitolo 7 Appendice Tipi di carta accettati 7 2 Indice analitico 7 4 Downloaded from ManualsPrinter com Manuals ...

Страница 379: ...ali se non eseguite correttamente Per utilizzare la macchina in condizioni di sicurezza prestare pertanto attenzione a queste avvertenze ATTENZIONE Indica operazioni che potrebbero provocare lesioni a persone se non eseguite correttamente Per utilizzare la macchina in condizioni di sicurezza prestare pertanto attenzione a queste avvertenze IMPORTANTE Indica avvertimenti e limitazioni relativi al f...

Страница 380: ...rmo del computer Illustrazioni utilizzate nel manuale Le illustrazioni della macchina utilizzate in questo manuale si riferiscono al modello imageRUNNER 2545i con la seguente apparecchiatura opzionale installata Inner Finisher B1 Inner Finisher Additional Tray B1 e CST Feeding Unit AE1 Tasti Esempio Pannello di controllo Icona tasto Nome tasto Funzioni aggiuntive Display pannello tattile Nome tast...

Страница 381: ...onare i tasti o i pulsanti più adatti alle proprie esigenze Abbreviazioni utilizzate nel manuale In questo manuale i nomi dei prodotti sono abbreviati come segue Sistema operativo Microsoft Windows 2000 Windows 2000 Sistema operativo Microsoft Windows XP Windows XP Sistema operativo Microsoft Windows Vista Windows Vista Sistema operativo Microsoft Windows 7 Windows 7 Sistema operativo Microsoft Wi...

Страница 382: ...ginale da riprodurre è possibile acquisire il documento dell utente successivo Questa apparecchiatura inoltre consente di stampare utilizzando una funzione diversa da quella di copiatura La complessità delle operazioni eseguite da questo sistema è tale per cui può succedere che i lavori di riproduzione sia copie che stampe debbano attendere il loro turno prima di essere stampati Per evitare confus...

Страница 383: ...nsegna di documenti quali copie fax o dati inviati da un computer client alla macchina Copiatura Stampa di dati acquisiti da un originale seguita da opzioni di finitura quali la pinzatura Downloaded from ManualsPrinter com Manuals ...

Страница 384: ...i opzionali nella Guida di riferimento Modello Copiatura Scansione remota IU remota Invio Fax Stampa Alimentatore Cassetto PDF ricercabile USB UFRII LT PCL PS Codici a barre 2 3 4 imageRUNNER 2545i opz opz opz opz opz imageRUNNER 2545 opz opz opz opz opz opz opz opz imageRUNNER 2535i opz opz opz opz opz imageRUNNER 2535 opz opz opz opz opz opz opz opz imageRUNNER 2530i opz opz opz opz opz imageRUN...

Страница 385: ...agnetica EMC della direttiva CE Dichiariamo che questo prodotto è conforme ai requisiti EMC della direttiva CE per una tensione nominale di ingresso di 230V 50 Hz sebbene la tensione nominale di questo prodotto sia 220 240V 50 60 Hz L uso di un cavo schermato è necessario per conformità ai requisiti tecnici di compatibilità elettromagnetica EMC della Direttiva CE Direttiva R TTE Questa apparecchia...

Страница 386: ...meno che non richiesto espressamente nel manuale della macchina Informazioni supplementari Durante la manutenzione o la regolazione del sistema ottico del prodotto non collocare cacciaviti o altri oggetti riflettenti sulla traiettoria del raggio laser Inoltre togliere accessori come orologi e anelli prima di intervenire sul prodotto Il raggio laser riflesso visibile o invisibile può provocare dann...

Страница 387: ...i dal programma internazionale ENERGY STAR L International ENERGY STAR Office Equipment Program è un programma internazionale che promuove il risparmio energetico nell impiego di computer e altre apparecchiature per l ufficio Questo progetto sostiene lo sviluppo e la diffusione di prodotti corredati di funzioni che riducono in modo considerevole il consumo di energia Si tratta di un progetto apert...

Страница 388: ...ò avere conseguenze negative sull ambiente e sulla salute umana a causa delle sostanze potenzialmente nocive solitamente contenute in tali rifiuti La collaborazione dell utente per il corretto smaltimento di questo prodotto contribuirà a un utilizzo efficace delle risorse naturali ed eviterà di incorrere in sanzioni amministrative ai sensi dell art 50 e successivi del Decreto Legislativo n 22 97 P...

Страница 389: ...e può utilizzare il SOFTWARE esclusivamente con il prodotto Canon acquistato il PRODOTTO 4 L utente non può assegnare dare in sublicenza commerciare distribuire o trasferire il SOFTWARE a terze parti senza il preventivo consenso scritto dei detentori dei diritti del SOFTWARE 5 Malgrado quanto indicato l utente può trasferire il SOFTWARE solo quando a assegna tutti i propri diritti al PRODOTTO e tu...

Страница 390: ... riproduzioni così ottenute può essere vietato dalla legge ed essere perseguibile penalmente e o civilmente Di seguito viene riportato un elenco dei documenti che è vietato riprodurre L elenco va inteso unicamente come guida In caso di dubbi sulla legalità dell utilizzo del prodotto per acquisire stampare o riprodurre un particolare documento e o sull uso delle immagini acquisite stampate o riprod...

Страница 391: ...sione di circa 3 secondi per pagina con conseguente riduzione dei costi telefonici Tempo di trasmissione fax di circa 3 secondi per pagina basato sulla tabella CCITT ITU T N 1 JBIG modo standard alla velocità modem di 33 6 Kbps La PSTN Public Network supporta correntemente velocità modem da 28 8 Kbps o inferiori a seconda delle condizioni della linea telefonica Downloaded from ManualsPrinter com M...

Страница 392: ...erture della macchina Queste aperture sono necessarie per una corretta ventilazione delle parti interne della macchina Se le aperture vengono ostruite le parti interne della macchina si surriscaldano Non appoggiare mai la macchina su superfici morbide per esempio divani o tappeti Non installare la macchina nei seguenti luoghi Luoghi umidi o polverosi Vicino a rubinetti d acqua o in prossimità di a...

Страница 393: ...e o inclinato o in luoghi soggetti a forti vibrazioni In caso contrario la macchina potrebbe cadere o ribaltarsi e causare infortuni Non rimuovere i supporti di stabilizzazione dopo l installazione della macchina in quanto se ne potrebbe provocare la caduta con il rischio di lesioni Alimentazione elettrica AVVERTENZA Non danneggiare o modificare il cavo di alimentazione Inoltre non appoggiare ogge...

Страница 394: ...schio di incendi o scosse elettriche IMPORTANTE Lasciare uno spazio sufficiente intorno alla presa in modo da poter scollegare facilmente il cavo in caso di necessità Se si collocano oggetti intorno alla presa elettrica il cavo non potrà essere scollegato facilmente in caso di emergenza Precauzioni AVVERTENZA Non tentare di smontare o modificare la macchina All interno della macchina sono presenti...

Страница 395: ...ZIONE Non collocare oggetti pesanti sulla macchina perché potrebbero cadere e causare infortuni alle persone Chiudere con cautela l alimentatore coperchio del piano di copiatura per evitare di rimanere incastrati con le mani e riportare infortuni Non premere sull alimentatore coperchio del piano di copiatura quando si utilizza quest ultimo per fotocopiare libri spessi In caso contrario il vetro po...

Страница 396: ...onamento della macchina Leggere le seguenti note e istruzioni di sicurezza Non aprire pannelli e coperchi diversi da quelli menzionati nei manuali Non rimuovere le seguenti etichette di avvertenza incollate sulla macchina Se le etichette sono state rimosse rivolgersi al rivenditore autorizzato Canon Se il raggio laser fuoriesce dalla macchina l esposizione può danneggiare seriamente la vista Contr...

Страница 397: ... verificarsi incendi o scosse elettriche Alcune aree all interno della macchina sono percorse da alta tensione Quando si rimuovono fogli inceppati o si effettua un controllo della parte interna della macchina fare attenzione che collane bracciali o altri oggetti metallici non vengano a contatto con le parti interne della macchina Non bruciare o gettare tra le fiamme le cartucce toner usate il tone...

Страница 398: ... fissaggio e dall area circostante per prolungati periodi di tempo In caso contrario sono possibili ustioni da bassa temperatura anche se non è stata toccata direttamente l unità di fissaggio e le parti circostanti Quando si rimuove un inceppamento della carta o si sostituisce la cartuccia del toner prestare attenzione a non macchiarsi con il toner In caso di contaminazione sciacquare immediatamen...

Страница 399: ...toner involontariamente raccogliere con attenzione le particelle di toner insieme oppure asportarle con un panno morbido operando in modo da evitarne l inalazione Per pulire il toner versato non usare mai un aspirapolvere che non disponga di una sicurezza contro le esplosioni di polveri Diversamente si potrebbe causare un malfunzionamento dell aspirapolvere o addirittura un esplosione della polver...

Страница 400: ...tatori di pacemaker cardiaco Il prodotto emette un campo magnetico a bassa intensità Se si è portatori di pacemaker cardiaco e si riscontrano anomalie allontanarsi dalla macchina e consultare un medico Downloaded from ManualsPrinter com Manuals ...

Страница 401: ...xxx Downloaded from ManualsPrinter com Manuals ...

Страница 402: ...egare i cavi Luogo di installazione e utilizzo 1 2 Precauzioni per l installazione 1 2 Precauzioni per l utilizzo 1 7 Collegamento dei cavi 1 9 Uso della macchina come stampante locale connessione USB 1 9 Condivisione della macchina con altri utenti in rete 1 11 Utilizzo della macchina come fax 1 13 Downloaded from ManualsPrinter com Manuals ...

Страница 403: ...temperature o umidità estreme sia basse che alte Per esempio non installare la macchina vicino a rubinetti d acqua caldaie umidificatori condizionatori d aria apparecchi di riscaldamento o stufe Non installare la macchina alla luce diretta del sole Se l installazione alla luce diretta del sole fosse inevitabile riparare la macchina con apposite tende Controllare che le tende non ostacolino le feri...

Страница 404: ... correttamente in modo da garantire un ambiente di lavoro confortevole nell area di funzionamento della macchina Evitare ambienti in cui si hanno esalazioni di ammoniaca Evitare luoghi soggetti a vibrazioni Per esempio evitare pavimenti o supporti instabili Evitare di esporre la macchina a bruschi sbalzi di temperatura Se l ambiente di installazione della macchina è freddo ma viene riscaldato rapi...

Страница 405: ...tabilizzazione della macchina Non rimuovere i supporti di stabilizzazione dopo aver installato la macchina Se si appesantisce la parte anteriore della macchina mentre i cassetti o le unità della macchina sono in posizione aperta la macchina può cadere in avanti Per evitare questa situazione verificare che i supporti di stabilizzazione siano in posizione Se la comunicazione non è disponibile contat...

Страница 406: ...vochi surriscaldamento e incendi Se si applica una tensione eccessiva alla parte di connessione del cavo di alimentazione è possibile danneggiare il cavo stesso o i fili all interno potrebbero scollegarsi Pericolo di incendio Evitare le situazioni seguenti Frequenti connessioni e disconnessioni del cavo di alimentazione Inciampare sul cavo di alimentazione Piegare il cavo di alimentazione vicino a...

Страница 407: ...e Vista dall alto con l Inner Finisher B1 collegato Trasporto della macchina Se si deve trasportare l apparecchiatura anche nell ambito dello stesso piano dell edificio contattare prima il rivenditore autorizzato Canon Non tentare di spostare la macchina da soli La larghezza è di 1 079 mm se non sono collegati componenti opzionali Almeno 100 mm 1 341 mm 565 mm 1 367 mm Downloaded from ManualsPrint...

Страница 408: ...le scollegare il cavo di alimentazione dalla presa a muro e contattare il rivenditore autorizzato Canon L uso della macchina in queste condizioni può provocare incendi o scosse elettriche Inoltre non collocare oggetti intorno alla spina in modo che possa essere scollegata in caso di necessità Non spegnere con l interruttore principale e non aprire gli sportelli anteriori quando la macchina è in fu...

Страница 409: ...re la spina dalla presa elettrica Durante il normale funzionamento la macchina genera una piccola quantità di ozono e altri odori Anche se la sensibilità all ozono o ad altri odori può variare soggettivamente la quantità emessa non è nociva La presenza di ozono o altri odori può risultare più evidente dopo un uso prolungato della macchina o un lungo ciclo di lavoro specie se l ambiente è poco vent...

Страница 410: ...n uso Uso della macchina come stampante locale connessione USB Se si desidera usare la macchina come stampante locale è possibile collegare la macchina e un computer con un cavo USB La macchina è compatibile con lo standard USB 2 0 High Speed Dopo aver collegato la macchina al computer installare i driver e le utility adatte al sistema operativo in uso Per ulteriori informazioni sull installazione...

Страница 411: ...on collegare o scollegare il cavo USB nei seguenti casi I driver sono in corso di installazione Il computer è in fase di avvio La macchina sta stampando Se si scollega il cavo USB dalla macchina o dal computer mentre sono accesi attendere almeno 10 secondi prima di ricollegarlo Se il cavo viene ricollegato immediatamente la macchina o il computer potrebbero funzionare scorrettamente Verificare che...

Страница 412: ...i 10BASE T e 100BASE TX utilizzabili per la maggior parte delle reti LAN Uso dell interfaccia Ethernet Collegare la porta LAN della macchina alla porta di un hub usando i seguenti tipi di cavo Per il collegamento a un computer con una porta 10BASE T cavo LAN doppino Categoria 3 o superiore Per il collegamento a un computer con una porta 100BASE TX cavo LAN doppino Categoria 5 o superiore ATTENZION...

Страница 413: ...a velocità Ethernet 10BASE T o 100BASE TX In ambienti misti 10BASE T 100BASE TX le periferiche in rete hub router ecc devono supportare gli ambienti misti Per maggiori informazioni contattare un rivenditore autorizzato Canon Computer con porta 100BASE TX Computer con porta 10BASE T Cavo LAN Hub La porta LAN RJ 45 è ubicata sul lato sinistro della macchina Downloaded from ManualsPrinter com Manuals...

Страница 414: ...ulteriori informazioni sulle linee telefoniche contattare la propria società telefonica IMPORTANTE Prima di utilizzare la funzione fax è necessario configurare la macchina Per ulteriori informazioni vedere il Capitolo 1 Introduzione alle funzioni di invio e fax nella Guida alla funzione di trasmissione e Fax Cavo modulare Presa telefonica a muro Il connettore per la linea telefonica si trova sul l...

Страница 415: ...Collegamento dei cavi 1 14 Installazione della macchina 1 Downloaded from ManualsPrinter com Manuals ...

Страница 416: ...dica i manuali da consultare per le istruzioni di configurazione pertinenti Accensione spegnimento della macchina 2 2 Accensione dell interruttore principale 2 2 Utilizzo dell interruttore del pannello di controllo modo Riposo 2 4 Spegnimento della macchina con l interruttore principale 2 4 Schema di configurazione 2 6 Downloaded from ManualsPrinter com Manuals ...

Страница 417: ...dere la macchina con l interruttore principale NOTA Per informazioni su come spegnere la macchina vedere Spegnimento della macchina con l interruttore principale a p 2 4 1 Assicurarsi che la spina sia correttamente inserita nella presa elettrica AVVERTENZA Per evitare scosse elettriche non collegare o scollegare il cavo di alimentazione con le mani bagnate IMPORTANTE Se l indicatore dell interrutt...

Страница 418: ...esto caso immettere l ID divisione o l ID utente e la password vedere il Capitolo 2 Utilizzo di base nella Guida di riferimento È possibile selezionare la schermata superiore della funzione desiderata visualizzata all accensione della macchina vedere il Capitolo 3 Configurazione delle impostazioni di base della macchina nella Guida di riferimento 3 Attendere che la macchina sia pronta per la scans...

Страница 419: ... spegne il pannello di controllo la macchina passa nel modo Riposo NOTA La macchina non entra nel modo Riposo mentre è in funzione Nel modo Riposo la macchina può ricevere inoltrare o stampare documenti Interruttore del pannello di controllo Stato della macchina ON Pronta OFF Modo Riposo Per spegnere correttamente la macchina premere l interruttore principale sul lato sinistro della macchina spost...

Страница 420: ...la macchina 2 NOTA È possibile utilizzare l impostazione Intervallo arresto automatico per spegnere automaticamente la macchina Vedere il Capitolo 3 Configurazione delle impostazioni di base della macchina nella Guida di riferimento Downloaded from ManualsPrinter com Manuals ...

Страница 421: ...D ROM del manuale utente a p 3 2 NOTA Per le funzioni disponibili per ogni prodotto vedere Funzioni disponibili a p xiii Necessario Tra le altre funzioni figurano l invio a supporti di memoria USB la funzione PDF ricercabile e la stampa di codici a barre N Elementi di configurazione Funzione Invio E mail I Fax Invioa un file server Fax Fax da un computer client Stampa Scansione remota IU remota Al...

Страница 422: ... server POP3 Dopo aver attivato la funzione Invio opzionale per imageRUNNER 2545 2535 2530 2525 2520 specificare Indirizzo e mail della macchina Server SMTP Server POP3 5 Impostazioni fax vedere la Guida alla funzione di trasmissione e Fax Prima di inviare ricevere i fax è necessario specificare quanto segue Numero di telefono dell unità numero di fax della macchina Tipo di linea telefonica Nome d...

Страница 423: ...Schema di configurazione 2 8 Prima di iniziare ad utilizzare la macchina 2 Downloaded from ManualsPrinter com Manuals ...

Страница 424: ...el CD ROM 3 4 Requisiti di sistema 3 5 Installazione 3 7 PCL Software per l utente 3 10 Contenuto del CD ROM 3 10 Requisiti di sistema 3 11 Installazione 3 12 PS Software per l utente opzionale 3 13 Contenuto del CD ROM 3 13 Requisiti di sistema 3 14 Installazione 3 14 Software Driver fax opzionale 3 16 Contenuto del CD ROM 3 16 Requisiti di sistema 3 17 Installazione 3 17 Downloaded from ManualsP...

Страница 425: ... del computer alcune funzioni potrebbero non operare correttamente Se i manuali PDF elencati nel menu del CD ROM non si aprono aprire il file PDF direttamente dalla cartella ITALIANO nel CD ROM del manuale utente Windows Macintosh Sistema operativo Windows 2000 Service Pack 4 o versione successiva Windows XP Service Pack 1a o versione successiva Windows Vista Service Pack 2 o versione successiva W...

Страница 426: ...ettivamente In Macintosh fare doppio clic sull icona START per avviare il menu del CD ROM a SFOGLIA MANUALE È possibile leggere le guide elencate di seguito facendo clic sulla guida desiderata Dopo aver selezionato la guida Adobe Reader Adobe Acrobat Reader si avvia e visualizza il manuale in formato PDF b Installa È possibile installare sul computer i manuali PDF in elenco Fare clic su Installa e...

Страница 427: ...elaborazione dei dati eseguite normalmente nella stampante vengono divise appropriatamente tra il PC host e la stampante riducendo notevolmente i tempi di stampa complessivi È possibile delegare il carico di lavoro in base ai dati di stampa favorendo così una velocità significativamente maggiore grazie a un ottimizzazione Color Network ScanGear Con Color Network ScanGear gli originali collocati ne...

Страница 428: ...perativi a 64 bit possono essere scaricati dal sito web Canon Requisiti di sistema Prima di installare il software verificare che il sistema soddisfi i requisiti illustrati di seguito Driver di stampa UFRII LT Software Sistemi operativi Windows 2000 Windows XP Windows Vista Windows 7 Windows Server 2003 Windows Server 2008 Mac OS X 10 4 9 o versione successiva NOTA I sistemi operativi possono vari...

Страница 429: ...0 600 e in grado di visualizzare almeno 256 colori Scheda di rete host compatibile con la comunicazione TCP IP e UDP IP su una rete Ethernet IMPORTANTE Per utilizzare la macchina come scanner di rete collegarla ad un computer per mezzo di una rete IPv4 NOTA Se si acquisiscono molte immagini o immagini contenenti una grande quantità di dati può verificarsi un errore di memoria insufficiente o una r...

Страница 430: ...stallazione vedere la Guida di Installazione del Driver Stampante o la Guida di Installazione del Driver Stampante Mac Menu del CD ROM Windows NOTA Visualizzare i manuali HTML prima di avviare l installazione Non è possibile visualizzare i manuali HTML mentre l installazione è in corso Fare clic per installare il driver di stampa Fare clic per visualizzare la Guida di Installazione del Driver Stam...

Страница 431: ...ll icona del CD visualizzata sul desktop È possibile individuare il programma di installazione e la Guida di Installazione del Driver Stampante Mac nella cartella riportante il nome del driver di stampa Fare doppio clic sull icona del programma di installazione nella relativa cartella per avviare l installazione Downloaded from ManualsPrinter com Manuals ...

Страница 432: ...tampante Mac Nella cartella di installazione fare doppio clic su Documents Guide icona index html NOTA A seconda del modello della stampante in uso la guida di installazione può essere un file PDF In tal caso fare doppio clic sull icona del PDF nella cartella Documents Downloaded from ManualsPrinter com Manuals ...

Страница 433: ...aborazione del PC host offrendo una maggiore velocità PCL6 è una versione avanzata di PCL5 che offre una superiore qualità di stampa e una maggiore velocità Guida di Installazione del Driver Stampante Leggere questo manuale HTML prima di installare il driver di stampa Gestione caratteri Utilizzare questo software per gestire i caratteri e visualizzarli accuratamente in Windows Fare doppio clic su ...

Страница 434: ...mi operativi Windows 2000 Windows XP Windows Vista Windows 7 Windows Server 2003 Windows Server 2008 NOTA I sistemi operativi possono variare a seconda della versione del driver di stampa utilizzato Hardware Computer Computer con i suddetti sistemi operativi Memoria Memoria necessaria per utilizzare correttamente i suddetti sistemi operativi Downloaded from ManualsPrinter com Manuals ...

Страница 435: ...oni sulla procedura di installazione Menu del CD ROM NOTA Visualizzare i manuali HTML prima di avviare l installazione Non è possibile visualizzare i manuali HTML mentre l installazione è in corso Fare clic per installare il driver di stampa Fare clic per visualizzare la Guida di Installazione del Driver Stampante Fare clic prima su questo pulsante Downloaded from ManualsPrinter com Manuals ...

Страница 436: ...le stampanti PS e li invia alla stampante Oltre a convertire i dati di stampa permette di configurare le impostazioni di finitura e impostazioni dettagliate per esempio i mezzitoni offrendo un ambiente di stampa appropriato per il desktop publishing e il publishing on demand Guida di Installazione del Driver Stampante Guida di installazione del driver della stampante PS per Mac Leggere questi manu...

Страница 437: ...r utilizzare correttamente i suddetti sistemi operativi Installazione Dalla schermata di menu del CD ROM è possibile avviare l installazione del software o visualizzare il manuale HTML per informazioni sulla procedura di installazione Per informazioni dettagliate sulla procedura di installazione vedere la Guida di Installazione del Driver Stampante o la Guida di Installazione del Driver Stampante ...

Страница 438: ...installazione Non è possibile visualizzare i manuali HTML mentre l installazione è in corso Per informazioni sull installazione del driver di stampa e la visualizzazione della Guida di Installazione del Driver Stampante Mac vedere UFRII LT Software per l utente a p 3 4 Downloaded from ManualsPrinter com Manuals ...

Страница 439: ...enuto del CD ROM Driver fax Con il driver del fax installato nel computer sarà possibile inviare documenti tramite fax direttamente dalle applicazioni del desktop del computer anziché acquisire gli originali utilizzando la macchina Guida di Installazione del Driver Fax Leggere questo manuale HTML prima di installare il driver fax IMPORTANTE I driver inclusi nei CD ROM supportano sistemi operativi ...

Страница 440: ... utilizzare correttamente i suddetti sistemi operativi Installazione Dalla schermata di menu del CD ROM è possibile avviare l installazione del software o visualizzare il manuale HTML per informazioni sulla procedura di installazione Menu del CD ROM NOTA Visualizzare i manuali HTML prima di avviare l installazione Non è possibile visualizzare i manuali HTML mentre l installazione è in corso Fare c...

Страница 441: ...Software Driver fax opzionale 3 18 CD ROM allegati 3 Downloaded from ManualsPrinter com Manuals ...

Страница 442: ... copia 4 2 Stampa da un computer 4 4 Stampa da un supporto di memoria USB Stampa supporto 4 6 Invio di un documento E Mail I Fax File Server e supporto di memoria USB 4 8 Invio di un fax 4 10 Scansione da un computer Scansione remota 4 12 Utilizzo della macchina da un computer IU remota 4 14 Downloaded from ManualsPrinter com Manuals ...

Страница 443: ... alimentatore o sul vetro di lettura Chiudere l alimentatore o il coperchio del piano di copiatura dopo aver posizionato gli originali sul piano di copiatura Immettere ID divisione e password se richiesti premere Log In Out Immettere ID utente e password se richiesti premere Log In Out Inserire la control card se richiesto Terminate le operazioni premere Log In Out o rimuovere la control card per ...

Страница 444: ...ngolo superiore destro del display del pannello tattile Quando viene visualizzata la schermata successiva selezionare il formato originale premere OK Avvio Per annullare la copia premere Stop È inoltre possibile annullare il lavoro corrente premendo Annulla nella schermata che indica lo stato del processo di copiatura La procedura di annullamento differisce a seconda dello stato del lavoro Per ult...

Страница 445: ...ne della pagina di configurazione della stampante indicato al punto 3 può variare in base all applicazione utilizzata 2 Il nome del pulsante per l avvio della stampa può variare in base all applicazione utilizzata Le schermate del driver di stampa illustrate nei punti da 2 a 4 possono variare in base all applicazione utilizzata Il driver di stampa installato sul computer consente alla macchina di ...

Страница 446: ...di controllo della macchina utilizzare la schermata Controllo sistema visualizzata premendo Stop o Controllo sistema 2 1 Il nome del pulsante per l avvio della stampa può variare in base all applicazione utilizzata 2 La procedura di annullamento differisce a seconda dello stato del lavoro Per ulteriori informazioni vedere il Capitolo 3 Gestione dei processi di stampa nella Guida per la stampa Per ...

Страница 447: ...moria USB premere Fine e procedere al punto successivo Se la macchina è nel modo Riposo premere Power Immettere ID e password o inserire la control card se richiesto vedere Come accedere alla macchina a p 4 2 Le porte USB sul lato destro della macchina sono opzionali USB Application 3 Port Interface Kit A1 La porta USB sul lato sinistro non è disponibile quando è collegata la suddetta opzione Alcu...

Страница 448: ...premere Bas per visualizzare i file selezionare il file Per annullare la stampa premere Stop È inoltre possibile annullare il lavoro di stampa corrente premendo Annulla nella schermata che indica lo stato del processo di stampa La procedura di annullamento differisce a seconda dello stato del lavoro Per ulteriori informazioni vedere il Capitolo 3 Gestione dei processi di stampa nella Guida per la ...

Страница 449: ...rmata Invio Posizionare gli originali Premere SEND Invio per visualizzare la schermata superiore delle funzioni Invio e Fax Posizionare gli originali nell alimentatore o sul vetro di lettura Se la macchina è nel modo Riposo premere Power Immettere ID e password o inserire la control card se richiesto vedere Come accedere alla macchina a p 4 2 Se viene visualizzata la schermata seguente immettere n...

Страница 450: ...te nella Guida alla funzione di trasmissione e Fax Alcune periferiche supporto di memoria USB non sono compatibili con la macchina Per ulteriori informazioni vedere il Capitolo 2 Invio di documenti nella Guida alla funzione di trasmissione e Fax Premere Avvio Quando viene visualizzato la schermata successiva selezionare il formato originale premere OK Immettere nome utente e password premere OK se...

Страница 451: ...accia Utente Remota Visualizzare la schermata Invio Posizionare gli originali Premere SEND Invio per visualizzare la schermata superiore delle funzioni Invio e Fax Se la macchina è nel modo Riposo premere Power Immettere ID e password o inserire la control card se richiesto vedere Come accedere alla macchina a p 4 2 Se viene visualizzata la schermata seguente immettere nome utente e password e spe...

Страница 452: ...il Capitolo 4 Specificare le destinazioni con facilità e rapidamente nella Guida alla funzione di trasmissione e Fax Quando viene visualizzato la schermata successiva selezionare il formato originale premere OK Per annullare la scansione degli originali premere Stop È inoltre possibile annullare la scansione degli originali premendo Annulla nella schermata che indica lo stato del processo di invio...

Страница 453: ...zate sul proprio computer in base all applicazione o al sistema operativo in uso Commutazione online della macchina Posizionare gli originali Premere SCAN PRINT Scansione Stampa per visualizzare la schermata Scansione Stampa Scansione remota Online Posizionare gli originali nell alimentatore o sul vetro di lettura Chiudere l alimentatore o il coperchio del piano di copiatura dopo aver posizionato ...

Страница 454: ...Color Network ScanGear Per ulteriori informazioni vedere la documentazione fornita con l applicazione compatibile TWAIN Nella finestra di dialogo Color Network ScanGear specificare le impostazioni quali modo colore e risoluzione Per annullare la scansione fare clic su Annulla nella finestra di dialogo visualizzata quando i dati di scansione vengono elaborati Al termine della scansione riportare la...

Страница 455: ...tiera del computer Nella pagina superiore della IU remota visualizzata al punto 1 immettere l ID divisione o l ID utente e la password fare clic su OK Dopo aver eseguito l accesso viene visualizzata la pagina di stato Periferica Se necessario passare alle altre pagine utilizzando il menu sul lato sinistro della pagina L ID e la password immessi all accesso dipendono dalle impostazioni della IU rem...

Страница 456: ...i carta 5 2 Caricamento della carta 5 3 Regolazione del cassetto per un diverso formato carta 5 5 Sostituzione del toner 5 9 Pulizia periodica 5 14 Piano di copiatura e coperchio 5 14 Rulli e area di scansione dell alimentatore 5 15 Consumabili 5 19 Tipi di carta 5 19 Toner 5 20 Cartuccia inchiostro per timbro 5 21 Cartuccia punti 5 21 Parti originali 5 21 Downloaded from ManualsPrinter com Manual...

Страница 457: ...e A5R Tipo Comune Riciclata Colorata e 3 fori vedere Tipi di carta accettati a p 7 2 Con il componente opzionale Envelope Feeder Attachment D1 è possibile caricare le buste seguenti nel Cassetto carta 2 N 10 COM10 ISO B5 Monarch ISO C5 e DL Vedere il Capitolo 4 Accessori opzionali nella Guida di riferimento Il numero di cassetti disponibili per la carta può variare in base alla configurazione dell...

Страница 458: ... riprodotte immagini a colori non stampare sul retro di questi fogli Carta stampata con una stampante a trasferimento termico non stampare sul retro di questi fogli Smazzare la risma di carta prima di inserirla e allineare i bordi della risma su una superficie piana Non inserire mai carta o altri oggetti nella parte vuota del cassetto accanto alla risma di fogli poichè si potrebbero causare incepp...

Страница 459: ...ampa è quello a faccia in su In caso di problemi come scarsa qualità della stampa o inceppamenti provare a capovolgere la risma e a reinserirla 3 Aprire una confezione di carta ed estrarre la risma di fogli ATTENZIONE Fare attenzione a non tagliarsi con i bordi dei fogli durante il caricamento nella macchina IMPORTANTE Riporre i fogli in eccedenza nella confezione originale e conservarli in un luo...

Страница 460: ...onfigurazione delle impostazioni di base della macchina nella Guida di riferimento IMPORTANTE Assicurarsi che il tipo di carta impostato per il cassetto carta corrisponda al tipo di carta caricata Regolazione del cassetto per un diverso formato carta Se si desidera cambiare il formato della carta nel cassetto regolare le guide scorrevoli in base al formato della nuova carta inserita come descritto...

Страница 461: ...possibile che la carta si inceppi o che le stampe risultino sporche oppure potrebbe sporcarsi l interno della macchina IMPORTANTE La carta arrotolata o arricciata deve essere appiattita prima dell uso Accertarsi che l altezza della risma dei fogli non superi l indicazione del limite massimo sui lati posteriore e sinistro delle guide scorrevoli Assicurarsi che il formato carta impostato per il cass...

Страница 462: ...to Per informazioni vedere il Capitolo 3 Configurazione delle impostazioni di base della macchina nella Guida di riferimento 6 Richiudere delicatamente il cassetto carta fino a bloccarlo in posizione ATTENZIONE Nel richiudere il cassetto carta fare attenzione a non rimanere incastrati con le dita riportando eventuali lesioni Etichetta formato carta Capacità del cassetto carta 550 fogli Etichetta f...

Страница 463: ...Cassetti carta 5 8 Manutenzione ordinaria 5 IMPORTANTE Verificare che l impostazione del tipo di carta del cassetto carta corrisponda al tipo di carta caricata Downloaded from ManualsPrinter com Manuals ...

Страница 464: ...perché il toner si è completamente esaurito sul display del pannello tattile viene visualizzato il messaggio Sostituire il toner Premendo Recupero successivo è possibile continuare il lavoro È tuttavia necessario sostituire la cartuccia del toner per effettuare ulteriori stampe AVVERTENZA Non bruciare o gettare tra le fiamme le cartucce toner usate il toner rimanente all interno delle cartucce può...

Страница 465: ...n i capi di abbigliamento Se il toner viene a contatto con le mani o con i capi di vestiario lavarlo immediatamente con acqua fredda Non utilizzare acqua calda il toner potrebbe fissarsi e macchiare indelebilmente Quando si gettano le cartucce toner esaurite inserirle in una busta per impedire la fuoriuscita del toner residuo all interno delle cartucce e smaltirle in un luogo lontano da fiamme lib...

Страница 466: ...sare incendi o ustioni 2 Ruotare la leva di blocco in senso antiorario fino a che non è in posizione verticale IMPORTANTE Assicurarsi che la freccia giù sulla leva di blocco sia allineata con la freccia su della posizione icona di sblocco prima di continuare IMPORTANTE Se non è possibile estrarre la cartuccia del toner controllare che la manopola sia completamente ruotata nella posizione corretta ...

Страница 467: ...ere Consumabili a p 5 19 Non toccare l apertura della cartuccia di toner e non sottoporta a colpi sbattendola In caso contrario si potrebbe causare una fuoriuscita di toner dalla cartuccia 5 Inserire a fonda la nuova cartuccia di toner nella porta di inserimento toner Tenere la nuova cartuccia toner con una mano da sotto mentre la si spinge nella macchina con l altra mano Downloaded from ManualsPr...

Страница 468: ...di blocco prima di continuare 7 Chiudere la copertura rifornimento toner ATTENZIONE Quando si chiude lo sportello fare attenzione a non rimanere incastrati con le dita riportando eventuali lesioni IMPORTANTE Accertarsi di pulire l unità di fissaggio ogni volta che si sostituisce la cartuccia di toner Vedere il Capitolo 5 Manutenzione ordinaria nella Guida di riferimento Icona di blocco Downloaded ...

Страница 469: ...tti in metallo della spina del cavo di alimentazione e la presa utilizzando un panno asciutto per rimuovere la polvere e lo sporco Se il cavo di alimentazione rimane collegato a lungo in un ambiente umido polveroso o fumoso sulla spina del cavo potrebbe accumularsi della polvere che potrebbe causare cortocircuiti e incendi IMPORTANTE Non inumidire eccessivamente il panno in quanto un eccesso di ac...

Страница 470: ... Pulire regolarmente i rulli e l area di scansione dell alimentatore come descritto di seguito IMPORTANTE Non inumidire eccessivamente il panno in quanto un eccesso di acqua potrebbe provocare un danno alla macchina NOTA L alimentatore DADF AA1 AB1 è opzionale per il modello imageRUNNER 2545 2535 2530 2525 2520 1 Aprire il coperchio dell alimentatore 2 Pulire i rulli in tutto tre punti all interno...

Страница 471: ...un panno soffice e asciutto Ruotare i rulli con le mani durante la pulizia 5 Pulire la parte in plastica trasparente del coperchio interno con un panno inumidito con acqua Quindi asciugare l area con un panno soffice e asciutto 6 Chiudere il coperchio interno ATTENZIONE Quando si chiude lo sportello fare attenzione a non rimanere incastrati con le dita riportando eventuali lesioni Linguetta Downlo...

Страница 472: ...ruota il rullo utilizzando la manopola di alimentazione Quindi asciugare l area con un panno soffice e asciutto NOTA Se la manopola di alimentazione non è raggiungibile quando l alimentatore è aperto chiudere l alimentatore ruotare lievemente la manopola aprire l alimentatore pulire il rullo Ripetere questi passaggi fino a pulire completamente la superficie del rullo Manopola di alimentazione Mano...

Страница 473: ... si chiude l alimentatore fare attenzione a non rimanere incastrati con le dita riportando eventuali lesioni Tenere presente che la luce emessa dal piano di copiatura può essere molto forte quando si chiude l alimentatore 11 Chiudere la copertura dell alimentatore ATTENZIONE Quando si chiude lo sportello fare attenzione a non rimanere incastrati con le dita riportando eventuali lesioni Area di sca...

Страница 474: ...A4 A3 e A5 sono disponibili carta riciclata carta colorata lucidi specifici per questa macchina etichette e altri tipi di carta Per maggiori informazioni contattare un rivenditore autorizzato Canon ATTENZIONE Non conservare la carta in luoghi esposti alle fiamme libere la carta potrebbe prendere fuoco e causare incendi o ustioni IMPORTANTE Conservare i fogli non utilizzati ben avvolti nella confez...

Страница 475: ...amente si potrebbe causare un malfunzionamento dell aspirapolvere o addirittura un esplosione della polvere causata dalla scarica statica ATTENZIONE Tenere il toner e gli altri materiali di consumo fuori dalla portata dei bambini In caso di ingestione di questi materiali consultare immediatamente un medico IMPORTANTE Conservare le cartucce toner in un luogo fresco lontano dalla luce diretta del so...

Страница 476: ...visualizzato un messaggio che richiede di caricare nuovi punti sostituire la cartuccia punti con una nuova Utilizzare solo le cartucce punti previste per l uso su questa macchina Staple J1 IMPORTANTE La modalità Pinzatura è disponibile solo quando il componente opzionale Inner Finisher B1 è collegato alla macchina Parti originali Canon progetta e produce toner parti di ricambio e forniture specifi...

Страница 477: ...Consumabili 5 22 Manutenzione ordinaria 5 Downloaded from ManualsPrinter com Manuals ...

Страница 478: ...azione degli inceppamenti carta 6 2 Unità di fissaggio 6 3 Cassetti carta 1 e 2 6 5 Alimentatore 6 9 Messaggio di richiesta di assistenza 6 12 Riavvio della macchina 6 12 Utilizzo della macchina con funzioni limitate 6 13 Richiesta riparazione dal pannello di controllo 6 14 Contattare il rivenditore autorizzato Canon di zona 6 16 Downloaded from ManualsPrinter com Manuals ...

Страница 479: ...non ferirsi con le parti all interno della macchina Se non si riesce ad estrarre il foglio inceppato rivolgersi a un rivenditore autorizzato Canon Potrebbero causare ustioni o scosse elettriche Quando si rimuove un foglio inceppatosi all interno della macchina fare attenzione a non sporcare mani o indumenti con il toner presente sul foglio In caso di contaminazione sciacquare immediatamente con ac...

Страница 480: ...telli nelle posizioni originali Dopo aver rimosso tutta la carta inceppata la stampa riprende NOTA Dopo aver eliminato tutti gli inceppamenti della carta la macchina ricalcola automaticamente il numero di copie o stampe rimanenti Non è necessario reinserire il numero di copie o stampe anche se si stampano set multipli Unità di fissaggio Se la carta si inceppa nell unità di fissaggio rimuovere la c...

Страница 481: ...te inferiore del gruppo di fissaggio 3 Spingere in basso lo sportello superiore dell unità di fissaggio tramite la linguetta e rimuovere tutta la carta inceppata ATTENZIONE L unità di fissaggio e l area circostante sono soggette ad alte temperature Quando si rimuove la carta inceppata evitare di toccare i componenti di questa zona ad eccezione della carta inceppata o dello sportello superiore Down...

Страница 482: ...ritto di seguito IMPORTANTE Nella procedura illustrata in questa sezione si presuppone che la macchina sia provvista di quattro cassetti carta Il numero di cassetti disponibili per la carta può variare in base alla configurazione della macchina 4 Appoggiare la mano sul simbolo sullo sportello di destra dell unità principale quindi spingere delicatamente lo sportello di destra fino a farlo scattare...

Страница 483: ...portello destro dell unità principale e aprire lo sportello destro 3 Aprire il pannello destro del cassetto carta e rimuovere tutta la carta inceppata 4 Premere il pulsante sul Cassetto carta 1 e aprire completamente il cassetto fino all arresto 2 Rimuovere l inceppamento Downloaded from ManualsPrinter com Manuals ...

Страница 484: ...mpletamente il cassetto fino all arresto 5 Rimuovere l inceppamento 6 Richiudere delicatamente il cassetto carta fino a bloccarlo in posizione ATTENZIONE Nel richiudere il cassetto carta fare attenzione a non rimanere incastrati con le dita riportando eventuali lesioni 8 Rimuovere l inceppamento Downloaded from ManualsPrinter com Manuals ...

Страница 485: ...rta fare attenzione a non rimanere incastrati con le dita riportando eventuali lesioni 10 Chiudere il coperchio destro del cassetto carta ATTENZIONE Quando si chiude lo sportello fare attenzione a non rimanere incastrati con le dita riportando eventuali lesioni 11 Appoggiare la mano sul simbolo sullo sportello di destra dell unità principale quindi spingere delicatamente lo sportello di destra fin...

Страница 486: ...ll alimentatore rimuovere la carta come descritto di seguito IMPORTANTE L alimentatore DADF AA1 AB1 è opzionale per il modello imageRUNNER 2545 2535 2530 2525 2520 2 Aprire il coperchio interno tenendolo per la linguetta anteriore 1 Aprire il coperchio dell alimentatore Linguetta Downloaded from ManualsPrinter com Manuals ...

Страница 487: ... il coperchio dell alimentatore ATTENZIONE Quando si chiudono i coperchi fare attenzione a non rimanere incastrati con le dita riportando eventuali lesioni 5 Sollevare l alimentatore e rimuovere eventuali originali inceppati Se si trovano originali inceppati nell alimentatore ripetere la procedura dal punto 1 Non tirare l originale forzandolo in quanto potrebbe strapparsi Manopola di alimentazione...

Страница 488: ...nelle posizioni originali Dopo aver rimosso tutta la carta inceppata la stampa riprende 6 Chiudere l alimentatore ATTENZIONE Quando si chiude l alimentatore fare attenzione a non rimanere incastrati con le dita riportando eventuali lesioni Tenere presente che la luce emessa dal piano di copiatura può essere molto forte quando si chiude l alimentatore Downloaded from ManualsPrinter com Manuals ...

Страница 489: ...a schermata visualizzata è simile a quella seguente seguire le procedure descritte di seguito Riavvio della macchina Se viene visualizzato un messaggio di intervento assistenza riavviare la macchina IMPORTANTE Se si spegne l interruttore principale tutti i lavori nella memoria della macchina verranno cancellati 1 Spegnere l interruttore principale della macchina 2 Attendere almeno 10 secondi e ria...

Страница 490: ... macchina verranno cancellati NOTA Impostando la macchina sul Modo Funzioni limitate dalla schermata con il messaggio di richiesta assistenza si attiva il Modo Funzioni limitate in Impostazioni comuni vedere il Capitolo 3 Configurazione delle impostazioni di base della macchina nella Guida di riferimento La schermata con il messaggio di richiesta assistenza potrebbe ricomparire se il Modo Funzioni...

Страница 491: ...endendo inutilizzabile il cavo Se il cavo è danneggiato possono verificarsi dispersioni di corrente con il rischio di incendi o scosse elettriche IMPORTANTE Per effettuare le richieste di riparazione dal display del pannello tattile la macchina deve essere configurata in anticipo Per maggiori informazioni contattare un rivenditore autorizzato Canon La macchina si avvia nel Modo Funzioni limitate N...

Страница 492: ...sibile annullare la richiesta premendo Annulla Sì 4 Premere Immagine danneggiata Inceppamenti carta o Altro problema per selezionare il tipo di problema da risolvere premere Richiesta Dopo l invio della richiesta viene visualizzata la schermata a sinistra NOTA È possibile annullare la richiesta premendo Annulla Sì Downloaded from ManualsPrinter com Manuals ...

Страница 493: ...bile il cavo Se il cavo è danneggiato possono verificarsi dispersioni di corrente con il rischio di incendi o scosse elettriche IMPORTANTE Anche se si verifica un interruzione dell energia o la macchina viene spenta una batteria incorporata conserva nella memoria i documenti ricevuti per un ora circa Tuttavia se la batteria non è completamente carica i documenti non verranno conservati La batteria...

Страница 494: ...PITOLO 7 1 7 Appendice Questo capitolo descrive i tipi di carta utilizzabili con la macchina e contiene l indice Tipi di carta accettati 7 2 Indice analitico 7 4 Downloaded from ManualsPrinter com Manuals ...

Страница 495: ...3 Configurazione delle impostazioni di base della macchina nella Guida di riferimento Per istruzioni su come registrare i tipi di carta per il bypass vedere il Capitolo 2 Operazioni di base e il Capitolo 3 Configurazione delle impostazioni di base della macchina nella Guida di riferimento Con questa macchina è possibile utilizzare carta lavorata senza uso di cloro Tipo di carta Origine carta Casse...

Страница 496: ...ssetti carta 1 3 4 Cassetto carta 2 Bypass A4 297 mm 210 mm A4R 210 mm 297 mm A3 297 mm 420 mm A5R 148 mm 210 mm Formato irregol 99 mm 297 mm 148 mm 432 mm N D N D Buste N 10 COM10 104 7 mm 241 3 mm N D Opzionale ISO B5 176 mm 250 mm N D Opzionale Monarch 98 4 mm 190 5 mm N D Opzionale ISO C5 162 mm 229 mm N D Opzionale DL 110 mm 220 mm N D Opzionale Cassetti carta 1 2 3 4 Carta Vedere Caricamento...

Страница 497: ...e utente 3 2 Collegamento dei cavi Rete 1 11 Telefono 1 13 USB 1 9 Color Network ScanGear 3 4 Connessione di rete 1 11 Connessione telefonica 1 13 Connessione USB 1 9 Consumabili Cartuccia inchiostro per timbro 5 21 Cartuccia punti 5 21 Tipo di carta 5 19 Toner 5 20 Copia definizione di xii Copiatura 4 2 D Driver della stampante PCL PCL5 PCL6 3 10 Driver della stampante PS 3 13 Driver della stampa...

Страница 498: ...azione Alimentazione elettrica 1 4 Istruzioni di sicurezza xxi Luogo e utilizzo 1 2 Precauzioni 1 2 Spazio di installazione 1 6 Interruttore del pannello di controllo 2 4 Interruttore principale 2 2 Invio a file server 4 8 a supporti di memoria USB 4 8 e mail 4 8 I fax 4 8 Istruzioni di sicurezza Alimentazione elettrica xxii Altre avvertenze xxix Installazione xxi Manutenzione e controlli xxvi Mat...

Страница 499: ...Software Driver fax 3 16 Stampa da un computer 4 4 da un supporto di memoria USB 4 6 Stampa supporto 4 6 Stampa supporto memoria USB 4 6 Stampa definizione di xii T Tasti e pulsanti utilizzati nel manuale ix Tipo di carta 5 19 Formato carta 7 3 Tipo di carta 7 2 Trasporto della macchina 1 6 TWAIN 3 4 U UFRII LT Software per l utente 3 4 Downloaded from ManualsPrinter com Manuals ...

Страница 500: ...imageRUNNER 2545i 2545 2535i 2535 2530i 2530 2525i 2525 2520i 2520 Guía de usuario Downloaded from ManualsPrinter com Manuals ...

Страница 501: ...o y facsímil CD ROM Instrucciones de la interfaz de usuario remoto Guía de IU remoto CD ROM Conectividad de red Gestión de la seguridad Guía de configuración del sistema CD ROM Instrucciones de Color Network ScanGear Guía de Network ScanGear CD ROM Instrucciones de impresión de dispositivos de memoria USB Instrucciones de impresora PS PCL UFRII LT Guía de impresora CD ROM Instrucciones del control...

Страница 502: ...ndice Incluye las descripciones del papel disponible y del Índice Capítulo 1 Capítulo 2 Capítulo 3 Capítulo 4 Capítulo 5 Capítulo 6 Capítulo 7 Se ha hecho un gran esfuerzo para evitar inexactitudes y omisiones en este manual No obstante debido al continuo perfeccionamiento de nuestros productos consulte a Canon si necesita una especificación exacta Downloaded from ManualsPrinter com Manuals ...

Страница 503: ...to xiv Directiva de la CE sobre compatibilidad electromagnética xiv Directiva R TTE xiv Seguridad láser xv Información adicional xv Programa internacional ENERGY STAR xvi Logotipo IPv6 Ready xvi Directiva WEEE xvii Marcas comerciales xviii Software de terceros xviii Descargo de responsabilidad xix Limitaciones legales al empleo de su equipo y al uso de imágenes xix Súper G3 xx Instrucciones import...

Страница 504: ...do del equipo 2 2 Encendido de la alimentación principal 2 2 Utilización del Interruptor de alimentación de panel de control modo de reposo 2 4 Apagado de la alimentación principal 2 4 Flujo de configuración 2 6 Capítulo 3 CD ROM entregados con el equipo CD ROM del Manual de usuario 3 2 Requisitos del sistema 3 2 Utilización del Menú CD ROM 3 3 Software de usuario UFRII LT 3 4 Contenido del CD ROM...

Страница 505: ...pel 5 3 Ajustar un casete para alojar papel de distinto tamaño 5 5 Sustituir el tóner 5 8 Limpieza periódica 5 13 Cristal de copia y tapa 5 13 Rodillos y área de lectura del alimentador 5 14 Consumibles 5 18 Papel 5 18 Tóner 5 19 Tenga cuidado con el tóner falsificado 5 20 Cartucho de tinta para sello 5 20 Cartucho de grapas 5 20 Productos genuinos 5 21 Capítulo 6 Solución de problemas Eliminar at...

Страница 506: ...vii Capítulo 7 Apéndice Papel disponible 7 2 Índice alfabético 7 4 Downloaded from ManualsPrinter com Manuals ...

Страница 507: ... lesiones personales si no se ejecutan correctamente Para utilizar el equipo de forma segura preste atención siempre a estas advertencias ATENCIÓN Indica una precaución relativa a operaciones que pueden ocasionar lesiones personales si no se ejecutan correctamente Para utilizar el equipo de forma segura preste atención siempre a estas precauciones IMPORTANTE Indica requisitos y limitaciones de uso...

Страница 508: ...lizadas en este manual Las ilustraciones del equipo que aparecen en este manual corresponden a la impresora imageRUNNER 2545i con los siguientes equipos opcionales instalados Unidad de Acabado Interna B1 Bandeja Adicional de Acabado Interna B1 y Unidad de Alimentación por Casete AE1 Teclas Ejemplo Panel de control Icono de tecla Nombre de tecla Funciones adicionales Pantalla del panel táctil Nombr...

Страница 509: ...ca Seleccione las teclas o los botones que mejor cumplan su función Abreviaturas utilizadas en este manual En este manual los nombres de productos se abrevian del modo siguiente Sistema operativo Microsoft Windows 2000 Windows 2000 Sistema operativo Microsoft Windows XP Windows XP Sistema operativo Microsoft Windows Vista Windows Vista Sistema operativo Microsoft Windows 7 Windows 7 Sistema operat...

Страница 510: ...l equipo ha leído el original que desea copiar puede leer inmediatamente el original del siguiente usuario También es posible imprimir desde el equipo utilizando funciones distintas a las de copia Como estas operaciones se realizan de forma compleja en el equipo no sólo las copias sino también los distintos tipos de impresiones deben esperar a veces su turno para ser realizadas Para evitar confusi...

Страница 511: ...cumentos como copias faxes o datos enviados desde el ordenador de un cliente al equipo Copiar Imprimir los datos leídos de un original y realizar las funciones de acabado como grapar Downloaded from ManualsPrinter com Manuals ...

Страница 512: ... 4 Equipos opcionales en la Guía de referencia Modelo Copia Lectura remota IU remoto En viar Fax Imprimir Alimen tador Casete PDF con búsqueda USB UFRII LT PCL PS Código de barras 2 3 4 imageRUNNER 2545i opc opc opc opc opc imageRUNNER 2545 opc opc opc opc opc opc opc opc imageRUNNER 2535i opc opc opc opc opc imageRUNNER 2535 opc opc opc opc opc opc opc opc imageRUNNER 2530i opc opc opc opc opc im...

Страница 513: ... CE sobre compatibilidad electromagnética Declaramos que este producto cumple con los requisitos de compatibilidad electromagnética de la Directiva de la CE cuando la tensión de entrada nominal es de 230 V y 50 Hz aunque la tensión de entrada prevista para el producto va de 220 V a 240 V y de 50 a 60 Hz El empleo de cables apantallados es necesario para cumplir con los requisitos técnicos de la Di...

Страница 514: ...etire los alojamientos de protección o las tapas externas excepto si se indica en el manual del equipo Información adicional Al reparar o ajustar el sistema óptico del producto tenga cuidado de no poner destornilladores u otros objetos brillantes en la trayectoria del rayo láser Asimismo debe quitarse accesorios como anillos o relojes antes de trabajar en el interior del equipo El rayo reflejado y...

Страница 515: ...es del Programa ENERGY STAR de ahorro de energía El Programa Internacional de Equipo de Oficina ENERGY STAR es un programa internacional que tiene por objeto promocionar el ahorro de energía en el uso de ordenadores y otros equipos de oficina El programa se basa en el desarrollo y difusión de productos con funciones que reducen eficazmente el consumo de energía Se trata de un sistema abierto en el...

Страница 516: ...electrónicos RAEE baterías y acumuladores La gestión incorrecta de este tipo de residuos puede afectar al medio ambiente y a la salud humana debido a las sustancias potencialmente nocivas que suelen contener estos aparatos Su cooperación en la correcta eliminación de este producto contribuirá al correcto aprovechamiento de los recursos naturales Los usuarios tienen derecho a devolver pilas acumula...

Страница 517: ...presente los propietarios de los derechos del SOFTWARE no le otorgan licencia ni derecho alguno ni explícitos ni implícitos relativos a los derechos de propiedad intelectual que dichos propietarios tienen sobre dicho SOFTWARE 3 Solo podrá utilizar el SOFTWARE con el producto Canon que adquirió el PRODUCTO 4 No podrá asignar sublicenciar comercializar distribuir ni transferir el SOFTWARE a ningún t...

Страница 518: ...ohibido por la ley y por tanto incurrir en responsabilidades civiles o penales por ello A continuación se ofrece una lista no exhaustiva de estos documentos Se trata únicamente de una relación a modo de guía Si no tiene la seguridad suficiente acerca del empleo de su equipo para leer imprimir o reproducir de algún modo un documento concreto y o hacer uso de las imágenes leídas impresas o reproduci...

Страница 519: ...de aproximadamente 3 segundos por página lo que redunda en menos gasto de línea telefónica Tiempo de transmisión de fax aproximado de 3 segundos por página según el gráfico nº 1 de CCITT ITU T JBIG modo estándar a una velocidad de módem de 33 6 Kbps La red telefónica conmutada pública admite actualmente velocidades de módem de 28 8 Kbps o inferiores según el estado de la línea telefónica Downloade...

Страница 520: ... nunca las rendijas de ventilación del equipo Estas aberturas tienen la finalidad de ventilar las piezas internas del equipo Si bloquea estas aberturas es posible que se recaliente el equipo Nunca ponga el equipo sobre una superficie blanda como un sofá o una alfombra No instale el equipo en las siguientes ubicaciones Lugares sucios o polvorientos Lugares próximos a grifos o agua Lugares expuestos...

Страница 521: ...ón llame a su distribuidor local Canon autorizado Collares y otros objetos metálicos Copas vasos flores y otros recipientes que contengan agua o líquidos ATENCIÓN No instale el equipo sobre superficies inestables o inclinadas como por ejemplo plataformas poco firmes o suelos inclinados o en lugares sometidos a vibraciones intensas dado que el equipo podrá caerse o volcarse provocando lesiones pers...

Страница 522: ...ue puede provocar un incendio o descarga eléctrica Como regla general no utilice cables de extensión El uso de cables de extensión puede ocasionar un incendio o descarga eléctrica No obstante si tiene que utilizar un cable de extensión use uno adecuado para tensiones de CA 220 240 V o superiores desenróllelo e introduzca completamente la clavija de alimentación en el enchufe del cable de extensión...

Страница 523: ...ruptor de alimentación principal y desconecte el cable de interfaz cuando desee trasladar el equipo Si no lo hace es posible que se deteriore el cable de alimentación o el cable de interfaz y se produzca un incendio o descarga eléctrica Asegúrese de que la clavija del cable de alimentación esté completamente introducida en el enchufe si se ha desplazado el equipo No utilice el equipo si la conexió...

Страница 524: ...o ponga las manos el pelo la ropa etc cerca de la salida y de los rodillos de alimentación Aunque el equipo no esté en funcionamiento sus manos el pelo o la ropa pueden quedar atrapados en los rodillos lo que puede ocasionar lesiones personales si el equipo comienza a imprimir repentinamente El papel que el equipo acabe de imprimir podría estar caliente Tenga cuidado al retirar o alinear papel de ...

Страница 525: ... exterior del equipo durante ninguna de las fases del funcionamiento normal Por seguridad lea estas indicaciones e instrucciones No abra nunca otras tapas distintas a las indicadas en los manuales No despegue las siguientes etiquetas de precaución adheridas al equipo Si se despegan las etiquetas póngase en contacto con su distribuidor local Canon autorizado Si el rayo láser sale del interior del e...

Страница 526: ...escarga eléctrica Algunas zonas del interior del equipo están sometidas a alta tensión Al extraer papel atascado o inspeccionar el interior del equipo evite tocar con collares pulseras u otros objetos metálicos los componentes internos del equipo ya que podría sufrir quemaduras o una descarga eléctrica No queme ni arroje al fuego los cartuchos de tóner usados ya que pueden arder los restos de tóne...

Страница 527: ...edor durante un periodo de tiempo prolongado De lo contrario podría sufrir quemaduras de baja temperatura aunque no haya tocado la unidad de fijación y la zona de alrededor directamente Al extraer papel atascado o sustituir el cartucho de tóner tenga cuidado de no mancharse las manos o la ropa con el tóner Si se mancha lave inmediatamente la zona con agua fría El lavado con agua caliente puede hac...

Страница 528: ...o dispersa tóner reúna cuidadosamente las partículas de tóner o límpielas con un paño suave y húmedo de manera que se evite la inhalación Para limpiar el tóner derramado no utilice nunca una aspiradora que no disponga de medidas de protección contra explosiones de polvo Al hacerlo podría provocar un mal funcionamiento en la aspiradora o tener como resultado una explosión de polvo debido a las desc...

Страница 529: ... ADVERTENCIA Para usuarios con marcapasos Este producto genera un campo magnético de bajo nivel Si utiliza marcapasos y detecta anomalías retírese del equipo y consulte a un médico Downloaded from ManualsPrinter com Manuals ...

Страница 530: ...ectarse los cables Lugar de instalación y manipulación 1 2 Precauciones de instalación 1 2 Precauciones de manipulación 1 7 Conexión de los cables 1 9 Utilizar el equipo como impresora local conexión USB 1 9 Compartir el equipo con otros usuarios de red 1 11 Uso del equipo como dispositivo de fax 1 13 Downloaded from ManualsPrinter com Manuals ...

Страница 531: ... los lugares sometidos a niveles extremos muy altos o muy bajos de temperatura y humedad Por ejemplo evite instalar el equipo cerca de grifos calderas humidificadores acondicionadores de aire calefactores y estufas Evite la instalación donde el equipo reciba la luz directa del sol Si es inevitable coloque cortinas para proteger el equipo Asegúrese de que las cortinas no bloquean las rejillas de ve...

Страница 532: ...ilar adecuadamente la habitación lo suficiente para mantener un ambiente de trabajo agradable Evite los lugares sometidos a vapores de amoníaco Evite los lugares sometidos a vibraciones Por ejemplo evite instalar el equipo sobre superficies inestables Evite exponer el equipo a cambios bruscos de temperatura Si la habitación en la que está instalado el equipo es fría pero se calienta rápidamente es...

Страница 533: ...elación del equipo No retire las patas de nivelación del equipo tras la instalación del mismo Si coloca peso sobre la parte delantera del equipo tras extraer los casetes o las unidades del equipo el equipo podría caerse hacia delante Para evitar que esto ocurra asegúrese de que las patas de nivelación del equipo estén colocadas correctamente Póngase en contacto con un distribuidor Canon autorizado...

Страница 534: ...omo consecuencia originar un incendio Si la conexión del cable de alimentación está demasiado tenso se podría deteriorar dicho cable o se podrían desconectar los cables situados en el interior del equipo De este modo se podría originar un incendio Evite las siguientes situaciones Conectar y desconectar el cable de alimentación con frecuencia Tropezarse con el cable de alimentación Doblar el cable ...

Страница 535: ... Cuando está instalada la Unidad de Acabado Interna B1 opcional Trasladar el equipo Si piensa trasladar el equipo aunque sólo sea a otro lugar de la misma planta del edificio llame previamente a su distribuidor local Canon autorizado No intente trasladar el equipo sin ayuda La anchura es de 1 079 mm cuando no se incluye ninguna opción 100 mm o más 1 341 mm 565 mm 1 367 mm Downloaded from ManualsPr...

Страница 536: ...able de alimentación de la toma eléctrica y póngase en contacto con su distribuidor local Canon autorizado El empleo del equipo en este estado puede provocar un incendio o descarga eléctrica Asimismo evite colocar objetos alrededor de la clavija de alimentación para que el equipo pueda desconectarse cuando sea necesario No apague el interruptor de alimentación principal ni abra las tapas frontales...

Страница 537: ...ando no vaya a utilizar el equipo durante varios días Este equipo genera una pequeña cantidad de ozono u otros olores durante su uso normal Aunque la sensibilidad al ozono o a otros olores es variable esta cantidad no es perjudicial Es posible que se perciba el ozono u otros olores cuando se use el equipo durante un periodo de tiempo prolongado especialmente en lugares pocos ventilados En las zona...

Страница 538: ...SB Si desea usar el equipo como impresora local puede conectar el equipo a un ordenador con un cable USB El equipo es compatible con USB 2 0 de alta velocidad Tras establecer la conexión entre el equipo y el ordenador deberá instalar los controladores y la utilidad correspondiente al sistema operativo del equipo Para obtener más información sobre cómo instalar el controlador a través de una conexi...

Страница 539: ...as siguientes situaciones Durante la instalación de los controladores Durante el arranque del equipo Durante el proceso de impresión Si desconecta el cable USB del equipo o del ordenador que está activado espere siempre al menos 10 segundos antes de volver a conectar el cable Si vuelve a conectar el cable de forma inmediata podría provocar que el equipo o el ordenador no funcione correctamente Ase...

Страница 540: ...0BASE T y 100BASE TX que pueden utilizarse en la mayoría de conexiones LAN Utilizar Ethernet Conecte el puerto LAN del equipo a un puerto concentrador utilizando los siguientes tipos de cable Si lo conecta a un ordenador con un puerto 10BASE T un cable LAN de par trenzado de categoría 3 o superior Si lo conecta a un ordenador con un puerto 100BASE TX un cable LAN de par trenzado de categoría 5 o s...

Страница 541: ...En un entorno 10BASE T 100BASE TX combinado los dispositivos de la red concentradores routers etc deben ser compatibles con el entorno combinado Para obtener más información llame a su distribuidor local autorizado de Canon Ordenador con un puerto 100BASE TX Ordenador con un puerto 10BASE T Cable LAN Concentrador El puerto LAN RJ 45 está ubicado en la parte izquierda del equipo Downloaded from Man...

Страница 542: ...tener más información sobre la línea telefónica póngase en contacto con la compañía telefónica local IMPORTANTE Antes de usar la función de fax es necesario establecer la configuración del equipo Para obtener más información consulte el Capítulo 1 Introducción al uso de las funciones de envío y fax en la Guía de envío y facsímil Cable modular Clavija mural de teléfono La clavija de teléfono está u...

Страница 543: ...Conexión de los cables 1 14 Instalación del equipo 1 Downloaded from ManualsPrinter com Manuals ...

Страница 544: ...a a los manuales adecuados para obtener las instrucciones de configuración necesarias Encendido apagado del equipo 2 2 Encendido de la alimentación principal 2 2 Utilización del Interruptor de alimentación de panel de control modo de reposo 2 4 Apagado de la alimentación principal 2 4 Flujo de configuración 2 6 Downloaded from ManualsPrinter com Manuals ...

Страница 545: ...ación principal NOTA Para obtener instrucciones sobre cómo apagar la alimentación principal consulte Apagado de la alimentación principal en la pág 2 4 1 Asegúrese de que la clavija del cable de alimentación esté completamente introducida en el enchufe ADVERTENCIA No enchufe ni desenchufe el cable de alimentación con las manos húmedas ya que puede recibir una descarga eléctrica IMPORTANTE Si no se...

Страница 546: ...talla de inicio de sesión En este caso introduzca su ID de departamento o su ID de usuario y la contraseña Consulte el Capítulo 2 Funciones básicas en la Guía de referencia Puede seleccionar la pantalla superior de la función deseada que aparece cuando se enciende el equipo Consulte el Capítulo 3 Configuración de las opciones básicas del equipo en la Guía de referencia 3 Espere hasta que el equipo...

Страница 547: ...oso NOTA El equipo no entrará en el modo de reposo cuando esté en funcionamiento El equipo puede recibir reenviar o imprimir documentos cuando se encuentre en el modo de reposo Interruptor de alimentación de panel de control Estado del equipo Activado Preparado Desactivado Modo de reposo Para apagar la alimentación principal de la máquina pulse el interruptor de alimentación principal ubicado en l...

Страница 548: ...quipo 2 NOTA Es posible utilizar la opción Tiempo para apagado automático para que el equipo se apague automáticamente Consulte el Capítulo 3 Configuración de las opciones básicas del equipo en la Guía de referencia Downloaded from ManualsPrinter com Manuals ...

Страница 549: ...ón se incluyen en el CD ROM del Manual del usuario Consulte CD ROM del Manual de usuario en la pág 3 2 NOTA Para conocer las funciones disponibles en función del producto consulte Funciones disponibles en la pág xiii necesario Nº Elementosde configuración Función Enviar e mail I fax Enviar a servidor de archivos Fax Fax desde el ordenador de un cliente Imprimir Lectura remota IU remoto Otras funci...

Страница 550: ...Especifique la dirección de la red del equipo y establezca una conexión a un equipo de su red Tras conectar correctamente el equipo a la red configure el equipo para el entorno de red 4 Opciones de e mail I fax consulte la Guía de configuración del sistema Los e mails I faxes se envían reciben a través del servidor SMTP Los e mails I faxes también pueden recibirse a través de un servidor POP3 Desp...

Страница 551: ...de impresora de Mac Fax Controlador de fax consulte la Guía del controlador de fax de Windows Lectura remota Color Network ScanGear consulte la Guía de Network ScanGear 7 Configuración del servidor de archivos consulte la Guía de configuración del sistema Antes de enviar sus datos a un ordenador de la red deberá configurar el ordenados como servidor de archivos Puede enviar datos a través de una r...

Страница 552: ...4 Contenido del CD ROM 3 4 Requisitos del sistema 3 5 Instalación 3 7 Software de usuario PCL 3 10 Contenido del CD ROM 3 10 Requisitos del sistema 3 11 Instalación 3 12 Software de usuario PS opcional 3 13 Contenido del CD ROM 3 13 Requisitos del sistema 3 14 Instalación 3 14 Software de controlador de fax opcional 3 16 Contenido del CD ROM 3 16 Requisitos del sistema 3 17 Instalación 3 17 Downlo...

Страница 553: ...n función de la configuración del ordenador es posible que algunas características no funcionen correctamente Si los manuales en PDF no se abren desde el Menú CD ROM abra los archivos PDF directamente desde la carpeta ESPAÑOL del CD ROM del Manual de usuario Windows Macintosh OS Windows 2000 Service Pack 4 o posterior Windows XP Service Pack 1a o posterior Windows Vista Service Pack 2 o posterior ...

Страница 554: ...perativo que esté usando Para los usuarios de Macintosh haga doble clic en el icono START para iniciar el Menú CD ROM a EXAMINAR MANUAL Puede leer cualquiera de las guías indicadas haciendo clic en ella Después de hacer clic en la guía que desee se ejecutará Adobe Reader Adobe Acrobat Reader y se mostrará el manual en PDF b INSTALAR Puede instalar los manuales en PDF indicados en su ordenador Tras...

Страница 555: ... forma adecuada entre el equipo host y la impresora para así reducir considerablemente el tiempo de impresión global La carga de trabajo puede delegarse para corresponderse con los datos de impresión aumentando de forma significativa la velocidad a través de la optimización Color Network ScanGear Con Color Network ScanGear los originales colocados en el alimentador cristal de copia pueden leerse e...

Страница 556: ... se indican a continuación Controlador de impresora UFRII LT Software Sistemas operativos Windows 2000 Windows XP Windows Vista Windows 7 Windows Server 2003 Windows Server 2008 Mac OS X 10 4 9 o posterior NOTA Los sistemas operativos compatibles pueden variar en función de la versión del controlador de impresora que utilice Hardware Ordenador Cualquier ordenador que ejecuta los sistemas anteriore...

Страница 557: ...z de comunicarse a través de redes TCP IP y UDP IP en una red Ethernet IMPORTANTE Si desea utilizar el equipo como escáner de red deberá conectarlo a un ordenador a través de una red IPv4 NOTA Al leer una gran cantidad de imágenes o imágenes que contienen grandes cantidades de datos de imágenes es posible que se produzca un error de memoria insuficiente o una pérdida importante de velocidad de lec...

Страница 558: ...stalación consulte la Guía de instalación del controlador de impresora o la Guía de instalación del controlador de impresora para Mac Menú CD ROM Windows NOTA Visualice los manuales en HTML antes de iniciar la instalación No podrá ver los manuales en HTML mientras la instalación esté en progreso Haga clic para instalar el controlador de impresora Haga clic para ver la Guía de instalación del contr...

Страница 559: ...le clic en el icono de CD que aparecerá en el escritorio Encontrará el instalador y la Guía de instalación del controlador de impresora para Mac en la carpeta que tiene el nombre del controlador de impresora Haga doble clic en el icono del instalador que aparecerá en la carpeta del instalador para iniciar la instalación Downloaded from ManualsPrinter com Manuals ...

Страница 560: ...e impresora para Mac En la carpeta de instalación haga doble clic en Documentos Guía icono index html NOTA En función del modelo de impresora que utilice es posible que la guía de instalación sea un archivo PDF En ese caso haga doble clic en el icono de PDF de la carpeta Documentos Downloaded from ManualsPrinter com Manuals ...

Страница 561: ...l equipo host para ejecutar procesos de alta velocidad PCL6 es una versión avanzada de PCL5 y ofrece una velocidad y calidad de impresión superiores Guía de instalación del controlador de impresora Lea este manual en HTML antes de instalar el controlador de impresora Font Manager Utilice este software para administrar fuentes y verlas con precisión en Windows Haga doble clic en Canonfm en el icono...

Страница 562: ...operativos Windows 2000 Windows XP Windows Vista Windows 7 Windows Server 2003 Windows Server 2008 NOTA Los sistemas operativos compatibles pueden variar en función de la versión del controlador de impresora que utilice Hardware Ordenador Cualquier ordenador que ejecuta los sistemas anteriores Memoria Cantidad de memoria necesaria para ejecutar los sistemas anteriores correctamente Downloaded from...

Страница 563: ...les sobre el procedimiento de instalación Menú CD ROM NOTA Visualice los manuales en HTML antes de iniciar la instalación No podrá ver los manuales en HTML mientras la instalación esté en progreso Haga clic para instalar el controlador de impresora Haga clic para ver la Guía de instalación del controlador de impresora Haga clic primero en este botón Downloaded from ManualsPrinter com Manuals ...

Страница 564: ...ía a la impresora Además de convertir datos de impresión también le permite configurar opciones relativas a las opciones detalladas y de acabado tales como los tonos medios y proporciona un entorno de impresión adecuado para la publicación de escritorio y la publicación bajo demanda Guía de instalación del controlador de impresora Guía de instalación del controlador de impresora PS para Mac Lea es...

Страница 565: ...dad de memoria necesaria para ejecutar los sistemas anteriores correctamente Instalación En la pantalla de menú del CD ROM puede comenzar a instalar el software o mostrar el manual en HTML para ver los detalles sobre el procedimiento de instalación Para obtener más información sobre el proceso de instalación consulte la Guía de instalación del controlador de impresora o la Guía de instalación del ...

Страница 566: ...a instalación No podrá ver los manuales en HTML mientras la instalación esté en progreso Para obtener más información sobre cómo instalar el controlador de impresora y ver la Guía de instalación del controlador de impresora para Mac consulte Software de usuario UFRII LT en la pág 3 4 Downloaded from ManualsPrinter com Manuals ...

Страница 567: ...jeta de Fax Súper G3 AG1 opcional Contenido del CD ROM Controlador de fax Con el controlador de fax instalado en su ordenador puede enviar documentos por fax directamente desde aplicaciones del escritorio de su ordenador en vez de tener que leer originales en el equipo Guía de instalación del controlador de fax Lea este manual en HTML antes de instalar el controlador de fax IMPORTANTE Los controla...

Страница 568: ...eriores Memoria Cantidad de memoria necesaria para ejecutar los sistemas anteriores correctamente Instalación En la pantalla de menú del CD ROM puede comenzar a instalar el software o mostrar el manual en HTML para ver los detalles sobre el procedimiento de instalación Menú CD ROM NOTA Visualice los manuales en HTML antes de iniciar la instalación No podrá ver los manuales en HTML mientras la inst...

Страница 569: ...Software de controlador de fax opcional 3 18 CD ROM entregados con el equipo 3 Downloaded from ManualsPrinter com Manuals ...

Страница 570: ...sde un ordenador 4 4 Impresión desde un dispositivo de memoria USB Impresión de dispositivos 4 6 Envío de un documento E mail I fax Servidor archivos y dispositivo de memoria USB 4 8 Envío de un fax 4 10 Lectura desde un ordenador Lectura remota 4 12 Funcionamiento del equipo desde un ordenador IU remoto 4 14 Downloaded from ManualsPrinter com Manuals ...

Страница 571: ...a del cristal de copia después de haber colocado los originales en el cristal de copia Introduzca su ID dpto y la contraseña si la pantalla así se lo solicita pulse la tecla Log In Out Introduzca su ID de usuario y la contraseña si la pantalla así se lo solicita pulse la tecla Log In Out Inserte la tarjeta de control si la pantalla así se lo solicita Cuando haya finalizado las operaciones pulse Lo...

Страница 572: ...do superior derecho de la pantalla de panel táctil Cuando aparezca la pantalla siguiente seleccione el tamaño original pulse Aceptar Inicio Para cancelar la copia pulse Detener También puede cancelar el trabajo actual pulsando Cancelar en la pantalla que indica el estado del proceso de copia El procedimiento de cancelación puede variar dependiendo del estado del trabajo Para obtener más informació...

Страница 573: ...ora mostrada en el paso 3 puede variar dependiendo de la aplicación que esté usando 2 El nombre del botón para iniciar la impresión puede variar dependiendo de la aplicación que esté usando Las pantallas del controlador de la impresora mostradas en los pasos del 2 al 4 pueden variar dependiendo de la aplicación que se esté utilizando El controlador de la impresora instalada en su ordenador permite...

Страница 574: ...a cancelar la impresión en el panel de control del equipo utilice la pantalla Monitor sistema que aparece al pulsar Detener o Monitor sistema 2 1 El nombre del botón para iniciar la impresión puede variar dependiendo de la aplicación que esté usando 2 El procedimiento de cancelación puede variar dependiendo del estado del trabajo Para obtener más información Capítulo 3 Gestión de trabajos de impre...

Страница 575: ...ducido el dispositivo de memoria USB pulse Hecho y continúe con el siguiente paso Si el equipo se encuentra en el modo de reposo pulse Encendido Introduzca su ID y contraseña o inserte la tarjeta de control si la pantalla así se lo solicita Consulte Cómo iniciar sesión en el equipo en la pág 4 2 Los puertos USB del lado derecho del equipo son opcionales Interfaz de 3 Puertos USB A1 El puerto USB d...

Страница 576: ... la carpeta pulse Baj para mostrar los archivos seleccione el archivo Para cancelar la impresión pulse Detener También puede cancelar el trabajo de impresión actual pulsando Cancelar en la pantalla que indica el estado del proceso de impresión El procedimiento de cancelación puede variar dependiendo del estado del trabajo Para obtener más información Capítulo 3 Gestión de trabajos de impresión en ...

Страница 577: ...los originales Pulse SEND Enviar para mostrar la pantalla superior de las funciones de envío y fax Si el equipo se encuentra en el modo de reposo pulse Encendido Introduzca su ID y contraseña o inserte la tarjeta de control si la pantalla así se lo solicita Consulte Cómo iniciar sesión en el equipo en la pág 4 2 Si aparece la siguiente pantalla introduzca su nombre usuario y contraseña y especifiq...

Страница 578: ...cómo cancelar el envío de un documento durante la transmisión consulte el Capítulo 2 Envío de documentos en la Guía de envío y facsímil Es posible que los métodos de envío disponibles que se muestran en la pantalla varíen en función de las opciones También puede especificar el destino utilizando Libreta direcciones Botones de favoritos o Botones acc rápido Estas funciones le ahorran el esfuerzo de...

Страница 579: ...alla de envío Coloque los originales Pulse SEND Enviar para mostrar la pantalla superior de las funciones de envío y fax Si el equipo se encuentra en el modo de reposo pulse Encendido Introduzca su ID y contraseña o inserte la tarjeta de control si la pantalla así se lo solicita Consulte Cómo iniciar sesión en el equipo en la pág 4 2 Si aparece la siguiente pantalla introduzca su nombre usuario y ...

Страница 580: ...especificación de destinos consulte el Capítulo 4 Especificación sencilla y rápida de destinos en la Guía de envío y facsímil Pulse Inicio Cuando aparezca la pantalla siguiente seleccione el tamaño original pulse Aceptar Para cancelar la lectura de originales pulse Detener También puede cancelar la lectura de originales pulsando Cancelar en la pantalla que indica el estado del proceso de envío Par...

Страница 581: ...rdenador en función de la aplicación o del sistema operativo que esté utilizando Cambie el equipo a Conectado Coloque los originales Pulse SCAN PRINT Lectura Impresión para ver la pantalla Lectura Impresión Lectura remota Conectar Coloque los originales en el alimentador o en el cristal de copia Cierre el alimentador la tapa del cristal de copia después de haber colocado los originales en el crist...

Страница 582: ... como el escáner a utilizar Para obtener más información consulte la documentación que acompaña a la aplicación compatible con TWAIN En el cuadro de diálogo Color Network ScanGear especifique las opciones como el modo de color y la resolución Para cancelar la lectura haga clic en Cancelar en el cuadro de diálogo que aparece cuando se están procesando los datos de lectura Cuando se haya completado ...

Страница 583: ...ador En la página superior del IU remoto que se muestra en el paso 1 introduzca su ID dpto o ID de usuario y contraseña haga clic en Aceptar Tras iniciar sesión correctamente se muestra la página Estado del dispositivo Diríjase a otras páginas según necesite haciendo uso del menú situado en el lado izquierdo de la página El ID y contraseña que deberá introducir al iniciar sesión dependerán del aju...

Страница 584: ... sello y los cartuchos de grapas Casetes 5 2 Cargar papel 5 3 Ajustar un casete para alojar papel de distinto tamaño 5 5 Sustituir el tóner 5 8 Limpieza periódica 5 13 Cristal de copia y tapa 5 13 Rodillos y área de lectura del alimentador 5 14 Consumibles 5 18 Papel 5 18 Tóner 5 19 Cartucho de tinta para sello 5 20 Cartucho de grapas 5 20 Productos genuinos 5 21 Downloaded from ManualsPrinter com...

Страница 585: ...y A5R Tipo Normal Reciclado Color y Taladrado Consulte Papel disponible en la pág 7 2 Con el Alimentador de Sobres D1 opcional podrán cargarse los siguientes sobres en el casete 2 Nº 10 COM10 ISO B5 Monarch ISO C5 y DL Consulte el Capítulo 4 Equipos opcionales en la Guía de referencia El número de casetes disponibles puede variar en función de la configuración del equipo Consulte Funciones disponi...

Страница 586: ...etas Papel en donde se hayan copiado imágenes en color no imprima en el reverso del papel Papel que se haya impreso utilizando una impresora de transferencia térmica no imprima en el reverso del papel Separe bien el papel antes de cargarlo y alinee los bordes del papel en una superficie plana No coloque papel ni otros objetos en la zona vacía del casete situada al lado del papel Si lo hace es posi...

Страница 587: ...sete se imprimirá la cara que esté colocada hacia arriba Si se producen problemas tales como atascos de papel o una mala calidad de impresión pruebe colocando el papel hacia abajo y vuelva a cargarlo 3 Abra un paquete de papel y extraiga la cantidad deseada ATENCIÓN Tenga cuidado de no cortarse con los bordes del papel al cargarlo en el equipo IMPORTANTE Vuelva a poner el papel sobrante en su paqu...

Страница 588: ... Capítulo 3 Configuración de las opciones básicas del equipo en la Guía de referencia IMPORTANTE Asegúrese de que la opción de tipo de papel del casete coincide con el tipo de papel que desea cargar Ajustar un casete para alojar papel de distinto tamaño Si desea cambiar el tamaño del papel en un casete ajuste las guías deslizantes del nuevo tamaño de papel tal y como se describe a continuación 5 I...

Страница 589: ... podrían producirse atascos de papel impresiones sucias o suciedad en el interior del equipo IMPORTANTE El papel enrollado o curvado se debe alisar antes de usarlo Asegúrese de que la altura del papel no supera la marca de límite de carga tanto en el lado izquierdo como en el lado derecho de las guías deslizantes Asegúrese de que la opción de tamaño de papel del casete coincide con el tamaño de pa...

Страница 590: ...ítulo 3 Configuración de las opciones básicas del equipo en la Guía de referencia IMPORTANTE Asegúrese de que el tipo de papel del casete de papel coincide con el tipo de papel que se está cargando 6 Introduzca con cuidado el casete en el equipo hasta que encaje ATENCIÓN Al poner de nuevo el casete en su posición original tenga cuidado con los dedos para evitar lesiones Chapa de tamaño de papel Ca...

Страница 591: ...pueda imprimir aparecerá el mensaje Cambie el tóner en la pantalla del panel táctil Si pulsa Hacer luego podrá reanudar las operaciones Sin embargo deberá cambiar el cartucho de tóner para poder seguir imprimiendo ADVERTENCIA No queme ni arroje al fuego los cartuchos de tóner usados ya que pueden arder los restos de tóner del interior del cartucho y provocar un incendio o quemaduras No guarde cart...

Страница 592: ...En tal caso lávese de inmediato con agua fría El lavado con agua caliente puede hacer que las manchas de tóner se fijen de forma permanente haciendo imposible su eliminación Para tirar los cartuchos de tóner usados póngalos en una bolsa con el fin de evitar que se disperse el tóner que queda en el interior de los cartuchos y deposítelos en un lugar alejado del fuego IMPORTANTE Utilice únicamente c...

Страница 593: ...ho y producir un incendio 2 Gire la palanca de bloqueo hacia la izquierda hasta que se coloque en posición vertical IMPORTANTE Asegúrese de que la flecha hacia abajo de la palanca de bloqueo está alineada con la flecha hacia arriba de la posición del icono Desbloquear antes de continuar IMPORTANTE Si no puede sacar el cartucho de tóner compruebe que el pomo está totalmente girado en la posición ad...

Страница 594: ...po Consulte Consumibles en la pág 5 18 No toque la apertura del cartucho de tóner ni lo someta a golpes De lo contrario podría gotear tóner del cartucho 5 Introduzca el nuevo cartucho de tóner en el puerto de suministro del tóner lo máximo posible Sostenga el nuevo cartucho de tóner con una mano desde abajo e introdúzcalo en el equipo con la otra mano Downloaded from ManualsPrinter com Manuals ...

Страница 595: ... con la flecha hacia la derecha de la posición del icono Bloquear 7 Cierre la tapa de cambio de tóner ATENCIÓN Para evitar accidentes tenga cuidado con los dedos al cerrar la tapa IMPORTANTE Asegúrese de limpiar la unidad de fijación cada vez que cambie el cartucho de tóner Consulte el Capítulo 5 Mantenimiento periódico en la Guía de referencia Icono Bloquear Downloaded from ManualsPrinter com Man...

Страница 596: ...rica y limpie la zona que rodea la base de las clavijas metálicas y el enchufe con un paño seco para eliminar el polvo y la suciedad Si el cable de alimentación permanece enchufado durante mucho tiempo en un lugar húmedo polvoriento o cargado de humo es posible que se acumule polvo alrededor de la clavija y se humedezca Esto puede provocar un cortocircuito y producirse un incendio IMPORTANTE No hu...

Страница 597: ... del alimentador y los rodillos periódicamente tal y como se indica en la siguiente ilustración IMPORTANTE No humedezca excesivamente el paño ya que demasiada agua puede dañar el equipo NOTA El Alimentador DADF AA1 AB1 es opcional para la imageRUNNER 2545 2535 2530 2525 2520 1 Abra la tapa del alimentador 2 Limpie los rodillos tres posiciones en total del interior de la tapa del alimentador con un...

Страница 598: ...o con agua A continuación limpie la zona con un paño suave y seco Gire los rodillos con la mano mientras los limpia 5 Limpie la parte de plástico transparente de la tapa interior con un paño humedecido con agua A continuación limpie la zona con un paño suave y seco 6 Cierre la tapa interior ATENCIÓN Para evitar accidentes tenga cuidado con los dedos al cerrar la tapa Pestaña Downloaded from Manual...

Страница 599: ...resina y los alrededores con un paño humedecido con agua A continuación limpie la zona con un paño suave y seco NOTA Si no se alcanza el mando de alimentación mientras el alimentador está abierto cierre el alimentador gire el mando de alimentación ligeramente abra el alimentador limpie el rodillo Repita estos pasos hasta que la superficie del rodillo quede completamente limpia Mando de alimentació...

Страница 600: ...ve y seco 10 Cierre el alimentador ATENCIÓN Para evitar accidentes tenga cuidado con los dedos al cerrar el alimentador Tenga en cuenta que la luz que emite el cristal de copia puede ser muy fuerte al cerrar el alimentador 11 Cierre la tapa del alimentador ATENCIÓN Para evitar accidentes tenga cuidado con los dedos al cerrar la tapa Área de lectura del alimentador Downloaded from ManualsPrinter co...

Страница 601: ...emos de papel reciclado papel en color transparencias recomendadas para el equipo etiquetas y otros tipos de papel Para obtener más información llame a su distribuidor local autorizado de Canon ATENCIÓN No guarde el papel en lugares expuestos al fuego ya que puede arder y provocar un incendio o quemaduras IMPORTANTE Para evitar la absorción de humedad guarde el papel restante bien envuelto en su p...

Страница 602: ...manera que se evite la inhalación Para limpiar el tóner derramado no utilice nunca una aspiradora que no disponga de medidas de protección contra explosiones de polvo Al hacerlo podría provocar un mal funcionamiento en la aspiradora o tener como resultado una explosión de polvo debido a las descargas estáticas ATENCIÓN Mantenga el tóner y otros consumibles fuera del alcance de los niños pequeños E...

Страница 603: ...utiliza para sellar los originales Utilice las pinzas proporcionadas para quitar y cambiar el cartucho de tinta para sello Cartucho de Tinta para Sello C1 IMPORTANTE El modo Sellar está disponible solo si la Unidad de Sello B1 opcional está instalada en el Alimentador opcional para la imageRUNNER 2545 2535 2530 2525 2520 Cartucho de grapas Si aparece un mensaje solicitándole que cargue grapas nuev...

Страница 604: ...ste equipo Para obtener la mejor calidad de impresión el mejor rendimiento y la mayor productividad del equipo recomendamos que utilice tóner componentes y productos Canon genuinos Póngase en contacto con su distribuidor Canon autorizado o con su proveedor de servicios para obtener productos Canon genuinos Downloaded from ManualsPrinter com Manuals ...

Страница 605: ...Consumibles 5 22 Mantenimiento periódico 5 Downloaded from ManualsPrinter com Manuals ...

Страница 606: ...pel 6 2 Unidad de fijación 6 3 Casetes 1 y 2 6 5 Alimentador 6 9 Mensajes de aviso al servicio técnico 6 12 Reiniciar el equipo 6 12 Utilizar el equipo con funciones limitadas 6 13 Solicitud de reparaciones desde el panel de control 6 14 Ponerse en contacto con su distribuidor local Canon autorizado 6 16 Downloaded from ManualsPrinter com Manuals ...

Страница 607: ...o Si no puede extraer el papel póngase en contacto con su distribuidor local Canon autorizado Al extraer papel atascado en el interior del equipo sáquelo con cuidado para evitar que el tóner depositado sobre el papel atascado se disperse y ensucie sus manos o ropa Si se mancha lave inmediatamente la zona con agua fría El lavado con agua caliente puede hacer que las manchas de tóner se fijen de for...

Страница 608: ... Una vez que haya eliminado todo el papel atascado se reanudará la impresión NOTA Cuando se eliminen todos los atascos de papel el equipo volverá a calcular automáticamente el número de copias o impresiones que se van a realizar No tendrá que volver a introducir el número de copias o impresiones incluso si está imprimiendo varios grupos Unidad de fijación Si el papel se atasca en la unidad de fija...

Страница 609: ...e inferior de la unidad de fijación 3 Tire de la tapa superior de la unidad de fijación hacia abajo utilizando la pestaña y elimine el papel atascado ATENCIÓN La unidad de fijación y las zonas de alrededor están sujetas a altas temperaturas Al extraer el papel atascado no toque nada de esta zona a excepción del papel atascado o de la tapa superior Downloaded from ManualsPrinter com Manuals ...

Страница 610: ...atascado tal y como se indica a continuación IMPORTANTE El procedimiento que se describe en esta sección hace referencia al equipo con cuatro casetes instalados El número de casetes disponibles puede variar en función de la configuración del equipo 4 Ponga la mano en la posición indicada por el símbolo de la mano situado en la tapa derecha de la unidad principal y cierre con cuidado la tapa derech...

Страница 611: ...de la tapa derecha de la unidad principal y abra la tapa derecha 3 Abra la tapa derecha del casete y elimine los atascos de papel 4 Pulse el botón del casete 1 y extraiga el casete hasta que se detenga 2 Extraiga el papel atascado Downloaded from ManualsPrinter com Manuals ...

Страница 612: ...sete hasta que se detenga 5 Extraiga el papel atascado 6 Introduzca con cuidado el casete en el equipo hasta que encaje ATENCIÓN Al poner de nuevo el casete en su posición original tenga cuidado con los dedos para evitar lesiones 8 Extraiga el papel atascado Downloaded from ManualsPrinter com Manuals ...

Страница 613: ...ncaje ATENCIÓN Al poner de nuevo el casete en su posición original tenga cuidado con los dedos para evitar lesiones 10 Cierre la tapa derecha del casete ATENCIÓN Para evitar accidentes tenga cuidado con los dedos al cerrar la tapa 11 Ponga la mano en la posición indicada por el símbolo de la mano situado en la tapa derecha de la unidad principal y cierre con cuidado la tapa derecha hasta que haga ...

Страница 614: ...extraiga el papel atascado tal y como se indica a continuación IMPORTANTE El Alimentador DADF AA1 AB1 es opcional para la imageRUNNER 2545 2535 2530 2525 2520 2 Abra la tapa interior sosteniendo la pestaña de la parte frontal 1 Abra la tapa del alimentador Pestaña Downloaded from ManualsPrinter com Manuals ...

Страница 615: ...a del alimentador ATENCIÓN Para evitar accidentes tenga cuidado con los dedos al cerrar las tapas 5 Levante el alimentador y compruebe si se han quedado originales atascados dentro Si encuentra algún original atascado en el alimentador repita el procedimiento desde el paso 1 No tire del original a la fuerza ya que se puede romper Mando de alimentación Original atascado Downloaded from ManualsPrint...

Страница 616: ...s en sus posiciones originales Una vez que haya eliminado todo el papel atascado se reanudará la impresión 6 Cierre el alimentador ATENCIÓN Para evitar accidentes tenga cuidado con los dedos al cerrar el alimentador Tenga en cuenta que la luz que emite el cristal de copia puede ser muy fuerte al cerrar el alimentador Downloaded from ManualsPrinter com Manuals ...

Страница 617: ...Si aparece una pantalla similar a la que se muestra a continuación siga los siguientes procedimientos Reiniciar el equipo Si aparece un mensaje de aviso al servicio técnico reinicie el equipo IMPORTANTE Si se desconecta la alimentación principal se borrarán todos los trabajos de la memoria del equipo 1 Apague la alimentación principal del equipo 2 Espere al menos 10 segundos y vuelva a encenderla ...

Страница 618: ...e la memoria del equipo NOTA Si establece el equipo en el modo de funciones limitadas desde la pantalla de mensajes de aviso al servicio técnico se activará el modo de funciones limitadas en las opciones comunes Consulte el Capítulo 3 Configuración de las opciones básicas del equipo en la Guía de referencia Es posible que la pantalla de mensajes de aviso al servicio técnico vuelva a aparecer si el...

Страница 619: ...ble de alimentación Si el cable de alimentación está deteriorado se pueden producir fugas de corriente y ocasionar un incendio o descarga eléctrica IMPORTANTE Para realizar solicitudes de reparación desde la pantalla del panel táctil deberá configurar el equipo previamente Para obtener más información llame a su distribuidor local autorizado de Canon El equipo se inicia en el modo de funciones lim...

Страница 620: ...itud pulsando Cancelar Sí 4 Pulse Problema de imagen Atascos de papel u Otros problemas para seleccionar el tipo de problema que desea solucionar pulse Solicitar La pantalla de la izquierda aparecerá cuando su solicitud se haya enviado correctamente NOTA Podrá cancelar la solicitud pulsando Cancelar Sí Downloaded from ManualsPrinter com Manuals ...

Страница 621: ... cable de alimentación está deteriorado se pueden producir fugas de corriente y ocasionar un incendio o descarga eléctrica IMPORTANTE Si se produce una interrupción del funcionamiento o si el equipo se apaga una batería integrada conservará los documentos recibidos en la memoria durante aproximadamente una hora Sin embargo si la batería no está totalmente cargada es posible que no se conserven los...

Страница 622: ...ÍTULO 7 1 7 Apéndice Este capítulo describe los tipos de papel que pueden utilizarse con el equipo e incluye el índice Papel disponible 7 2 Índice alfabético 7 4 Downloaded from ManualsPrinter com Manuals ...

Страница 623: ...el Capítulo 3 Configuración de las opciones básicas del equipo en la Guía de referencia Para obtener instrucciones sobre cómo guardar tipos de papel para la bandeja de alimentación consulte el Capítulo 2 Funciones básicas y el Capítulo 3 Configuración de las opciones básicas del equipo en la Guía de referencia Con este equipo se puede utilizar papel sin cloro Tipo de papel Alojamiento de papel Cas...

Страница 624: ...asete 2 Bandeja de alimentación A4 297 mm 210 mm A4R 210 mm 297 mm A3 297 mm 420 mm A5R 148 mm 210 mm Tam no estándar De 99 mm a 297 mm De 148 mm a 432 mm N D N D Sobre N 10 COM10 104 7 mm 241 3 mm N D Opcional ISO B5 176 mm 250 mm N D Opcional Monarch 98 4 mm 190 5 mm N D Opcional ISO C5 162 mm 229 mm N D Opcional DL 110 mm 220 mm N D Opcional Casetes 1 2 3 4 Papel Consulte Cargar papel en la pág...

Страница 625: ...es Red 1 11 Teléfono 1 13 USB 1 9 Conexión de red 1 11 Conexión del teléfono 1 13 Conexión USB 1 9 Consumibles Cartucho de grapas 5 20 Cartucho de tinta para sello 5 20 Papel 5 18 Tóner 5 19 Controlador de fax 3 16 Controlador de impresora PCL PCL5 PCL6 3 10 Controlador de impresora PS 3 13 Controlador de impresora PS para Mac 3 13 Controlador de impresora UFRII LT 3 4 Controlador de impresora UFR...

Страница 626: ...e un ordenador 4 4 Instalación Alimentación eléctrica 1 4 Espacio de instalación 1 6 Instrucciones de seguridad xxi Precauciones 1 2 Ubicación y manipulación 1 2 Instrucciones de seguridad Alimentación eléctrica xxiii Consumibles xxix Instalación xxi Manipulación xxiv Mantenimiento e inspecciones xxvii Otras advertencias xxx Interruptor de alimentación de panel de control 2 4 IU remoto 4 14 L Lect...

Страница 627: ...tware de usuario PS 3 13 Software de usuario UFRII LT 3 4 Solicitud de reparaciones 6 14 Solución de problemas Funciones limitadas 6 13 Mensajes de aviso al servicio técnico 6 12 T Teclas y botones utilizados en este manual ix Transparencia 7 2 Trasladar el equipo 1 6 TWAIN 3 4 U Unidad de Calentador de Casete 37 2 3 Downloaded from ManualsPrinter com Manuals ...

Страница 628: ...Downloaded from ManualsPrinter com Manuals ...

Страница 629: ...Downloaded from ManualsPrinter com Manuals ...

Страница 630: ...ON LATIN AMERICA INC 703 Waterford Way Suite 400 Miami Florida 33126 U S A CANON AUSTRALIA PTY LTD 1 Thomas Holt Drive North Ryde Sydney N S W 2113 Australia CANON CHINA CO LTD 15F Jinbao Building No 89 Jinbao Street Dongcheng District Beijing 100005 China CANON SINGAPORE PTE LTD 1 HarbourFront Avenue 04 01 Keppel Bay Tower Singapore 098632 CANON HONGKONG CO LTD 19 F The Metropolis Tower 10 Metrop...

Отзывы: