


0FR4-09Y
This section describes the procedure for saving scanned data in a computer.
You can perform the following four tasks.
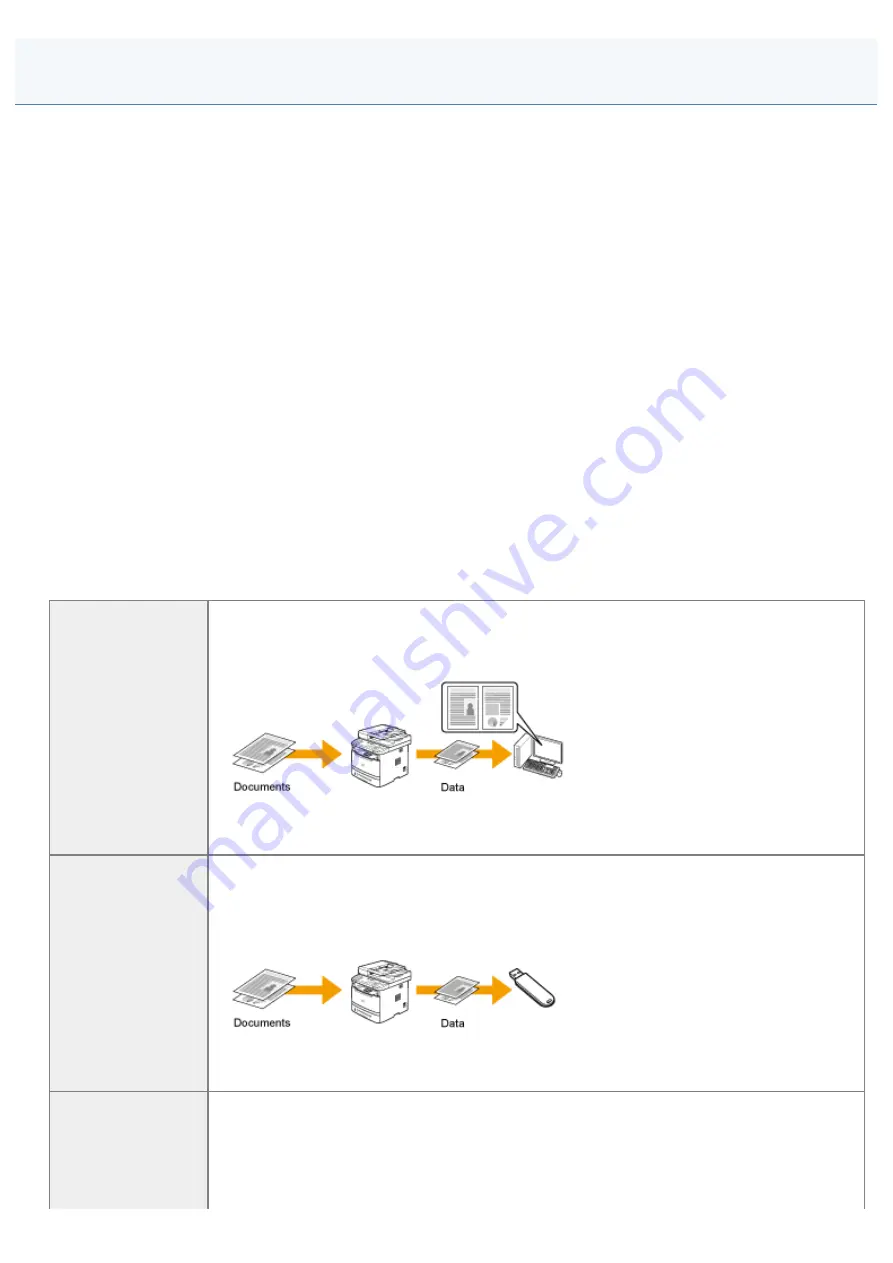
Saving scanned paper documents to a computer
You can easily save scanned paper documents to a computer from the operation panel of the machine.
The machine provides a wide variety of scan settings for you to choose from. You can save a scanned document in the
"Searchable PDF" file format, which converts scanned images to searchable text data, without having to specify
advanced scan settings.
Plus, you can scan documents using the MF Toolbox available for the machine, or the WIA driver. There are many
ways to convert your paper documents into electronic files. All you need to do is to select one based on your scan
needs.
Saving scanned documents to USB memory device
You can save scanned documents to USB memory device inserted in the slot of the machine.
Since you do not need to configure your computer, you can easily convert paper documents into electronic files.
Emailing scanned documents
You can send scanned documents to your e-mail application.
You can send scanned documents to your e-mail application without installing the software on your computer.
Sending scanned documents to a file server
You can send scanned documents to a file server.
You can send scanned documents to a file server without installing the software on your computer.
Saving scanned
documents to a
computer
See "
Scanning Paper Documents and Saving Them to a Computer (USB & Network
Saving scanned
documents to USB
memory device
See "
Saving Scanned Documents to USB Memory Device
."
See "
Scanning
㻠㻞㻜㻌㻛㻌㻥㻢㻠
Содержание i-SENSYS MF6180dw
Страница 1: ......
Страница 46: ...NOTE If you press Menu before you press OK The changes made to the settings are not saved...
Страница 49: ...The entry is complete...
Страница 57: ......
Страница 64: ......
Страница 75: ...8 Make sure that the destination you registered is displayed in Members List and click OK...
Страница 103: ...Envelope ISO B5 Load the envelopes so that the flap is toward the back of the machine when it is viewed from the front...
Страница 106: ...6 Press Select Paper Settings to close the Select Paper screen...
Страница 118: ...5 Press Menu to close the menu screen...
Страница 121: ...5 Press Menu to close the menu screen...
Страница 124: ...5 Press Menu to close the menu screen...
Страница 129: ...6 Press Menu to close the menu screen...
Страница 133: ...mm Display length in millimeters Inch Display length in inches 6 Press Menu to close the menu screen...
Страница 135: ...6 Press Menu to close the menu screen...
Страница 137: ...6 Press Menu to close the menu screen...
Страница 147: ...5 Press Menu to close the menu screen...
Страница 149: ...Press Menu to close the Menu screen...
Страница 151: ...5 Press Menu to close the menu screen...
Страница 153: ...5 Press Menu to close the menu screen...
Страница 170: ...5 Select Yes using and press OK Printing starts 6 Press Report to close Print Report screen...
Страница 174: ...5 Select Yes using and press OK Printing starts 6 Press Report to close the Print Reports screen...
Страница 176: ...5 Select Yes and press OK Printing begins 6 Press Report to close the Print Reports screen...
Страница 178: ...5 Select Yes using and press OK Printing starts 6 Press Report to close Print Report screen...
Страница 183: ...0FR4 03J Note that specifications are subject to change without notice Specifications...
Страница 194: ...0FR4 041 Supported Document Types Scan Area Document Type...
Страница 197: ...0FR4 044 Supported Paper Types Printable Area Paper...
Страница 210: ...Check the details 7 Press Status Monitor Cancel to close the screen...
Страница 217: ...Prioritize character readability Prioritize illustration readability such as photos 5 Press Start...
Страница 229: ...0FR4 04Y 2 on 1 4 on 1 Copying an ID Card Copying Multiple Documents onto One Sheet N on 1...
Страница 242: ...6 Select the size of the original document using or and press OK 7 Press Start...
Страница 244: ...5 Press Start...
Страница 249: ...Select Yes using and press OK...
Страница 277: ...6 Press Start to receive fax es...
Страница 315: ...5 Select Apply using or and press OK The changes are saved...
Страница 333: ...6 Press Status Monitor Cancel to close the screen...
Страница 366: ...To print documents using AirPrint...
Страница 370: ...4 Click Add Port 5 Select Canon MFNP Port for Available port types and click New Port 6 Click Auto Detect...
Страница 372: ...9 Click Finish 10 Click Close 11 Click Apply...
Страница 378: ...Printing begins...
Страница 388: ...Check the details 7 Press Status Monitor Cancel to close the screen...
Страница 390: ...Press Menu to close the menu screen The setup is complete...
Страница 395: ...5 Remove the USB memory media 6 Press Status Monitor Cancel to close the screen...
Страница 409: ...3 Click Network Settings and select Cloud Print Settings 4 Click Register in Google Cloud Print Registration Status...
Страница 421: ...Emailing scanned documents Sending scanned documents to a file server See Sending Scanned Documents to a File Server...
Страница 484: ...9 Select Start Sending with or and then press OK The E mail is sent...
Страница 502: ...6 Select Apply using or and press OK 7 Press Menu to close the menu screen...
Страница 509: ...The scanned file is sent...
Страница 523: ...Checking the MAC address of the machine See Checking the MAC Address...
Страница 558: ...4 Click Edit in IPv6 Settings 5 Select the IPv6 check box...
Страница 561: ...10 Restart the machine Turn OFF the machine and wait for at least 10 seconds before turning it back ON...
Страница 565: ...Check the information 6 Press Status Monitor Cancel to close the screen...
Страница 577: ...6 Click OK 7 Click Close...
Страница 581: ...2 Click Start Software Programs 3 Click Start for Send Function Setting Tool 4 Click Next...
Страница 587: ......
Страница 589: ...4 Click Edit 5 Specify the required settings as needed and click OK...
Страница 592: ...6 Restart the machine Turn OFF the machine and wait for at least 10 seconds before turning it back ON...
Страница 594: ...3 Click Store to Shared Folder Settings 4 Register the file server that you use...
Страница 596: ...6 Make sure the settings and click Register...
Страница 604: ...4 Click Edit in IPv4 Settings 5 Specify DNS settings...
Страница 607: ...8 Click OK...
Страница 609: ...4 Click Edit in IPv6 Settings 5 Specify DNS settings...
Страница 614: ...4 Click Edit in WINS Configuration 5 Specify the WINS settings...
Страница 617: ...4 Click Edit in SMB Settings 5 Set NetBIOS Name and Workgroup Name...
Страница 624: ...Select MTU Size using or and then press OK 6 Press Menu to close the menu screen...
Страница 626: ...4 Click Edit in SNTP Settings 5 Select the Use SNTP check box and specify the required settings...
Страница 628: ......
Страница 639: ...Press Menu to close the menu screen...
Страница 643: ...5 Press Menu to close the menu screen...
Страница 661: ...2 Click OK...
Страница 664: ...4 Click Generate Key 5 Specify the keys...
Страница 668: ...4 Click Register Key and Certificate or Register CA Certificate 5 Click Install...
Страница 669: ...6 Click Browse and then specify a file to install 7 Click Start Installation...
Страница 671: ...4 Click an icon for keys or certificates you want to verify 5 Checks detailed information of the certificates...
Страница 673: ......
Страница 675: ...4 Click Register Key and Certificate 5 Click Register...
Страница 676: ...6 Enter a key name and a password 7 Click OK...
Страница 678: ...3 Click Security Settings CA Certificate Settings 4 Click Register CA Certificate 5...
Страница 679: ...Click Register...
Страница 681: ...4 Click Delete In the keys and or certificates used for authentication IEEE802 1X etc is displayed 5 Click OK...
Страница 690: ...4 Click Edit 5 Select the Use IEEE802 1X check box...
Страница 691: ...6 Enter a login name 7 Select the Use TLS check box...
Страница 692: ...8 Click Key and Certificate 9 Click Register Default Key for a key to specify from a list of keys and certificates...
Страница 695: ...4 Click Edit 5 Select the Use IEEE802 1X check box...
Страница 696: ...6 Enter a login name 7 Select either the Use TTLS or the Use PEAP check box...
Страница 708: ...3 Select OK enter a user name and PIN and then click OK 4 Click OK 5 Click OK or Print...
Страница 715: ...3 Click Security Settings IP Address Filter 4 Click Edit in the filter which you want to specify...
Страница 725: ...NOTE To delete registered MAC addresses 1 Select the MAC address to delete 2 Click Delete 7 Click OK...
Страница 734: ...4 Click Edit 5 Specify SNMPv3...
Страница 747: ...4 Click Edit in Remote Maintenance Server Settings 5 Select the Use Proxy check box and specify the required settings...
Страница 797: ...0FR4 0K5 Change Defaults Register new copy settings Changing the Default Settings Copy Settings...
Страница 832: ...13 Close the feeder or the platen glass cover gently 14 Place documents in the feeder...
Страница 834: ...The machine is ready to print...
Страница 837: ...System Settings 5 When the following screen appears select Yes using and press OK The machine is ready to print...
Страница 861: ...0FR4 0L4 Sending Problems Receiving Problems Fax Problems...
Страница 865: ...a fax to an international destination Sending a Fax Abroad Adding Pauses Change the initial sending speed TX Start Speed...
Страница 876: ...If there is no improvement Turn OFF the machine and wait for at least 10 seconds before turning it back ON...
Страница 884: ...0FR4 0LR Wired LAN Troubles Wireless LAN Troubles MF6180dw Only Network Problems...
Страница 911: ...4 Close the feeder 5 Connect the power cord and turn ON the power switch...
Страница 934: ...Text more easily detected as color Text more easily detected as black and white 6 Press Menu to close the menu screen...
Страница 943: ...0FR4 0S6 Basic Windows Operations For Macintosh Users Appendix...
Страница 959: ...15 Office Locations Display the contact information for inquiries...
Страница 965: ......
Страница 993: ...4 Read the License Agreement and click Continue 5 Click Agree 6 When the following screen appears click Continue...
Страница 1004: ...8 Close the dialog box...
Страница 1013: ...The icon is added to the printer folder...
Страница 1018: ......
Страница 1020: ......
Страница 1022: ...When User Account Control appears Click Yes or Continue 4 Click Delete 5 Click Yes 6 Click Exit...
Страница 1031: ...Installing the MF Drivers and MF Toolbox...
Страница 1033: ...How to display the Help screen Summary etc 4 Click Searching from Contents You can search a content by entering a keyword...


