


0KCY-07L
Setting IPv4 Address
The machine's IPv4 address can be either assigned automatically by a dynamic IP addressing protocol, such as
DHCP, or entered manually. When connecting the machine to a wired LAN, make sure that the connectors of
the LAN cable are firmly inserted into the ports (
Connecting to a Wired LAN
). You can test the network
connection if necessary.
Setting IPv4 Address
Testing the Network Connection
Tap <Menu> in the Home Screen.
Tap <Network Settings>.
If a screen for entering a PIN is displayed, enter the PIN with the numeric keys and tap <Apply>.
Setting the System
Manager PIN
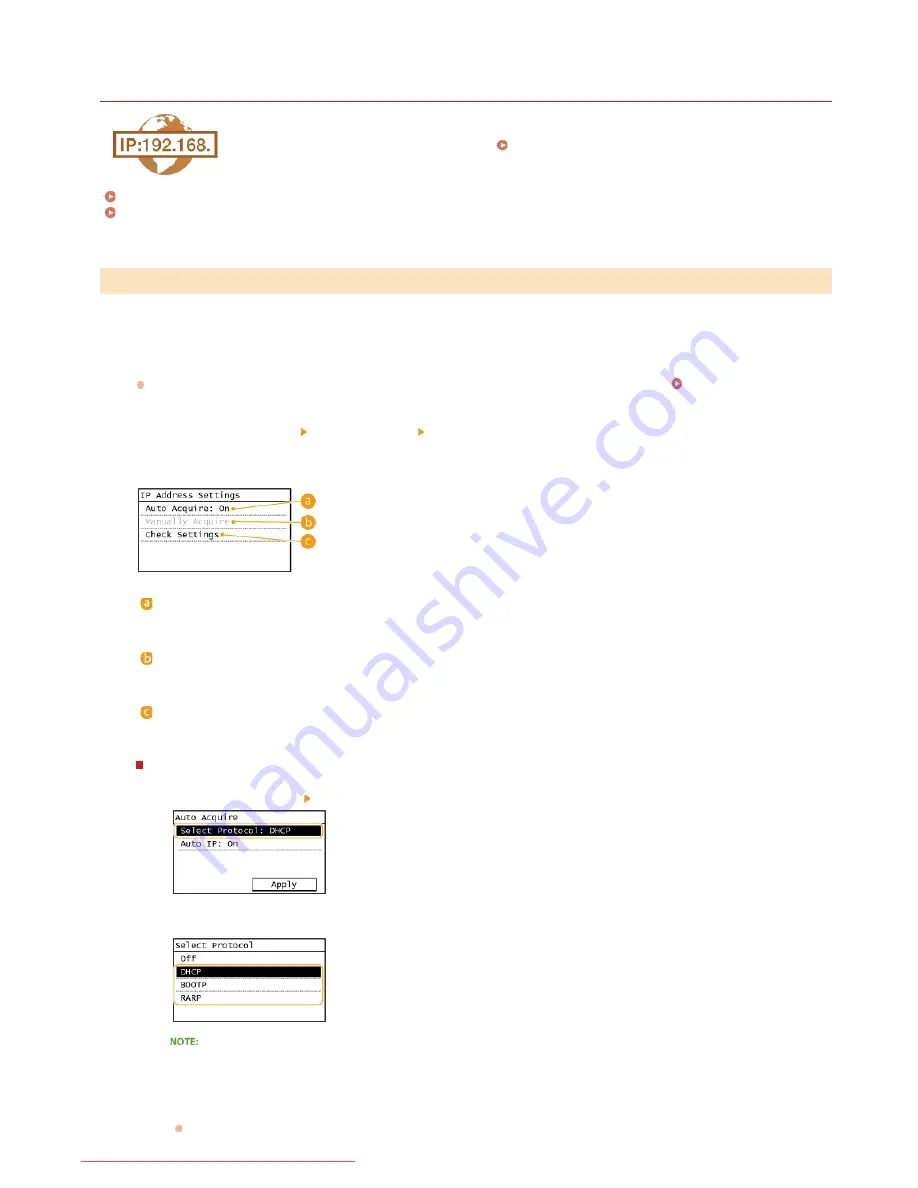
Select <TCP/IP Settings> <IPv4 Settings> <IP Address Settings>.
Configure IP address settings.
<Auto Acquire>
Select to automatically assign an IP address via a protocol such as DHCP. When <Auto Acquire: On> is displayed, automatic
addressing is enabled.
<Manually Acquire>
Select to configure the IP address settings by manually entering an IP address. In order to select this option, <Auto Acquire>
must be set to <Off>.
<Check Settings>
Select when you want to view the current IP address settings.
Automatically assigning an IP address
1
Select <Auto Acquire> <Select Protocol>.
2
Tap <DHCP>, <BOOTP>, or <RARP>.
If you do not want to use DHCP/BOOTP/RARP to assign an IP address
Select <Off>. If you select <DHCP>, <BOOTP>, or <RARP> when these services are unavailable, the machine will waste
time and communications resources searching the network for these services.
3
Check that <Auto IP> is set to <On>.
If <Off> is selected, change the setting to <On>.
Setting IPv4 Address
1
2
3
4
㻞㻡㻢㻌㻛㻌㻠㻣㻡
Downloaded from ManualsPrinter.com Manuals
Содержание i-SENSYS MF217w
Страница 1: ...㻝㻌㻛㻌㻠㻣㻡 Downloaded from ManualsPrinter com Manuals ...
Страница 7: ...Contact Us 475 㻣㻌㻛㻌㻠㻣㻡 Downloaded from ManualsPrinter com Manuals ...
Страница 31: ...Tap Apply Tap End LINKS Display 4 5 㻟㻝㻌㻛㻌㻠㻣㻡 Downloaded from ManualsPrinter com Manuals ...
Страница 59: ...Tap Yes 5 㻡㻥㻌㻛㻌㻠㻣㻡 Downloaded from ManualsPrinter com Manuals ...
Страница 65: ...Exiting Quiet Mode Press to exit quiet mode 㻢㻡㻌㻛㻌㻠㻣㻡 Downloaded from ManualsPrinter com Manuals ...
Страница 67: ...the hook 㻢㻣㻌㻛㻌㻠㻣㻡 Downloaded from ManualsPrinter com Manuals ...
Страница 72: ...LINKS Basic Copy Operations 㻣㻞㻌㻛㻌㻠㻣㻡 Downloaded from ManualsPrinter com Manuals ...
Страница 92: ...LINKS Receiving Faxes 㻥㻞㻌㻛㻌㻠㻣㻡 Downloaded from ManualsPrinter com Manuals ...
Страница 128: ...The document is forwarded to the specified destination 㻝㻞㻤㻌㻛㻌㻠㻣㻡 Downloaded from ManualsPrinter com Manuals ...
Страница 134: ...㻝㻟㻠㻌㻛㻌㻠㻣㻡 Downloaded from ManualsPrinter com Manuals ...
Страница 162: ...LINKS Printing a Document 㻝㻢㻞㻌㻛㻌㻠㻣㻡 Downloaded from ManualsPrinter com Manuals ...
Страница 169: ...LINKS Printing a Document 㻝㻢㻥㻌㻛㻌㻠㻣㻡 Downloaded from ManualsPrinter com Manuals ...
Страница 210: ...LINKS Scanning from the Machine 㻞㻝㻜㻌㻛㻌㻠㻣㻡 Downloaded from ManualsPrinter com Manuals ...
Страница 269: ...LINKS Setting Up Print Server 㻞㻢㻥㻌㻛㻌㻠㻣㻡 Downloaded from ManualsPrinter com Manuals ...
Страница 287: ...㻞㻤㻣㻌㻛㻌㻠㻣㻡 Downloaded from ManualsPrinter com Manuals ...
Страница 310: ...㻟㻝㻜㻌㻛㻌㻠㻣㻡 Downloaded from ManualsPrinter com Manuals ...
Страница 317: ...LINKS Remote UI Screens 㻟㻝㻣㻌㻛㻌㻠㻣㻡 Downloaded from ManualsPrinter com Manuals ...
Страница 416: ...㻠㻝㻢㻌㻛㻌㻠㻣㻡 Downloaded from ManualsPrinter com Manuals ...
Страница 455: ...㻠㻡㻡㻌㻛㻌㻠㻣㻡 Downloaded from ManualsPrinter com Manuals ...
Страница 457: ...Click Back Exit 6 㻠㻡㻣㻌㻛㻌㻠㻣㻡 Downloaded from ManualsPrinter com Manuals ...
Страница 476: ...㻝㻌㻛㻌㻠㻣 Downloaded from ManualsPrinter com Manuals ...
Страница 506: ...㻟㻝㻌㻛㻌㻠㻣 Downloaded from ManualsPrinter com Manuals ...
Страница 510: ...The uninstaller starts Click Uninstall Click OK 4 5 㻟㻡㻌㻛㻌㻠㻣 Downloaded from ManualsPrinter com Manuals ...


