S
e
tti
n
g
Up
Yo
u
r
LAS
E
R CLAS
S
2060P
Chapter 2
Setting Up Your LASER CLASS 2060P
2-21
Connecting the LASER CLASS 2060P to Your PC
Your LASER CLASS 2060P has an 8-bit, bi-directional parallel interface
port that allows you to connect it to a PC. To do this, you need to
purchase a Centronics-compatible parallel interface cable from your
dealer.
For best results, use a cable that is no longer than 6.6 feet (2 meters).
Canon recommends that you use a cable that complies with IEEE 1284.
Contact your local authorised Canon Facsimile Dealer if you need help in
selecting a cable.
Connect the LASER CLASS 2060P to your computer as follows:
1.
Make sure the computer is turned off and the LASER CLASS 2060P is
unplugged.
2.
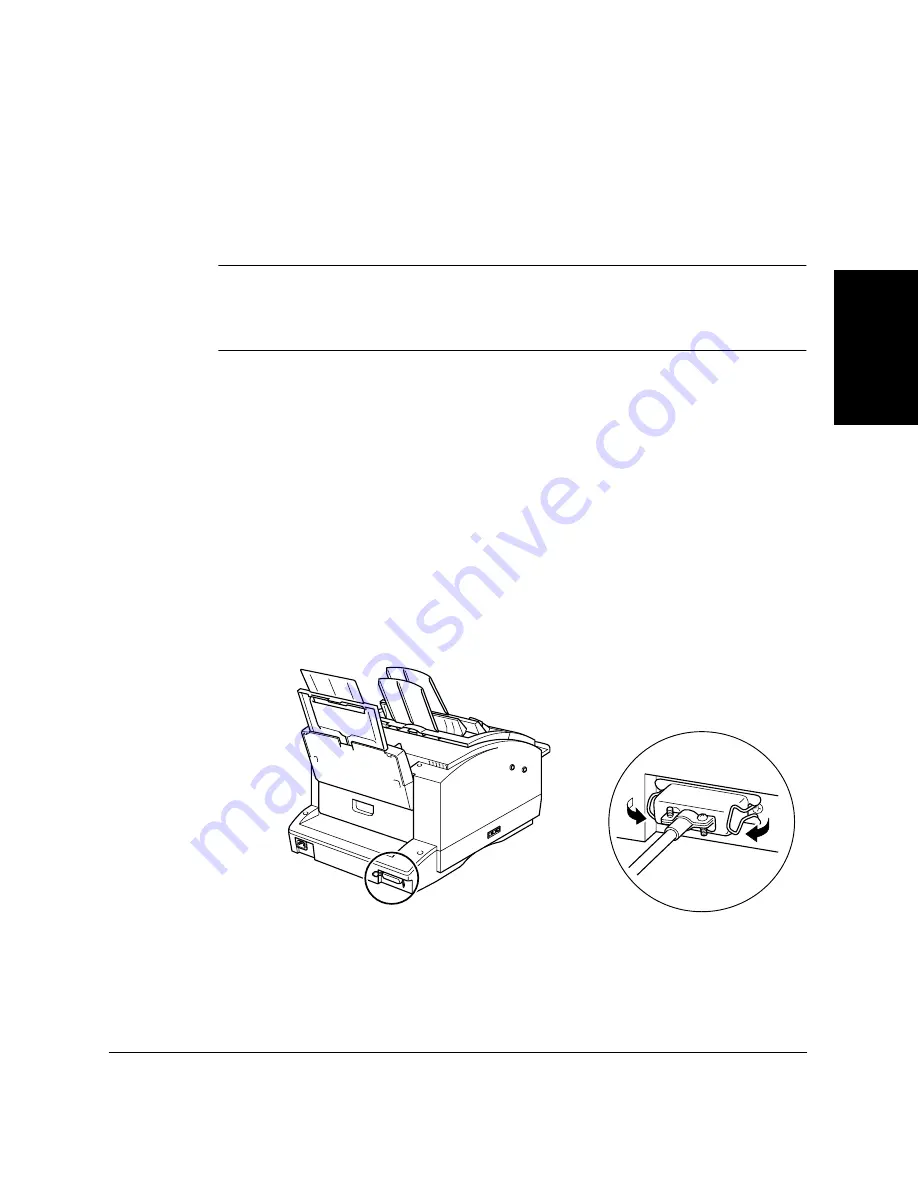
Connect the parallel interface cable to your LASER CLASS 2060P:
a.
Align the cable connector with the interface port so their shapes
match.
b. Gently press the cable connector into the port.
c.
Secure the cable connector by snapping both wire clips (on the
sides of the port) into the cable connector, as shown below.
3.
Connect the other end of the cable to the parallel interface port on
your computer in the same manner.
N
Содержание H12157
Страница 1: ......
Страница 12: ...xii Preface ...
Страница 20: ...xx Contents ...
Страница 82: ...2 48 Setting Up Your LASER CLASS 2060P Chapter 2 ...
Страница 112: ...4 18 Paper Handling Chapter 4 ...
Страница 144: ...5 32 Speed Dialing Chapter 5 ...
Страница 202: ...7 22 Receiving Faxes Chapter 7 ...
Страница 224: ...9 14 Setting Up and Using Polling Chapter 9 ...
Страница 248: ...12 16 Reports and Lists Chapter 12 ...
Страница 322: ...15 18 The Menu System Chapter 15 ...
Страница 332: ...A 10 Specifications Appendix ...
Страница 356: ...I 12 Index ...
Страница 357: ...Index I 13 Index ...
Страница 358: ...I 14 Index ...


