Clip/Photo Operations
146
1
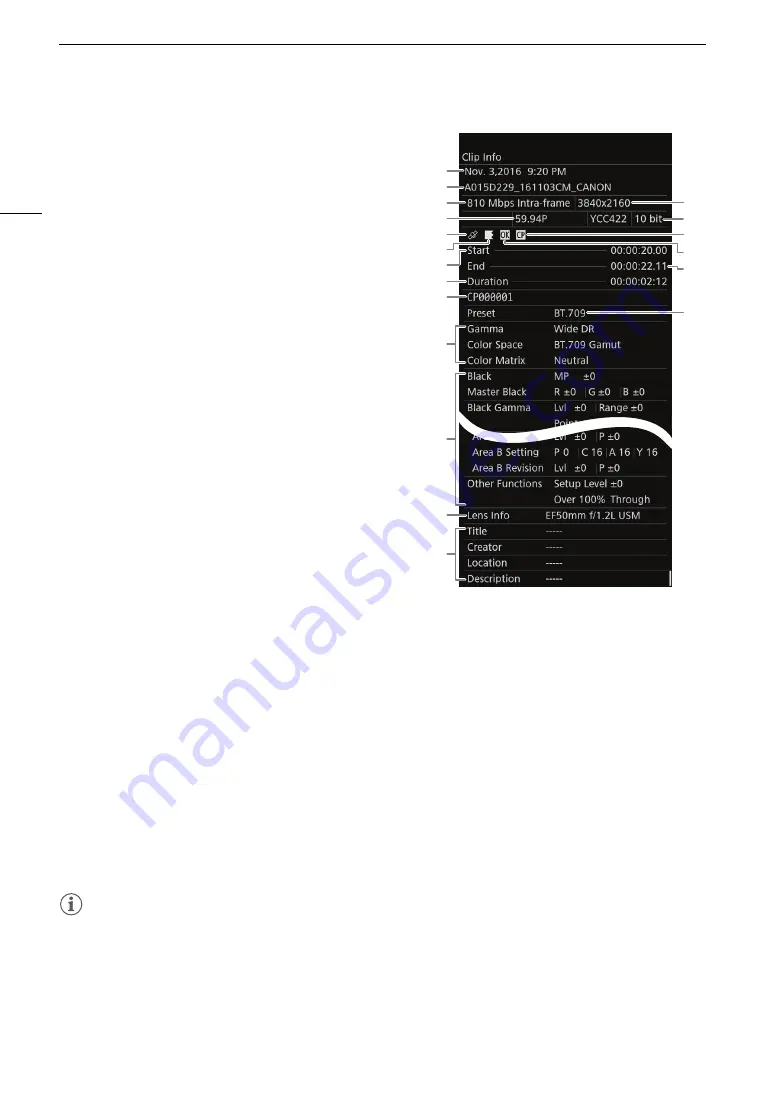
Recording date and time
2
Clip file name (
A
62)
3
Bit rate and compression (
A
4
Frame rate*
(
A
65)
5
Clip geotagged with GPS information** (
A
6
Relay clip** (
A
5
indicates the first part of the recording,
6
indicates
the middle part(s) and
7
indicates the last part.
7
Start time code
8
Clip duration
9
Embedded custom picture file** (
A
10 Custom picture file’s main settings (
A
11 Custom picture file’s detailed settings (
A
12 Lens information**
13 User memo information** (
A
14 Resolution (
A
15 Color sampling (
A
16 Custom picture file embedded
17
$
mark**/
%
mark** (
A
18 End time code
19 Preset color setting (
A
* For XF-AVC clips recorded using slow & fast motion recording, [S&F
REC] and both the shooting frame rate and the playback frame rate
will be displayed.
** Only for XF-AVC clips.
Adding and Deleting
$
Marks or
%
Marks
You can add an OK mark (
$
) or check mark (
%
) to XF-AVC clips recorded on the CFast card in order to tag
them as special clips. Since clips with an
$
mark cannot be deleted with the camera, you can use this mark
also to protect important clips.
1 Select the desired clip (
A
.
• Select [CFast (XF-AVC)] as the playback media/format.
2 Add the clip mark (
$
or
%
mark).
[OPTIONS]
>
[Add
$
Mark] or [Add
%
Mark]
>
[OK]
• Alternatively, you can press an assignable button set to [Add
$
Mark] or [Add
%
Mark] (
A
• [
$
Mark] or [
%
Mark] will appear briefly on the monitoring screen and the selected clip mark will be added
to the clip. On the control display,
$
or
%
will appear with the clip details on the PLAY screen.
3 When the confirmation screen appears, press [OK].
NOTES
• A clip cannot have both an
$
mark and
%
mark at the same time. When you add a
%
mark to a clip with an
$
mark, the
$
mark will be deleted. Similarly, when you add an
$
mark to a clip with a
%
mark, the
%
mark will be deleted.
14
15
19
16
17
1
2
3
5
7
6
8
9
4
11
10
12
13
18


