57
Clearing Jams
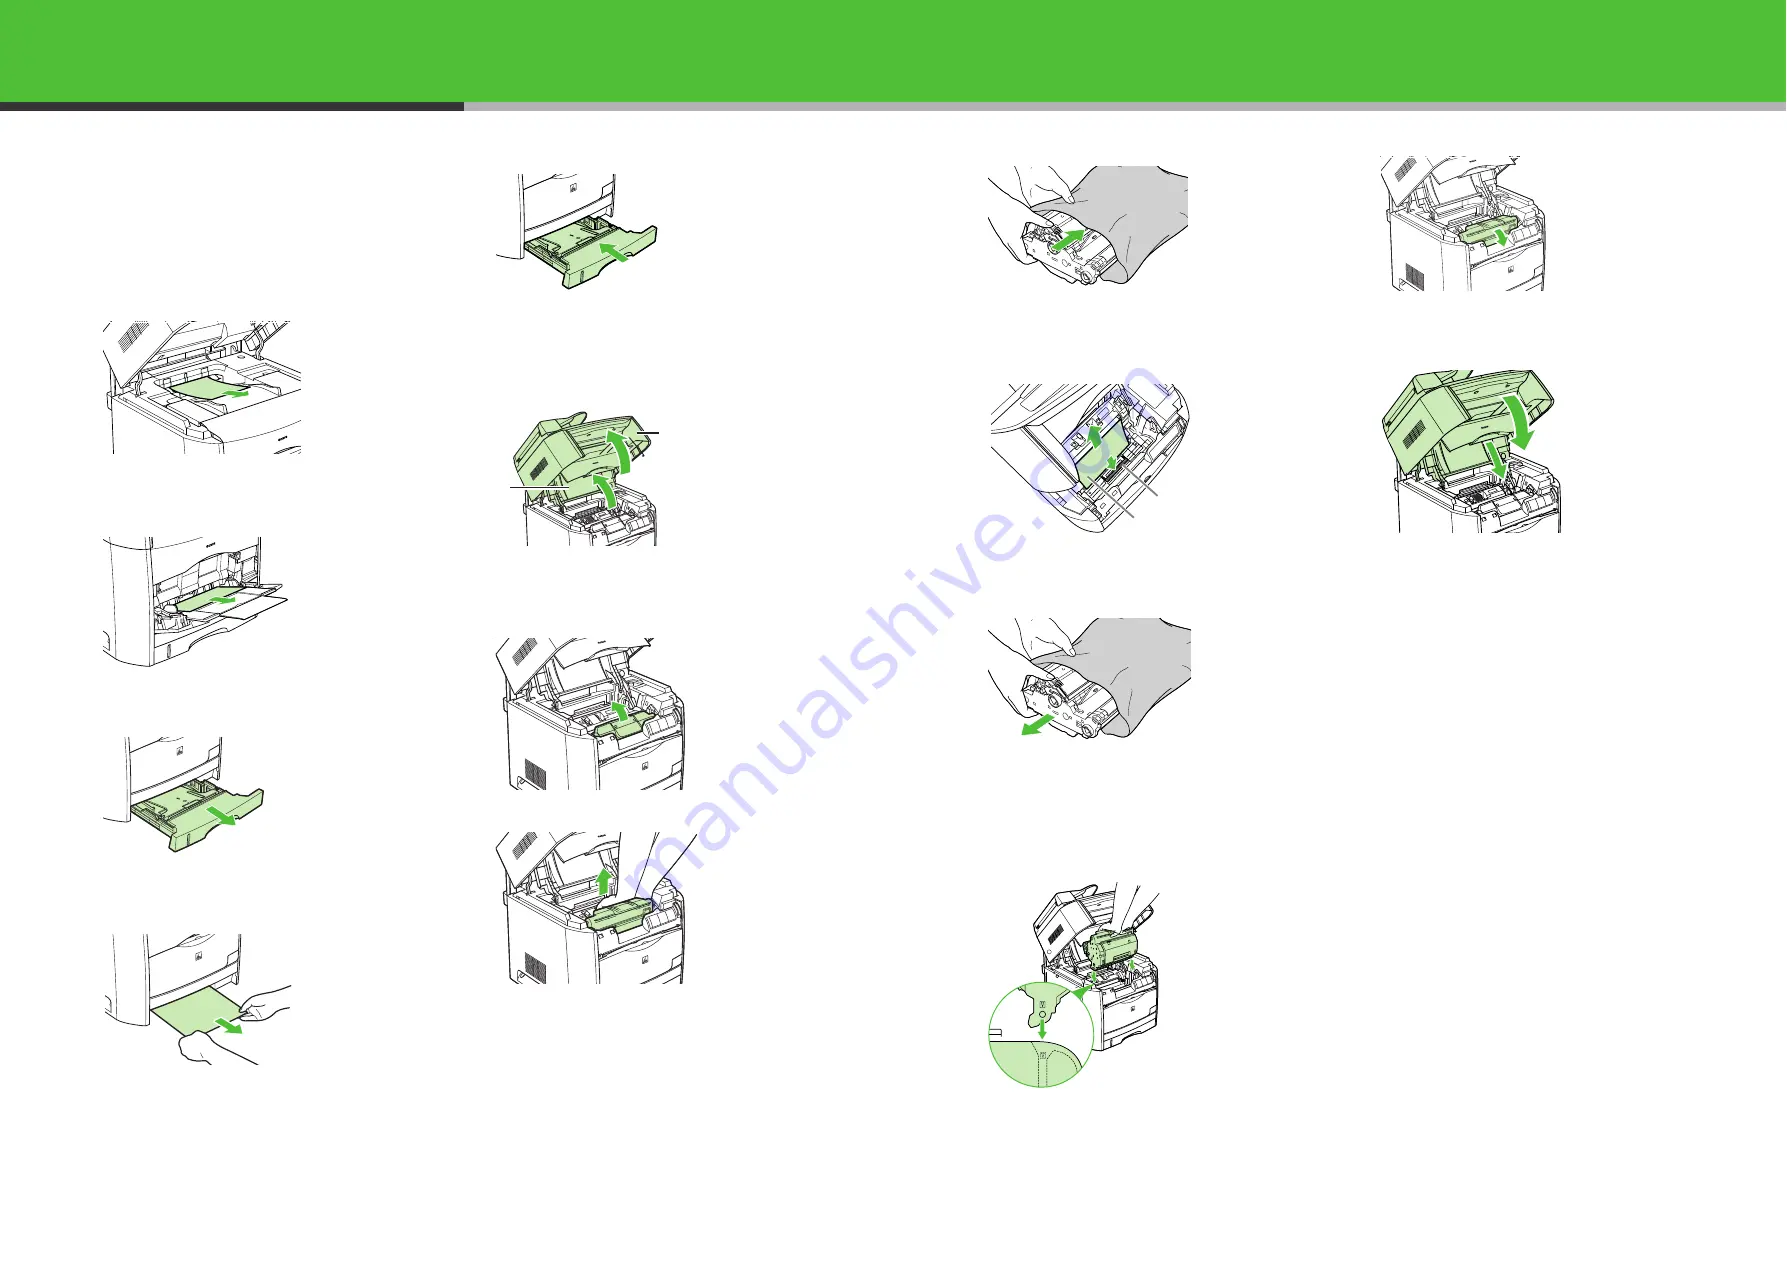
Paper Jams Inside the Machine
If the message <REC. PAPER JAM> and <OPEN
PRINTER COVER> appear in the LCD, remove the
paper in the following procedure.
1
If paper is jammed in the output tray, remove
the jammed paper.
2
If paper is jammed in the multi-purpose tray,
remove the jammed paper.
3
Pull out the paper cassette.
4
Remove the jammed paper.
5
Insert the cassette in the machine.
6
Lift the scanning platform (A) and open the
cartridge cover until it is locked (B) when the
whirring sound stops.
7
Remove the drum cartridge from the machine.
Pull up the green handle on the drum cartridge in the
direction of the arrow.
Lift the cartridge straight up.
If paper is jammed in the removed drum cartridge, do not
try to pull the paper out forcefully but see Chapter 9,
“Paper Jam in the Drum Cartridge,” in the User’s Guide.
A
B
8
Place the drum cartridge in the protective bag.
9
Press the green lock release lever (A) and
remove the jammed paper (B).
10
Take the drum cartridge out of the protective
bag.
11
Hold the drum cartridge with both hands and
install it in the machine.
Position the triangular mark on the drum cartridge with
the triangular mark on the machine and install the drum
cartridge.
Lock it by pushing down toward you.
12
Close the cartridge cover and lower the
scanning platform.
If the message is still displayed after closing the cartridge
cover, pieces of torn paper may still be remaining inside.
Re-check the various sections of the machine and
remove all pieces of the jammed paper from inside the
machine.
B
A
58


