background image

18

Advanced Print Features

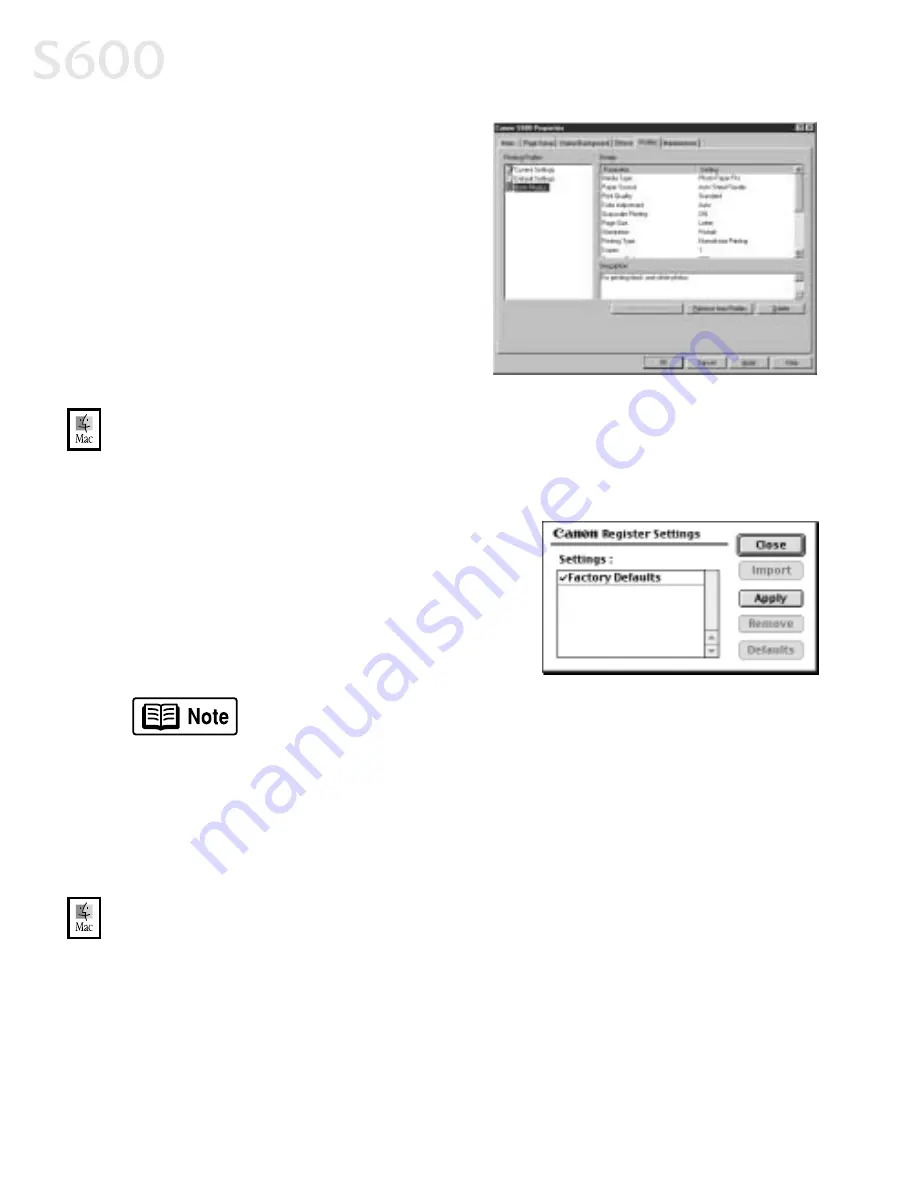
3.

Select the Profiles

Profiles

Profiles

Profiles tab.

4.

Highlight the saved setting profile 
you want to use.

5.

Click Retrieve from Profiles

Retrieve from Profiles

Retrieve from Profiles

Retrieve from Profiles, then 

click OK

OK

OK

OK to confirm the profile 

change. The profile settings will 
become active.

6.

Click OK

OK

OK

OK again to close the window.

To save driver settings in Mac OS:

To save driver settings in Mac OS:

To save driver settings in Mac OS:

To save driver settings in Mac OS:

1.

From an application File 

File 

File 

File menu, select Print

Print

Print

Print. The Print window will appear.

2.

Make the desired printer driver setting changes.

3.

From the Print window, click Apply

Apply

Apply

Apply. The 

Register Settings dialog will open. 

4.

Click Apply

Apply

Apply

Apply again, then type a name for 

the settings. 

5.

Click OK. The Register Settings window 
will reappear.

6.

When done, click Close

Close

Close

Close.

To recall driver settings in Mac OS:

To recall driver settings in Mac OS:

To recall driver settings in Mac OS:

To recall driver settings in Mac OS:

1.

From an application File

File

File

File menu, select Print

Print

Print

Print.

2.

Click Apply

Apply

Apply

Apply, then select the name of your saved settings.

3.

Click Defaults

Defaults

Defaults

Defaults, then OK

OK

OK

OK.

4.

Click Import

Import

Import

Import, then Close

Close

Close

Close.

To save the new settings as your default settings for the Manual 
icon, click the name in the Settings list, then click Default

Default

Default

Default.

See the 

S600 User’s Guide 

on the Setup Software & User’s Guide 

CD-ROM for instructions on removing manual settings and 
restoring default settings.

Содержание Color Bubble Jet S600

Страница 1: ...S600 S600 S600 S600 Color Bubble Jet Color Bubble Jet Color Bubble Jet Color Bubble Jet Printer Printer Printer Printer Quick Start Guide Quick Start Guide Quick Start Guide Quick Start Guide ...

Страница 2: ...re not guaranteed or warranted and they are not intended to be nor should they be understood to be representation or warranties concerning the products described Specifications are subject to change without notice All print speeds based on high speed draft mode Print speed will vary depending on system configuration software document complexity print mode and page coverage As an ENERGY STAR partne...

Страница 3: ...ensity and Brightness 12 Changing the Page Setup 14 Saving and Recalling Driver Settings 17 Chapter 3 Printing Maintenance Monitoring Ink Levels 19 Replacing Ink Tanks 20 Printing a Nozzle Check Pattern 20 Cleaning the Printhead 22 Aligning the Printhead 23 Chapter 4 Troubleshooting Tips for Troubleshooting 25 Customer Care Center 32 Appendix Installing the Printer Driver 33 Uninstalling the Print...

Страница 4: ...ii Contents ...

Страница 5: ...S600 printer see Specialty Media on page 3 Turning Your Printer On and Off Turning Your Printer On and Off Turning Your Printer On and Off Turning Your Printer On and Off To turn your printer on or off press the POWER button The POWER lamp will flash green when warming up or when a print job is being sent to the printer It will glow a steady non flashing green when the printer is ready for use or ...

Страница 6: ...tart Start then Settings Settings Settings Settings then Printers Printers Printers Printers 2 Right click the Canon S600 Canon S600 Canon S600 Canon S600 printer icon then click Set as Default Set as Default Set as Default Set as Default The Canon S600 printer icon will display a check mark indicating it is the default printer To select the S600 from within a Windows application To select the S60...

Страница 7: ... Media Specialty Media Specialty Media Specialty Media For optimum results Canon recommends that you use genuine Canon media with your S600 printer Follow the instructions that come with any specialty media on storing handling and printing The specialty media available for use with the S600 include Canon High Resolution Paper Canon Transparencies Canon Banner Paper Canon Glossy Photo Paper Canon P...

Страница 8: ...ad Limit and Paper Thickness Lever Position Load Limit and Paper Thickness Lever Position Load Limit and Paper Thickness Lever Position Media Type Media Type Media Type Media Type Paper Rest Paper Rest Paper Rest Paper Rest Load Limit Load Limit Load Limit Load Limit Paper Thickness Paper Thickness Paper Thickness Paper Thickness Lever Position Lever Position Lever Position Lever Position Plain pa...

Страница 9: ...r other media To load paper or other media To load paper or other media 1 Make sure the paper thickness lever is set correctly for the media used 2 Slide the paper guide completely to the left 3 Fan the edges of the sheets to remove static cling and avoid paper jams then tap the edges of the stack against a flat surface so the stack is aligned 4 Insert the media into the paper rest with the print ...

Страница 10: ...jams make sure envelopes are flat before you load them into the paper tray 4 With the address side facing up and pointed in the direction shown in the illustration align the stack with the right side of the paper rest then insert the stack into the printer 5 Slide the paper guide to the edge of the envelopes until it is firmly in place Make sure that none of the flaps overlap If the envelope edges...

Страница 11: ...inter Status Monitor To cancel a print job from the Printer Status Monitor To cancel a print job from the Printer Status Monitor To cancel a print job from the Printer Status Monitor 1 Click Start Start Start Start then Settings Settings Settings Settings then Printers Printers Printers Printers 2 Right click Canon S600 Canon S600 Canon S600 Canon S600 then click Properties Properties Properties P...

Страница 12: ...cancel a print job in Mac OS when using background printing To cancel a print job in Mac OS when using background printing To cancel a print job in Mac OS when using background printing To cancel a print job in Mac OS when using background printing 1 While a job is printing go to the BJ Print Monitor window click Finder Finder Finder Finder then BJ Print Monitor BJ Print Monitor BJ Print Monitor B...

Страница 13: ...icantly improve the quality of your printout See Recommended Paper Use on page 3 Also always use the specific Canon inks for your S600 printer as noted on the inside back cover Printer Driver Printer Driver Printer Driver Printer Driver Settings Settings Settings Settings There is a variety of settings you can use to enhance the quality of the print the colors and the way in which the document com...

Страница 14: ...opriate Media Type Media Type Media Type Media Type from the drop down menu 4 Each media type has a default print quality but you can select a different Print Quality Print Quality Print Quality Print Quality High High High High For high quality when printing a color document Standard Standard Standard Standard For high quality when printing text Draft Draft Draft Draft For printing text drafts at...

Страница 15: ...low the on screen instructions to select the optimum output type media and settings for your print job 5 Click OK OK OK OK to save the setting and close the S600 Properties window To automatically make images more smooth in Windows To automatically make images more smooth in Windows To automatically make images more smooth in Windows To automatically make images more smooth in Windows Image Optimi...

Страница 16: ...olor Balance Intensity and Brightness Adjusting Color Balance Intensity and Brightness Adjusting Color Balance Intensity and Brightness Adjusting Color Balance Intensity and Brightness You can enhance color printing by adjusting the color balance intensity saturation and brightness To manually adjust color settings To manually adjust color settings To manually adjust color settings To manually adj...

Страница 17: ...his allows for a wider range of tones Set to Graphic Graphic Graphic Graphic when printing graphic images for crisper cleaner graphic images 9 Select a Brightness Brightness Brightness Brightness setting to determine how light or dark the image will appear when printed 10 When done click OK OK OK OK To print in black only check the Grayscale Printing Grayscale Printing Grayscale Printing Grayscale...

Страница 18: ...ls Details Details 4 Click the Color Color Color Color icon 5 Adjust the Color Correction Color Correction Color Correction Color Correction Print Print Print Print Type Type Type Type Gamma Correction Gamma Correction Gamma Correction Gamma Correction Color Color Color Color Balance Balance Balance Balance and Intensity Intensity Intensity Intensity settings for your image 6 When done click OK OK...

Страница 19: ...e number of pages to a sheet of paper 2 to 16 the print order for those pages left to right or right to left and whether you want to print a border around each page Poster Printing Poster Printing Poster Printing Poster Printing Lets you print an oversized image on multiple pages that can then be manually joined together Click Specify Specify Specify Specify to set the image divisions how many til...

Страница 20: ...t and print order in Mac OS To change page layout and print order in Mac OS To change page layout and print order in Mac OS 1 Make sure that S600 is the selected printer from the Apple Apple Apple Apple menu select Chooser Chooser Chooser Chooser then S600 S600 S600 S600 2 From an application File File File File menu click Print Print Print Print The Print window will appear 3 Click Options Option...

Страница 21: ...ation File File File File menu select Print Print Print Print 2 With Canon S600 Canon S600 Canon S600 Canon S600 as the selected printer click Properties Properties Properties Properties 3 Make the desired printer driver setting changes 4 Without exiting the Properties window select the Profiles Profiles Profiles Profiles tab 5 Click Add to Profiles Add to Profiles Add to Profiles Add to Profiles ...

Страница 22: ...he Register Settings dialog will open 4 Click Apply Apply Apply Apply again then type a name for the settings 5 Click OK The Register Settings window will reappear 6 When done click Close Close Close Close To recall driver settings in Mac OS To recall driver settings in Mac OS To recall driver settings in Mac OS To recall driver settings in Mac OS 1 From an application File File File File menu sel...

Страница 23: ...operties Properties Properties 3 Select the Maintenance Maintenance Maintenance Maintenance tab then click Start Status Monitor Start Status Monitor Start Status Monitor Start Status Monitor The Canon S600 Status Monitor window will appear The Ink panel displays the ink levels for each tank The following icons appear when an ink tank is low or has run out of ink Ink low Replace ink tank as soon as...

Страница 24: ... orange protective cap 4 Holding the new ink tank at a slight angle align it with the correct color slot then gently insert it 5 Press down on the ink tank until it clicks into place 6 Close the front cover Printing a Nozzle Check Pattern Printing a Nozzle Check Pattern Printing a Nozzle Check Pattern Printing a Nozzle Check Pattern The printhead discharges ink through nozzles tiny openings from w...

Страница 25: ...t of the top pattern is missing see Cleaning the Printhead on page 22 for procedures To print a nozzle check pattern in Mac OS To print a nozzle check pattern in Mac OS To print a nozzle check pattern in Mac OS To print a nozzle check pattern in Mac OS 1 Make sure the printer is on and paper loaded 2 In a software application click File File File File then Page Setup Page Setup Page Setup Page Set...

Страница 26: ...aintenance Maintenance tab then click the Cleaning Cleaning Cleaning Cleaning button The printer will clean the printhead 4 Click OK OK OK OK to close the window 5 After the cleaning print a nozzle check pattern to check the results See Printing a Nozzle Check Pattern on page 20 6 If there is no change after cleaning check the amount of ink remaining If an ink tank is empty replace it See Monitori...

Страница 27: ...dows To align the printhead in Windows To align the printhead in Windows To align the printhead in Windows 1 Make sure the printer is on and paper loaded 2 Click Start Start Start Start then Settings Settings Settings Settings then Printers Printers Printers Printers 3 Right click the Canon S600 Canon S600 Canon S600 Canon S600 printer icon then select Properties Properties Properties Properties 4...

Страница 28: ...p Page Setup Page Setup Page Setup 3 Click the Utilities Utilities Utilities Utilities button 4 Click the down arrow to select Test Test Test Test Print Print Print Print 5 Click the Print Head Alignment Print Head Alignment Print Head Alignment Print Head Alignment icon 6 Follow the on screen instructions to complete printhead alignment 7 After each printhead alignment pattern check click Send Se...

Страница 29: ... not install properly Printer Hardware Printer Hardware Printer Hardware Printer Hardware The printer is not working or not working as expected Printed Output Printed Output Printed Output Printed Output The printed output is not coming out as expected Error Message Error Message Error Message Error Message You are getting an error message from the software displayed on the screen or the printer i...

Страница 30: ...msetup exe where x x x x is the CD ROM drive Mac OS Mac OS Mac OS Mac OS Double click the CD ROM CD ROM CD ROM CD ROM icon on your desktop CD ROM drive not specified Normally after you insert the S600 CD ROM the setup window displays automatically If it does not Windows Windows Windows Windows 1 Double click My Computer My Computer My Computer My Computer on the Windows desktop then double click t...

Страница 31: ...ach or remove the torn paper do not attempt to disassemble the printer yourself Contact the Customer Care Center 2 Reload paper into the paper rest then press RESUME RESUME RESUME RESUME on the printer You will need to reprint the page that jammed If you turn the printer off your print job data will be lost Print the job again Use a standard paper size whenever possible to prevent jams Printer is ...

Страница 32: ...rly See Printing a Nozzle Check Pattern on page 20 or Cleaning the Printhead on page 22 If necessary perform multiple printhead cleanings See Cleaning the Printhead on page 22 or the S600 User s Guide on the Setup Software User s Guide CD ROM for more information Problem Problem Problem Problem Possible Cause Possible Cause Possible Cause Possible Cause Try This Try This Try This Try This Printed ...

Страница 33: ...ality Quality bar to select your preferred output quality Printed output is faded or unclear Media not loaded print side up Check that your media is placed in the printer facing in the correct direction See Loading Paper and Other Media on page 4 Low ink Verify that you have sufficient ink in the ink tanks See Monitoring Ink Levels on page 19 Printhead nozzles clogged or damaged Verify that the pr...

Страница 34: ...er and the printer If the ECP setting is incorrect it could result in incorrect print information going to the printer See the S600 User s Guide on the Setup Software User s Guide CD ROM for instructions on how to check ECP settings and reconfigure if needed Problem Problem Problem Problem Possible Cause Possible Cause Possible Cause Possible Cause Try This Try This Try This Try This Printer does ...

Страница 35: ...n you can confirm the low ink alert in the BJ Print Monitor See the S600 User s Guide on the Setup Software User s Guide CD ROM for more information on using the BJ Print Monitor After the alert displays you can continue printing for a short time but have a replacement ready to install Windows Windows Windows Windows The low ink alert displays in the BJ Status Monitor Click the Ink Information tab...

Страница 36: ...7 413 2848 1 757 413 2848 Support program specifics are subject to change without notice Refer to the product information starting on page 40 for warranty details System error message displays System error occurred If a system error occurs printing stops Windows Windows Windows Windows A window displays the error message System errors may include problems writing to LPT1 or USBPRN application erro...

Страница 37: ...en the setup program started the Add New Hardware Wizard will appear Do NOT use the wizard click Cancel Cancel Cancel Cancel to close the window and continue If the setup program does not run automatically click Start Start Start Start then Run Run Run Run then type x msetup exe x msetup exe x msetup exe x msetup exe where x x x x is the CD ROM drive 4 Read the Welcome screen then click Next Next ...

Страница 38: ...OM in the CD ROM drive 3 Open the Printer Driver Printer Driver Printer Driver Printer Driver folder on the CD ROM then double click the Installer Installer Installer Installer icon 4 Read the License Agreement then click Accept Accept Accept Accept 5 Click Install Install Install Install The printer driver will load automatically If the message No other applications can be running displays click ...

Страница 39: ...t then click Accept Accept Accept Accept 4 Select Uninstall Uninstall Uninstall Uninstall from the drop down list at the top left of the dialog box then click the Uninstall Uninstall Uninstall Uninstall button on the bottom right 5 Follow the on screen instructions 6 When the uninstall is complete click Quit Quit Quit Quit 7 Click Restart Restart Restart Restart when prompted to restart your compu...

Страница 40: ... in a location where ambient temperature is within 41 F 95 F 5 C 35 C and 10 90 humidity with no condensation Never place the printer on a thick carpet or rug Fibers or dust entering the printer could cause a fire Keep the power outlet for the printer free of all obstacles so you can unplug the power cord at any time Such obstacles could prevent you from unplugging the printer when a printer fault...

Страница 41: ...er contains high voltage components which could cause a fire or serious electric shock Working Around the Printer Working Around the Printer Working Around the Printer Working Around the Printer Never use flammable sprays near the printer Gases in the spray could cause a fire or electric shock if they come in contact with electrical components inside the printer Never insert your fingers or hands ...

Страница 42: ...tallation This equipment generates uses and can radiate radio frequency energy and if not installed and used in accordance with the instructions may cause harmful interference to radio communications However there is no guarantee that interference will not occur in a particular installation If this equipment does cause harmful interference to radio or television reception which can be determined b...

Страница 43: ...allel Interface parallel Interface parallel Interface parallel IEEE 1284 compatible Interface USB Interface USB Interface USB Interface USB USB 1 1 compatible Interface connector parallel Interface connector parallel Interface connector parallel Interface connector parallel Amphenol 57 40360 or equivalent Interface connector USB Interface connector USB Interface connector USB Interface connector U...

Страница 44: ...nting Graphic image printing Graphic image printing Data format Canon extended mode raster image format Resolution Canon extended mode 600 1200 2400 dpi Printhead Printhead Printhead Printhead Black nozzles 320 600 dpi Color nozzles 256 1200 dpi Ink Tank BCI 3e Ink Tank BCI 3e Ink Tank BCI 3e Ink Tank BCI 3e Ink colors Black Cyan Magenta Yellow Black ink tank capacity Black ink tank capacity Black...

Страница 45: ...T SHALL BIND CANON SOME STATES DO NOT ALLOW LIMITATIONS ON HOW LONG AN IMPLIED WARRANTY LASTS SO THE ABOVE LIMITATION MAY NOT APPLY TO YOU CANON SHALL NOT BE LIABLE FOR LOSS OF REVENUES OR PROFITS INCONVENIENCE EXPENSE FOR SUBSTITUTE EQUIPMENT OR SERVICE STORAGE CHARGES LOSS OR CORRUPTION OF DATA OR ANY OTHER SPECIAL INCIDENTAL OR CONSEQUENTIAL DAMAGES CAUSED BY THE USE OR MISUSE OF OR INABILITY T...

Страница 46: ...cement product that is sent to you and your originally purchased product shall become the property of the replacement product that is sent to you and your originally purchased product shall become the property of Canon Canon Canon Canon InstantExchange warranty program service is available only during the express limited warranty period for your product and only in the continental United States Al...

Страница 47: ...ecalling saved settings 17 removing 35 saving settings for future use 17 troubleshooting installation of 25 uninstalling 35 E E E E edges smoothing 13 envelopes how to load 6 error messages explanation of 28 F F F F fixing problems how to 25 G G G G graphics improving quality 11 13 grayscale 13 I I I I Image Color Management ICM 13 Image Optimizer 11 improving enlarged graphics 11 13 improving pri...

Страница 48: ...rn 20 smoothing rough edges 13 troubleshooting bad printouts 28 troubleshooting problems with 27 printing color images in grayscale 13 problems what to do to fix 25 product registration 35 Q Q Q Q quality of printing 9 R R R R registering your product 35 replacing empty ink tanks 20 S S S S safety information 36 scaled printing 16 smoothing rough edges in images 13 stopping a print job how to 7 sy...

Отзывы: