


Chapter 2
2-32
F-2-129
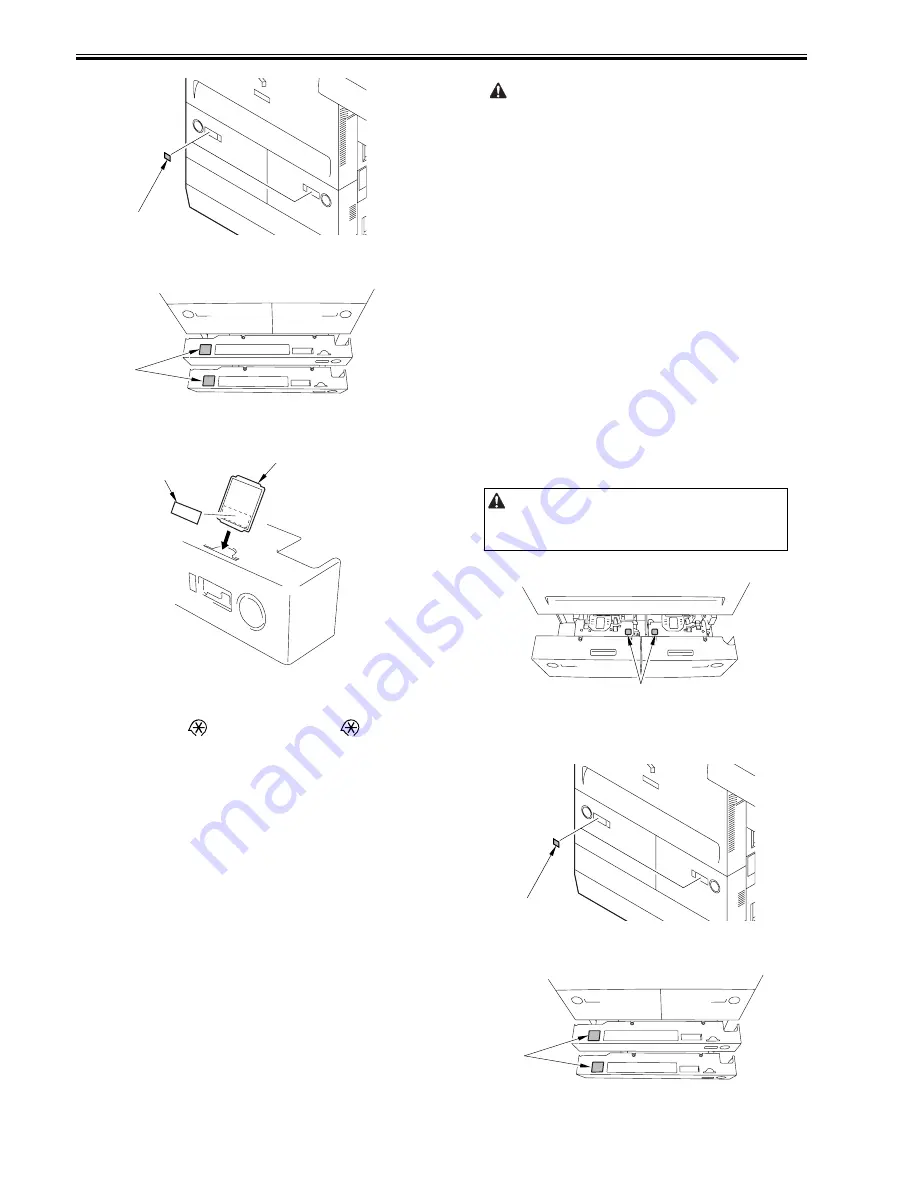
6) Press the release button of the cassette 3/4, and slide out the cassette.
7) Attach the 3-hole paper placement label [1].
F-2-130
8) Affix the corresponding cassette size label [1] onto the paper size plate [2]
of the cassette. Set the paper size plate in the cassette cover.
F-2-131
9) Close the deck/cassette.
10) To ensure stable reproduction of images, generate 2 solid black prints
(A3) as follows:
11) Start service mode. (
'2' and '8' at the same time >
)
12) Make the following selections: COPIER > TEST > PG > PG-PICK.
13) Select the source of paper containing A3 paper, and press the OK key.
('3' for cassette 3; '4' for cassette 4)
14) Press reset once.
15) Make the following selections: COPIER > TEST > PG > TYPE.
16) Type in '7', and press the OK key.
('7' for solid black; PG-TYPE7)
17) Press the Start key to generate a single solid black (A3) print. Check the
output, and wait for about 5 sec. Then, press the Start key to generate an-
other print.
18) When done, press the Reset key twice to end service mode.
19) Place the test sheet on the copyboard, and check the copy image.
Check to be sure that the pickup operation for all sources of paper is
normal (by making 3 test copies each from decks and cassettes).
- check to be sure that there is no abnormal noise.
- check to see that images at all default magnifications are normal.
- check to see that as many copies as specified are made normally.
- if there is a difference in density between left and right, correct it by
adjusting the height of the primary charging wire at the front or the
rear.
- Check to see that copying operation is normal.
horizontal registration standard (margin at image left): 2.5 +/-1.5 mm
lead edge registration standard (margin at image lead edge): 4.0 +1.5/-1.0
mm
If not as indicated, make adjustments by referring to the instructions
under "Adjusting the Horizontal Registration" and "Adjusting the Lead
Edge Registration."
20) Make double-sided copies to check the machine operation.
21) Make standard settings in additional functions and service mode to suit
the needs of the user.
22) Press the Reset key twice to end service mode.
23) Clean up the area around the machine.
24) Move the machine to its final place, and fix it in place using the adjusters.
25) If you are installing accessories, do so according to their respective In-
stallation Procedures.
26) Fill out the service sheet.
2.2.20 Attaching the Labels, Placing Paper, and Checking
Images and Operation
0012-2062
iR7095P
1) Check with the user to find out the size of paper that will be used.
2) Press the release button of the front deck (right, left), and slide out the
deck.
3) Attach the 3-hole paper placement label [1].
F-2-132
4) Put paper in the front deck (right/left).
5) Close the front deck (right/left). Affix the corresponding cassette size la-
bel [1] onto the paper size plate of the each deck.
F-2-133
6) Press the release button of the cassette 3/4, and slide out the cassette.
7) Attach the 3-hole paper placement label [1].
F-2-134
8) Affix the corresponding cassette size label [1] onto the paper size plate [2]
[1]
[1]
[1]
[2]
At times, the first 10 copies or so may show soiled images because of toner
dropping from the drum separation claw. The symptom should disappear as
additional copies are made.
MEMO:
For the Card Reader-D1, see "Card Reader-D1 Installation Procedure."
If you are changing the size of the front deck (right, left), refer to the
instructions under "Switching Over the Front Deck (right/left) Paper Size."
[1]
[1]
[1]
Содержание 7086 Series
Страница 1: ...Sep 7 2007 Service Manual iR7105 7095 7086 Series ...
Страница 2: ......
Страница 6: ......
Страница 26: ...Contents ...
Страница 27: ...Chapter 1 Introduction ...
Страница 28: ......
Страница 30: ......
Страница 32: ...Chapter 1 1 2 Not all products are necessarily available in all sales areas ...
Страница 55: ...Chapter 2 Installation ...
Страница 56: ......
Страница 150: ......
Страница 151: ...Chapter 3 Basic Operation ...
Страница 152: ......
Страница 154: ......
Страница 159: ...Chapter 4 Main Controller ...
Страница 160: ......
Страница 162: ......
Страница 183: ...Chapter 5 Original Exposure System ...
Страница 184: ......
Страница 228: ......
Страница 229: ...Chapter 6 Laser Exposure ...
Страница 230: ......
Страница 232: ......
Страница 238: ...Chapter 6 6 6 F 6 7 1 Laser light 2 Laser shutter 1 2 1 2 2 1 ...
Страница 240: ......
Страница 241: ...Chapter 7 Image Formation ...
Страница 242: ......
Страница 246: ......
Страница 294: ......
Страница 295: ...Chapter 8 Pickup Feeding System ...
Страница 296: ......
Страница 300: ......
Страница 353: ...Chapter 9 Fixing System ...
Страница 354: ......
Страница 378: ......
Страница 379: ...Chapter 10 External and Controls ...
Страница 380: ......
Страница 384: ......
Страница 394: ...Chapter 10 10 10 F 10 7 ...
Страница 417: ...Chapter 11 MEAP ...
Страница 418: ......
Страница 420: ......
Страница 466: ......
Страница 467: ...Chapter 12 RDS ...
Страница 468: ......
Страница 470: ......
Страница 479: ...Chapter 13 Maintenance and Inspection ...
Страница 480: ......
Страница 482: ......
Страница 496: ......
Страница 497: ...Chapter 14 Standards and Adjustments ...
Страница 498: ......
Страница 526: ......
Страница 527: ...Chapter 15 Correcting Faulty Images ...
Страница 528: ......
Страница 530: ......
Страница 560: ......
Страница 561: ...Chapter 16 Self Diagnosis ...
Страница 562: ......
Страница 564: ......
Страница 584: ......
Страница 585: ...Chapter 17 Service Mode ...
Страница 586: ......
Страница 588: ...Contents 17 8 1 1 COPIER Items 17 94 ...
Страница 688: ......
Страница 689: ...Chapter 18 Upgrading ...
Страница 690: ......
Страница 692: ......
Страница 696: ...Chapter 18 18 4 ...
Страница 713: ...Chapter 18 18 22 formatting and download the system software once again ...
Страница 726: ...Chapter 19 Service Tools ...
Страница 727: ......
Страница 728: ...Contents Contents 19 1 Service Tools 19 1 19 1 1 Special Tools Table 19 1 19 1 2 Solvents Oils 19 2 ...
Страница 729: ......
Страница 733: ......
Страница 734: ...Sep 7 2007 ...
Страница 735: ......


