

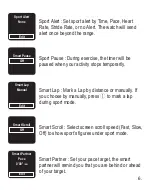


<6> Modify the format at [SETTING -> SYSTEM -> Format]
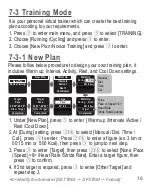
It is your personal virtual trainer which can create the best training
plan according to your requirements.
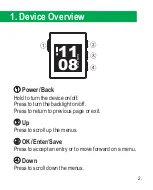
1. Press
③
to enter main menu, and press
③
to select [TRAINING].
2. Choose [Running /Cycling] and press
③
to enter.
3. Choose [New Plan /Novice Training] and press
③
to enter.
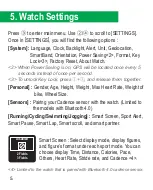
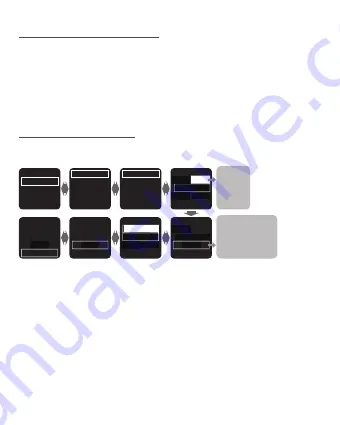
Please follow below procedure to design your own training plan, it
includes Warm up, Interval, Activity, Rest, and Cool Down settings.
1. Under [New Plan], press
③
to enter [Warm up /Intervals /Active /
Rest /Cool Down].
2. At [During] setting, press
②
/
④
to select [Manual /Dist. /Time /
Cal.], press
③
to enter ; Press
②
/
④
to enter a figure (ex: 3 km or
00:15 min or 500 Kcal), then press
③
to jump to next step.
3. Press
③
to enter [Target], then press
②
/
④
to select [None /Pace
(
Speed
) <6> /Heart Rate /Stride Rate]. Enter a target figure, then
press
③
to confirm.
4. If 2nd target is required, press
③
to enter [Other Target] and
repeat step 3.
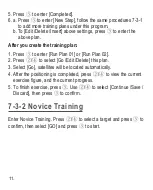
7-3 Training Mode
7-3-1 New Plan
New Plan
New Plan
Novice Training
Target
001.00
km
During
Dist.
Warm Up
Completed
00"-00
Pace
Targe
Other Target
Completed
00'00"-00'00"
Pace
Target
Other Target
Completed
00'00"-00'00"
Pace
Target
None
Pace or Speed <6>
Heart Rate
Stride Rate/Cadence
001.00
km
During
Dist.
Warm Up
Warm Up
Intervals
Active 1
Rest 1
Cool Dowm
Manual
Dist.
Time
Cal.
10.