background image

24

START-UP INSTRUCTIONS 

(CONTINUED)

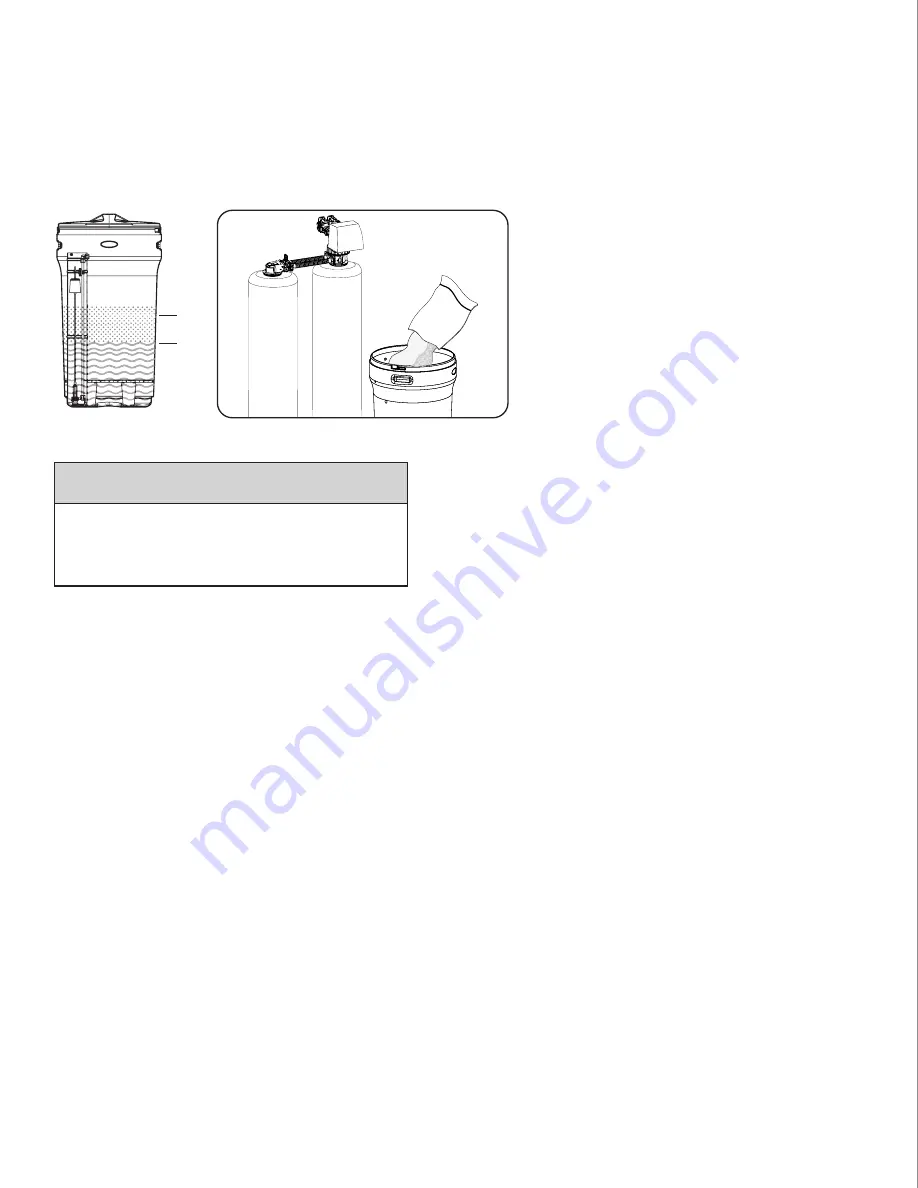
STEP 4. ADD SALT TO BRINE CABINET

Put 80 to 100 lbs [40 kg] of water conditioner salt into the brine tank. The unit will automatically fill the water to the correct level when it  
regenerates.

Salt

Water

Congratulations!  

Start-Up Instructions are 

now complete – the unit 

is operational.


NOTE

HTO, HNU models

See 

Start-Up Instructions - Problem Water Injector 

Kit

 if you have iron in your water and are installing an 

upflow water conditioner.

Содержание 185HTO

Страница 1: ...w all instructions carefully before operation 4 Avoid pinched O rings during installation by applying NSF certified lubricant to all seals provided with install kit 5 This system is not intended for t...

Страница 2: ......

Страница 3: ...W RATE INFORMATION 8 FEED WATER PARAMETERS 8 UNPACKING INSPECTION 9 BEFORE INSTALLATION 10 PREPARATIONS 11 PLANNING YOUR INSTALLATION 15 INSTALLATION STEPS 17 UNDERSTAND THE SCREEN KEYPAD CONFIGURATIO...

Страница 4: ...he warranty The warranty provided gives you specific legal rights and otherwise limits your legal rights to the extent permitted by law By installing and or using this product you are accepting these...

Страница 5: ...umber serial number and valve serial number in the Records Contacts section as they will be important if you need to troubleshoot FIND AND RECORD VALVE TYPE SERIAL NUMBERS RECORDS CONTACTS YOUR DEALER...

Страница 6: ...or 40 F 110 F Do NOT expose conditioner to freezing temperatures or vacuum Discharge lines exposed to freezing temperatures should be positioned with a downward slope Do NOT expose conditioner to dire...

Страница 7: ...ller usually sets this for the worst case hardness Reserve Capacity Calculated at seventy five 75 gallons per person Scrolling Diagnostics By pressing any button to light the LCD display the unit will...

Страница 8: ...ter conditioner HEDP Hardness 75 gpg Maximum Iron Max 2 ppm ferrous Maximum Manganese 0 75 ppm Maximum Hydrogen Sulfide 0 0 ppm MaximumTDS 2000 ppm pH 6 5 to 7 5 HTO HTOK Maximum Hardness 75 gpg Maxim...

Страница 9: ...C w Parallel Adaptor UNPACKING INSPECTION WARNING RISK OF CHOKING Discard all leftover parts and packaging materials after installation Small parts could be a choking hazard NOTE Canature is NOT respo...

Страница 10: ...em Conditioner resins will degrade in the presence of chlorine or chloramines above one 1 ppm If you have anything in excess of this amount you will experience reduced life of the resin Carbon filtrat...

Страница 11: ...during transit If this occurs back wash the conditioner to reclassify the media 1 Remove the adaptor and valve from the mineral tank Grease the bottom oring of the adaptor with silicone grease provide...

Страница 12: ...Support Bed Gravel Support Bed Gravel Support Bed Gravel Carbon Tannins A850 Resin or A860 Resin Neutralizer Filter Conditioner Resin Conditioner Resin Conditioner Resin Conditioner Resin Conditioner...

Страница 13: ...trol valve Apply lubricant to the larger O ring on the bottom of the valve that seals with the tank threads 5 Remove the tape from the top of the riser tube Carefully position the valve over the riser...

Страница 14: ...ide the brine tank 6 For installation of brine tank at the installation site pull the other end of the brine tube from the hole on the brine tank The completed assembly is below 3 Place the brine grid...

Страница 15: ...notliableforanynon compliancewithlocal requirements 4 Locate conditioner as close as possible to the water supply source 5 Locate conditioner as close as possible to a floor or laundry tub drain and a...

Страница 16: ...Inlet Outlet Water Pipe Inlet Water Pipe Outlet Drain Elbow Assembly Brine Elbow Assembly 5 8 Drain Line Floor drain Laundry Drain IMPORTANT PLEASE ENSURE THE ATTACHED TUBE STIFFENER IS INSERTED INTO...

Страница 17: ...umbing adaptors 3 Apply the supplied lubricant 92360 to the O rings of the fittings 4 Connect the supplied elbow plumbing adaptors to the bypass with red clips 5 Connect the inlet and outlet of the wa...

Страница 18: ...ake sure bypass knobs are completely open otherwise the untreated water may enter through the valve OPEN OPEN CLOSE OPEN OPEN CLOSE OPEN OPEN CLOSE SERVICE INLET OUTLET INLET OUTLET BYPASS INSTALLATIO...

Страница 19: ...maximum recorded flow rate of the water 11 Day override 12 Rinse override 13 Delayed regeneration 14 RegenerationTime time of day when backwash starts 15 Refill time 16 Valve mode 17 Valve ID UNDERSTA...

Страница 20: ...Do NOT add salt to the brine tank at this time NOTE If severe loss in water pressure is ob served when the conditioner unit is initially placed in service the conditioner tank may have been laid on it...

Страница 21: ...m Manganese x 8 __ grains of hardness These numbers can be found on your water analysis report and the equivalent grains of hardness should be added to your total hardness number The new sum of these...

Страница 22: ...1 for three seconds 3 to unlock 2 After three 3 seconds the display will beep confirming unlock 3 Press and hold button one 1 for three seconds 3 until you hear a beep This will unlock the SETTINGS m...

Страница 23: ...three 3 or four 4 key to change WATER SOURCE value For problem water set to WELL OTHER For clean city water choose MUNICIPAL REGEN TIME 02 00 AM LOAD DEFAULT NO REGEN TIME 02 00 PM PROGRAMING COMPLETE...

Страница 24: ...e tank The unit will automatically fill the water to the correct level when it regenerates Salt Water Congratulations Start Up Instructions are now complete the unit is operational NOTE HTO HNU models...

Страница 25: ...WATER INJECTOR KIT For use on HTO HNU conditioners only IMPORTANT If the water source this water conditioner is being applied on is not municipal water and contains up to 2 0 mg l ppm of ferrous Clea...

Страница 26: ...ess button two 2 until past PROGRAMMING COMPLETE PRESS SETTINGS KEY 3 SEC TO UNLOCK 1 The display may read PRESS SETTINGS KEY Press button one 1 for three seconds 3 to unlock 2 After three 3 seconds t...

Страница 27: ...to the water heater OFF and shut the heater inlet water valve OFF 2 Drain hot water tank completely OPEN the InletWaterValve allowing the heater tank to be refilled with iron free water Continue flush...

Страница 28: ...heck cross pipes annually Maintenance materials Please see Common Spare Parts CARE OF YOUR CONDITIONER To retain the attractive appearance of your new water conditioner occasionally clean it with a mi...

Страница 29: ...tuations happen or the unit fails to regenerate for any other reason correct the problem first then regenerate the unit manually Regenerate two times in a row to restore the reserve capacity and bring...

Страница 30: ...of the holder and drill 1 Measure 2 inches from the top of the tank beside the oblong molding 3 Install the holder 5 Take off the small hole cover on the BrineWell lid 4 Hang the ResCare bottle on the...

Страница 31: ...ResCare SERVICING YOUR CONTROL VALVE BEFORE SERVICING YOU WILL NEED TO 1 Shut the water supply to the conditioner OFF put the conditioner into the BYPASS position 2 Relieve water pressure in the condi...

Страница 32: ...l and repeat until finishing with a seal Important use the specialized end spacer and note it s placement 6 Lubricate the piston assembly with silicone lubricant Part 92360 and then replace the Piston...

Страница 33: ...Injector Configuration Plug Groove Plug Injectors Fig 1 CLEAN INJECTOR ASSEMBLY FOR MODELS BEFORE JUNE 2022 Sediment salt and silt will restrict or clog the injector A clean water supply and pure salt...

Страница 34: ...eration Unplug power for 30 seconds then reconnect If the alarm continues contact your authorized installer UNIT REGENERATES BUT DOES NOT USE SALT Drain line flow control is plugged Clean or replace i...

Страница 35: ...motor and transformer if unable to determine the output of the transformer separately 2 Contact your authorized installer for parts and or assistance COMMON SPARE PARTS TROUBLESHOOTING GUIDE CONTINUED...

Страница 36: ...mage caused by any force of nature is not covered in this warranty At our sole discretion we will repair or replace defective parts if our warranty department determines it to be defective under the t...

Отзывы: