


GB
12
913
SWITCHING ON THE APPLIANCE
Close the door, insert the plug in the mains socket and set the required temperature. Allow the fridge to run empty
until the set temperature appears on the display, then place the food in the compartment and close the door.
T4 SETTING THE TEMPERATURE
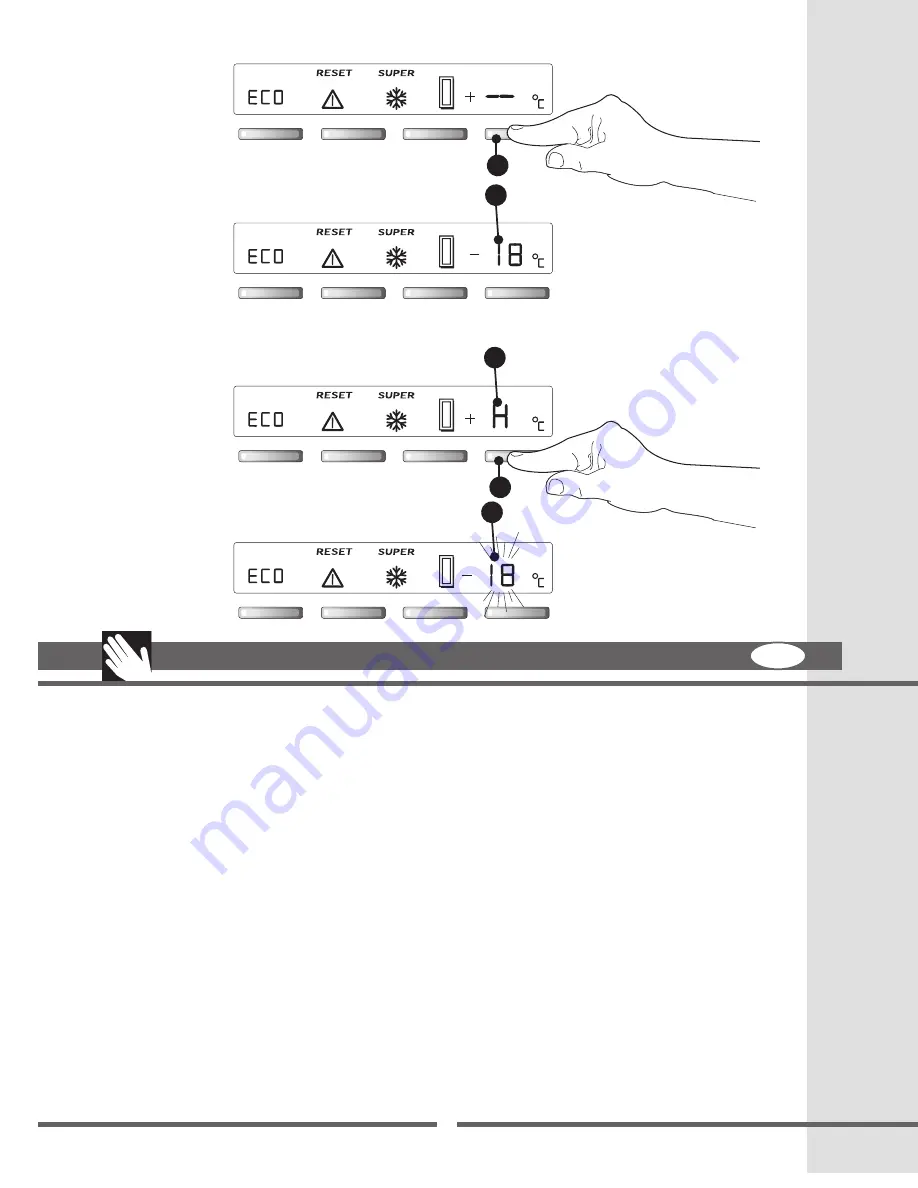
To start the appliance, press button “T4” for at least 0.5 seconds To stop the appliance, press button “T4” for 4
seconds. The symbol “—” (fi g. a) will appear on the display. During normal operation, the display will indicate
the internal temperature with the symbol “S5” (fi g. b). The display indicates the values of the internal temperature
b20°C and -40°C. Temperatures higher than +20°C (e.g. +21°C) are indicated by the letter “H” (fi g. c).
The temperature can be set between -18 and -24 °C.
PROGRAMMING AND ADJUSTING THE TEMPERATURE
Press button “T4” once. The programmed temperature will fl ash for 6 seconds (fi g. d). When button “T4” is re-pressed,
the temperature setting changes. The temperature reduces by 1°C for each clock down to -24°C, after which the display
restarts from -18°C. The new setting will be memorised after “S5” stops fl ashing.
CHECKING THE PROGRAMMED TEMPERATURE
Press button “T4” once. The programmed temperature “S5” will fl ash for 6 seconds (fi g. d), after which the actual
temperature inside the compartment will be displayed. The programmed functions will stay in the memory even in the
case of a power cut or when the appliance is disconnected from the mains supply
USING THE FREEZER COMPARTMENT Mod. A
T4
S5
Fig.a
Fig.b
Fig.c
Fig.d
T4
S5
S5
Содержание FRZ360N
Страница 25: ...913 ...
Страница 26: ...913 ...
Страница 27: ...913 ...
Страница 28: ...913 1 ...
Страница 29: ...913 ...
Страница 30: ...913 A Fig h S3 ...
Страница 31: ...913 Fig e Fig f Fig g T2 S2 T2 S2 T1 S1 T1 S1 S3 ...
Страница 32: ...913 T3 S3 Fig a Fig b Fig c Fig d T3 S3 S3 ...
Страница 33: ...913 T2 T3 T1 S1 S2 S3 S4 Fig 2 Fig 1 ...
Страница 34: ...913 A Fig i S2 S4 S2 S4 T2 ...
Страница 35: ...913 Fig h T2 S2 ...
Страница 36: ...913 Fig e Fig f T3 S3 T3 S3 T1 S1 T1 S1 Fig g Fig h S5 T2 S2 ...
Страница 37: ...913 T4 S5 Fig a Fig b Fig c Fig d T4 S5 S5 ...
Страница 38: ...913 S1 S2 S3 S4 S5 T1 T2 T3 T4 Fig 1 Fig 2 ...
Страница 39: ...913 Green and Yellow to Earth Blue to Neutral 13 amp Fuse Brown to Live Cord Clamp ...
Страница 40: ...913 3 I ...
Страница 41: ...913 2e 2g 2n 2h 2p 2f ...
Страница 42: ...913 2b 2a 2c 2b2 2d A 2b3 ...
Страница 43: ...913 1 ...
Страница 44: ...913 5 6 8 9 7 1 2 3 4 1 2 3 4 Mod A Mod B ...
Страница 45: ...913 ...
Страница 46: ...913 Mod A Mod B ...
Страница 47: ...913 Mod A Mod B ...


