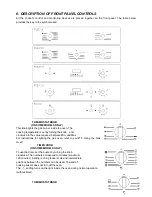
23 hours 59 minutes can be set as maximum.
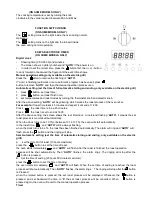
TO set the time, press the button, and then + or - button, until the required time is shown on the screen.
After the setting, the correct time (hour, minute) and the button will show on the screen. When the
button is ressed the time displaced will be seen. When the set time is reached, disappears and the
alarm will ring again. To stop the alarm, press the button.
Notice
:
after pressing the related button, setting is supposed to be done in 5 seconds. In case of blackout, the
set process as well as the real time (hour, minute) will disappear. After the power is on again, three“
0
”and
“
AUTO
” shows on the screen, the oven will automatically reset.
7. USING THE OVEN
7.1 Precautions and General Advice
When the oven and grill are used for the first time, they should be heated to the maximum temperature
for long
enough to burn off any oily residues left by the manufacturing process, which might contaminate
foods with
unpleasant smells.
To avoid unpleasant contact with any steam inside the oven, open the door in two stages: hold it open just a
little (about 5 cm) for 4-5 seconds, then open it completely. If you have to check or carry out other procedures
on food during cooking, leave the door open for a short time to prevent a drop in the oven temperature which
will impair the cooking results.
7.2 Cooling fan system (on some models only)
The appliance is equipped with a cooling system which comes into operation a few minutes after the oven is lit.
Operation of the fan generates a normal air flow which comes out above the door and may continue for a short
time even after the oven is turned off.
7.3 Using the gas oven
7.3.1 Electronic spark ignition
Completely open the oven door and press the thermostat knob while turning it anti-clockwise to the maximum
temperature setting; this automatically activates the electric spark ignition device. Once the burner has ignited,
keep the knob pressed down for a few seconds to allow the thermocouple to heat up.
If the burner has not lit after 15 seconds, stop trying, leave the oven door open and wait 1 minute before trying
again.
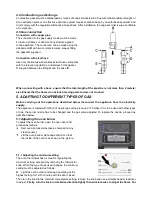
7.3.2 Lighting the burner by hand
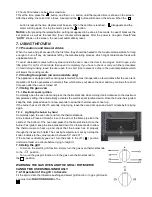
Completely open the oven door and turn the thermostat knob
Anti-clockwise. Place a lit match close to the end of the flame pipe
A
in
the
centre of the bottom of the oven and press the
thermostat knob. Once the
burner has ignited, keep the knob pressed down for a few seconds to allow
the thermocouple to heat up and check that the burner has lit properly
through the inspection hole
B
. The cooking temperature is set by turning the
knob clockwise to the value required, between 50° and 231°.
If the burner accidentally goes out, turn the knob to the off ( ) position
and wait at least one minute
before trying to relight it.
7.4 Using the grill
- To turn on the electric grill function, simply turn the gas oven
thermostat knob
to the position .
- To turn on the gas grill function, turn the gas oven
thermostat knob to
the position.
WARNING: THE GAS OVEN AND THE GRILL/ ROTISSERIE
CANNOT BE USED SIMULTANEOUSLY.
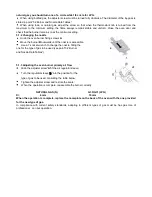
7.4.1 Operation of the grill + rotisserie
Fit the spit rod into the rotisserie bushing and select grill function
(
In gas grill model,
you must turn
FUNCTION KNOB
to The


