background image

20

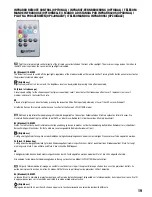
FL (Flash / Stroboscope)

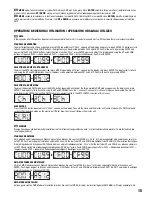
Réglage de rapidité, à 4 positions, pour l’effet Stroboscope (appuyer plusieurs fois sur la touche). En position 1, le stroboscope est désactivé. Position 

2, fréquence des éclairs lente ; position 3, fréquence moyenne ; position 4, fréquence la plus rapide.

UV

Les 4 positions de luminosité s’obtiennent par pressions successives sur la touche UV. La position 1 correspond à l’extinction des LED. 

Toutes les autres touches de cette télécommande n’ont aucune fonction avec le projecteur Cameo CLPFLAT1UVIR.

ES

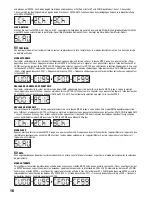
Apunte el mando a distancia directamente al panel frontal del sensor de infrarrojos del foco. El alcance máximo es de 8 metros aprox. En los 

modos DMX y Esclavo, el sensor del foco está desactivado.

BL (Blackout, oscurecimiento) / ON/OFF

El botón BL se utiliza para apagar el foco, independientemente del modo de funcionamiento. Pulse de nuevo el botón BL para activar el modo de 

funcionamiento anterior. 


(Brightness, brillo)

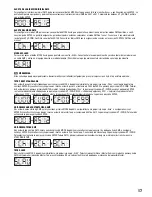
Ajuste del brillo en 4 niveles. Cada vez que pulse este botón irá cambiando la intensidad.

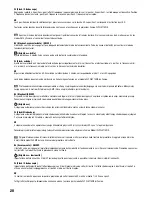
FL (Flash, estrobo)

Ajuste de la velocidad en 4 niveles del efecto estrobo (pulsar repetidamente). El nivel 1 desactiva el efecto estrobo, el nivel 2 es la frecuencia míni-

ma, el nivel 3 es la frecuencia media y el nivel 4 es la frecuencia máxima de destellos.

UV

Al pulsar repetidamente el botón UV, irá variando su intensidad en 4 niveles, correspondiendo el nivel 1 a los LED apagados. 

Los demás botones de este mando a distancia no tienen ninguna función en el modelo CLPFLAT1UVIR de Cameo.

PL

Pilot na podczerwień skierować bezpośrednio w stronę czujnika podczerwieni znajdującego się na przednim panelu reflektora. Maksymalny 

zasięg wynosi ok. 8 metrów. W trybie pracy DMX i Slave czujnik reflektora jest nieaktywny.

BL (Blackout)/ON/OFF

Przycisk BL służy do wyłączania reflektora niezależnie od tego, w którym z trybów dostępnych na pilocie urządzenie w danym momencie pracuje. 

Ponowne naciśnięcie przycisku BL powoduje powrót do wybranego wcześniej trybu pracy. 


(Brightness)

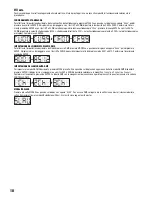
4-stopniowe ustawienie jasności. Naciskając ten przycisk kilkakrotnie, można ustawić różne stopnie jasności.

FL (Flash/Stroboskop)

4-stopniowe ustawienie prędkości efektu stroboskopu (kilkakrotne naciskanie). Stopień 1 oznacza nieaktywny efekt lampy stroboskopowej, stopień 

2 oznacza małą, stopień 3 średnią, a stopień 4 dużą częstotliwość błysku.

UV

4 stopnie jasności można wywołać naciskając kilkakrotnie przycisk UV, przy czym diody LED są na 1 stopniu wyłączone. 

Pozostałe przyciski pilota nie posiadają żadnych funkcji w odniesieniu do urządzenia Cameo Modell CLPFLAT1UVIR.

IT

Dirigere il telecomando a infrarossi direttamente verso il sensore a infrarossi sul pannello frontale del proiettore. Il raggio d’azione è di circa 

8 metri. Nelle modalità DMX e slave, il sensore del proiettore è disattivato.

BL (Oscuramento) / ON/OFF

Il tasto BL serve per spegnere il proiettore indipendentemente dalla modalità di funzionamento in cui si trova sul telecomando. Premendo nuovamen-

te il tasto BL, la modalità attivata in precedenza viene riattivata. 


(Brightness - luminosità)

Impostazione della luminosità a 4 livelli. Premendo più volte questo pulsante, è possibile richiamare i diversi stadi di luminosità.

FL (Flash / Stroboscopio)

Impostazione della velocità dell’effetto stroboscopico a 4 livelli (premere diverse volte). Al livello 1 l’effetto stroboscopico è disattivato; al livello 2 è 

attivo a una velocità di lampeggio bassa, al livello 3 media e al livello 4 rapida.

UV

I 4 livelli di luminosità si possono impostare premendo più volte il pulsante UV, mentre al livello 1 i LED sono spenti. 

Tutti gli altri tasti di questo telecomando non hanno alcuna funzione per il modello CLPFLAT1UVIR di Cameo.

Содержание CLPFLAT1UVIR

Страница 1: ...UNGSANLEITUNG MANUEL D UTILISATION MANUAL DE USUARIO INSTRUKCJA OBS UGI MANUALE D USO LED UV FLAT PAR 7 X 3 W HIGH POWER FLAT UV LED PAR LIGHT IN BLACK HOUSING WITH IR REMOTE CONTROL CAPABILITY CLPFLA...

Страница 2: ...s Make certain that wall mounts are properly installed and secured Make certain that the equipment is installed securely and cannot fall down 7 During installation observ e the applicable safety regul...

Страница 3: ...electrical shock The warning triangle with exclamation mark indicates important operating and maintenance instructions Warning This symbol indicates a hot surface Certain parts of the housing can bec...

Страница 4: ...lich durch Sicherungen des gleichen Typs und Wertes Sollte eine Sicherung wiederholt ausl sen wenden Sie sich bitte an ein autorisiertes Servicezentrum 29 Um das Ger t vollst ndig vom Stromnetz zu tre...

Страница 5: ...z toutes les r glementations en vigueur dans votre pays pour mettre l appareil au rebut Lorsque vous jetez l emballage de l appareil veuillez s parer plastique papier et carton 21 Les films plastique...

Страница 6: ...aines circonstances les effets Stroboscope sont susceptibles de provoquer des crises d pilepsie aupr s de personnes sensibles Il est donc conseill aux personnes pileptiques d viter les lieux o sont in...

Страница 7: ...smo deber dejarse una distancia m nima de 0 5 metros con cualquier material inflamable 35 Los cables el ctricos que sirven para alimentar a varios equipos deben tener una secci n m nima de 1 5 mm En l...

Страница 8: ...daj warto ciom sieci elektrycznej Je li do czony kabel sieciowy lub do czony adapter sieciowy nie pasuje do gniazda elektrycznego nale y skontaktowa si z elektrykiem 25 Nie stawa na kablu sieciowym Na...

Страница 9: ...re mai il dispositivo a contatto con materiali liquidi o gas infiammabili 12 Accertarsi che all interno del dispositivo non possa penetrare acqua per gocciolamento o spruzzo Non collocare sul disposit...

Страница 10: ...toposte a manutenzione da parte dell utente Per gli interventi di manutenzione e di riparazione rivolgersi esclusivamente a personale qualificato Il triangolo equilatero con il simbolo del lampo segna...

Страница 11: ...rbar Master Slave Funktionalit t Robustes flaches Geh use ger uschlos durch Konvektionsk hlung Longlife LEDs mit besonders langer Lebensdauer Doppelhalterung Steuerung ber Infrarot Fernbedienung optio...

Страница 12: ...panel steruj cy funkcje Master Slave wy trzyma a p aska obudowa bezg o na praca dzi ki ch odzeniu konwekcyjnemu trwa e diody LED o wyj tkowo d ugiej ywotno ci podw jny uchwyt sterowanie za pomoc pilot...

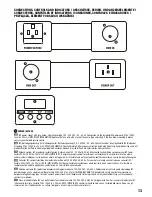
Страница 13: ...n fusible neuf du m me format et du m me calibre valeurs indiqu es sur le panneau arri re de l appareil Si le fusible fond de fa on r p t e veuillez consulter un centre de r parations agr ES Conector...

Страница 14: ...tion After approx 70 seconds of inactivity the display goes off and will be restored as soon as one of the 4 control buttons MODE ENTER UP and DOWN is activated DE Das LED Display zeigt den aktuellen...

Страница 15: ...slave unit follows the master unit DE HINWEIS Wenige Sekunden nachdem der Scheinwerfer korrekt am Stromnetz angeschlossen wird ist er betriebsbereit und wechselt in die Betriebsart die zuvor angew hlt...

Страница 16: ...l afficheur appuyez alors deux fois sur ENTER L afficheur se met clignoter vous pouvez alors r gler l aide des touches UP et DOWN la valeur de l adresse de d part DMX de A001 A512 Pour valider votre s...

Страница 17: ...CUxx a nast pnie dwukrotnie nacisn ENTER Wy wietlacz zaczyna pulsowa i mo na ustawi jasno w zakresie od CU00 do CU99 za pomoc przycisk w UP i DOWN Potwier dzi ustawienie za pomoc przycisku ENTER i wy...

Страница 18: ...IO DMX Per effettuare l impostazione desiderata dell indirizzo di avvio DMX premere MODE fino a quando sul display non appare Axxx quindi premere ENTER Il display inizia a lampeggiare e con i tasti UP...

Страница 19: ...DMX und der Slave Betriebsart ist der Sensor des Strahlers deaktiviert BL Blackout ON OFF Die BL Taste dient dazu den Strahler abzuschalten unabh ngig davon in welcher auf der Fernbedienung befindlic...

Страница 20: ...est nieaktywny BL Blackout ON OFF Przycisk BL s u y do wy czania reflektora niezale nie od tego w kt rym z tryb w dost pnych na pilocie urz dzenie w danym momencie pracuje Ponowne naci ni cie przycisk...

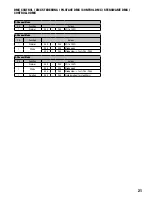
Страница 21: ...Dimmer 000 255 0 to 100 2 Channel Mode Ch Function Values 1 Dimmer 000 255 0 to 100 2 Strobe 000 005 Strobe open 006 255 Strobe slow fast 1Hz 20Hz 3 Channel Mode Ch Function Values 1 Dimmer 000 255 0...

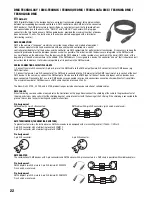
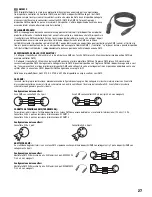
Страница 22: ...the first DMX device e g DMX Controller 2 Connect the female 3 pin XLR connector of the DMX cable connected to the first projector to the DMX input male 3 pin socket of the next DMX device In the same...

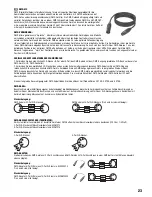
Страница 23: ...B DMX Controller 2 Verbinden Sie den weibliche XLR Stecker des an den ersten Scheinwerfer angeschlossenen DMX Kabels mit dem DMX Eingang m nnliche XLR Buchse des n chsten DMX Ger ts Verbinden Sie den...

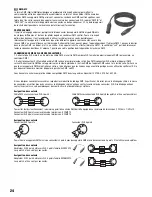
Страница 24: ...r XLR m le de l appareil DMX suivant Reliez la sortie DMX de cet appareil selon le m me m thode l entr e DMX de l appareil DMX suivant et ainsi de suite Veillez ce que tous les appareils DMX soient re...

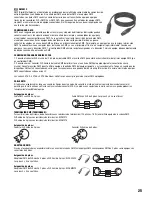
Страница 25: ...embra del cable DMX del primer foco a la entrada DMX del equipo siguiente conector de chasis macho Conecte la salida DMX de este ltimo equipo a la entrada DMX del equipo siguiente y as sucesivamente T...

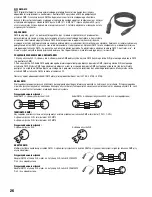
Страница 26: ...sk wtyczk XLR kabla DMX pod czonego do pierwszego reflektora pod czy do wej cia DMX m skie gniazdo XLR nast pnego urz dzenia DMX Wyj cie DMX tego urz dzenia pod czy w taki sam spos b do wej cia DMX na...

Страница 27: ...o proiettore DMX con l ingresso DMX presa XLR maschio del successivo dispositivo DMX Analogamente collegare l uscita DMX di questo dispositivo con l ingresso DMX del dispositivo seguente e cos via Ten...

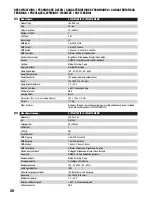
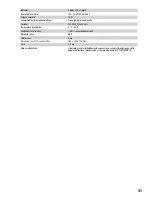
Страница 28: ...AR can Type flat can Colour Spectrum UV 396 nm Number of LEDs 7 LED Type 3 W Beam Angle 40 DMX Input 3 pin XLR male DMX Output 3 pin XLR female DMX Mode 1 channel 2 channel 3 channel DMX Functions Dim...

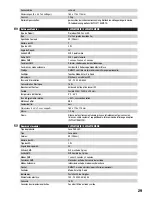
Страница 29: ...eur Embase d entr e et de renvoi IEC Fusible Fusible F3AL 250V 5 x 20 mm Temp rature d utilisation 0 C 40 C Taux d hygrom trie relative 85 sans condensation Mat riau Coffret ABS Couleur bo tier noir D...

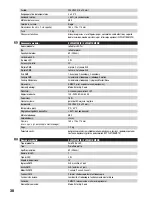
Страница 30: ...cjonalny Elementy obs ugi Mode Enter Up Down Wska niki 4 znakowy wy wietlacz LED Napi cie robocze 100 240 V AC 50 60 Hz Pob r mocy 16 W Z cze zasilania gniazdo IEC wej cie i wyj cie Bezpiecznik F3AL 2...

Страница 31: ...F3AL 250 V 5x20 mm Temperatura di esercizio 0 C 40 C Umidit dell aria relativa 85 senza condensazione Materiale cassa ABS Colore cassa Nero Dimensioni L x H x P senza staffa 180 x 175 x 115 mm Peso 1...

Страница 32: ...ren gewerblichen Abf llen entsorgt werden FR GARANTIE FABRICANT LIMITATION DE RESPONSABILIT Nos conditions actuelles de garantie et de limitation de responsabilit sont disponibles l adresse suivante h...

Страница 33: ...mi dostawcami i ewentualne sprawdzenie uzgodnionych umownie warunk w utylizacji urz dze Niniejszy produkt nie mo e by utylizowany razem z innymi odpadami przemys owymi IT MANUFACTURER S WARRANTY LIMIT...

Страница 34: ...34...

Страница 35: ...35...

Страница 36: ...36 WWW CAMEOLIGHT COM Adam Hall GmbH Daimlerstrasse 9 61267 Neu Anspach Germany Tel 49 0 6081 9419 0 Fax 49 0 6081 9419 1000 web www adamhall com e mail mail adamhall com REV 01...

Отзывы: