background image

295

215

!!

Pa

g.


4

  - M

an

u

al

 c

od

e: 

3

1

9

U

1

6

31

9

U

16

 ve

r.


1

.0

1.

0

  1

1/

2

0

11  © C

A

M

E c

an

ce

lli auto

m

ati

ci

 s.p.a. - T

h

e d

ata a

n

d i

nf

or

m

ati

on

 r

ep

orte

d i

n th

is

 in

stall

ati

on m

an

u

al a

re s

u

sc

ep

tib

le to

 c

h

an

g

e at a

ny tim

e a

n

d with

ou

t o

b

lig

ati

on

 o

n C

A

M

E c

an

ce

lli auto

m

ati

ci

 s.p.a. to n

otify u

se

rs.

ENGLISH


Before installing do the following:         

• 

Check that the panel’s anchoring point is protected from possible blows, and that the anchoring surface is solid. Also check that 

the anchoring is done using the appropriate bolts, screws etc.

• 

Make sure you have a suitable omnipolar cut-off device with contacts more than 3 mm apart, and independent (sectioned off) 

power supply.

• 


Make sure that any connections inside the case (that provide continuance to the protective circuit) are fitted with extra 

insulation as compared to the other conductive parts inside;

• 

Make sure you have suitable tubing and conduits for the electrical cables to pass through and be protected against mechanical 

damage.

Make sure you have all the tools and materials you will need for the installation at hand to work in  total safety and compliance with 
the current standards and regulations. The following figure illustrates the minimum equipment needed by the installer.
Here are some examples.

Fix the base of the panel in a protected area; we suggest 
using round top Phillips recessed head screws of max. 6mm 
in diameter.

5.3 - FIXING AND MOUNTING THE BOX

Perforate the pre-punched holes and insert the cable glands 
with the corrugated tubing for the electrical cables to travel 
through
N.B.: the pre-punched holes have the following diameters:
23m 29 and 37 mm.

Assemble the pressure hinges.

5 Installation

5.1 - PRELIMINARY CHECKS

5.2 - TOOLS AND MATERIALS

Содержание ZL90

Страница 1: ...R Q W U R O V O L Q H Z 24 SERIES INSTALLATION MANUAL ZL90 CONTROL PANEL FOR 24V OPERATORS English EN 8 1...

Страница 2: ...nsulation rating II Material ABS Protection rating IP54 operating temperature 20 55 C This product is engineered and manufactured by CAME cancelli automatici s p a and complies with current safety reg...

Страница 3: ...M1 motor fuse 2 M2 motor fuse 3 Line fuse 4 Accessories fuse 5 Control unit fuse 6 Buttons for calibrating the stroke 7 Buttons for memorising the radio 8 code Control and signalling LED unit 9 Funct...

Страница 4: ...ted with extra insulation as compared to the other conductive parts inside Make sure you have suitable tubing and conduits for the electrical cables to pass through and be protected against mechanical...

Страница 5: ...the connected devices and according to the CEI EN 60204 1 standards For connections that require several sequential loads the sizes given on the table must be re evaluated based on actual power draw a...

Страница 6: ...NGLISH Power supply 230V a c 50 60 Hz Terminals for powering the following accessories 24V a c normally alternated power 24V a c continuous power when the emergency batteri es are in operation Overall...

Страница 7: ...will start to blink c when the led stays on after about 5 seconds the procedure is complete d set to the dip switches back to OFF or to the previous position which depends on the functions selection...

Страница 8: ...ct causes reversal until total opening is obtained partial stop N C socket input for safety devices such as photocells sensitive edges and other EN 12978 compliant devices Halts moving gate leaves and...

Страница 9: ...P switch 8 to ON to activate test operation IMPORTANT when running the safety test function the N C contacts if unused should be excluded on the relative DIP switches see chapter 7 selecting functions...

Страница 10: ...ter a total safety stop or during a power outage 2 ON Open stop close stop function with button 2 7 and remote control with built in radiofrequency card 2 OFF Open close inversion function with button...

Страница 11: ...between the photocells that are set to the PARTIAL STOP or OBSTACLE STAND BY function Led CY Led PROG Led ALIM Led STOP Led CX TH 9 Signal LED Trimmer ACT Adjusts the waiting time when gate is open On...

Страница 12: ...s to be half way open block the gearmotors again 10 1 PRELIMINARY ASSESSMENT OF THE DIRECTION OF MOVEMENT DURING OPENING Otherwise 1 if the gate leaves close invert the M N phases on either of the gea...

Страница 13: ...ATIC CALIBRATION OF THE GEARMOTORS The gate leaf of the second gearmotor perform a closing run and an opening run With gate leaves fully ope the PROG LED stays on for some seconds to show the proper a...

Страница 14: ...p a to notify users ENGLISH 11 Activating the remote control AF card Lock the radiofrequency card into the electronic card AFTER CUTTING OFF THE POWER SUPPLY or after disconnecting the batteries N B...

Страница 15: ...AT01 AT02 AT04 CAME CAME CAME TWIN TWIN2 TWIN4 Pag 15 15 Manual code 319U16 319U16 ver 1 0 1 0 11 2011 CAME cancelli automatici s p a The data and information reported in this installation manual are...

Страница 16: ...ronic card pressed The LED ashes 2 Press the transmitter button you wish to memorise The LED will stay on to show memorisation has been successful LED flashing LED on 11 4 MEMORISATION CH1 Channel for...

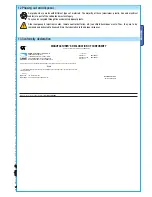
Страница 17: ...rms that specialise in their proper disposal MANUFACTURER S DECLARATION OF CONFORMITY Pursuant to annex II A of the Directive 2006 95 CE CAME Cancelli Automatici S p A via Martiri della Libert 15 310...

Страница 18: ...tion Solutions Pvt Ltd Automation Solutions Pvt Ltd A 10 Green Park 110016 New Delhi New Delhi 91 11 64640255 256 91 2678 3510 CAME Americas Automation Llc CAME Americas Automation Llc U S A 11345 NW...

Отзывы: