Page
10
- Manual:
FA00744-EN
- ver
.
1
- 04/2017 - © C
AME S.p.A. - The data and information shown in this manual ar
e t
o be consider
ed subject t
o change at any time and without the need for any advance warning.
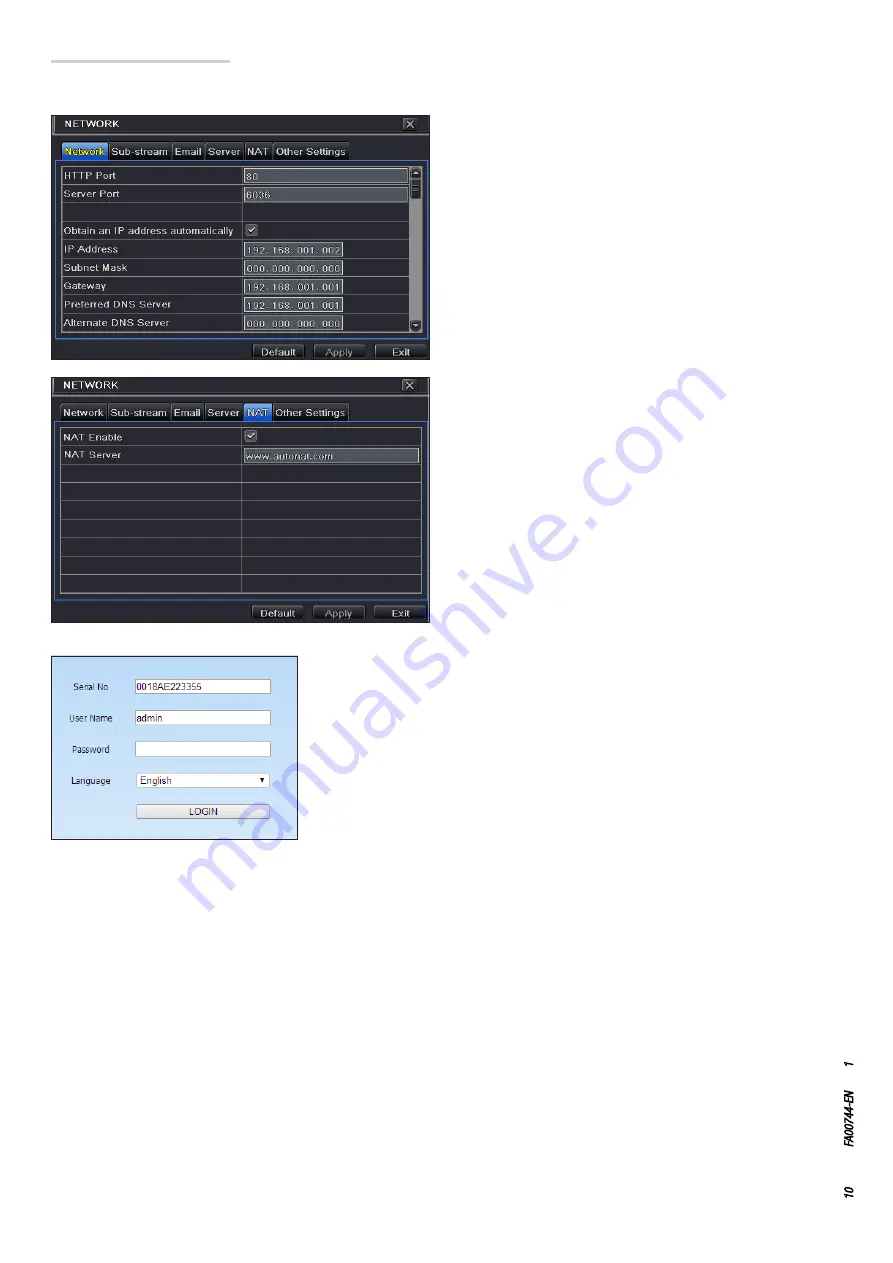
1. The DVR must be powered and connected to the network.
2. Access the Menu
⇨
Setup
⇨
Network. IP address, Subnet Mask
and Gateway can be obtained automatically but can also be
entered manually depending on the PC's setup.
Check that the network segment is the same as that of the network
used.
3. Set the preferred or alternative DNS server. Click APPLY to save
the parameters.
Connection via Cloud
NAT settings
Access to NAT server
After completing the NAT settings, it is possible to access the NAT server on PC (enter http://
www.autonat.com to access the IE client). If you are accessing NAT for the first time, the network
automatically downloads ActiveX. After installing ActiveX, the login window is opened:
Serial No:
MAC address of DVR
To display the DVR's MAC address, access the Menu
⇨
Information)
⇨
Network.
User Name:
name of user of the DVR (default name is admin).
Password:
DVR password (default password is 123456).
Remote access can also take place via NVMS1000 software (for PC) or NVMS1200 software (for
MAC OS).
4. Select the NAT tab.
5. Enable NAT and if necessary fill in the NAT Server fields, the
default NAT Server value is www.autonat.com.
6. Click APPLY to save the parameters.


