14
Stereo processing
Choose preferred stereo processing mode for the current source.
Multichannel processing
Choose preferred multichannel processing mode for the current source.
Lip sync
(KQ\Z[ [OL H\KPV KLSH` PM ULJLZZHY` [V Z`UJOYVUPZL [V ]PKLV MVY [OL J\YYLU[
source.
Zone 2 (CXR200 only)
CXR Setup Menu
Speaker Setup
Input Setup
Zone 2 Settings
Network Setup
General Settings
HDMI Output Setup
Advanced Setup
Zone 2 Power
Zone 2 Source
Zone 2 Power On Volume
On
Follow Main Zone
- 30 dB
@V\ JHU ZLSLJ[ ZV\YJLZ PUKLWLUKLU[ MYVT 4HPU PU AVUL VY ZL[ [V -VSSV^
4HPUAVUL
HDMI 2 will output the audio as formatted by the chosen source, either stereo
VY T\S[PJOHUULS \USLZZ ZL[ [V -VSSV^ 4HPU AVUL PU ^OPJO JHZL H Z[LYLV
downmix signal will be output.
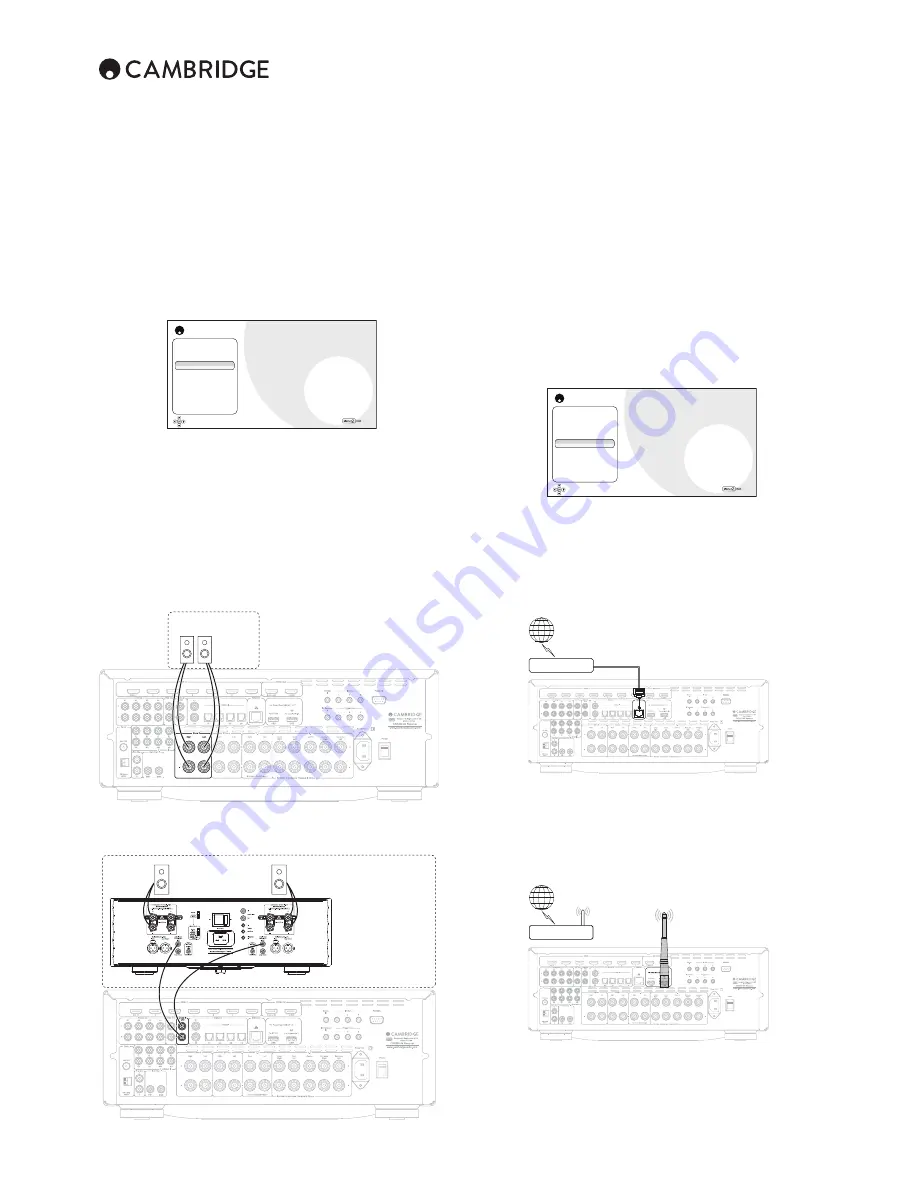
Zone 2 line level and speaker outputs
;VNL[H\KPVPUAVU40ZV\YJL`V\T\Z[ZLSLJ[-VSSV^4HPUVY
ZLSLJ[[OLZHTLZV\YJLHZPU[OL4HPUaVUL0MHKPɈLYLU[ZV\YJLPZZLSLJ[LK
for Zone 2, then the zone 2 source must have a stereo audio input selected.
Zone 2 speaker outputs
0U[OLTLU\:WLHRLY:L[\W%)HJR(TW*VUÄN\YH[PVUZLSLJ[AVUL
Zone 2
8VLQJ=RQHZLWKDQH[WHUQDODPSOLðHU
;OL AVUL SPUL SL]LS V\[W\[Z JHU IL JVUULJ[LK [V HU HTWSPÄLY MVY \ZL PU
zone 2.
Zone 2
Controlling zone 2
You can use the main remote handset, the buttons on the front of the unit
P[ZLSMVY[OL*HTIYPKNL*VUULJ[(WW[VJVU[YVS=VS\TLZV\YJLHUKT\[L
From the remote press and hold the Zone 2 button followed by the feature
you require.
Zone 2 power
Enables the Zone 2 function.
Zone 2 source
Select the video/audio source that will be sent to Zone 2.
Zone 2 power on volume
Set the desired maximum volume level when powering on Zone 2.
Network setup
Not Connected
CXR Setup Menu
Speaker Setup
Input Setup
Zone 2 Settings
Network Setup
General Settings
HDMI Output Setup
Advanced Setup
Connection Information
Network Setup
Wireless Setup
Retry Connection
Ź
Ź
Ź
To use CXR for Internet Radio/Audio Streaming you need:
(IYVHKIHUKPU[LYUL[JVUULJ[PVU
(^PÄVY^PYLKUL[^VYRJVUULJ[PVU
Use a wired connection for seamless playback of high resolution 24/176 and
ÄSLZ
Connecting to a wired network
Internet
Router/Modem
Ethernet cable
Connect a network cable (Category 5/5E or better, straight through Ethernet
cable) between the CXR and your router.
Network setup
For advanced users wanting to use a static IP. Only select static IP if you
know exactly what you are doing!
Wireless setup
Internet
Router/Modem
10-30m distance
Connect the supplied wireless antenna to the correct USB input on the rear
of CXR – it will need to be in range of your wireless router.
Input setup cont.
Содержание CRX200
Страница 1: ...CXR120 200 AV RECEIVER ...
Страница 18: ...CXR120 200 AV RECEIVER ...
Страница 59: ... CXR200 AV Receiver ...
Страница 60: ......
Страница 61: ......
Страница 62: ......


