Cambridge Audio 640Razur Скачать руководство пользователя страница 19

Dolby   Digital   EX/DTS   ES   Modes   - Selects a range of digital surround
modes with the appropriately digitally encoded material (only). These
modes are for use with the digital outputs (set to Bitstream/Raw) from
DVD players or satellite receivers etc. In order for the 640R to allow
selection of these modes a valid input digital bitstream must be present.
This is because the 640R needs to read the incoming flags in order to
determine the type of decoding which can be used and present any
options that might be possible. 

If no bitstream is present, pressing this button will result in the 640R
displaying “Mode Unavailable”. 

Note: The modes available for each button depend both on the Speaker
Configuration that has previously been set in the OSD and on the source
material.

For 5.1 Speaker setups the Dolby Digital/DTS Surround Modes button
will have a maximum of only one mode available which will depend on
the source material. See the following ‘Decode modes’ tables.

The Prologic/ Neo:6/DSP modes button will present more options where
possible including Post-Processed modes.

These are modes that allow extra processing to be applied after the
main surround-sound decoding. For instance Dolby Digital (2/0) + PLII
Music. Which adds a 5.1 ProLogic decode to a Stereo Dolby Digital
decode to turn 2 channel stereo into 5.1.

This mode would be accessed by first selecting the Dolby Digital EX /
DTS ES Mode button with a Dolby (2/0) bitstream present (selects a
normal Dolby Digital (2/0) decode. Now press the Pro Logic/ Neo:6/DSP
mode button to access the next mode which adds a PLII decode on top.

For 6.1 or 7.1 Speaker setups, the number of decoding possibilities
increases as shown in the following ‘Decode modes’ tables. Several
extra Post Processing modes are available using either Prologic IIx or
Neo:6.

Incoming   Dolby   Digital/DTS   streams   are   always   shown   on   the   front
panel   display   as   Dolby   Digital   (x/x)   or   DTS   (x/x),   where   the   bracketed
numbers   indicate   the   active   channels   in   the   source   material.   Active
output  channels  are  shown  by  the  icons  on  the  right  hand  side  of  the
front  panel  display.  Possible  incoming  DD/DTS  types  are:

(1/0) - Mono, Centre channel only

(2/0) - Left/Right stereo

(2/1) - Left/Right stereo and LFE (Sub)

(2/2) - Left/Right stereo and Left/Right surround 

(3/0) - Left, Centre, Right

(3/1) - Left, Centre, Right and LFE (Sub)

(3/2) - 5.1: Left, Right, Centre, Left Surround, Right Surround and LFE

(Sub)

(3/3) - 6.1: Left, Right, Centre, Left Surround, Right Surround, Surround

Back and LFE (Sub)

640R

azur

19

ENGLISH

Operating instructions

To activate the 640R, switch the Power button on the rear panel to 

On

then press the 

Standby/On

button on the front panel.

Selecting the source

1. Select the desired source by pushing the corresponding source

button on the front panel or remote control.

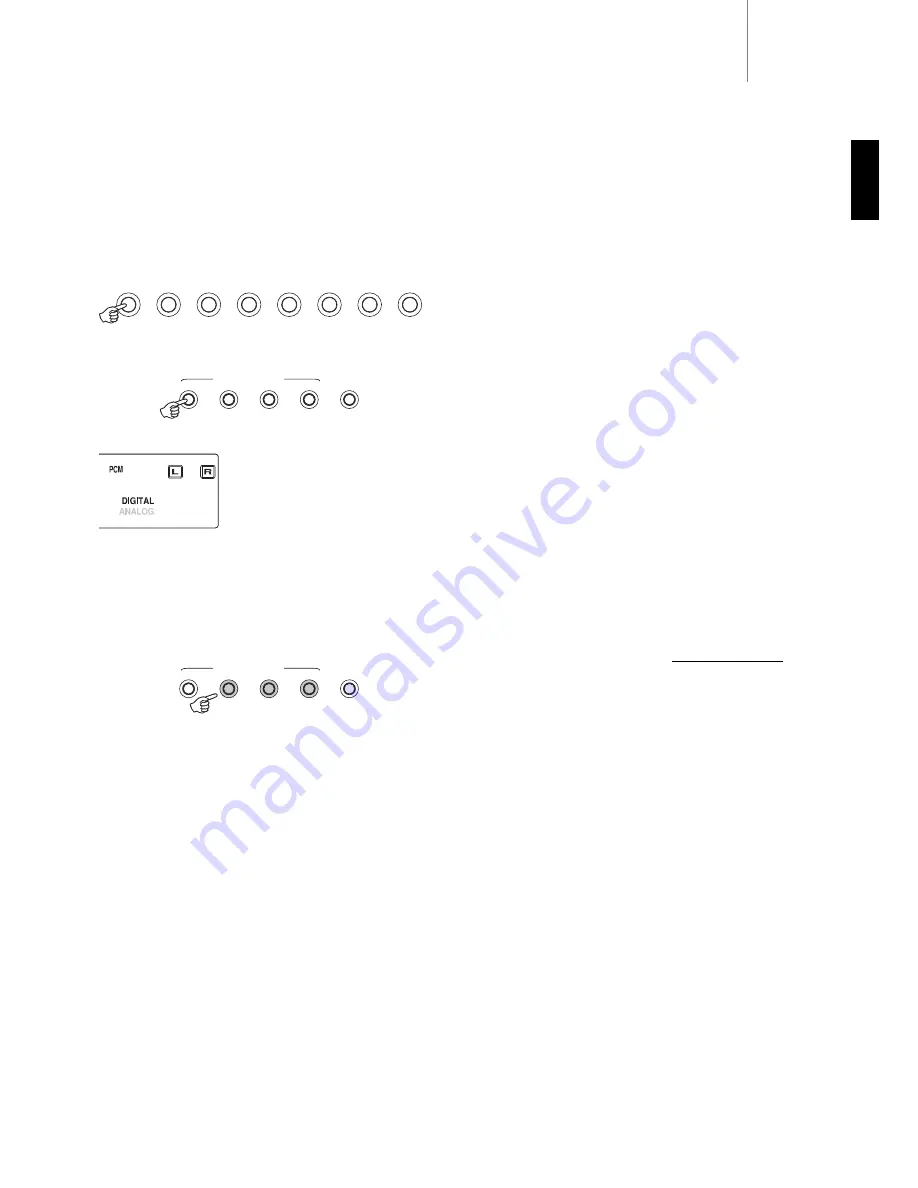
2. If necessary, press the 

Audio Input Type

button to select the input

mode of the source equipment, either analog or digital (depending on
the connection made on the rear panel).

The digital or analog icons on the display
show which is the currently selected input
type. 

Note: The 640R stores the input type for each source so that it is
automatically recalled when that source is selected again.

Selecting the desired listening mode

Select an appropriate mode for the source material/type you are
listening to by pressing one of the 3 main Digital Processing Options
buttons and cycling through sub-modes where available.

In all cases the first time a mode button is pressed the 640R will report
the current decoding mode on the front panel display. Pressing the
button again will then cycle to the next available mode (if there is one).
If no button is pressed for 4 or 5 seconds the 640R returns to normal
operation without changing mode.

Stereo  Modes  - Selects 2 channel Stereo  operation for stereo material,
pressing again selects Sub mode.  

This is a digitally processed mode that allows bass and treble controls,
and sub generation if required. The input can be either analog (in which
case it will be turned into digital by 24 bit A/D conversion) or natively
digital.

Digital inputs can be connected to the SPDIF outputs from Tuner's or CD
Players etc (LPCM) or the digital outputs of DVD players (set to
Bitstream/Raw) playing 2-channel Dolby Digital (2/0) or DTS (2/0)
material.

Prologic/Neo:6/DSP  modes  - Selects a range of surround modes with
appropriate matrix encoded material. 

These modes are for use with the analog or digital outputs from TV's or
VCR Players for instance if the source material has been encoded using
one of these processes. 

ProLogic and Neo:6 are both available in various guises to decode
appropriately encoded soundtracks. Additionally DSP modes are
available to process sources with no encoding at all. Due to the matrix
encoding process none of these modes incorporate flags that tell the
640R the type of encoding used in the source material. Thus you must
manually select these modes.

DVD

Video 1

Video 2

Recorder 1

Aux

CD

Recorder 2

7.1 Direct

Stereo
Modes

Dolby Digital/
DTS Surround

Modes

Pro Logic/Neo/

DSP Surround

Modes

Video

Input Type

Audio

Input Type

Digital Processing Options

Stereo
Modes

Dolby Digital/
DTS Surround

Modes

Pro Logic/Neo/

DSP Surround

Modes

Video

Input Type

Audio

Input Type

Digital Processing Options

Содержание 640Razur

Страница 1: ...ENGLISH AV receiver User s manual 2 640R azur...

Страница 2: ...onnections 11 5 1 6 1 7 1 Direct In 12 7 1 Preamp Out 12 Aerial connections 13 Front Input connections 13 640R setup 14 1 Speaker configuration 14 2 Speaker delay 15 3 Level calibration 16 4 Source se...

Страница 3: ...possible stereo reproduction for these The 640R also carries a 5 1 6 1 7 1 channel analog input This feature allows for the connection of a DVD Audio or SACD player equipped with a 5 1 output and is...

Страница 4: ...our model does not have an earth wire then disregard this instruction If a standard 13 amp BS 1363 plug is used a 5 amp fuse must be fitted or if any other type of plug is used a 5 amp fuse must be fi...

Страница 5: ...ronic equipment To turn the unit off completely switch off on the rear panel If you do not intend to use this unit for a long period of time unplug it from the mains socket Power cord protection The u...

Страница 6: ...ding device connected to the Recorder 2 input 7 1 Direct Press to select a 7 1 6 1 or 5 1 source DVD A or SACD player etc connected to the 7 1 Direct In sockets Note The 640R remembers the audio and v...

Страница 7: ...ti room capability IR Three IR emitter outputs for remote control of source equipment Video Out 1 2 Provides video feeds to the 2nd 3rd zone Please refer to the Multi Room section of this manual for m...

Страница 8: ...On Analog Direct Directly selects a stereo analog input for the current source with no A D conversion or DSP processing Stereo Modes Selects Stereo or Stereo Sub modes for Analog or Digital sources di...

Страница 9: ...are recommended The coloured speaker terminals are positive and the black speaker terminals are negative Make sure correct polarity is maintained at each speaker connector or the sound can become wea...

Страница 10: ...der 1 Audio player recorder Tape MD CD R FM AM tuner Phono cable 2RCA 2RCA Video player Digital audio connections Two types of digital audio connections can be made to the 640R 1 Optical Toslink 2 Coa...

Страница 11: ...deo 1 Video 2 and Recorder 1 see the Assigning HDMI sources section for more information The 640R routes the HDMI outputs of DVD players set top boxes etc to the TV Monitor without any internal proces...

Страница 12: ...eo 1 Video 2 Multi Room Composite S Video Digital O This device complies with part 15 of FCC rules TV MonOut Power On Off Manufactured in an ISO9002 approved facility Designed in London England www ca...

Страница 13: ...0R to decode surround sound information if the console game supports it Composite video cable Stereo phono cable RCA RCA S Video cable Optical cable OPT OPT FM aerial Connect an aerial to the FM 75 oh...

Страница 14: ...his to None in the settings as shown later and the 640R will automatically redirect the centre channel audio information into the Left and Right Front channels creating what is known as a Phantom Cent...

Страница 15: ...essing the OSD button always moves back one menu item and then exits and stores from the main menu screen 640R azur 15 ENGLISH Because the speakers in a surround sound system are usually different dis...

Страница 16: ...Level calibration Level Calibration Test Signal On Front L 0dB Front R 0dB Surround L 0dB Surround R 0dB Centre 0dB Subwoofer 0dB Surr Back L 0dB Surr Back R 0dB Return To Menu OSD The next step is to...

Страница 17: ...40R is fully compatible with DVI in that simple passive DVI HDMI adaptors are available which allow the conversion of the DVI connector to an HDMI format connector and back again if required for routi...

Страница 18: ...operate the 640R below is a brief guide to the Surround Sound formats that the 640R is compatible with Dolby Digital Known also as DD 3 2 or DD 5 1 provides up to 5 1 output from suitable encoded Dol...

Страница 19: ...activate the 640R switch the Power button on the rear panel to On then press the Standby On button on the front panel Selecting the source 1 Select the desired source by pushing the corresponding sour...

Страница 20: ...r 5 1 decode post processed to 6 1 7 1 Indicates 7 1 output created by a 2 0 5 1 or 6 1 decode post processed to 7 1 6 1 Indicates 6 1 output created from 6 1 material decoded as 5 1 and then post pro...

Страница 21: ...IIx Music 6 1 DTS 3 2 ES Matrix 6 1 DTS 3 2 Neo 6 Cinema 6 1 DTS 3 2 Neo 6 Music 6 1 DTS ES Matrix 3 3 PLIIx Movie 6 1 DTS ES Matrix 3 3 6 6 1 1 DTS ES Matrix 3 3 PLIIx Music 6 1 DTS ES Matrix 3 3 Neo...

Страница 22: ...ES Matrix 7 1 DTS 3 2 Neo 6 Cinema 7 1 DTS 3 2 Neo 6 Music 7 1 DTS ES Matrix 3 3 PLIIx Movie 7 1 DTS ES Matrix 3 3 6 6 1 1 DTS ES Matrix 3 3 PLIIx Music 7 1 DTS ES Matrix 3 3 7 7 1 1 DTS ES Matrix 3 3...

Страница 23: ...c tuning manual tuning or preset mode 4 Press the Tuning and Tuning buttons or the left and right arrow buttons on the remote to select the station you want to listen to In automatic tuning mode the u...

Страница 24: ...ithout the OSD by holding down the Sub On Off button and using the Vol Up Down buttons whilst it is kept down Input naming If desired it is possible to customise the names shown on the front panel dis...

Страница 25: ...4V DC In IR3 1 2 Keypad 1 Keypad 2 DVD SR SBR SW L SL SBL SB Y Cb Pb Cr Pr Y Cb Pb Cr Pr Y Cb Pb Cr Pr Y Cb Pb Cr Pr C 7 1 Direct In 7 1 Preamp Out L R L R Serial No label fitted on underside Max Powe...

Страница 26: ...Right Right Left Left Power AC On Off Power Manufactured in an ISO9002 approved facility IR Emitter In In Out Control Bus S P DIF Co axial Toslink Optical Digital Outputs Mains Voltage Selector Switch...

Страница 27: ...SET will appear briefly on the front panel display before returning to Standby mode Reset Back up memory Tuning Mode Store DVD Video 1 Stereo Modes Dolby Digital DTS Surround Modes Pro Logic Neo DSP S...

Страница 28: ...tputs 2nd 3rd Zone 3 IR Emitter outputs 2 Composite video outputs 2nd 3rd Zone 1 External PSU input 24VDC Standby power consumption 10w Quiescent power consumption 70w Max power consumption 1400w Dime...

Страница 29: ...1 or 7 1 7 1 has mono back surrounds DTS ES Matrix Discrete PLIIx Movie PLIIx Movie post process of DTS ES 6 1 giving 6 1 or 7 1 DTS ES Matrix Discrete PLIIx Music PLIIx Music post process of DTS ES...

Страница 30: ...AP20060 2 A Cambridge Audio Gallery Court Hankey Place London SE1 4BB England www cambridge audio com 2007 Cambridge Audio Ltd...

Отзывы: