XR-320 Series Installation
3
NOTE: Once you connect the GIG1/POE port, an automatic upgrade typically starts soon after the AP has Internet
connectivity.
Do not unplug this port while booting or during the upgrade process or the AP may become
inoperable
. The upgrade should take 10 minutes or less depending on bandwidth.
4.
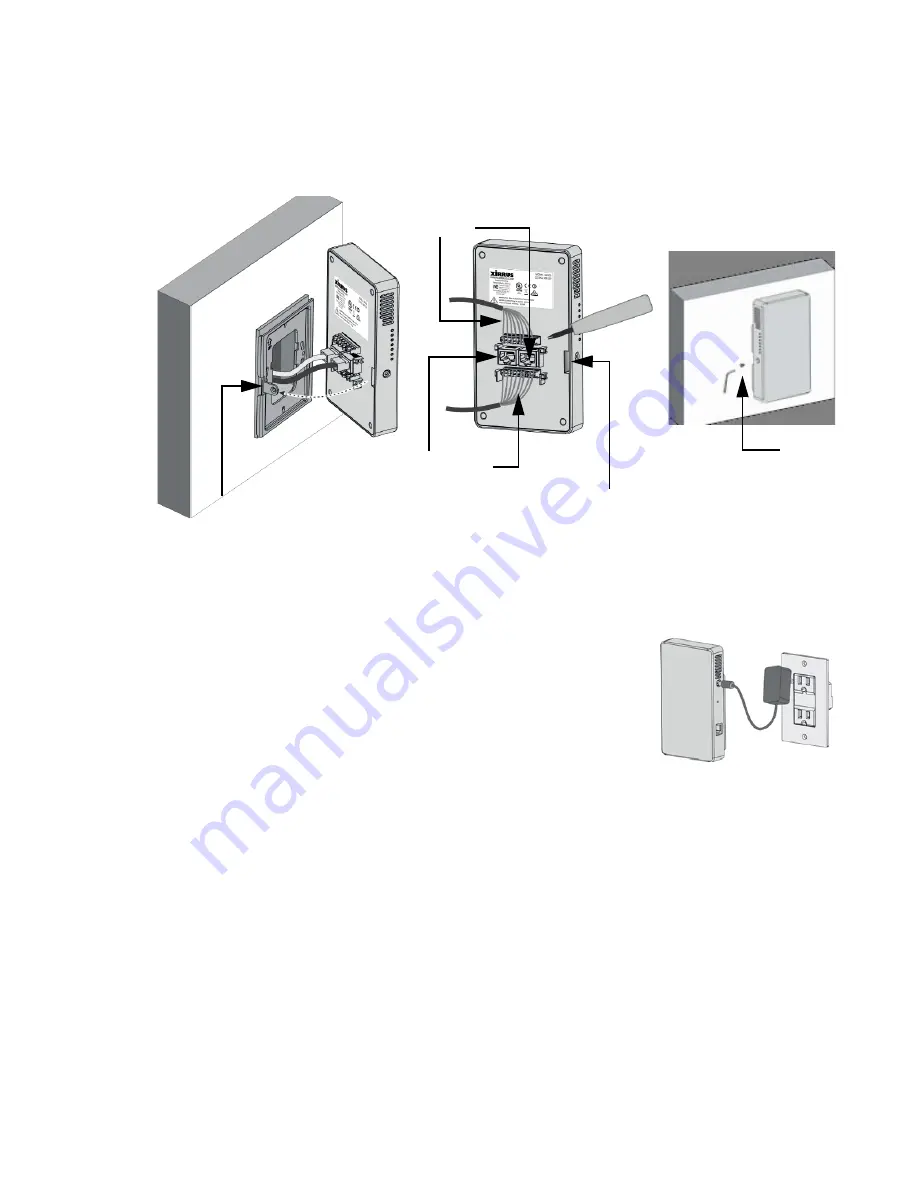
Move the AP into position against the bracket. Make sure that the locking tab mates with the locking slot as
indicated by the dotted line in
(A). Secure the AP to the mounting bracket using the locking screw, as
shown in
(C). The screw should be tightened to not more than 20Kgf and care should be taken not to
damage the equipment.
5.
If you have not supplied power via PoE, use a local 48 VDC power adapter
(meeting the specifications on Page 1) as shown in
.
6.
When the correct power is supplied, the POWER LED on the side of the unit
lights, and the XR-320 boots up.
7.
Note that once the AP is configured by XMS as described below, the 2.4G/5G
LED lights up when one or both radios are enabled. Orange indicates that the
5GHz radio is on or that both radios are on. Green indicates that only the 2.4GHz radio is on.
Zero-Touch Provisioning and Management
XR-320 APs are managed by Xirrus Management System (XMS) for initial setup and continuing management.
Once you configure a default XMS profile with desired AP settings, newly discovered APs are automatically
assigned to that profile, and its configuration and software version are sent to the APs. Additional profiles may be
created for different needs. Wait ten minutes after powering an AP to allow XMS to discover and upgrade it before
using XMS to manage it.
XMS is available in two versions:
XMS-Cloud
—performs zero-touch provisioning. New APs appear in XMS even before you receive your
equipment. When the email arrives with your login information, use XMS-Cloud to create profiles and assign
APs to them. A Guided Tour will walk you through the basic steps of creating a profile containing
configuration settings, including creating SSIDs and firewall/application control rules. Once the installed AP
Locking slot
Uplink PoE+
Pass-through
Figure 3
A
B
C
Install
Locking Screw
Locking tab
Figure 4


