Chapter 2: Packaging and Installation of Access Point
25
6. Run the RJ45 cable (s) through the 15mm hole and remount the ceiling tile.
7. Attach the RJ45 cable (s) to XV2-2 unit .
8. Slide XV2-2 into the mounting bracket.
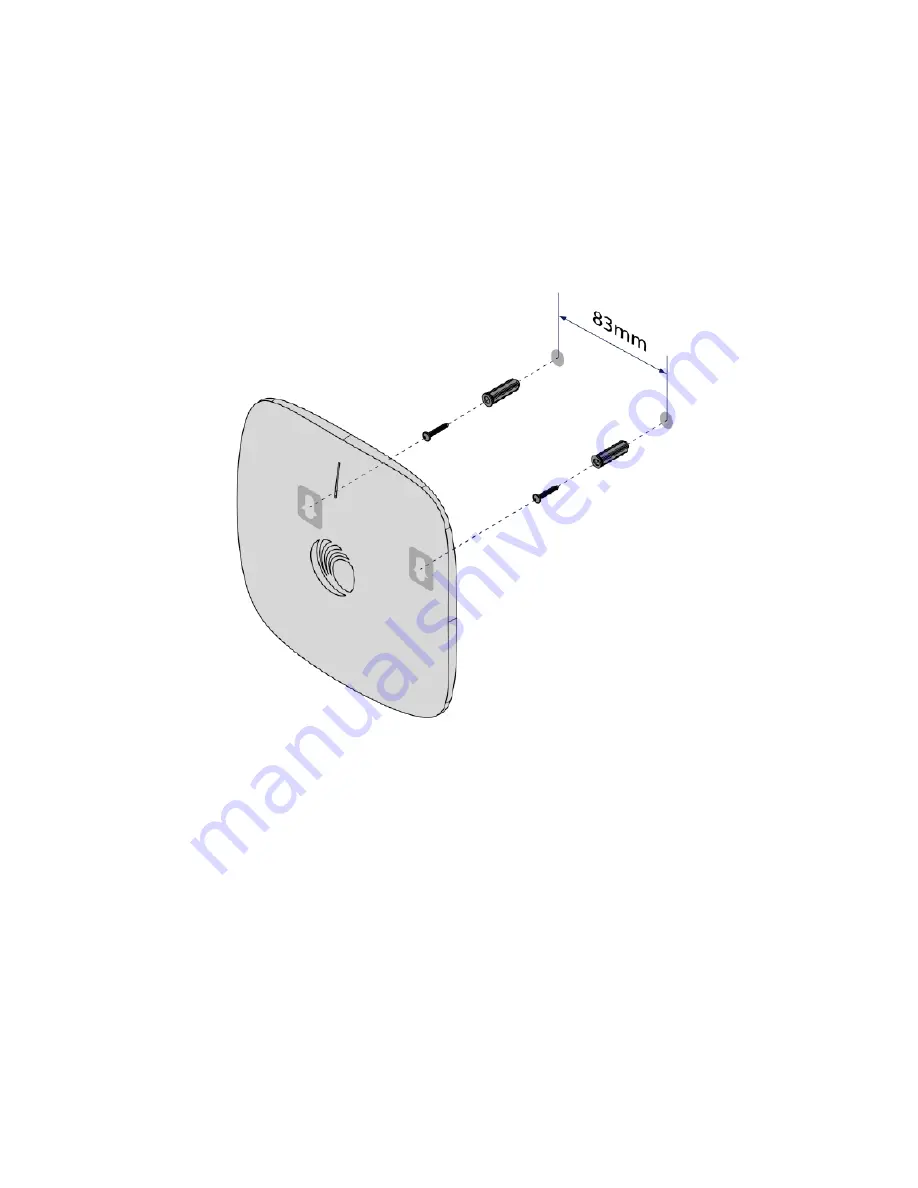
Wall mounting
You can mount XV2-2 unit to any wall by using two screws with corresponding wall anchors. The ceiling
mount bracket can be used as a template to align the screws with the unit.
T-bar mounting
The XV2-2 unit can be secured to a 38mm ceiling T-bar rail by using the ceiling mount bracket. The A
marking on the bracket must be used for this width T-bar rail.


