XD2-240 and XD4-240 Installation Guide
4
3B—Direct Ceiling Mount without Mounting Plate
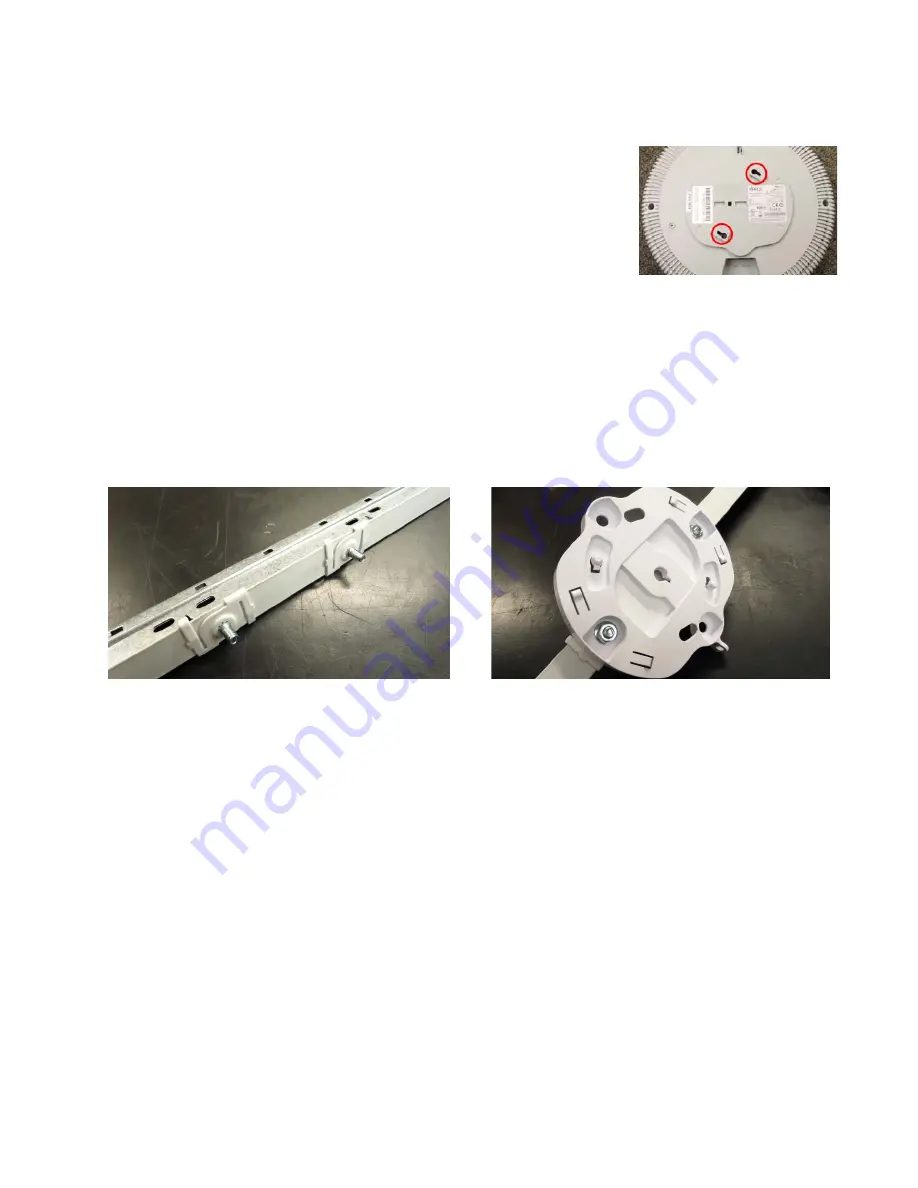
To attach the AP directly to the ceiling, use the keyhole slots on the back of the AP,
indicated in red in the photo.
NOTE: The AP must not be disassembled - do not remove the back of the AP to
tighten the screws after mounting.
1.
Remove the locking slug, if any, from the back of the AP. (See photo (C) on
previous page.)
2.
Mark the locations for the two mounting screws on the ceiling—the centers are 3.5” (8.9 cm) apart.
3.
Cut an access hole for the cable(s) in the ceiling and draw enough cable through to attach to the AP after it is
installed.
4.
Install two user-supplied screws in the ceiling (we recommend max screw size #8, Pan Head type) so that they
protrude 1/16” (1.6 mm) between the mounting surface and the head of the screw.
5.
Proceed to
Connect Cables and Install AP on page 5
3C—Ceiling Grid Mount with Mounting Plate
1.
Use two of the four holes on the AP mounting plate to mark the placement of the two supplied T-bar clips
on the metal ceiling support grid.
NOTE: You MUST use the mounting studs furnished with the T-BAR clips. You cannot use old T-bar clips from XN or XS
APs with the XD Series. Old clips and studs will damage the AP case.
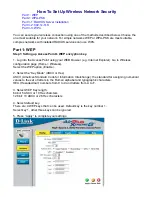
Twist the two T-bar clips onto the metal ceiling grid at the marked locations as illustrated on the segment of
ceiling grid above, and tighten the screw posts to 10-12 lbf.ft (1.38-1.66 kgf.m). Do not over- tighten the screw
posts.
2.
Cut an access hole in the ceiling tile and draw the cable(s) through.
3.
Align the AP mounting plate over the screw posts of the clips and secure it using the nuts provided. Tighten
the nuts to 10-12 lbf.ft (1.38-1.66 kgf.m), but do not over tighten.
4.
Proceed to
Connect Cables and Install AP on page 5


