This appliance has no user serviceable
parts. Any servicing beyond that described in
the Cleaning Section should be performed by
an Authorized Service Representative only.
See warranty available online.
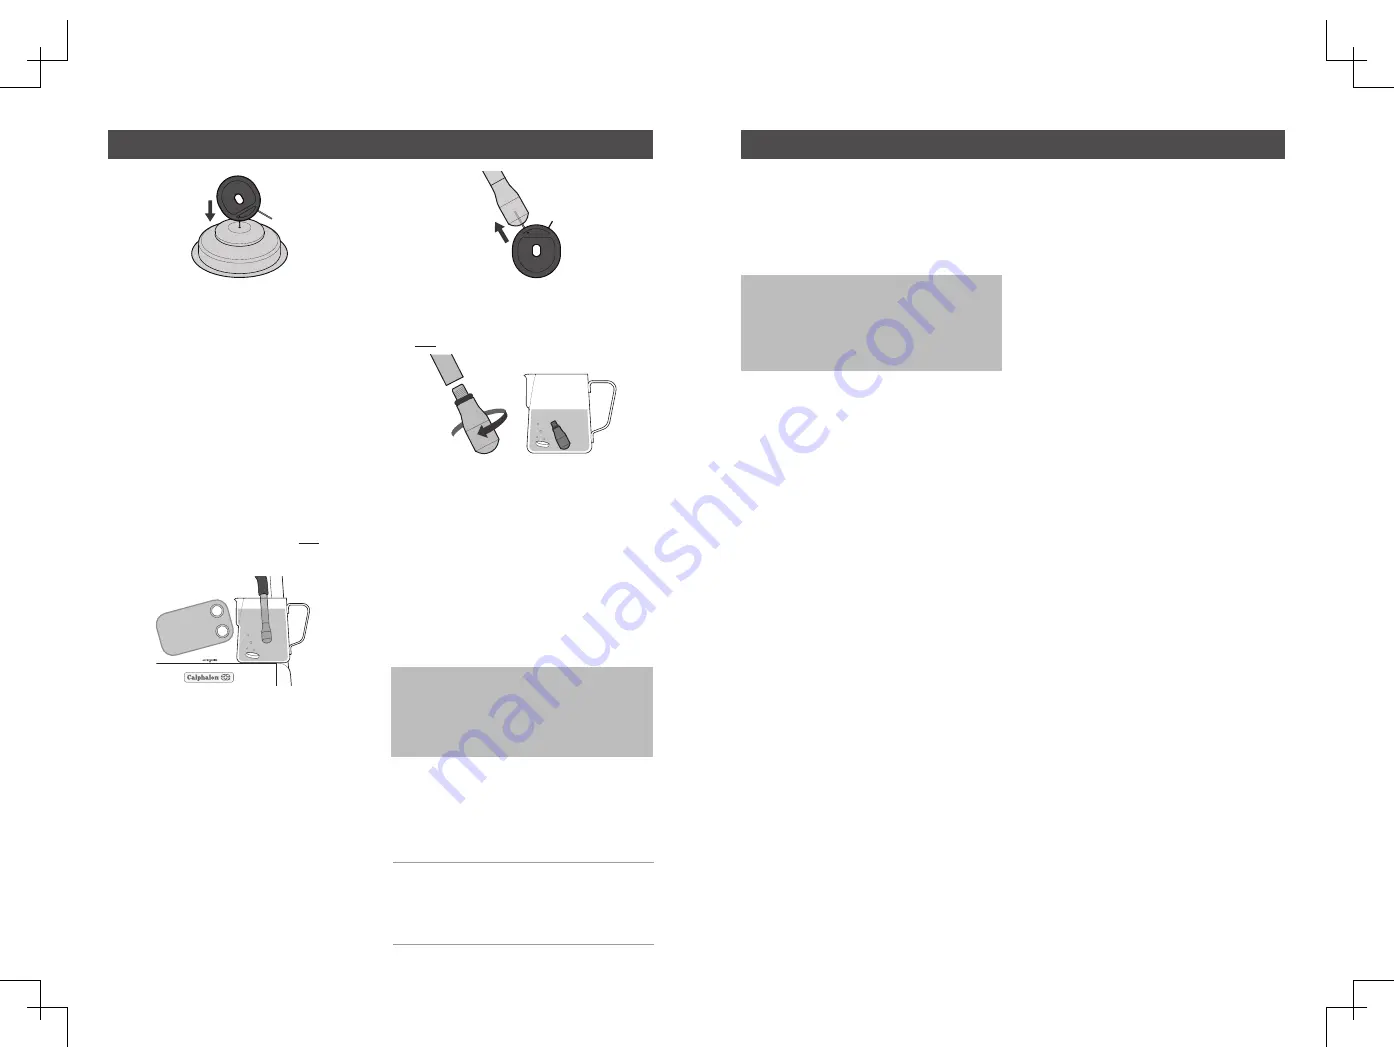
Cleaning Steam Wand
• Every time
• 2-3 Months
- Soak the Steam Wand overnight in the Milk
Pitcher with warm water and add one
Espresso Machine Cleaning Tablet.
- In the morning remove the Pitcher and rinse
ensuring that all traces of the solution have
been removed.
- Wipe Steam Wand and Tip with a damp cloth
ensuring that all traces of the cleaning tablet
have been removed.
- Run Hot Water through the Steam Wand for
40 secs
.
• Unblocking Steam Wand
- Insert the 'Steam' Cleaning Pin up the
Steam Wand Tip hole.
- Run Hot Water through the Steam Wand.
• Steam Wand Remains Blocked:
- Unscrew the Steam Wand Tip and soak
overnight in the Milk Pitcher with warm water and
add one Espresso Machine Cleaning Tablet.
- In the morning rinse the Pitcher and Steam Wand
Tip under running water ensuring all traces of
the cleaning tablet have been removed.
- Use the Cleaning Pin to clean the Steam Tip.
- Screw the Steam Wand Tip back into the
Steam Wand Arm.
- Run Hot Water through the Steam Wand for
40 secs.
ESPR
ESSO
MACHINE
CLEANIN
G
TABLE
TS
STEAM
FILTER
INSERT
INSERT
ESPR
ESSO
MACHINE
CLEA
NING
TABL
ETS
THERMOBLOCK
58MM C
AFÉ GROUP HEAD
INS
ERT
ESPRE
SSO
MACHINE
CLEAN
ING
TABLET
S
PLEASE EMPTY TRAY
REMOVE
STEAM
FILTER
UNSCREW
INSERT
INSERT
DUA
L W
AL
L
THERMOBLOCK
58MM CA
FÉ GROUP HEAD
INS
ERT
22
23
Care and Cleaning
PLEASE EMPTY TRAY
REMOVE
STEAM
FILTER
UNSCREW
INSERT
INSERT
DUA
L W
AL
L
THERMOBLOCK
58MM CAF
É GROUP HEAD
INS
ER
T
Group Head Rubber Seal
A rubber seal is located in the Group Head
and creates a seal against the Filter Basket
when making an espresso.
Important:
When your espresso machine
Note:
is not being used, we recommend that you
do not leave the Portafilter inserted
into the Group Head, as this will reduce
the life of the seal.
MACHINE
CLEANIN
G
TABLE
TS
PLEASE EMPTY TRAY
REMOVE
STEAM
FILTER
UNSCREW
INSERT
INSERT
DUA
L W
AL
L
THERMOBLOCK
58MM C
AFÉ GROUP HEAD
INS
ERT
Descaling: Group Head and Steam Wand
- Place filter basket into portafilter
(without coffee) & insert into group head.
- Press the 1 SHOT button.
- Water will pour through.
- Repeat if needed.
- Wipe the steam wand with a damp cloth.
- After texturing milk purge the steam
wand by turning the dial to HOT WATER
for 3 seconds.
After continued use, your machine may
develop a build up of mineral deposits and will
require occasional descaling. We recommend
descaling your machine every 4-6 months,
although this period will depend on the
hardness of water and frequency of use.
• Power
Ensure that:
- The power plug is inserted into the outlet and
turned on.
- The machine is ON and in the ready state.
• Descaling
1. Press the 2 CUP button and allow the
descaling solution to pour through. Then
turn the dial to HOT WATER and allow
approximately 100mL of water to pour
through.
2. Press the ON/OFF button to turn off the
machine.
3. Leave the descaling solution in the machine
for 5 minutes.
4. Press the ON/OFF button to turn on the
machine.
5. Repeat Step 1 three times.
6. Discard the descaling solution and rinse the
water tank with water.
7. Fill the water tank with water to the MAX
level.
8. Repeat Step 1 two times with water.
9. After descaling, cancel the descaling
warning by simultaneously pressing the 1
SHOT, 2 SHOT and STEAM buttons for
3 seconds.
• Cancel the descale warning
- After descaling, cancel the descale warning
by simultaneously pressing the 1 SHOT, 2 SHOT
and STEAM buttons for 3 seconds.
Descaling solution
You have 3 options:
A. Espresso Machine Descaling Tablets
or
B. Liquid Descaler
or
C. White vinegar and warm water.
A and B descaling solutions are available
for purchase online or from major retailers.
Preparing for descaling
• Fill water tank with solution
- Fill water tank to the MAX level and add one
Descaling tablet
Allow powder to fully dissolve.
or
B. In an empty Water Reservoir add
one cup of Liquid Descaler. Fill Water
Reservoir with warm water to the MAX level.
Allow solution to mix thoroughly.
or
C. In an empty Water Reservoir add
2 tablespoons of white vinegar.
Fill Water Reservoir to the MAX level with
warm water.
Allow solution to mix thoroughly.
• Place containers
- Place 2 large cups under the group head and
steam wand.
Important:
Your machine will let you know
when it’s time to descale. The STANDBY,
1 CUP, 2 CUP and STEAM buttons will
flash 5 times. You will need to descale
your machine and reset it to cancel the
descale warning.
Over time this seal loses its elasticity and
may require replacement. The seal may
need replacing when watery espresso leaks
from around the group head, or if the portafil-
ter feels loose when fully rotated to the
centre position.
BVCLECM-PMPMN-SS̲23EM1 (US).pdf 12 2023/6/6 14:54


