background image

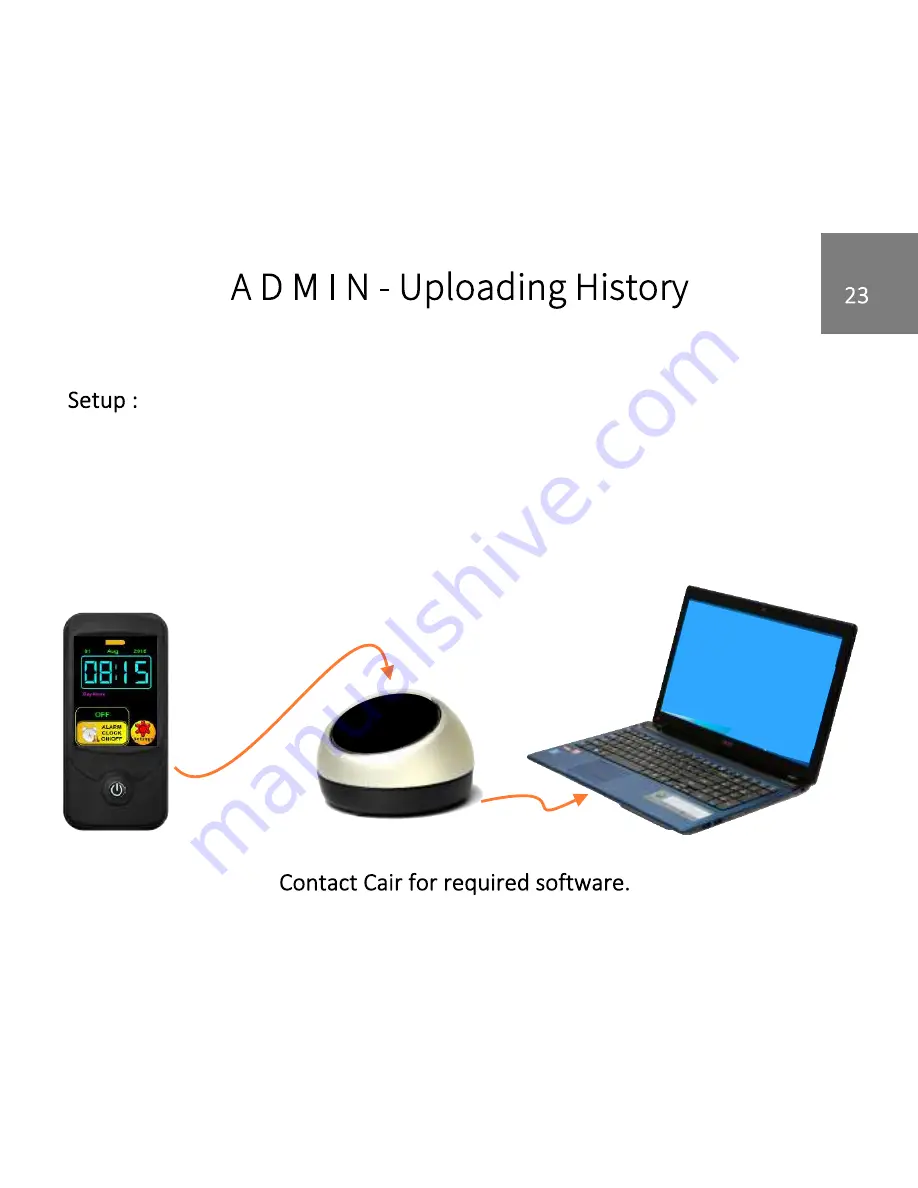
The Buzzz must be placed in the charger and the charger connected to a
computer configured with appropriate software. Activation of an upload
whilst not in the charger will cause an error screen to appear and the History
screen will be restored.

Содержание Buzzz

Страница 1: ...U S E R G U I D E ...

Страница 2: ...on Setting up and Charging Mode Outline Standard Mode Advanced Mode Active Alerts Settings Date Time Alarm Clock Admin Options Day Mode On Off Standby Technical Specification 3 4 5 6 7 8 9 11 11 12 13 14 15 16 17 26 27 28 29 30 31 ...

Страница 3: ...Buzzz Charger Base Stylus Lanyard Belt Clip Plug Power Supply and USB Cable ...

Страница 4: ...h View and save alert history Upload data for management reports Standard mode for 1 1 use and Advanced mode in a more complex setting The Buzzz Notifier is a non intrusive portable alarm receiver Designed to make caring easier and simpler without the need for a telephone line or monitoring centre Supporting up to 150 devices the Buzzz allows the carer to receive immediate alerts enabling them to ...

Страница 5: ...charger base Place the Buzzz into the charging slot indicated by the blue lights On first use the Buzzz will require up to 3 hours to fully charge To turn the Buzzz on press and hold the button for approximately 10 seconds Once charged choose which Mode you require You can now add devices into the Buzzz and customise settings to your required preferences ...

Страница 6: ...iously been activated allowing the carer to view the most immediate alert The Advanced Mode is ideal if the unit is being used to care for many people at once e g In a Care Home or in a more complex setting with many different paired devices When multiple alarms are activated they will all be queued allowing you to prioritise alerts ...

Страница 7: ...ctions are 1 Short press 1 second places the Buzzz into standby 2 Long press 10 Seconds turns the Buzzz On Off Day Mode If set Current Alarm Clock Settings Alarm Clock ON OFF Control ON OFF Button Battery Charging Status Time Date Press to go to Settings Menu See page 29 ...

Страница 8: ...d by pressing OK or Clear Once an alert is acknowledged the Buzzz will return to the Main Screen Also note when multiple alerts are activated simultaneously they will be logged in the Active Alerts section in the home screen See page 12 Alert Signal Strength Alert Serial Number Name of Alert Location of Alert Type of Alert Device Battery Status Accept Alert Visible for approx the first 5 seconds ...

Страница 9: ...ferent paired devices In Advanced Mode when multiple alerts are activated all unacknowledged alerts are queued by delaying the alerts The pending alerts can be viewed via the Active Alerts icon on the home screen The Active Alerts icon is only visible when there is a pending alert Or when there are several alerts coming through at the same time OFF 04 Sept 2017 ...

Страница 10: ...llowing From here you can choose between Standard Mode and Advanced Mode using the arrows To begin locate and press the button on the Buzzz unit for approximately one second short press This button is used to put the touch screen on standby The Buzzz is still able to receive alert calls when the Buzzz is on standby ...

Страница 11: ...lert will be reactivated after a set length of time This length of time can be adjusted in the Admin Mode see page 27 is used when you can answer an alert immediately may be used when you cannot answer an alert ie you are busy and will be unable to answer the alert for the foreseeable future or you can see that a colleague has dealt with the alert This information can then be used by managers to e...

Страница 12: ...Touch the Active Alerts icon If there aren t any pending alerts the Active Alerts button will disappear OFF 04 Sept 2017 The Active Alerts screen can display up to three alerts at a time of a possible thirty pending alerts Use to navigate The details for individual alerts can be viewed by selecting the alert This will take you to the alert information screen which will display more detailed inform...

Страница 13: ...ur personal preferences Adjust vibrate brightness and sound both handset and charger base and strobe using the arrows To set the sound levels etc for the charger base the Buzzz must be placed in the charger base Set Vibrate Strobe Set Brightness Set Volume ...

Страница 14: ...ptional The ascend tone starts from a volume of 0 The handset volume can be switched off completely if preferred However the charger base will produce sound at the lowest level if the handset is in the charger base in order to always provide an alert for safety Ascend starts at 0 and gradually builds volume flashes are optional and can be turned on when an alert is received This feature may be use...

Страница 15: ... confirm Touch the Time icon to move to the Clock Selection Touch the Hours Minutes icon to move to the selection screen Use the to return to the and select the and set the day month and year in the same way Days arrows OK arrows OK arrows OK If you have any problems at any point use the icon to go back ...

Страница 16: ...g the Alarm Clock ON OFF icon on the main screen The set time will now show on the Main Screen Touch the icon again to switch the alarm clock off The image on the right shows the screen that will appear when the alarm clock goes off You can use the Alarm Clock function for different reasons e g As a wake up call medication reminder visits from nurse care staff etc OFF 11 49 ...

Страница 17: ... contains these icons Useful for testing the range of a newly installed device Shows signal strength and battery status of the paired device To pair devices sensors to the Buzzz Notifier Used to change the PIN number which gives access to the admin menu Default PIN 1234 Administrators can view devices and the event log This can also be uploaded to a computer This allows you to customise day mode s...

Страница 18: ...it is shipped with to a more secure PIN In Admin Menu choose New PIN This will take you to the keyboard First enter the current PIN then select Ent You will then be prompted to Enter New PIN Choose a 4 digit PIN you will remember then touch Ent The new PIN will override the old PIN From the Admin Menu ...

Страница 19: ...enter a name e g Mum Press to return to previous screen Press Back space to delete a character Space Press Enter to save text You will then be prompted to enter location enter Max 15 characters and then touch Ent This will take you to the Day Mode screen See next page Enter Max 15 characters and then touch Ent ...

Страница 20: ...formation you have entered will be displayed on the next screen If it is correct touch OK or to restart Next you will be prompted to activate the device being programmed Activate your device Once a device has been paired you will get a confirmation screen showing the data entered along with the device ID number Check the data on screen is correct If anything is incorrect either edit or delete the ...

Страница 21: ... the information that is displayed is A real alert cannot be received from any device in walk test mode so when the walk test has been completed ensure you exit the screen by pressing the Also walk test alerts do not show up in the History Log Signal Strength Indicator Signal Strength Max 5 Min 0 Unique Identity Hexadecimal Unique Identity Decimal Activated device Battery Status Wider range signal...

Страница 22: ...ored alert events as a file To send all device information as a file To view all paired devices on the screen To view all stored alert events on the screen The device history can be viewed on the Buzzz or can be uploaded to a PC ...

Страница 23: ...ced in the charger and the charger connected to a computer configured with appropriate software Activation of an upload whilst not in the charger will cause an error screen to appear and the History screen will be restored ...

Страница 24: ...e Buzzz into usually the last number Click on Receive Data this will then wait for data from the Buzzz Go to the Notifier and navigate to Settings Admin History Upload Devices When the devices have been uploaded Click on Receive Data again Go to the Notifier and this time choose Upload Events In the menu you should now be able to click on the View Alerts and View Devices and see the relevant data ...

Страница 25: ...ices Use Icon to scroll previous devices Use Icon for previous screen Use Icon to scroll to next event Use to scroll to previous event Use Icon for previous screen Event Counter Select a device from list by touching the device text ...

Страница 26: ...l need to be entered in order to delete the device Any pending alerts for that device will be removed However previous alerts for that device will still be stored in the Event Log as will the deletion of the device If Edit is selected you are able to edit the programmed device without re activating the alert BARB ...

Страница 27: ...vals 30s 1min 1 min 30s 2mins 2min 30s option of 4 alert tones Set the start and end of the day Day Mode On stops an Alert coming through during the times set See page 28 Boost Continuous reception Recommended setting for Door Contacts and PIR s Economy Timed reception and gives an increased battery life Certain devices may require boost mode ...

Страница 28: ...ce set when programming a device or sensor to the Buzzz see page 19 the option of Day Mode on off will be given If Day Mode On is selected this will activate the timings set as shown above Therefore only allowing the alert of that particular device to come through to the Buzzz outside of this set time E g A door alarm device may only need to be monitored during the night Start of Day time End of D...

Страница 29: ...ll in operation i e a trigger from a device will display an alert The Buzzz is turned off In this state no devices screen touches or alarm clock settings will cause the Buzzz to turn on The Buzzz may be turned off to preserve battery life E g when it goes into storage etc If the battery goes flat placing the Buzzz into a connected charger will cause a restart Note the Button controls these functio...

Страница 30: ...hrs 60 days when off Low battery warning Battery symbol turns red beeping indication red flashing battery symbol Charged Intermediate Intermediate Low to Start of Low with to Charged Intermediate Low Warning After the low with warning there is an audio warning and the Buzzz Notifier will be unresponsive unless placed in the charger base Weight 250g Operating temperature 10 C to 50 C Humidity 5 95 ...

Страница 31: ...rces The Buzzz Notifier comes with a 24 month warranty The warranty policy sets the full extent of Cair s warranty responsibility The warranty policy is provided in lieu of all other express implied and statutory warranties All other warranties express implied or statutory including but limited to any implied warranties and conditions of merchantability non infringement of third party rights and f...

Страница 32: ...CAIR UK Ltd Hanson Lane Halifax West Yorkshire HX1 4SD W www we cair com T 01422 399 155 E hello we cair com User Guide Version 1 1 12 04 18 ...

Отзывы: