background image

Black plate (49,1)

Cadillac CTS/CTS-V Navigation System - 2011

Infotainment System

49

8. Press the Start Guidance screen

button. The route is now ready
to be started.

See

Getting Started on Your

Route

in this section.

Selecting a POI Category

1. Press the DEST control button.

2. Press the Point of Interest

screen button.

3. Press the Browse POI

Categories screen button.

4. Select a category, and then a

sub-category.

The system will display available
POI names in the selected
sub-category.

5. Select the POI name from

the list.

6. A confirmation screen displays

with the POI information. If the
POI information is correct, select
the Go screen button. The
system calculates the route.

7. Select the route preference

(Fastest, Shortest, or Easy). The
system highlights the route.

8. Press the Start Guidance screen

button. The route is now ready
to be started.

See

Getting Started on Your

Route

in this section.

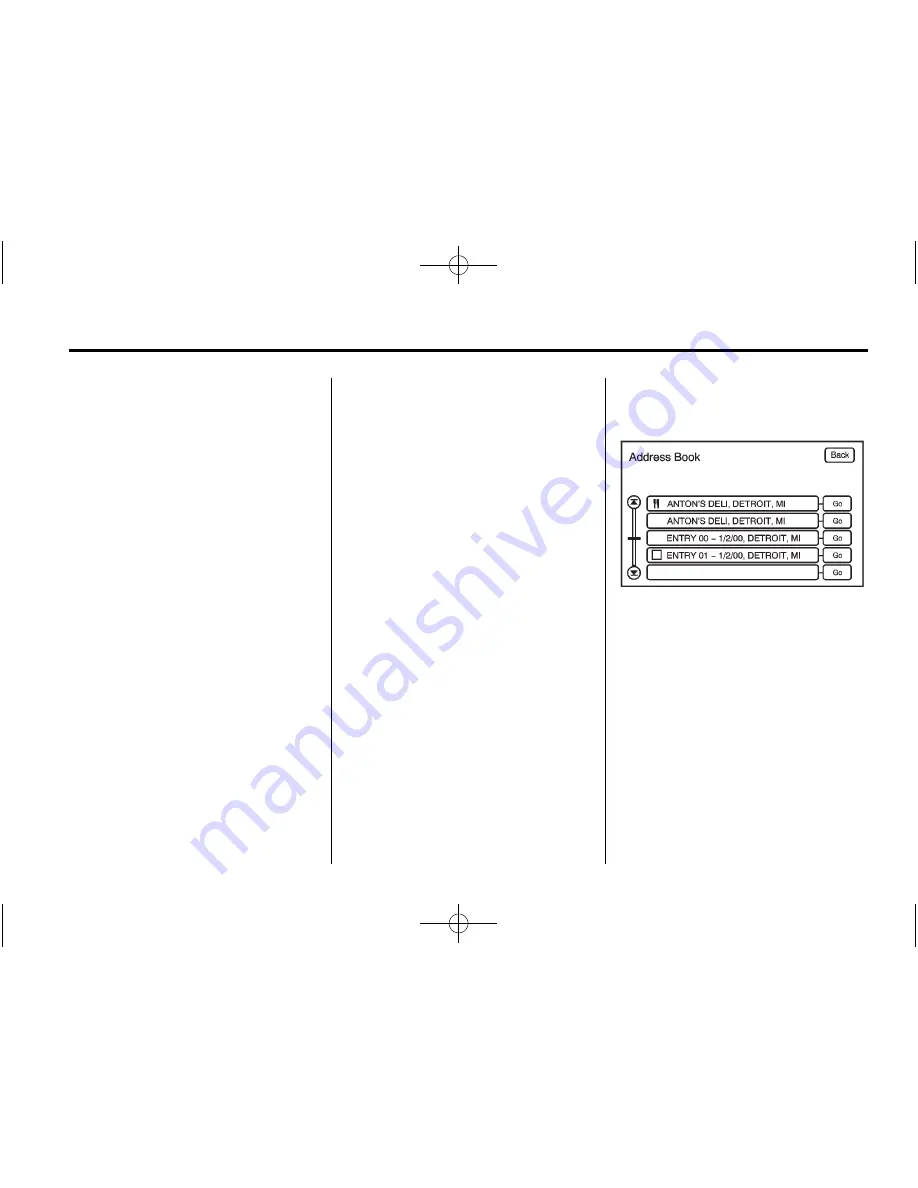
Address Book

Address Book:

The address book

entry method allows you to select a
destination by selecting an address
that has been stored in your
address book.

1. Press the DEST control button.

2. Press the Address Book screen

button.

A list of your address book
addresses display. Use the scroll
arrows to the left to move
through the list.

Содержание 2011 CTS COUPE

Страница 1: ...MP3 22 Hard Drive Device HDD 27 Auxiliary Devices 32 Navigation 35 Using the Navigation System 35 Maps 38 Navigation Symbols 40 Destination 44 Configure Menu 57 Global Positioning System GPS 65 Vehic...

Страница 2: ...Black plate 2 1 Cadillac CTS CTS V Navigation System 2011...

Страница 3: ...t sold in Canada substitute the name General Motors of Canada Limited for Cadillac Motor Car Division wherever it appears in this manual Keep this manual with the owner manual in the vehicle so it wil...

Страница 4: ...mand for navigation systems equipped with phone capability WARNING Taking your eyes off the road too long or too often while using the navigation system could cause a crash resulting in injury or deat...

Страница 5: ...the navigation system is turned on a screen may appear with the information below and you must read and acknowledge the information it contains After acknowledging the start up information you will b...

Страница 6: ...Black plate 6 1 Cadillac CTS CTS V Navigation System 2011 6 Infotainment System CTS Shown CTS V Similar...

Страница 7: ...nual Deleting Personal Information This navigation system can record and store destinations and personal information such as names and addresses When disposing of the vehicle you may want to delete th...

Страница 8: ...screen button if an incorrect character has been entered If four or less names are available for the entered characters a list displays If more than four are available there is a match counter with a...

Страница 9: ...route is now ready to be started See Point of Interest POI under Destination on page 44 for more information Storing Preset Destinations 1 Press O to turn the system on 2 A caution may appear Press OK...

Страница 10: ...ance screen button 3 Press the Yes screen button to confirm cancellation Voice Guidance To adjust the volume of voice guidance prompts 1 Press the CONFIG control button to enter the menu options then...

Страница 11: ...display the full audio screen 2 Press to switch between AM FM XM if equipped CD DVD HDD and AUX auxiliary input or press the screen button See Satellite Radio on page 16 if equipped CD DVD Player on...

Страница 12: ...ed band stations in the area 2 Use the up and down arrow buttons to scroll the frequencies 3 Select the frequency FM lists may also contain a category to select if stations in the area support Radio D...

Страница 13: ...G control button to access the Sound menu to adjust the treble midrange bass fade balance and Digital Signal Processing DSP TREBLE Press the or sign to increase or decrease the treble If a station is...

Страница 14: ...for AM or FM 5 1 Surround 5 1 Surround sound processing is available for DVD A DVD V sources that were recorded in 5 1 surround 5 1 Surround Normal Best for all seating positions 5 1 Surround Rear Bes...

Страница 15: ...rol screen button to access the AudioPilot menu 3 Press the ON screen button To turn off press the OFF screen button Timeshift Timeshift records all information from AM FM XM if equipped etc for up to...

Страница 16: ...TY for current programming and the name of the program being broadcasted Satellite Radio XM Category Restore If Equipped Press the Yes button of Restore All Categories screen to add all categories tha...

Страница 17: ...a CD or DVD is inserted Gracenote logo display starts with the Gracenote database access and the CD DVD tab activates The player is only compatible with CDs or DVDs of the appropriate region code that...

Страница 18: ...ight arrow to go to the next track 2 Press the left arrow to go to the start of the current track if more than five seconds have played or to the previous track if five seconds or less have played 3 I...

Страница 19: ...all menu options from the display 2 Press anywhere on the screen to display the menu options Cursor Press this button to access the cursor menu The arrows and other cursor options allow navigation of...

Страница 20: ...change the language heard 2 Repeatedly press to toggle through the available languages This may not be available on all DVDs This button is not available when the DVD is stopped Subtitle Stream 1 Pre...

Страница 21: ...hange the language that you are listening to Subtitle Language Press English French or Spanish to change the language of the subtitles Menu Language Press English French or Spanish to change the langu...

Страница 22: ...s and or the CD DVD comes out it could be for one of the following reasons If a disc was inserted with an invalid or unknown format If the disc is not from a correct region It is very hot When the tem...

Страница 23: ...to any root directory folders However playlists can always be accessed before root folders or files Empty Directory or Folder If a root directory or a folder exists somewhere in the file structure tha...

Страница 24: ...the song name contained in the file If the song name is not present in the file then the radio displays the file name with the extension such as mp3 as the track name Preprogrammed Playlists Preprogra...

Страница 25: ...urn off random play r Rewind 1 Press and hold to rewind quickly through a track selection A sound is heard at a reduced volume 2 Release this button to stop rewinding The display shows the elapsed tim...

Страница 26: ...he center button on the main screen to show that music is being played from a specific folder Artist Press to view the artists that have been stored on the Disc Select an artist name to view all songs...

Страница 27: ...m See Radio under Configure Menu on page 57 for information on entering your ID number 2 Press the REC record control button 3 A confirmation window displays Press Yes to record all tracks press No to...

Страница 28: ...tracks press No to cancel the operation A progress bar displays if Yes was selected To record selected tracks 1 Connect a USB device 2 Press the USB screen button located in the middle of the screen...

Страница 29: ...here it was stopped 2 Press it again to pause the currently playing media source TUNE TONE Turn to go to the next or previous track u SEEK t SEEK 1 Press the right arrow to go to the next track 2 Pres...

Страница 30: ...y appears in the center button on the main screen to show music is being played in this mode Artist 1 Press to view the artists that have been stored on the HDD 2 Select an artist name to view all son...

Страница 31: ...d or not and the speed of the recording process does not take any longer than normal Timeshift cannot be activated during the background recording function Duplicate Content When record is executed th...

Страница 32: ...an iPod laptop computer MP3 player CD changer or cassette tape player etc to the auxiliary input jack for use as another source for audio listening Drivers are encouraged to set up any auxiliary devic...

Страница 33: ...ied to the hard drive The recording process occurs in the background and does not affect playback from any source including the USB device itself The quality of the listening experience should be the...

Страница 34: ...Playlists and Audio books to play from the iPod The iPod charges while it is connected to the vehicle and if the vehicle is turned to ACC ACCESSORY or ON RUN It can also be left connected to the vehic...

Страница 35: ...This section presents basic information needed to operate the navigation system Use the control buttons located on the navigation system along with the available touch screen buttons on the navigatio...

Страница 36: ...io on page 11 CD DVD Player on page 17 MP3 on page 22 Hard Drive Device HDD on page 27 for more information Y CD DVD Eject Press to eject a CD or a DVD See CD DVD Player on page 17 AUDIO Press to acce...

Страница 37: ...for more information DEL Delete Press to delete XM categories if equipped and information from the hard drive See Hard Drive Device HDD on page 27 for more information INFO Information Press for Speec...

Страница 38: ...DD After receiving an updated map disc it needs to be copied to the HDD Read the following steps completely before operating this feature 1 Turn the ignition on 2 Press O to turn the system on 3 Inser...

Страница 39: ...tomatically based on the direction the vehicle is being travelled Map Scales V U Zoom In Zoom Out Press the zoom in or out screen buttons or the scale on the bar to change the level of map detail The...

Страница 40: ...een Your vehicle is shown as this symbol It indicates the current position and heading direction of the vehicle on the map The destination symbol appears on the map after a route has been planned mark...

Страница 41: ...to change between viewing the time of day and the arrival time If waypoints have been added to the current route each waypoint destination appears giving the same information Select this screen symbol...

Страница 42: ...as the Heading Up symbol but shows the map in a 3 D view The No GPS symbol appears when the vehicle is acquiring or not receiving a Global Positioning System GPS satellite signal See Global Positionin...

Страница 43: ...p and down the list Use the Sort by Dist distance Icon Name and on Route as desired Go Press this screen button next to the desired POI to make this POI a destination or a waypoint Select a POI name t...

Страница 44: ...EST control button to access the Select Destination screen From this screen select from several options to plan a route by entering destinations Address Entry Street The address entry destination meth...

Страница 45: ...ist 4 Select the street name 5 Enter the house number The system displays the house number range that is available for the street 6 If there is more than one city the list of cities that have that str...

Страница 46: ...t displays the last five selected streets Press this button to select a street from the list 5 Select the street name 6 Once a street has been selected the numeric keyboard displays allowing entry of...

Страница 47: ...ys the last five selected streets Press this button to select a street from the list 6 Select the street name 7 Once a street has been selected the numeric keyboard displays allowing entry of the hous...

Страница 48: ...ready to be started See Getting Started on Your Route in this section Entering the City Name First 1 Press the DEST control button 2 Press the Point of Interest screen button 3 Press the City screen...

Страница 49: ...list 6 A confirmation screen displays with the POI information If the POI information is correct select the Go screen button The system calculates the route 7 Select the route preference Fastest Shor...

Страница 50: ...subscribers that makes operating your navigation system much simpler It allows subscribers to request and receive navigation assistance on the go Using OnStar Destination Download If Equipped Press t...

Страница 51: ...route guidance is already active the navigation system adds the downloaded destination as the next waypoint in the existing route All features such as Call and Add to Address Book will be available fo...

Страница 52: ...abilities such as Go Mark Zoom Scroll etc The address is shown at the top of the screen Destination Map Screen Getting Started on Your Route Once a destination has been entered there are several funct...

Страница 53: ...inal destination Fast Forward Scroll Press to fast forward scroll to the final destination This button displays once the forward scroll button has been selected u Fast Forward Skip Press to go to the...

Страница 54: ...e waypoints press the DEST control button then select the Add screen button where the next waypoint should fall on the route The system calculates and highlights the route The route is now ready to be...

Страница 55: ...ld one of the six screen buttons at the bottom of the screen until the text within the button changes The name appears in that preset destination screen button and is now available to select from the...

Страница 56: ...e the touch tap arrows to the left to move through the list 3 Select the address book entry to change 4 Press the Phone screen button and use the numeric keyboard to enter or change the phone number 5...

Страница 57: ...Delete All screen button A confirmation window displays Select Yes to cancel No to cancel this operation Configure Menu Press the CONFIG control button to adjust several of the system s features and...

Страница 58: ...ic Event Voice Prompt Press to turn traffic voice instructions on and off Traffic voice is on when the button is highlighted Speech Recognition Prompt Press to turn speech recognition prompts on and o...

Страница 59: ...hrough XM Satellite Radio A service fee is required to receive the XM NavTraffic service Real time traffic information is provided to fully integrate the navigation system to display current traffic c...

Страница 60: ...icates that the traffic condition is far away Yellow indicates that a minor traffic condition in the general area Red indicates that while under route guidance a quicker route is available Traffic flo...

Страница 61: ...the area with the traffic condition from the route Select each traffic condition to avoid Avoided List Once one or more traffic conditions have been avoided touch this screen button to view the list...

Страница 62: ...rmation for Guidance button This button highlights when it is active Alternate Route When the pop up display Detour Available appears on the screen to notify that a possibly quicker route is available...

Страница 63: ...ity Other Display Press the CONFIG control button to enter the menu options then press the CONFIG control button repeatedly until Display is selected or press the Display screen button Display Off Pre...

Страница 64: ...ice versa See Analog Clock in the Index of your vehicles owner manual to change the analog clock time To set the time 1 Press the CONFIG control button to enter the menu options then press the CONFIG...

Страница 65: ...dings trees large trucks or a tunnel Objects are located on the rear shelf of the vehicle Satellites are being repaired or improved After market glass tinting has been applied to the vehicle s rear wi...

Страница 66: ...igation use after the map data is updated The battery is disconnected for several days The vehicle is driving in heavy traffic where driving is at low speeds and the vehicle is stopped and started rep...

Страница 67: ...pdated periodically provided that the map information has changed If you have any questions about the operation of the navigation system or the update process contact the GM Nav Disc Center toll free...

Страница 68: ...isplays a symbol while the speech recognition is active 2 Clearly state one of the commands listed under Speech Help Canceling Speech Recognition Press the Mute Voice button while using speech recogni...

Страница 69: ...e on the hard drive AUX Auxiliary Device Commands Available when an auxiliary device is being used Weather Press INFO then press INFO repeatedly until the Weather screen button is selected or touch th...

Страница 70: ...ic recognition technology and related data are provided by Gracenote Gracenote is the industry standard in music recognition technology and related content delivery For more information visit www grac...

Страница 71: ...OF THE SOFTWARE OR AGAINST INFRINGEMENT IF YOU HAVE RECEIVED ANY WARRANTIES REGARDING THE DEVICE OR THE SOFTWARE THOSE WARRANTIES DO NOT ORIGINATE FROM AND ARE NOT BINDING ON MS NO LIABILITY FOR CERTA...

Страница 72: ...e licensor of the Supplemental Component s GM MS Microsoft Corporation and their affiliates reserve the right to discontinue any Internet based services provided to you or made available to you throug...

Страница 73: ...s provided only in electronic form you may print one copy of such electronic documentation This EULA does not grant you any rights in connection with any trademarks or service marks of GM MS Microsoft...

Страница 74: ...Black plate 74 1 Cadillac CTS CTS V Navigation System 2011 74 Infotainment System 2 NOTES...

Страница 75: ...des V hicules Canadiens 3 Canceling Guidance 10 Canceling Speech Recognition 68 CD Eject 31 CD DVD Messages 22 CD DVD Player 17 Cleaning the Display 10 Commands 69 Compressed Audio 31 Configure Menu...

Страница 76: ...Hard Drive Device HDD 27 I Installing the DVD Map Disc 38 Introduction 3 L Language 7 M Map Adjustments 39 Map Coverage 38 Map Scales 39 Maps 38 Menu Configure 57 Microsoft License Agreement 70 MP3 22...

Страница 77: ...oblems with Route Guidance 66 R Radio 57 Radio Data System RDS 16 Radio Menu 14 Radios AM FM Radio 11 CD DVD Player 17 Satellite 16 Recording from a CD 27 Recording from a USB Device 28 S Satellite Ra...

Страница 78: ...an MP3 CD and DVD 22 Using OnStar Destination Download If Equipped 50 Using Speech Recognition 68 Using the Radio Controls to Connect and Control Your iPod 33 Using Your Stored Preset Destinations 10...

Отзывы: