background image

Black plate (60,1)

Cadillac DTS Navigation System - 2011

60

Infotainment System

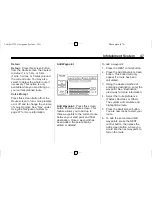
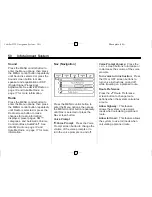
Display

Press the MENU control button to
enter the Menu options, then press
the MENU control button repeatedly
until Display is selected or press the
Display screen button.

Display Off

Press this screen button to turn the
display off. Press any control button
to view the display.

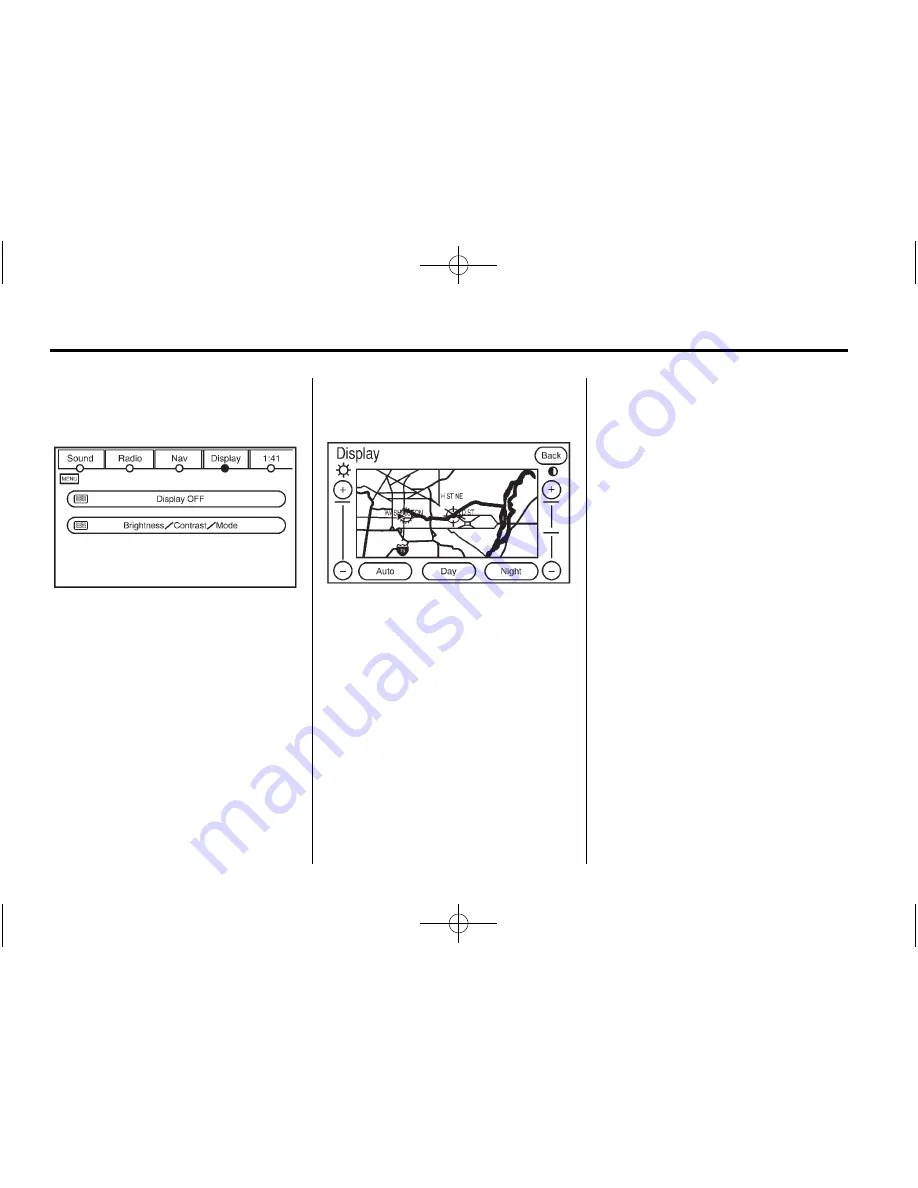
Brightness/Contrast/Mode

Press this screen button to change
the brightness, contrast, and mode
of the display.

]

(Brightness):

Press the + or

screen buttons to increase or
decrease the brightness of the
screen.

_

(Contrast):

Press the + or

screen buttons to increase or
decrease the contrast of the screen.

Auto (Automatic):

Press this

screen button for the system to
automatically adjust the screen
background depending on exterior
lighting conditions.

At night, the brightness can be
adjusted with the vehicle dimming
knob near the headlamp switch.

Night:

Press this screen button and

the system will make the map
background darker.

Day:

Press this screen button and

the system will make the map
background brighter.

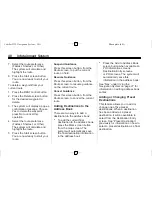
Setting the Clock

Press the MENU control button to
enter the menu options, then press
the MENU control button repeatedly
until the time is selected or press
the time screen button, then press
the Set screen button.

Hours:

Press the

or + signs to

decrease or increase the hours.

Minutes:

Press the

or + signs to

decrease or increase the minutes.

Содержание 2010 DTS

Страница 1: ... 17 Audio Players 18 CD DVD Player 18 MP3 24 Auxiliary Devices 27 Navigation 27 Using the Navigation System 27 Maps 29 Navigation Symbols 32 Destination 37 Configure Menu 49 Global Positioning System GPS 61 Vehicle Positioning 61 Problems with Route Guidance 62 If the System Needs Service 63 Ordering Map DVDs 63 Database Coverage Explanations 63 Voice Recognition 63 Index i 1 ...

Страница 2: ...Black plate 2 1 Cadillac DTS Navigation System 2011 ...

Страница 3: ...rks of Dolby Laboratories The information in this manual supplements the owner manual This manual describes features that may or may not be on your specific vehicle either because they are options that you did not purchase or due to changes subsequent to the printing of this owner manual Please refer to the purchase documentation relating to your specific vehicle to confirm each of the features fo...

Страница 4: ... on the drive is important for safe driving The navigation system has built in features intended to help keep your eyes on the road and mind on the drive Some features may be disabled while driving Note that these functions will be grayed out A grayed out function indicates it is not available when the vehicle is moving All functions are available when the vehicle is parked Do the following before...

Страница 5: ...e navigation system Because the navigation system uses street map information that does not include all traffic restrictions or the latest road changes it may suggest using a road that is now closed for construction or a turn that is prohibited by signs at the intersection Because the system uses limited information you must always evaluate whether following the system s directions is safe and leg...

Страница 6: ...ttons except for NAV Navigation and DEST Destination can be accessed You can also press the NAV control button to have this Caution screen appear When getting started set the navigation system to your preference or delete information you may have entered using various options Screen Shown with Map Disc Inserted ...

Страница 7: ...nge the language of the navigation screens see DIC Vehicle Customization in the Index of your vehicles owner manual To change the navigation screens from English or metric see DIC Operation and Displays in the Index of your vehicles owner manual Deleting Personal Information This navigation system can record and store personal information such as names and addresses At times such as when you are d...

Страница 8: ...st Home or Preset Destination select the appropriate region that contains the final destination Your vehicle must be in P Park to perform this operation Setting the Search Area To set the search area 1 If the radio is already on with a map disc inserted skip to Step 5 2 Press O to turn the system on 3 Insert the DVD map disc See Installing the Map DVD under Maps on page 29 for more information 4 A...

Страница 9: ...ll automatically be selected for entry Start entering the street name Do not enter directional information or street type and use the space symbol screen button U between street or city names Use the backspace q screen button if an incorrect character has been entered If five or less names are available a list will display If more than five are available there will be a screen button with a number...

Страница 10: ...rence Fastest Shortest or Other The system will calculate and highlight the route 10 Press the Start screen button You are now ready to start your route See Point of Interest POI under Destination on page 37 for more information Storing Preset Destinations 1 If the radio is already on with a map disc inserted skip to Step 5 2 Press O to turn the system on 3 Insert the DVD map disc See Installing t...

Страница 11: ...e preference Fastest Shortest or Other The system will calculate and highlight the route 8 Press the Start screen button You are now ready to start your route See Preset Destination under Destination on page 37 for more information Canceling Guidance Guidance will be canceled once you arrive at your final destination To cancel guidance prior to arrival at the final destination do the following 1 P...

Страница 12: ... added to the vehicle the chimes may not work Make sure that replacement or additional equipment is compatible with the vehicle before installing it See Accessories and Modifications in the vehicle s owner manual Playing the Radio O Power Volume Press this knob to turn the audio system on and off Turn the knob to increase or to decrease the volume f Tuning Sound Knob Turn this knob to go to the ne...

Страница 13: ...ertain to the category For XM touch the left and right arrow screen buttons to change categories The station information will appear on the display See Radio Menu later in this section to add and remove XM categories from the category list When listening to XM stations you will be able to select all of the categories when using the right and left arrow screen buttons on the main audio screen The c...

Страница 14: ...DSP Shown Equalization Similar f Sound Menu Press this knob or press the MENU control button to access the Sound menu to adjust the treble midrange bass fade balance and equalization or Digital Signal Processing DSP if the vehicle has the Bose sound system Setting the Tone TREBLE Press the or sign to increase or decrease the treble If a station is weak or noisy decrease the treble MID Midrange Pre...

Страница 15: ...sed to provide a choice of four different listening experiences DSP can be used while listening to the audio system The type of DSP selected is displayed on the status line Select from the following DSP settings for the AM FM radio Normal Press this screen button to adjust the audio to be in normal mode This provides the best sound quality or all seating positions Rear Press this screen button to ...

Страница 16: ...ake up for road and wind noise as you drive To use Automatic Volume Control 1 Set the volume at the desired level 2 Press the MENU control button to enter the menu screen then press the MENU control button repeatedly until Radio is selected or press the Radio screen button 3 Press the Automatic Volume Control screen button 4 Press the LOW MEDIUM or HIGH screen buttons Each higher setting allows fo...

Страница 17: ...lected type of programming Receive announcements concerning local and national emergencies Display messages from radio stations This system relies on receiving specific information from these stations and will only work when the information is available In rare cases a radio station may broadcast incorrect information that will cause the radio features to work improperly If this happens contact th...

Страница 18: ...er pulls it in and begins playing The CD player can play the smaller 3 inch 8 cm single CDs with an adapter ring Full size CDs and the smaller CDs are loaded in the same manner While playing a CD the navigation system is available If you insert a CD with the system off and the ignition on it will start to play As each new track starts to play the track number appears on the display If a CD error a...

Страница 19: ...ow to go to the next track Press the left arrow to go to the start of the current track if more than eight seconds have played If either arrow is pressed more than once the player will continue moving backward or forward through the CD The sound will mute while seeking You can also turn the tune knob to seek to the next or previous track Z Eject Press this button to eject a CD or DVD If a CD or DV...

Страница 20: ...reen buttons Menu options are available when they are highlighted Some menu options are only available when the DVD is not playing Full Press this screen button to remove all menu options from the display Press anywhere on the screen to display the menu options Cursor Press this button to access the cursor menu The arrows and other cursor options allow you to navigate the DVD menu options The curs...

Страница 21: ...oard allows you to type in the title number of the title that you would like to watch Setup Press this button to display the DVD Setup screen This button is only available when the DVD is not playing The DVD Setup screen allows you to change the brightness contrast and mode change the viewing on the monitor and to change the initial settings language parental level and aspect Brightness Press the ...

Страница 22: ...rst entered a keyboard will appear on the display and a four digit password will need to be created Type in a password that you will be able to remember Once the password is created you can then select a rating level If you would like to change the rating level press the Parental Level button then press the Password button Type in the password and then change the rating level If the password is fo...

Страница 23: ...urrent track or chapter Press this button again to go to the previous track or chapter This button may not work when the DVD is playing the copyright information or the previews CD DVD Messages If Disc Read Error appears on the display and or the CD DVD comes out it could be for one of the following reasons If a disc was inserted with an invalid or unknown format If the map DVD disc was installed ...

Страница 24: ...ended that there is a maximum of 192 files on a disc The files can be recorded on a CD R or CD RW with a maximum capacity of 700 MB DVD with MP3 are not playable on this system Root Directory The root directory will be treated as a folder If the root directory has compressed audio files the directory will be displayed as ROOT All files contained directly under the root directory will be accessed p...

Страница 25: ... file name without the extension such as mp3 as the track name Track names longer than 32 characters or four pages will be shortened The display will not show parts of words on the last page of text and the extension of the filename will not display Preprogrammed Playlists You can access preprogrammed playlists which were created by WinAmp MusicMatch or Real Jukebox software however you will not h...

Страница 26: ... through the current track r Reverse Press and hold this screen button to reverse through the current track q r Folder Press the left or right arrow to go to the previous or next folder on the disc Press the middle screen button with the folder name to sort the MP3 by folder and file name It may take a few minutes for the system to sort the MP3 Sort By Press this screen button to organize the MP3 ...

Страница 27: ... the auxiliary input jack When a device is connected the system will detect and automatically begin playing audio from the device over the vehicle s speakers If a device is connected and you are listening to another source FM CD MP3 etc press the AUDIO control button to enter the audio menu then press the AUDIO control button repeatedly until AUX is selected or press the AUX screen button An auxil...

Страница 28: ...s control button to access the Destination Entry screen to plan a destination or to change the search area See Destination on page 37 for more information RPT Navigation Repeat Press this control button to repeat the last voice guidance prompt FAV Favorite Press this control button to access the preset stations See Storing Preset Stations under AM FM Radio on page 12 and Satellite Radio on page 17...

Страница 29: ... name selections easier the system will only highlight the characters that can follow the last one entered For example if a Z is entered a T may not be available for selection If a name does not display after entry it may need to be entered differently the map DVD disc may not contain that information or the correct search area has not been selected See Database Coverage Explanations on page 63 fo...

Страница 30: ...t is very hot when the temperature returns to normal the map disc should play You are driving on a very rough road When the road becomes smoother the map disc should play The map disc is dirty scratched wet or upside down If any error occurs repeatedly or if an error cannot be corrected contact your dealer Ejecting the DVD Map Disc When the DVD map disc is not loaded you will not be able to use th...

Страница 31: ...direction of travel Map Scales V U Zoom In Zoom Out Press the zoom in or out screen buttons or the scale on the bar to change the level of map detail The scale will appear on the screen once the zoom in or zoom out screen buttons are selected The system will adjust the map accordingly The scale of a map can range from 45 m 150 ft to 402 km 250 mi To change from English or metric see Driver Informa...

Страница 32: ...t position to the destination mark Navigation Symbols The following symbols are the most common symbols that will appear on a map screen Your vehicle is shown as this symbol It indicates the current position and heading direction of your vehicle on the map The destination symbol will appear on the map after a route has been planned marking your final destination The waypoint symbol will display on...

Страница 33: ...ur destination This symbol will appear before you start driving on the route or if you are on a road where navigation guidance cannot be given The north up symbol indicates the map with North Up known as North Up mode While in North Up mode the vehicle icon will follow the north direction on the map regardless of which direction the vehicle is traveling Select this screen symbol to switch between ...

Страница 34: ...s the Mark screen button to store the location on the screen in your address book The system will automatically store the point in the address book See Adding Destinations to the Address Book under Destination on page 37 for more information Displaying Points of Interest POI on the Map Screen Press anywhere on the map to display the POI Point of Interest screen button Press the POI screen button t...

Страница 35: ...out the POI From this screen you can select Add to Address Book Go or Map Add to Address Book Press this screen button to add this POI to the address book See Nav under Using the Navigation System on page 27 for information on editing address book entries Go Press this screen button to make this POI a destination or a waypoint Map Press this screen button to display the map showing the location of...

Страница 36: ...he next maneuver direction and how many miles or kilometers you are from it Dual Mode This dual screen symbol displays when the screen is in dual mode Dual mode displays the route on half of the screen and a maneuver or Interstate Exit list on the other half The Interstate Exit list advises of approaching exits Press this button to switch between dual screen and full screen which displays the enti...

Страница 37: ...For example if you were traveling from Michigan to Florida change the region currently selected in the search area to Florida Enter a destination in Florida under the Destination Entry menu Destination Press the DEST control button to access the Destination Entry screen From this screen you can select from several options to plan a route by entering destination points Search Area The Destination E...

Страница 38: ...expand the available options To enter a destination by entering the city name first do the following 1 Press the DEST control button 2 Press the 6 Address Entry screen button 3 Press the City name button 4 Enter the city name or press the Last 5 Cities screen button The Last 5 Cities screen will display a list of the last five city names that had been entered Select a city from the list and it wil...

Страница 39: ... and start entering the street name If five or less names are available a list will display If more than five are available there will be a screen button with a number in it it represents the number of available streets Select this button to view the list 4 Select the street name with the correct prefix from the list Dr Ln St etc 5 Once a street has been selected the City name category will automa...

Страница 40: ...view the list 4 Select the desired street name with the correct prefix from the list Dr Ln St etc 5 Once a street has been selected the Cross Street screen button will become available Press the Cross Street button and start entering the cross street name If five or less names are available a list will display If more than five are available there will be a screen button with a number in it it rep...

Страница 41: ...able there will be a screen button with a number in it it represents the number of available POIs Press this button to view the list 4 Press the Go screen button next to the POI The map screen with the destination marked will display 5 Select the route preference Fastest Shortest or Other The system will calculate and highlight the route 6 Press the Start screen button You are now ready to start y...

Страница 42: ...ddress book entry method allows you to select a destination by selecting an address that has been stored in your address book Address Book Press this screen button to access the Address Book screen From this screen you can select an address that already exists as the destination To use the address book entry method do the following 1 Press the DEST control button 2 Press the Address Book screen bu...

Страница 43: ...Advisor can locate a point of interest or an address and download the necessary information or coordinates to your navigation system Once the destination is downloaded the navigation system will search for the address in the mapping disc s database When the address is found it will be shown on your navigation system s screen along with the buttons described below OnStar Download Screen Press the G...

Страница 44: ...m displays an OnStar Destination Download Screen and operations will continue as outlined in the Using OnStar Destination Download section Route Guidance Active If OnStar downloads a destination while route guidance is already active the navigation system adds the downloaded destination as the next waypoint in the existing route All features such as Call and Add to Address Book will be available f...

Страница 45: ...and routing by coordinates is not available the Go and Map buttons gray out and routing will not be available Press the blue OnStar button for further assistance The Call button grays out when there is no phone number available for your destination and while connected to OnStar Map Destination Screen Functions If the map screen is used to show destination it will have map screen capabilities such ...

Страница 46: ...to cancel an avoided turn The list of selected avoided turns will display Select the turn to cancel the turn from being avoided Route Preview Press this screen button to preview the entire route in either direction t Reverse Skip Press this screen button to go back to the start point or previous waypoint q r Reverse Scroll Press this screen button to scroll to the start point or previous waypoint ...

Страница 47: ...utton from the Route screen This feature allows you to add up to three waypoints to the current route between your start point and final destination Once a waypoint has been added the points can be edited or deleted To add a waypoint 1 Press the DEST control button 2 Press the Add Waypoint screen button This button will only appear if a route has been calculated 3 Using the desired method of enter...

Страница 48: ...ume guidance on the current route Cancel Guidance Press this screen button from the Route screen to cancel the current route Adding Destinations to the Address Book There are two ways to add a destination to the address book To add the current final destination to the address book press the Mark screen button from the map screen The system will automatically save the final destination information ...

Страница 49: ... preset destination 1 Press the MENU control button 2 Press the Nav screen button or press the MENU control button until the Nav screen button is selected or press the Nav screen button 3 Press the Edit View screen button 4 Select the address book entry that you would like to store as the preset destination Press the Name screen button to add a name if needed 5 Press and hold one of the buttons at...

Страница 50: ... Satellite Radio on page 17 for more information Nav Navigation Press the MENU control button to enter the Menu options then press the MENU control button repeatedly until Nav is selected or press the Nav screen button Voice Prompt Voice Prompt Press the Voice Prompt screen button to change the volume of the voice prompts or to turn the voice prompts on and off Voice Prompt Volume Press the or scr...

Страница 51: ... button and use the alpha keyboard to edit or add the name 6 Press the OK screen button to save your changes To add or change the phone number of an address book entry 1 Press the MENU control button 2 Press the NAV screen button 3 Press the Edit View Address Book screen button 4 Press the address book entry to change 5 Press the Phone screen button and use the numeric keyboard to input or change ...

Страница 52: ...utton 2 Press the NAV screen button 3 Press the Edit View Address Book screen button 4 Select the address book entry to delete 5 Press and hold the Delete screen button until the delete all address book entries pop up confirmation displays Press Yes to delete press No to cancel the operation Map Database Information Press the Map Database Information screen button to change the map DVD and to view...

Страница 53: ...ite Radio XM NavTraffic provides real time traffic information fully integrated to the navigation system to display current traffic conditions for a driver s chosen route and surrounding area XM NavTraffic allows drivers to make the most informed timesaving routing decisions If the Traffic touch screen button is pressed or if an attempt is made to turn on the traffic display in the Navigation Setu...

Страница 54: ...red in order to receive the XM NavTraffic service Turning XM NavTraffic On and Off To turn traffic on or off 1 Press the MENU control button then press the MENU control button repeatedly until Nav is selected or press the Nav screen button 2 Press the Traffic Options button 3 Press the Traffic button This button is highlighted when it is active Selecting Alert for Approaching Traffic Events enable...

Страница 55: ...turned off Traffic events are in the area but none are on route Traffic events are on route Locations and Information of Traffic Conditions The system may take some time to sort the information The list of traffic conditions display in the order of distance from the vehicle at a minimum of approximately 25 km 16 mi If traveling on a planned route the list can be filtered to see traffic conditions ...

Страница 56: ...formation of the event Options Press the Options screen button A Traffic Options menu displays Select the desired traffic related option Traffic Press to enable or disable the traffic function Show Traffic ICONS Press to display traffic icons on the map screen This function allows which traffic information displays Traffic Flow Status This touch screen button is used to enable or disable the green...

Страница 57: ...go traffic delayed and congested traffic Category 3 Incidents p Alert Object in the roadway disabled vehicle or dangerous road conditions t Accident Roadway obstructed due to accident s Road Works Delayed traffic due to construction Category 4 Advisories j Road Condition Delayed or stopped traffic lane blocked or closed due to a road condition k Weather Heavy rain snow or fog weather condition m P...

Страница 58: ...ded incidences Select an incidence to cancel it from being on the avoided list Scrolling to Traffic Events on the Map While scrolling the map traffic condition icons may appear To receive information about the traffic condition place the cross hairs over the traffic condition icon After selecting the INFO information screen button the type of traffic condition the street name and a description of ...

Страница 59: ...tton is used to avoid the location of an event on the route If selected a new route is calculated and the related traffic event is avoided After the new route has been calculated the navigation system goes to the full map screen and shows the new route The Avoid button is only available if the event is on the route ahead and in the Traffic On Route List Traffic Voice Prompts The traffic voice prom...

Страница 60: ...ons to increase or decrease the contrast of the screen Auto Automatic Press this screen button for the system to automatically adjust the screen background depending on exterior lighting conditions At night the brightness can be adjusted with the vehicle dimming knob near the headlamp switch Night Press this screen button and the system will make the map background darker Day Press this screen but...

Страница 61: ...s are obstructed by tall buildings trees large trucks or a tunnel Objects are located on the rear shelf of the vehicle Satellites are being repaired or improved After market glass tinting has been applied to the vehicle s rear windshield Notice Do not apply after market glass tinting to the vehicle s windows Glass tinting interferes with the system s ability to receive GPS signals and causes the s...

Страница 62: ...ion system see your dealer Problems with Route Guidance Inappropriate route guidance may occur under one or more of the following conditions You have not turned onto the road indicated Route guidance may not be available when using automatic rerouting for the next right or left turn The route may not be changed when using automatic rerouting There is no route guidance when turning at an intersecti...

Страница 63: ...pdated disc replace the old disc in the navigation system See Installing the DVD Map Disc and Ejecting the DVD Map Disc under Maps on page 29 Dispose of the old disc to avoid confusion about which disc is the most current Database Coverage Explanations Coverage area depends upon the map detail available Some areas have greater map detail than others The navigation system works only as well as the ...

Страница 64: ...on If you experience difficulty with the system recognizing a command try saying it more softly and wait for a few seconds after the beep or you may just try saying it again Background noise may cause voice commands to be misunderstood including airflow noise from wind To use the voice recognition system the map DVD must be loaded This system is able to recognize commands in three different langua...

Страница 65: ...ag screen button The system will respond Name Please Navigation Help Navigation Help This command instructs the system to assist with navigation commands Display Commands Use the following display commands to set the display mode Display set day mode Use this command to set the display to daytime mode Display set night mode Use this command to set the display to night mode Display set auto mode Us...

Страница 66: ...nd instructs the system to select a specific track number CD DVD Disc select next folder Use this command to select the next folder on the MP3 or audio DVD CD DVD Disc select previous folder Use this command to select the previous folder on the MP3 or audio DVD CD help DVD help Disc help This command instructs the system to assist with CD and DVD commands Auxiliary Commands The following auxiliary...

Страница 67: ...nu 49 Control Buttons 27 D Database Coverage Explanations 63 Deleting Personal Information 7 Destination Navigation 37 Devices Auxiliary 27 Display 60 Driving on a Route 36 DVD Map Disc Messages 30 DVD Menu Options 20 DVD CD Player 18 E Ejecting the DVD Map Disc 30 F Finding a Station 12 G Getting Started on Your Route 45 Global Positioning System GPS 61 Guidance Volume 11 H Handling the DVD Map D...

Страница 68: ... 31 Setting the Clock 8 60 Setting the Search Area Entering an Address and Point of Interest and Storing Preset Destinations 8 Sound 50 Sound Menu 14 Storing Preset Stations 14 Storing Radio Station Presets 7 Symbols Navigation 32 System Needs Service If 63 T Touch Sensitive Screen Buttons 28 Traveling Across Regions 37 U Using an MP3 CD 24 Using OnStar Destination Download 43 Using Your Stored Pr...

Отзывы: